

I remember last Tuesday like it was scripted for a sitcom. My youngest was frantically hunting for a missing mitten, the dog was tripping everyone in the hallway, and I was trying—unsuccessfully—to force a bulky parka into a locker. Every time I pushed the door, it gave me that infuriating scrape-thud against the frame. It just wouldn’t stay shut. I ended up standing there in the cold draft, staring at a door that was clearly square just six months ago, wondering why my house was conspiring against my sanity. If you’ve ever felt that spike of blood pressure when a door won’t latch, you aren’t alone. It’s a classic symptom of the hinge shift, and today, we’re going to stop the scraping and get your entryway back to being functional.
Stop Fighting Your Mudroom Doors and Fix the Alignment
When doors stop behaving, most people assume the house is settling or the wood has warped beyond repair. While those are possibilities, the real culprit in 90% of custom lockers is a subtle shift in the hinge hardware. These doors take a lot of house-wide abuse. They get slammed, leaned on by toddlers, and stuffed with heavy gear. Eventually, those screws lose their bite or the metal itself yields just enough to cause a sag. I’ll be honest: early in my DIY journey, I made the amateur mistake of thinking I needed to plane down the door. I took off about an eighth of an inch of beautiful finish, only to realize the door was still crooked because the top hinge was loose. Don’t be like me. We need to look at the mechanics first, much like how you would fix uneven gaps in custom built-in doors in other parts of the house. Often, the weight of the door combined with heavy coats creates a leverage point that pulls at the top fasteners. If you didn’t use the structural cleat strategy for heavy mudroom lockers during installation, that stress goes straight to the hinges. According to the USDA Forest Products Laboratory, wood screw withdrawal resistance depends heavily on the specific gravity of the wood and the integrity of the pilot hole, meaning once that hole is stripped, the door is going to dive. Fixing this doesn’t just make the door shut; it preserves the life of the entire unit.
Is a tiny hinge adjustment actually worth the effort?
You might be thinking, “Can’t I just put a magnetic catch on it and call it a day?” You could, but you’re treating the symptom, not the disease. A sagging door eventually ruins the hinges and the face frame. I’ve seen lockers where the door eventually pulled away so hard it started pulling the bench away from the wall because of the constant vibration and tension. Fixing it now takes ten minutes; fixing a broken frame takes a weekend. Have you ever noticed your doors getting harder to close as the seasons change? It’s a common frustration, but luckily, it’s one we can tackle with a few simple tools and a bit of helpful know-how. Let’s look at why those hinges move and how we can lock them back into place so you can get back to your morning coffee without the door-slamming drama.
Stop the Scrape by Realigning the Hinge Geometry
Before you start hacking away at the wood, you need to understand that a door is basically a lever. The hinges are the fulcrums, and the weight of the door—often loaded with heavy winter gear—is constantly trying to pull the top hinge away from the frame while pushing the bottom hinge into it. When your door starts to scrape, it’s rarely because the wood grew; it’s because the geometry of the rectangle has shifted into a trapezoid. This is a common issue when creating effortless storage solutions for a tidy stylish home, where high-use doors are the norm. The first thing to check isn’t the door itself, but the verticality of the face frame. If the frame has tilted even a fraction of a degree, your alignment will be off.
Tighten the Hardware Before You Reach for the Planer
The most common culprit is a loose screw in the top hinge. I cannot tell you how many times I’ve seen homeowners (and younger versions of myself) try to sand down a door when a two-minute turn of a screwdriver would have solved the problem. Open the door and check the screws that mount the hinge to the locker frame. If they spin without tightening, the wood fibers are stripped. I remember a project where I was installing a massive set of creative built-ins for seamless storage and home aesthetics, and I over-torqued a screw into soft poplar. The door immediately sagged. I had to back it out, glue in a few toothpicks to give the screw new material to bite into, and re-seat it. It felt like a ‘hack,’ but it’s a standard industry move that creates a permanent fix without needing to relocate the hinge entirely.
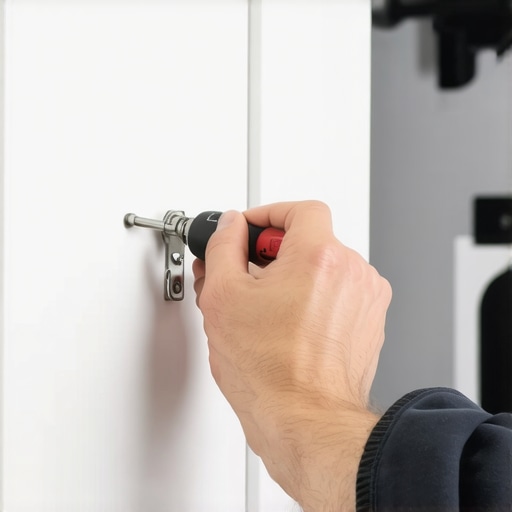
Give Stripped Screw Holes Their Grip Back
If the ‘toothpick trick’ feels too low-tech, you can use a professional wood plug or a larger gauge screw, but be careful not to split the frame. For heavy-duty mudroom lockers, standard 1-inch screws often aren’t enough to handle the lateral tension of a 20-pound solid wood door plus the weight of a heavy parka hanging on the interior hook. Replacing the center screw of the top hinge with a 2.5-inch structural screw that reaches through the locker frame and into the wall stud is a game-changer. This is similar to how we use 6 heavy-duty L-brackets for reinforcing custom built-in units when stability is the priority. This ‘anchor screw’ pulls the entire locker frame tight against the wall, squaring up the opening and lifting the door’s leading edge away from the floor.
Master the Three-Way Adjustment on European Hinges
If your mudroom uses concealed ‘Euro’ hinges, you have a secret weapon: the adjustment screws. These hinges are designed with three dimensions of movement. The screw closest to the door adjusts the lateral (side-to-side) tilt. The screw at the back of the hinge plate moves the door in or out, which is vital if the door is rubbing against the face frame. Much like learning how to fix drawer fronts that won’t stay aligned, you have to work in small increments. Turn the lateral screw a quarter-turn clockwise, then close the door to check the gap. I once spent an hour chasing my tail on a laundry room cabinet because I turned the screws too far and ended up making the bottom scrape instead of the top. Small tweaks are the key to a flush, silent close. If you still see a dip, check the base of the unit; sometimes the leveling leg move for mudroom cubbies on tile is necessary to ensure the entire structure is plumb before the hinges can do their job properly.
Most DIYers—and even some pros—obsess over getting the base perfectly level using a standard bubble level. While that’s a great start, it’s a common myth that a level base guarantees a square door later. In my experience, the weight of a stone top or a fully loaded locker changes the ‘geometry’ of your floor. This is known as floor deflection. If you haven’t accounted for how the subfloor bows under a 300-pound unit, your hinges will never stay aligned. I’ve seen beautiful projects where the homeowner followed an expert guide to flawless vanity installation tricks and tips to the letter, only to have the doors bind six months later because the joists settled under the new load. According to the Architectural Woodwork Institute (AWI), the standard for premium grade installation allows for very little deviation, but those standards assume a structurally sound substrate that won’t flex. If you’re working on a second floor or over a long joist span, you need to over-correct your shimming to anticipate that dip.
The biggest trap you’ll fall into is ‘over-pinning’ the unit. You think more screws equals more stability, but if you drive three-inch screws through every possible point in the back rail without allowing for seasonal wood movement, you’re basically creating a tension trap. This often leads to situations why your heavy quartz vanity is cracking the cabinet frame or pulling the face frames apart. Have you ever fallen into this trap? Let me know in the comments.
Why does your perfectly level vanity still have door gaps?
It usually comes down to ‘racking.’ If the wall behind your unit isn’t perfectly flat (and spoiler alert: it never is), tightening the mounting screws can pull the cabinet box into a slight diamond shape. You won’t see it with the naked eye, but your hinges will feel it. This is why mastering 7 tactics for leveling vanities on sloping tile floors is about more than just the floor—it’s about shimming the back of the cabinet so it sits against the wall without being forced into a twist. If you just crank the screws down, you’re essentially ‘pre-loading’ the wood with stress that eventually manifests as sagging doors or failing latches. When you’re trying to fix uneven gaps in custom built-in doors, always back the mounting screws off half a turn to see if the box ‘springs’ back into its natural square shape. It’s a nuance that separates the weekend warriors from the master cabinet makers.
Once the dust settles and your tools are put away, the real work of homeownership begins: maintenance. Wood is a living, breathing material that reacts to the world around it. If you think your installation is a ‘set it and forget it’ project, you’re in for a surprise when the first heat wave hits or the winter air dries out your hallway. I’ve made it a habit to do a ‘snug-down’ ritual every six months. I grab my favorite Pozidriv screwdriver—the one specifically designed for European hardware—and I check every single hinge screw. It sounds obsessive, but catching a screw that has backed out a quarter-turn today prevents a stripped-out hole or a cracked face frame next year.
Don’t Let Humidity Wreck Your Hard Work
Climate control is the silent partner in your cabinetry’s longevity. I’ve seen gorgeous mudrooms fall apart because they were installed in unconditioned spaces where the humidity fluctuated wildly. This is particularly true if you are looking for built-in storage ideas to declutter and enhance your home in a basement or garage. If you notice your doors sticking in July but gapping in January, your house is breathing. To combat this, I always recommend using 7 moisture barriers for vanities in high humidity bathrooms even for mudroom units that sit against exterior walls. Moisture is the enemy of alignment. According to Blum’s technical specifications for their CLIP top BLUMOTION hinges, these components are tested for 200,000 opening and closing cycles, but that rating assumes the hinge remains perfectly perpendicular to the mounting plate. When wood swells and pushes the hinge out of square, those internal bearings wear out prematurely.
How do I maintain my custom storage units over time?
Maintenance isn’t just about tightening screws; it’s about monitoring weight. We all suffer from ‘storage creep’—the tendency to keep piling items into a convenient spot until the shelf bows. If you’re utilizing creative storage solutions for vanities to declutter in style, keep an eye on the center point of your shelves. If you see a dip, it’s time to redistribute the load or add a mid-span support. I personally keep a dedicated scribing tool for cabinets against textured plaster walls in my maintenance kit. Why? Because as houses settle, the gaps between your built-ins and the wall can change. If a gap opens up, I don’t just caulk it; I investigate if the unit is pulling away from the studs. It’s better to know why your laundry room cabinets are warping now than to wait for the entire unit to fail.
The Future of Integrated Storage Tech
Looking ahead, I see the industry moving toward ‘active’ cabinetry. We’re already seeing smart sensors that can alert you to moisture leaks under a vanity or stress sensors that flag when a shelf is overloaded. For now, we rely on our eyes and a good level, but the ‘smart home’ of 2025 and beyond will likely include built-ins that tell you when they need a hinge adjustment. Until then, you need to be the sensor. I want you to try this one specific advanced tip: next time you have your doors open, apply a tiny drop of dry-film lubricant to the hinge pivot points. Avoid WD-40, which attracts dust; use a Teflon or silicone-based dry spray. It keeps the movement buttery smooth and reduces the friction that leads to hardware fatigue. If you want to ensure your home remains a sanctuary of order, check out our guide on how to effortless storage solutions for a tidy stylish home and stay ahead of the wear and tear.
The Hard Truths I Learned While Crawling Inside Mudroom Lockers
After years of wrestling with stubborn cabinetry, I have realized that wood has a distinct memory, and it doesn’t always appreciate being forced into a rigid box. The first major lesson was that a level is often just a starting suggestion; the actual structure of your home will always dictate the final fit of your doors. I also discovered that ‘over-tightening’ is a recipe for silent disaster. If you pull a locker frame too tight against an uneven wall without proper shimming, you are essentially pre-loading the hinges for a inevitable failure. Finally, I’ve found that even the most effortless storage solutions for a tidy stylish home rely more on the integrity of the wall studs than the glue in the joints. If the wall moves or the house settles, the door follows suit—it is simply physics in action.
The Essential Alignment Toolkit for Every Homeowner
You do not need a professional workshop to keep your built-ins in perfect working order. I always keep a few specific items in my ‘home maintenance’ bucket that save me hours of frustration. A Pozidriv screwdriver is non-negotiable if your unit uses European hardware; using a standard Phillips is the fastest way to strip those precision adjustment screws. I also swear by a high-quality scribing tool for cabinets against textured plaster walls to check for shifts in the unit’s position over the seasons. Lastly, keep a stash of 2.5-inch structural screws on hand. They are the only reliable way to anchor a heavy, coat-laden locker back to the house’s framing and prevent that frustrating downward ‘dive’ that causes the door to scrape the floor.
Take Control of Your Entryway and Restore the Peace
Fixing a stubborn, scraping door is about more than just silencing an annoying sound; it is about taking pride in the functional details of your living space. Whether you are currently exploring new built-in storage ideas to declutter and enhance your home or are simply trying to survive a chaotic Tuesday morning, these small mechanical adjustments will make your day run smoother. Your mudroom should be a source of order, not a point of friction. Once you master the basic geometry of the hinge, you will never look at a crooked door with intimidation again. Go grab your screwdriver and reclaim your quiet entryway.
Have you ever had a door that just refused to stay square no matter how many times you adjusted the screws? Let me know your biggest DIY frustration in the comments below!