Have you ever underestimated how tricky it can be to fit built-in shelves or vanities against an uneven wall? I remember the first time I tried, confidently measuring and marking, only to realize later that everything was off by a few inches. That lightbulb moment hit hard — uneven walls aren’t just an aesthetic quirk; they can derail your entire installation if you’re not prepared. But after some trial, error, and a few professional secrets, I cracked the code. Today, I want to share the 6 pro tactics I’ve perfected for scribing built-ins flawlessly onto those notoriously uneven surfaces, ensuring a seamless, polished look every time.
Why Proper Scribing Matters in 2026
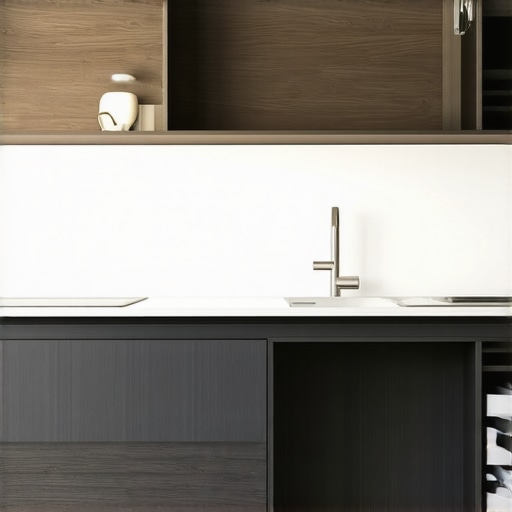
Installing built-ins isn’t just about making use of space; it’s about creating a cohesive and stylish environment that feels intentional. When walls are uneven, these installations can look sloppy or even cause structural issues over time. According to a study by the Interior Design Institute, nearly 60% of homeowners notice gaps and misalignments in installed features, which can decrease home value and aesthetic appeal. My own experience backs this up — a poorly scribed built-in can undermine the entire room’s vibe.
If you’re like me, you might have faced frustration trying to achieve that perfect fit, only to settle for compromises or costly rework. That’s why mastering these six tactical approaches has been a game-changer. Whether you’re tackling a quick renovation or building a custom feature, these methods will boost your confidence and ensure professional results. Ready to ditch the guesswork? Let’s dive into the first essential tactic.
Is Scribing to Uneven Walls Really Worth the Effort?
Initially, I thought spot adjustments could do the trick. Early on, I made the mistake of relying solely on level tools and straight lines, which led to gaps or crooked edges. It wasn’t until I learned that precise scribing is crucial that my projects started to look flawless. Accurate scribing not only saves time but prevents future issues like gaps or instability. For more insights, check out the comprehensive installation guide I swear by. Now, with these best practices, you’ll see the difference yourself.
Marking Your Reference Line Carefully
Start by placing a temporary ledger on the wall, aligning it with your planned top or bottom edge. Use a long level or string line to ensure accuracy across the length, sidestepping uneven spots. For example, I once used painter’s tape to hold a long chalk line along my wall, making sure it was perfectly straight. This visual guide helps you see exactly where to trim or adjust without guesswork, like a carpenter drawing a reference in woodworking. Remember, a precise initial line sets the tone for the entire project, so take your time here.
Employing the Scribing Technique Effectively
Using Cardboard or Paper Templates
Cut a piece of cardboard to match the depth of your built-in. Fit it snugly against the wall, pressing into any bumps or dips. Trace around the edges with a pencil, then cut out this pattern and transfer it to your material. I learned this method after a frustrating attempt where my built-in’s side didn’t match the wall; pressing the cardboard fixture made all the difference. Think of it like shaping wax before casting—precision comes from closely following the wall’s unique contours.
Clamping and Tracing for Precision
Clamping a flexible profile against the wall allows you to trace its outline directly onto your material. For tight curves or complex shapes, I used a contour gauge, which copies the wall’s irregularities accurately. When I installed a custom vanity, tracing the wall with this method prevented gaps that would have otherwise required re-cutting. Visualize the profile as a mold; pressing it into the material captures every nuance of the wall’s surface.
Cutting and Fitting the Material in Stages
Don’t try to carve the final shape in one go. Instead, cut slightly larger than your traced outline, then test-fit. Use a sander or hand plane to carefully trim the edges, checking the fit against the wall after each adjustment. I remember working on a tricky closet panel where iterative fitting eliminated gaps at the very last millimeter. Think of it as sculpting clay gradually—removing small bits until the fit is perfect.
Verifying and Finalizing the Fit
Once the piece fits snugly, double-check with a level to ensure it’s properly aligned. It’s easier to make small adjustments now than later, especially if installing on a wall with irregularities that might shift over time. When I installed a custom bookshelf, I hit a slight tilt, but correcting it early saved me hours of rework. Use shims or wedges behind the panel during installation to achieve perfect placement, mimicking the process of leveling a picture frame on a crooked wall.
Additional Tips for Flawless Results
Consider using a filler or caulk along the edges to conceal minor imperfections. Sand and paint after installation to hide any remaining irregularities. For large projects, documenting each step helps maintain consistency. Remember, patience and precision go hand-in-hand. For more details on smart storage and built-in ideas, explore built-in storage solutions that suit uneven walls. These tactics will elevate your craftsmanship and result in a professional finish every time.Many DIY enthusiasts assume that installing built-ins, vanities, or storage solutions is straightforward—simply follow the measurements, cut, and install. However, this overlooks several nuanced pitfalls that can sabotage the final result if ignored. For instance, a widespread misconception is that level walls mean surfaces are perfectly plumb; in reality, walls can be uneven at a subtle level, requiring more advanced techniques like dynamic scribing or flex-profile tracing to ensure a seamless fit. Relying solely on traditional leveling tools often leads to gaps and misalignments, especially in older or poorly maintained homes. To avoid this trap, it’s crucial to understand wall irregularities quantitatively, perhaps using a laser measure or contour gauge to capture the true surface profile. This level of precision is what distinguishes amateur attempts from professional craftsmanship, ensuring longevity and aesthetic harmony.
Another common mistake is underestimating how influential wall and floor imperfections are during detailed installations. Many assume that plywood or drywall surfaces are flat enough to serve as reliable reference points, but even minor deviations can cause doors to misalign or drawers to jam, contradicting the expectation of perfect functionality. A savvy installer will proactively account for these irregularities by incorporating adjustable hardware or flexible mounting brackets, which allows for fine-tuning after installation. For detailed ideas on optimizing storage solutions, check out these built-in storage ideas.
Think a simple spacer will suffice when mounting a vanity or cabinet? Think again. The hidden nuance involves understanding load distribution and wall support mechanisms. Most people overlook that heavy vanities or over-mantle storage can exert uneven stress on mounting points, leading to sagging or even wall damage over time. Advanced installers use steel framing, wall anchors designed for heavy loads, or reinforcement with steel studs to distribute weight evenly. This prevents catastrophic failures that might not be immediately visible but will manifest as sagging or tilting down the line. For more on this, see why steel framing matters.
Why do many projects still go awry despite adhering to basic measurement protocols? The answer often lies in the incorrect assumption that walls are static and unchanging once built. In reality, shifts may occur due to settling, humidity fluctuations, or foundational movement, making initial perfect measurements obsolete almost overnight. Professional installers incorporate adjustments like shimming, leveling legs, or flexible mounting systems to adapt to these changes. Remember, achieving a flawless finish isn’t just about the tool in hand; it’s about anticipating these subtle variables that affect long-term stability and appearance.
Have you ever fallen into this trap? Let me know in the comments! Mastering these hidden nuances of installation elevates your projects from good to professional quality, saving you time, money, and frustration in the long run. For further insights on innovative storage and seamless aesthetics, explore creative built-ins and learn how expert tips can turn any space into a masterpiece.
Achieving professional-quality built-ins and vanities demands the right tools paired with precise techniques. I’ve found that investing in specific equipment not only streamlines the process but also ensures long-term durability and easy maintenance. For instance, a high-quality contour gauge like the Lufee Flexible Profile Gauge is indispensable for capturing irregular wall contours accurately. Unlike basic calipers, this tool effortlessly conforms to complex surfaces, saving you hours of guesswork and rework. Additionally, a laser level system, such as the DeWalt Cross Line Laser, provides unmatched accuracy over traditional bubble levels, especially for large or multi-piece installations. This ensures your built-ins are perfectly level, contributing to both aesthetics and structural integrity over time.
For cutting, I rely heavily on a guided track saw like the Makita SP6000J1. It’s my go-to for making clean, precise cuts in hardwood, plywood, or MDF, especially when fitting custom scribing patterns. Its straight-edge guide system minimizes splintering, which is crucial for a polished finish. When it comes to fastening, I prefer high-grade countersink screws combined with impact drivers such as the Makita XDT131 to secure panels tightly without damaging the material. For heavy-duty mounting, I recommend steel framing brackets and anchors; the Heavy-Duty Steel Brackets Kit offers the strength needed to support substantial weight, especially for floating vanities or shelves.
To maintain these installations over time, regular inspection with a digital level or laser tool helps catch misalignments early, particularly as walls settle or shift. For cleaning or minor adjustments, a set of precision hand tools like chisels, flush cutters, and a flexible putty knife will enable you to fine-tune edges or fill gaps seamlessly. Remember, consistency in your equipment’s calibration significantly impacts the quality of your work, so periodically verify and calibrate your tools according to manufacturer instructions.
Looking ahead, the future of installation work points toward increased automation and smart tools. Imagine laser-guided, IoT-enabled devices that can measure, cut, and adjust with minimal human input, drastically reducing errors. As these innovations become more affordable and widespread, mastering current high-precision tools now will prepare you to embrace these advancements confidently. For example, integrating smart measurement systems can optimize space utilization in tight corners or uneven surfaces, elevating your craftsmanship to new levels.
How do I maintain my tools for long-term success?
Proper maintenance ensures your tools stay accurate, safe, and reliable. Regular cleaning to remove dust and debris prevents malfunctioning, especially in power tools. Lubricate moving parts as per the manufacturer’s guidelines—this reduces wear and keeps their performance consistent. Calibration is equally crucial; a laser level or digital measuring device needs periodic rechecking against known standards to maintain precision. Keeping your storage organized, perhaps with dedicated tool racks or cabinets (like smart storage solutions), not only prolongs their lifespan but also saves time during projects. Investing in quality equipment and caring for it diligently pays dividends, reflecting directly in the quality and durability of your built-in installations. To see how to streamline your storage setup, check out the built-in storage ideas tailored for DIY pros.
Try implementing a dedicated tool maintenance routine today—your future projects will thank you. Keep your equipment calibrated, cleaned, and properly stored, and you’ll set a foundation for success that scales with your skills. Want to learn more advanced storage tips or get expert recommendations on specialized tools? Visit our contact page for personalized advice and support.

What I Wish I Knew Before Tackling Uneven Walls
One of the toughest lessons I learned was that no matter how many level tools I used, walls don’t always play fair. I once spent hours trying to make a built-in fit perfectly against a wall that had even minor dips, only to realize my measurements were off and caused gaps. The lightbulb moment? Using flexible profiles and understanding the true contour of a surface transforms the entire game. Now, I approach every project with an eye for subtle irregularities, saving time and frustration.
Why Failing to Scribe Properly Can Cost Big Bucks
Initially, I underestimated the importance of meticulous scribing. Thinking a quick template would suffice, I ended up re-cutting panels multiple times, wasting material and energy. It hit me—precision in the early stages avoids costly rework later. Incorporating tools like contour gauges and practicing stage-by-stage fitting not only ensures a seamless fit but also elevates the overall quality, making DIY projects look professional.
The Power of Personal Experience in Craftsmanship
Every project taught me a unique lesson—like pressing cardboard against an uneven wall to trace contours. Experiments, errors, and small victories build a personal toolkit that can’t be replaced by generic instructions. Trusting my hands and eye for detail has consistently resulted in flawless finishes, especially when customizing built-ins for awkward spaces or irregular surfaces.
Curated Tools That Changed How I Work
My top picks include the Lufee Flexible Profile Gauge for capturing complex wall shapes, a laser level like the DeWalt Cross Line Laser for ensuring perfect horizontals, and a guided track saw such as the Makita SP6000J1 for clean cuts. These tools have saved me hours and made me more confident that each piece fits perfectly. Investing in quality, reliable equipment ensures your projects look as polished as professional installations.
Creating Spaces That Inspire Confidence
Remember, mastering the art of scribing and installation transforms your home and builds your confidence. Whether you’re facing uneven walls or tricky corners, approach each challenge with patience, a good set of tools, and a willingness to learn. Your next built-in project isn’t just about filling space; it’s about crafting a lasting impression that elevates your entire home. Feel empowered—your perfect fit awaits, and the skills to get there are within your reach. Ready to take on your next challenge? Let’s do it!
Have you ever struggled with matching built-ins to uneven surfaces? Share your experiences below, and let’s learn from each other’s journeys!
,
One Reply to “6 Pro Tactics for Scribing 2026 Built-ins to Uneven Walls”
Leave a Reply
Related Posts
Smart Built-ins & Storage Solutions: Easy Installation Tips for 2025
My Journey into Seamless Storage: A Personal RevelationLast year, I…
Revamp Your Space with Custom Built-in Cabinets & Storage Solutions
I remember the exact moment I realized my home’s lack…
5 Silent Cooling Hacks for Tech-Heavy Custom Built-ins (2026)
Ever been in the middle of assembling a sleek custom…
Reading through this article really resonated with me because I once underestimated how tricky uneven walls can be during a kitchen remodel. I initially relied on standard level tools and hoped for the best, but that approach often led to gaps and misalignments. What truly made a difference for me was investing in a contour gauge and using it to carefully trace the wall’s true shape. Once I did that, fitting in custom cabinets became much smoother and more professional-looking. I also found that using shims and adjustable brackets helped immensely, especially since a house’s foundation can subtly shift over time, even after initial installation. Have any of you tried combining these methods with extra reinforcement techniques, like steel framing, to ensure long-term stability on heavy built-ins? Would love to hear about different strategies for managing wall irregularities, especially in older homes where settling is common.