It was a typical Sunday morning when I finally hit my breaking point. Clothes spilling over the sides of my closet, drawers crammed so full I feared they’d burst, and that sneaky shelf above the door nearly collapsing under the weight of forgotten odds and ends. As I stood there, surveying my chaotic space, a lightbulb flickered in my mind—there had to be smarter, more discreet ways to maximize storage without turning my bedroom into a cluttered storage unit. Have you ever felt that frustration, staring at your tiny closet and wondering if there’s a secret to creating more space?
Transforming Small Closets Without Major Renovations
So, here’s the good news: you don’t need to tear down walls or invest in massive renovations to reclaim your space. What you need are innovative yet practical solutions that blend seamlessly with your bedroom’s aesthetic. Over the years, I’ve experimented with various methods—some working, others not—but I’ve uncovered smart strategies that genuinely make a difference. From hidden compartments to clever built-ins, these little tricks can turn your cramped closet into a functional oasis.
Is All The Hype Surrounding Hidden Storage Worth It?
In my early days, I was skeptical—maybe you are too. I once tried to cram more shelves into my closet, only to find it more cluttered than ever. That mistake taught me to focus on quality over quantity. Now, I focus on solutions like concealed drawers, under-floor compartments, and wall-mounted hidden niches. These not only optimize space but keep things looking sleek—no more visual clutter. Want to learn how I tackled this challenge? Check out [this article](https://customcabinetrypro.com/built-in-storage-ideas-to-declutter-and-enhance-your-home) for inspiration.
By embracing hidden storage, I made way for more dresses, shoes, and essentials—without sacrificing style or accessibility. And the best part is, many of these solutions are surprisingly affordable and easy to implement with some clever planning.
Stay tuned. I’ll walk you through the top 7 ingenious storage ideas that can revolutionize your small bedroom closet in 2026, making every inch count and transforming chaos into calm.
Build Custom Shelves to Fit Your Closet’s Unique Shape
Start by measuring every nook and cranny of your closet, including odd angles and recessed areas. Use a tape measure and a notepad to record dimensions. Then, sketch a layout for adjustable shelves that can accommodate your clothing and accessories. When installing, use a level to ensure each shelf is perfectly horizontal. I once customized a shelf to fit into a sloped ceiling corner, which transformed an otherwise wasted space into a practical storage spot. Use these creative built-in strategies to deepen your understanding.
Secure Shelves Properly to Prevent Wobbling
Use steel wall anchors and brackets, especially if your closet walls are drywall rather than studs. When I upgraded my shelves, I anchored them using steel cleats attached to sturdy wall anchors; this prevented sagging and wobbling under heavy loads. For heavy items, consider steel wall tracks tested for maximum load, which distribute weight evenly and bolster durability. Learn more about this technique here.
Hidden drawers or compartments can replace clutter-prone baskets. To install, cut precise openings into existing shelves using a jig saw, then fit pre-made drawer boxes or build your own with plywood and sliders. I fabricated a sliding drawer beneath my shelf for jewelry, which kept my accessories organized and out of sight. Using built-in storage ideas helps to seamlessly integrate these hidden compartments into your design.
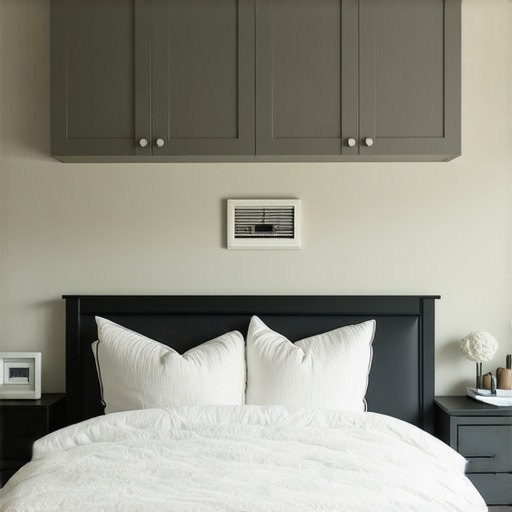
Use Vertical Space with Overhead Cabinets
Maximize all available height by adding overhead cabinets above your closet door. Secure these cabinets using steel cleats anchored into ceiling joists to bear the weight. I installed a set to store seasonal clothes, freeing up shelf space below. For secure installation, refer to these anchoring tips.
Create a tailored combination of shelves, hidden compartments, and hanging rods to suit your specific needs. Start by categorizing your clothing, then assign storage zones for each category, optimizing accessibility. During my overhaul, I used adjustable partitions to separate shoes from shirts, which made my daily routine faster. This approach ensures each item has its dedicated spot, reducing clutter and enhancing efficiency. For tips on designing an integrated system that looks great and works well, visit these design ideas.
Executing these steps requires patience and precision, but the results speak for themselves: a more spacious, organized, and stylish closet. Every added shelf, hidden drawer, and secure anchor maximizes your space without costly renovations. Remember, planning and careful measuring are key—don’t rush this phase. Trust the process, and your closet will thank you.When it comes to installing built-in storage and vanities, many homeowners and even professionals operate under assumptions that can lead to costly mistakes. One widespread myth is that pre-made, off-the-shelf solutions are always sufficient for custom spaces. In reality, standardized units often lack the precision needed for irregular wall shapes or unique room dimensions, resulting in gaps, instability, or even structural damage over time. This is why collaborating with specialists who tailor every element, as discussed in creative built-in strategies, can save you headaches and money.
A common oversight is neglecting the importance of weight distribution and anchoring. Homeowners frequently assume that attaching a vanity or shelves to drywall is sufficient, but heavier components require reinforced supports or steel wall ties to prevent sagging or detachment. Studies in structural engineering highlight that improper mounting causes failure within a few years, especially in humid environments or with heavy use. Advanced installers consult resources like heavy-duty anchoring techniques to ensure longevity.
Why Do My Built-Ins Sag or Pull Away Over Time? The Hidden Risks
This is often due to a misunderstanding of load capacity and wall composition. Many think that drywall alone can handle the weight of custom vanities or extensive shelving, but without proper reinforcement, gravity and vibration will cause movement, leading to unsightly gaps or, worse, structural failure. Experts recommend employing steel brackets, wall studs, and proper anchoring methods tailored to your wall material. For example, steel wall tracks are essential in supporting significant weight in high-use areas.
Some pitfalls are subtle but destructive. For instance, installing resilient materials like waterproof MDF or phenolic backers behind vanities can drastically improve durability and prevent warping—a detail often overlooked by amateurs. Moreover, understanding the nuances of ventilation and moisture control is critical; failure here can cause wood warping, mold development, or hardware deterioration. Investing time in detailed planning, much like the tips found in effortless storage solutions, ensures your built-ins stay beautiful and functional for years.
Have you ever fallen into this trap? Let me know in the comments. Remember, embracing these advanced considerations can elevate your project from basic to truly expert, cutting down on future repairs and maximizing your space’s potential.
To ensure your custom-built storage solutions and vanities remain functional and visually appealing over the years, investing in the right tools and following a consistent maintenance routine is crucial. I personally rely on precision measurement tools like the Bosch Digital Laser Level because it guarantees perfectly aligned shelves and fixtures, preventing wobbles and misplacements that can develop over time. For cleaning, I recommend using a microfiber cloth combined with a gentle, pH-neutral cleaner to maintain finishes without scratching or dulling surfaces.
How do I maintain built-ins and vanities over time?
Regular inspections are your best bet to identify early signs of wear or damage. Check for loose screws, sagging shelves, or wobbling fixtures, and tighten or reinforce them before problems escalate. Using these maintenance strategies can extend the lifespan of your installations significantly. Additionally, applying a protective sealant or wax every couple of years can help preserve wood finishes from moisture and dust.
For more advanced upkeep, consider installing smart sensors that monitor humidity and temperature, especially in rooms with high moisture levels like bathrooms. This proactive approach prevents warping, mold, and hardware deterioration—issues that standard care might overlook. As trends evolve, I believe integrating IoT devices into home storage solutions will become standard, offering real-time alerts and guiding you through maintenance tasks via mobile apps.
Gear I recommend for ongoing care
Aside from measurement and cleaning tools, I also swear by the DeWalt Cordless Electric Screwdriver for quick adjustments and tightenings, especially when dealing with hardware that may loosen over time. It streamlines repairs and allows you to address issues without disassembling large sections of your cabinetry. When tackling custom vanities, consider tools like the Bosch Router Kit to re-profile edges or create new jig setups for repairs if needed. Mastering the use of these tools not only simplifies maintenance but also empowers you to handle minor repairs confidently.
Future outlook: Maintenance in a smart home world
As home automation advances, I predict that integrated maintenance systems—like IoT-enabled hinges and moisture sensors—will become commonplace in built-ins and vanities. These innovations will allow homeowners to receive alerts when maintenance is due or when issues arise, reducing the risk of costly repairs down the line. Embracing these technologies early can save time and money, ensuring your closets and bathrooms stay pristine and functional for years to come.
Don’t forget to try implementing a small upgrade today—consider adding motion-activated LED lighting inside your shelves or under cabinets. It’s an easy way to improve accessibility and visibility while performing regular checks. For expert guidance on installing smart features, visit these vanity installation hacks. Keep your built-ins working perfectly by adopting both the right tools and a proactive maintenance mindset—your future self will thank you!

Over time, I realized that the most effective storage solutions come from embracing imperfections—like an uneven wall or an unusual closet shape—rather than fighting them. My journey taught me that patience, combined with a willingness to think outside the box, can lead to truly personalized spaces that serve your needs without sacrificing style. Don’t shy away from experimenting with unconventional materials or layouts; often, the quirkiest ideas turn out to be the most functional in disguise. Remember, the true magic happens when you view your space as a canvas for creative problem-solving rather than a problem itself.
One Reply to “7 Hidden Storage Solutions for 2026 Small Bedroom Closets”
Leave a Reply
Related Posts
How to Mount 2026 Bedroom Built-ins over HVAC Vents
Ever fumbled with installing your bedroom built-ins only to realize…
![5 Hidden Closet Hacks for Sloped Bedroom Ceilings [2026]](https://customcabinetrypro.com/wp-content/uploads/2026/01/5-Hidden-Closet-Hacks-for-Sloped-Bedroom-Ceilings-2026.jpeg)
5 Hidden Closet Hacks for Sloped Bedroom Ceilings [2026]
Ever found yourself stumbling over clutter in your bedroom, frustrated…
![Stop Bedroom Built-in Sway: 4 Hidden Support Fixes [2026]](https://customcabinetrypro.com/wp-content/uploads/2026/03/Stop-Bedroom-Built-in-Sway-4-Hidden-Support-Fixes-2026.jpeg)
Stop Bedroom Built-in Sway: 4 Hidden Support Fixes [2026]
Have you ever leaned against your built-in wardrobe or vanity…
This article really hits home for me. I’ve been dealing with a tiny closet that constantly feels packed, no matter how many times I try to reorganize. I especially appreciate the idea of hidden compartments—my favorite is the sliding drawer for jewelry; it’s so sleek and practical. One thing I’ve found useful is installing a vertical shoe rack on the inside of the door to free up shelf space. The flexibility of customizing storage to fit unusual shapes really makes a difference. Do others have tips for managing accessories or seasonal clothes without cluttering up the main space? I’d love to hear about more creative ideas that keep the closet looking tidy but still accessible.