

I will never forget that sickening metallic ping—the sound of a cheap zinc bolt snapping under tension—followed by the slow-motion roar of my winter tires and plastic bins cascading onto the hood of my truck. It was 2 AM, and my ‘over-engineered’ overhead storage rack had just decided to give up the ghost. I thought I was being smart by using beefy-looking fasteners I found in a bargain bin, but that was my first big mistake. I learned the hard way that when it comes to holding hundreds of pounds over your prized possessions, the metallurgy of the bolt matters far more than the size of the head. Today, I want to make sure you never have to sweep up shattered plastic and broken hardware by showing you exactly which fasteners are worth your trust.
Don’t Let Your Garage Ceiling Become a Safety Hazard
If you are anything like me, you probably spend hours researching the best lumber or the perfect layout for your workshop but barely thirty seconds picking out screws. We focus on the effortless storage solutions that make our spaces look good, yet we ignore the tiny pieces of steel that actually do the heavy lifting. In those early days, I assumed that as long as a bolt was thick, it was strong. I was wrong. I didn’t account for shear strength or the difference between brittle zinc and tempered steel. If you are currently eyeing a set of lag bolts for your garage ceiling joists, you need to know that not all hardware is created equal. Most ‘standard’ lag screws are Grade 2 at best, which is fine for a fence gate but potentially disastrous for a 400-pound rack system. Have you ever noticed your racks starting to sag or heard a strange creaking when the temperature changes? That is your hardware begging for mercy.
Are these specialized bolts really worth the extra money?
It is a fair question to ask if you are staring at a price tag that is three times higher than the bulk bin options. You might wonder if ‘structural’ is just a marketing buzzword designed to separate you from your hard-earned cash. However, according to the American Institute of Steel Construction (AISC), the yield strength of a fastener is a non-negotiable factor in structural safety; using a fastener with insufficient ductility in a high-load environment is the primary cause of sudden, catastrophic failure. When I switched to a proper lag bolt pattern for heavy anchoring, the peace of mind alone was worth the investment. We are talking about preventing thousands of dollars in property damage for the sake of a ten-dollar upgrade in hardware. Whether you are figuring out how to anchor tool cabinets to wood stud walls or mounting a heavy-duty rack to a concrete slab using concrete wedge anchors, the bolt is the last line of defense. Have you ever had a fastener fail on you mid-project, or found your storage bins on the floor after a humid weekend? I’d love to hear your experiences in the comments so we can all learn from those ‘gravity-defying’ moments that didn’t go as planned. Let’s get into the specific specs you need to look for before your next trip to the hardware store.
Gravity is a Relentless Thief
Think of your fasteners as the literal tendons of your storage system. If the muscle—the rack or the shelving—is strong but the tendons are weak, the whole limb eventually fails. Gravity never stops pulling, and it is a master at finding the weakest point in your installation. When you are dealing with several hundred pounds of overhead weight, you need to understand the difference between ‘tension’ and ‘shear.’ Tension is the force trying to pull a bolt straight out of the wood, while shear is the downward weight trying to snap that bolt in half. This is precisely why plastic wall anchors fail for heavy shelving; they have almost zero resistance to the shearing force of a heavy bin. If you want a shelf that stays level for a decade, you have to choose hardware rated for the specific load and the specific material of your walls.
Pick Structural Screws Over Standard Lags
For years, the lag bolt was the undisputed king of heavy-duty mounting. But let’s be honest: they are a pain to install. They require a perfectly sized pilot hole and a socket wrench, and if you get the torque wrong, you snap the head right off. I’ve moved almost exclusively to structural screws like GRKs or TimberLOKs. These are heat-treated, high-tensile steel fasteners that don’t require a pilot hole in most cases and have a much higher shear rating than the zinc-plated garbage you find in bulk bins. When I was helping a friend with a step-by-step guide to vanity installation for beginners, we swapped out the provided hardware for structural screws because the stock ones felt like they were made of hardened butter. The peace of mind when that screw ‘bites’ into the stud is worth every penny.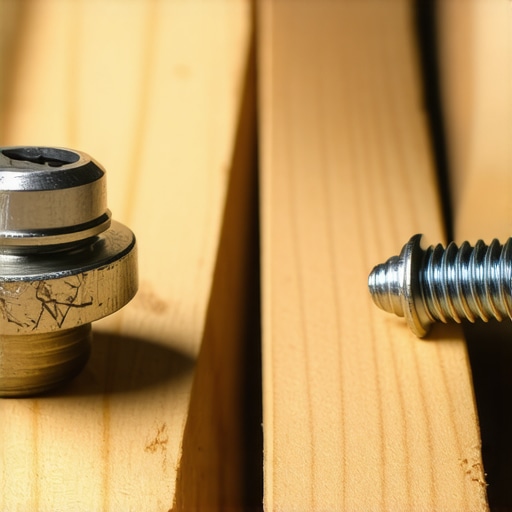
Treat the Pilot Hole Like a Surgical Strike
I’ll never forget the time I tried to be ‘efficient’ by skipping the pilot holes on a set of 4-inch lags for a heavy bike rack. I figured my high-torque impact driver would just muscle them through. Instead of a secure mount, I heard a sickening crack as I split a 2×6 ceiling joist right down the middle. I turned a twenty-minute job into a four-hour structural repair involving sistering a new joist to the broken one. Now, I treat every hole like a surgical strike. If you are using traditional lag bolts, your pilot hole should be the same diameter as the ‘shank’ of the bolt (the solid part inside the threads). This allows the threads to bite deep into the wood fibers without forcing the wood apart. It is a balancing act between friction and structural integrity. For those working with masonry, the concrete wedge anchor move for heavy garage racks is the only way to go, but even then, the depth of your hole determines the ultimate pull-out strength.
Look for the Grade Marking on the Bolt Head
If you must use bolts, look at the head. A plain head is usually Grade 2—the weakest. Three radial lines indicate Grade 5, and six lines mean Grade 8. For garage racks, Grade 5 is usually the sweet spot. I learned this the hard way when mounting a heavy workbench. I used Grade 2 bolts and, within months, the constant vibration from my table saw caused the bolts to stretch and the bench to wobble. I had to go back and implement a lag bolt hack for garage ceiling joists to stabilize the whole structure. If you are mounting into something less reliable than wood, like a metal stud, you need a different strategy entirely, such as learning how to secure built-in desks to thin metal studs using heavy-duty toggles rather than standard screws. Don’t let a three-cent difference in bolt price be the reason your gear ends up on the floor.The ‘more is better’ philosophy is the most common mistake I see in DIY circles. People think that if two structural screws are good, ten must be five times better. In reality, you might be making the structure weaker. According to the American Wood Council’s National Design Specification (NDS) for Wood Construction, there are strict rules for ‘edge distance’ and ‘spacing’ between fasteners. If you drive too many large-diameter screws into a single 2×4, you are effectively perforating the wood like a sheet of notebook paper. Instead of a solid anchor, you’ve created a perforated line that is primed to split under a heavy load. This is a common reason for the structural fix for sagging garage ceiling racks; usually, the fix isn’t more screws, but better-distributed ones. Another ‘oops’ factor I see constantly is the abuse of the impact driver. We love that rat-tat-tat sound as the screw sinks, but if you over-torque a lag or structural screw, you crush the internal wood fibers. Once those fibers are crushed, they lose their ability to ‘grip’ the threads, reducing your pull-out strength by as much as 30%. When I’m working on an expert guide to flawless vanity installation tricks and tips, I always tell people to finish those last few turns with a hand ratchet. You need to feel the resistance. If you’ve ever had a floating vanity start to dip despite using massive bolts, you likely over-compressed the wood during installation. You can learn more about how to stop floating vanities from dipping with steel plates if your wall structure is already compromised.
Is your wall’s internal framing the real bottleneck?
Advanced installers know that the best bolt in the world is useless if the wall itself can’t handle the rotational force. This is the hidden nuance of ‘cantilevered’ loads—like a deep floating desk or a heavy media bench. You aren’t just pulling the screw out; you are trying to twist the stud within the wall. This is exactly where a hidden blocking strategy for heavy bathroom grab bars or the hidden plywood backing for heavy pot racks becomes mandatory. You aren’t just anchoring to the stud; you are tying multiple studs together to distribute that rotational torque. If you’ve ever installed a heavy-duty storage system only to find the drywall cracking six inches above the bracket, you’ve hit the structural limit of your framing, not your hardware. We often focus so much on the effortless storage solutions on the surface that we ignore the physics happening behind the paint. Have you ever fallen into this trap of over-fastening, or maybe you’ve seen a wall start to flex under the weight of a new project? Let me know in the comments. If you’re struggling with a specific setup, like trying to stop floating shelf wobble with this internal bolt move, it’s usually a sign that the leverage of the shelf is winning the battle against your wall’s rigidity. Let’s look at how to reinforce the substrate before the first screw even touches the wood.Installation isn’t a ‘set it and forget it’ event. Wood is a living material that breathes, expands, and contracts with the seasons. If you’ve just finished a massive project like innovative storage solutions to transform your bathroom, the last thing you want is for a humidity spike in July to cause your drawers to bind. According to the USDA Forest Products Laboratory’s Wood Handbook, timber can shrink or swell significantly based on relative humidity, which can actually loosen the ‘bite’ of your fasteners over time. I make it a habit to go through my garage and bathroom every six months with a simple hex key or screwdriver just to check the tension on primary load points. It takes ten minutes, but it prevents the slow-motion disaster of a sagging rack. 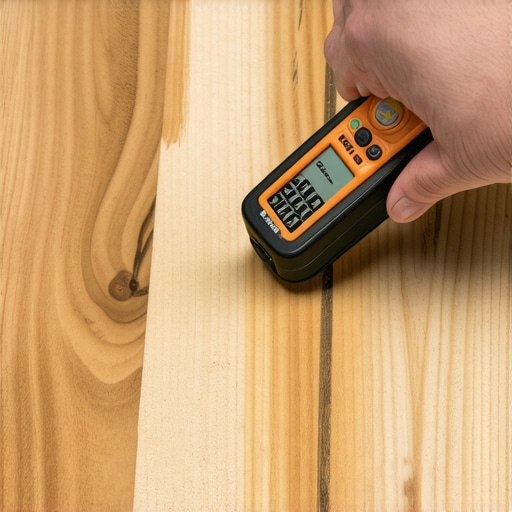
How do I keep my custom installations from losing their edge over the years?
The secret isn’t just in the hardware; it’s in the regular inspection of the gaps. If you start seeing a hairline crack where your built-in meets the ceiling, that’s your house telling you something is shifting. This is a common issue when people use innovative built-in solutions for small rooms where every millimeter of clearance matters. I always suggest using a digital moisture meter before you even start building. If you install your shelves when the wood is at 12% moisture but your house stays at 6% in the winter, those joints are going to open up. For those working on custom vanities with expert design tips, ensuring the base is isolated from floor moisture is key to longevity. Let’s talk about the ‘Scaling Up’ phase. Once you’ve mastered a single shelf, you’ll likely want to tackle a full wall. This is where you move from simple screws to advanced methods like the internal torsion box move for long floating shelves. My favorite tool for this isn’t a fancy saw—it’s a high-quality digital level. I’ve found that even a 0.1-degree error at the wall can translate to a half-inch drop at the edge of a deep shelf. When I was doing a step-by-step guide to vanity installation for beginners, I realized most people fail because they trust their eyes over their tools. Get a level that beeps at 0 and 90 degrees; it changes the game. Looking ahead, I see the DIY world moving toward ‘active hardware’—fasteners that can signal via an app when they are under too much stress or when a leak is detected behind a cabinet. But until that’s standard, we rely on the fundamentals. I challenge you to go into your storage area today and check just three bolts. Give them a quarter-turn by hand. If they move easily, you just saved yourself a future headache. If you’re dealing with more complex issues, like trying to stop cabinet doors from warping in humid bathrooms, remember that maintenance is always cheaper than replacement.
What Five Years of Snapped Bolts Taught Me
Looking back at my trail of broken plastic bins and bent brackets, the biggest takeaway wasn’t just about picking a thicker bolt. It was realizing that hardware is a system, not a single component. I used to think I could out-muscle gravity with more screws, but I eventually learned that a structural fix for sagging garage ceiling racks often involves fewer, better-placed fasteners rather than a scattershot approach. Another hard truth: your wall is only as strong as its weakest link. You can have a Grade 8 bolt, but if it’s anchored into a rotting stud or crumbling plaster, it’s just a very expensive paperweight. Finally, don’t ignore the ‘creaks.’ If a shelf makes noise when you load it, the metal is likely fatiguing or the wood is splitting—address it before it becomes a 2 AM emergency.
#IMAGE_PLACEHOLDER_E#
Gear That Makes Your Life Easier and Safer
I don’t leave my workshop without a few specific items that have saved me from countless installation headaches. First, invest in a quality digital moisture meter. It’s the only way to know if your lumber is ready for a tight fit or if it’s going to shrink and loosen your bolts by Christmas. Second, keep a box of GRK structural screws on hand; they have replaced almost every lag bolt in my repertoire because they don’t split wood and have incredible shear strength. For those diving into more complex projects, like an expert guide to flawless vanity installation tricks and tips, a self-leveling cross-line laser is worth its weight in gold. It ensures your mounting points are perfectly aligned across long spans, preventing the torque issues that lead to fastener failure. If you ever find your drawers sticking, you might need to fix loose pull-out pantry tracks for good by checking your alignment first.
Build Your Future Storage with Total Confidence
At the end of the day, the goal isn’t just to hang a rack; it’s to create a space where you feel safe and organized. Whether you are implementing innovative storage solutions to transform your bathroom or securing a massive overhead rack in the garage, the principles of metallurgy and physics remain the same. Don’t be afraid to over-spec your hardware—a few extra dollars now is the best insurance policy you’ll ever buy. You have the knowledge to look past the shiny finish and see the structural integrity underneath. Now, go grab your impact driver and start reinforcing your world. Have you ever had a fastener fail in a way that completely surprised you, or did you catch a sagging shelf just in time? Let me know in the comments below!