

I stood there staring at the custom vanity I’d spent weeks picking out, and my heart absolutely sank. Between the back of the wood and the “character-rich” brick wall of my old house was a gap so wide it looked like the Grand Canyon. My first instinct? Fill it with caulk. Big mistake. I created a sticky, globby mess that looked amateur and, honestly, a bit embarrassing. If you’ve ever tried to force a straight cabinet against a wall that has its own personality, you know the frustration. We spend all this money on creative built-ins for seamless storage, only to have the finish ruined by a jagged gap. Today, I’m sharing the scribing trick that changed everything for me. It’s the difference between a DIY project that looks “okay” and one that looks like it was done by a master craftsman. Have you ever stood back from a project only to realize the wall was your biggest enemy? Let me know in the comments if you’ve been there too!
Stop Fighting Your Crooked Walls
When I first started out, I thought walls were straight. They aren’t. Especially when you’re dealing with masonry like brick or stone, you’re fighting a losing battle if you expect a flush fit right out of the box. According to the Masonry Institute of America, natural variations in brick texture and mortar joints can create surfaces that are wildly out of plane, often varying by more than a quarter-inch over short distances. I used to try sanding the cabinet down by eye, which usually resulted in me taking off way too much material and ruining a perfectly good piece of wood. It wasn’t until I mastered the scribing hack for perfect built-in gaps that I finally got that high-end look I was after. This technique allows you to trace the exact profile of your wall onto your cabinet, so you can cut a custom edge that hugs every bump and dip.
Is scribing really worth the extra effort?
I get it. You’re tired, you just want the vanity installed, and the idea of taking it back down to trim the edges feels like a chore. But here is the truth: a bad fit will haunt you every time you walk into the room. Whether you are following an expert guide to flawless vanity installation or winging it on a weekend, skipping the scribe is the number one reason why projects look “home-made” instead of professional. Scribing doesn’t just hide gaps; it provides structural integrity by ensuring your cabinet is actually supported against the wall rather than just floating near it. Trust me, spending that extra twenty minutes with a compass and a jigsaw is the best investment you’ll make in your home’s aesthetic.
Get Your Cabinet Perfectly Level First
Before you even touch a pencil, your cabinet must be perfectly plumb and level. If your base is wonky, your scribe line will be a lie. I learned this the hard way when I ignored the leveling move for vanities on slanted bathroom floors and ended up with a cabinet that fit the wall but made every drawer slide open on its own. Use shims to get the unit exactly where it needs to live permanently. Secure it lightly so it doesn’t shift, but keep it accessible enough that you can remove it for the final trim. This initial setup is like the foundation of a house; if it’s off by a hair, the roof—or in this case, your scribe—will never sit right.
Set Your Compass to the Widest Gap
Find the largest space between the cabinet and the brick. This is your magic number. Open your carpenter’s compass to this exact distance. The trick here is to keep the metal point against the wall and the pencil point on your cabinet face. As you drag the compass down, the metal point follows the peaks and valleys of the brick, and the pencil mimics that exact silhouette onto the wood. If you’ve ever tried to how to fit built-ins into out-of-square alcoves, you know that the wall is rarely a straight line. 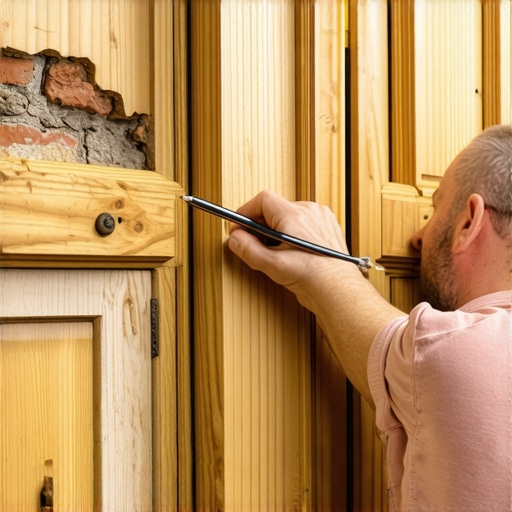 I remember a mudroom project where the wall bowed out like a belly. I thought I could just use a thicker bead of caulk, but by the time I was done, the gap was an inch wide and looked like a white snake crawling up the wall. I had to rip it all out, replace the side panel, and start over with a proper scribe. It was a painful lesson in why we don’t ‘fix it in post.’
Cut at a Back-Angle for a Seamless Look
Once you have your line, it’s time to cut. Don’t cut straight through the wood. Instead, angle your jigsaw blade slightly inward—this is called a back-cut. By removing more material from the back of the wood than the front, you create a ‘knife-edge.’ This edge is much easier to fine-tune with a belt sander or a block plane. This precision is vital when you maximize your space with custom vanities because it allows the visible face of the cabinet to sit tight against the masonry without the back of the board getting in the way.
Dealing with Drastic Masonry Dips
Sometimes a brick wall is so irregular that a standard scribe feels impossible. This is common when you are trying to master the scribing secret for perfect built-ins on rounded drywall corners or heavy stone. In these cases, you might need to ‘double scribe.’ Take off the bulk of the material first, reposition the cabinet, and then scribe one last time for that final hair-thin fit. If you are following a step-by-step guide to vanity installation for beginners, don’t let the extra steps intimidate you. The goal is to make the cabinet look like it grew out of the wall rather than being shoved against it. Every bump you trace and every angled cut you make brings you closer to that high-end, custom-built reality that separates the pros from the amateurs.
Forget What You Know About Standard Studs
Most DIYers assume that finding a stud is the ultimate victory in any installation. In my experience, relying solely on standard framing is the quickest way to end up with a sagging mess. Everyone says wood screws and a prayer are enough, but when you are trying to maximize your space with custom vanities, you have to look at the structural math behind the wall. Most modern studs are made of fast-growth lumber that is prone to twisting. If you’re mounting a heavy unit, especially a floating one, you should be looking into how to stop floating vanities from dipping with steel plates. I’ve seen countless ‘pro’ installs where the unit looked great on day one, only to develop a nasty tilt six months later because the internal leverage of the vanity was literally crushing the wood fibers of the studs. Have you ever fallen into this trap and watched your hard work start to sag? Let me know in the comments!
Can your wall actually handle the weight of a floating stone-top vanity?
This is the question that separates the amateurs from the master builders. When you add a 100-pound quartz top to a custom built-in, you aren’t just dealing with vertical weight; you’re dealing with rotational torque. To counter this, I often skip the basic L-brackets and go straight for the internal torsion box trick for extra long floating shelves, even inside vanity carcasses. This creates a rigid skeleton that resists bending. According to the USDA Forest Products Laboratory’s Wood Handbook, wood can fluctuate significantly in size and strength based on relative humidity, meaning a ‘perfect’ summer fit might become a structural nightmare in the winter if you don’t account for material movement. 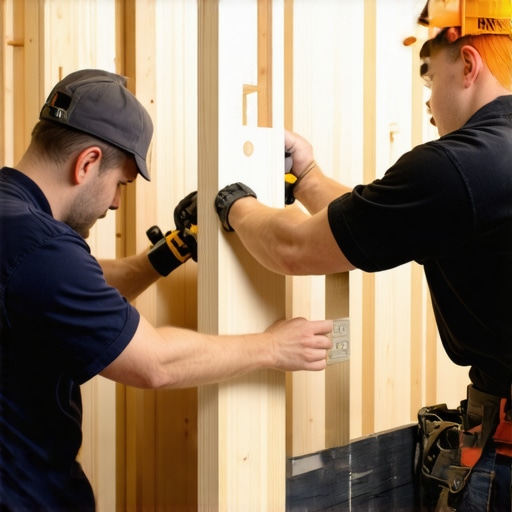
The Moisture Trap Most Homeowners Ignore
The biggest ‘oops’ factor I see in bathroom and basement projects isn’t the finish; it’s the lack of a thermal break. If you’re installing against an exterior wall, you must follow the moisture barrier rule for cabinets on cold outer walls. Without it, the temperature differential creates condensation behind your beautiful new cabinet, leading to mold and wood rot that you won’t see until the floor starts to soft-spot. While most people are focused on creative storage solutions for vanities, the real pros are worried about the airflow behind the box.
Don’t Over-Tighten Your Scribe Lines
Here is a nuanced mistake I see all the time: over-tightening the mounting screws after a perfect scribe. If you force the cabinet into a dip in the wall too hard, you can actually rack the cabinet box, causing doors to misalign. It’s better to have a slightly loose fit that is properly shimmed than a tight fit that warps your cabinetry. When following an expert guide to flawless vanity installation, remember that wood needs to breathe. If you pin it too tightly against masonry, something has to give when the seasons change, and it’s usually your expensive miter joints.I’ve wasted too many hours trying to make cheap school compasses work for precision scribing, and the result was always a shaky, inconsistent line. These days, I don’t go into a bathroom install without my FastCap AccuScribe. It’s the only tool I’ve found that stays rigid enough to handle the rough texture of masonry without the pencil jumping. If you are aiming for creative storage solutions for vanities that actually look high-end, you need a scriber that locks down. After I mark my line, I swap the jigsaw for a cordless trim router. By using a small bit and free-handing the back-cut, I get a edge so crisp it looks like it was factory-milled for that specific wall.
How do I maintain my custom built-ins over time?
The real work starts about six months after the install when the house has gone through a full seasonal shift. Wood moves, but your brick wall doesn’t. This is when you’ll notice hinges starting to creek or doors hanging just a millimeter out of square. I always go back and check the tension on the mounting points. If you have a particularly heavy setup, you might need to implement the reinforced hinge fix for heavy mirror doors to prevent the weight from stripping the soft wood fibers in the cabinet carcass. According to the Kitchen Cabinet Manufacturers Association (KCMA), the most common point of failure in custom cabinetry isn’t the wood itself, but the hardware’s connection to the substrate under repeated load cycles. 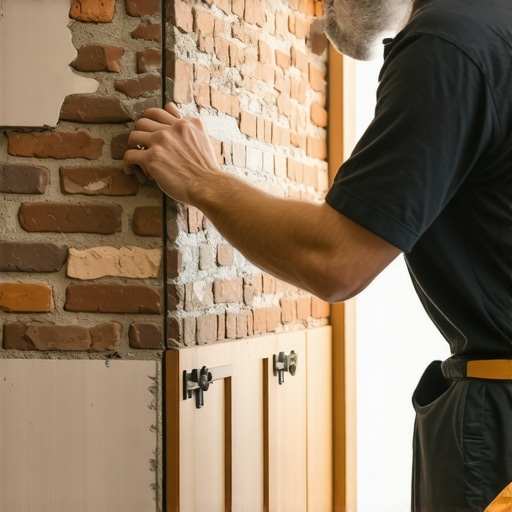
Your Six-Month Performance Check
I make it a habit to crawl inside the cabinet with a flashlight twice a year. You are looking for ‘witness marks’—little lines of dust or wear that show where pieces are rubbing together. If you see wood dust near your tracks, it’s time to learn how to fix shaky garage workbenches with cantilever brackets or similar bracing techniques to stop the micro-wobble. A tiny bit of movement today becomes a cracked joint or a failed drawer slide three years from now. This is especially vital if you’ve worked hard to maximize your space with custom vanities, as tighter tolerances mean less room for error when things start to shift.
The Future of Precision Fitting
Looking ahead, I’m seeing more pros move toward mobile LiDAR scanning. We’re already at a point where a smartphone can map a crooked wall with sub-millimeter accuracy. Soon, the ‘scribing hack’ might involve a digital file sent to a CNC machine rather than a compass and a pencil. But until that’s in every DIYer’s pocket, the physical scribe remains the gold standard. I challenge you to try the back-cut method on your next project. Don’t just cut the line; angle that blade and feel how much tighter the cabinet hugs the wall. It’s a small mechanical change that yields a massive visual reward.
Hard Lessons from My War with Masonry
After years of fighting crooked walls, I’ve realized that the gap isn’t your enemy—it’s your opportunity to show off your skill. One of the biggest lightbulb moments was realizing that a perfect scribe isn’t just about the cut; it’s about the prep work. If you skip the leveling phase, even the most beautiful scribing move for flawless cabinet gaps on natural stone won’t save a cabinet that won’t close properly. Another hard lesson: always buy more material than you think. You will mess up a back-cut at least once, and having that spare side panel is the only thing that will keep your blood pressure down. Finally, remember that wood and masonry are two different worlds. One moves with the humidity, the other doesn’t. Giving your installation a tiny bit of ‘breathing room’ within the scribe line prevents the wood from cracking when the seasons change.
My Go-To Kit for Flawless Finishes
You don’t need a massive workshop to get pro results, but you do need the right gadgets. First, ditch the pencil-behind-the-ear method and get a dedicated carpenter’s compass. It keeps your line consistent, which is vital for effortless storage solutions for a tidy, stylish home. Second, I always keep a belt sander nearby for those ‘micro-adjustments’ after the jigsaw cut. Third, if you’re dealing with weight issues, keep a few hidden steel plates in your bin; they are the best way to fix wobbly built-ins with 4 hidden steel plate tactics without ruining the look. #IMAGE_PLACEHOLDER_E# Lastly, stay updated on top trends in vanity designs you need to know in 2025 to ensure your hard work stays modern for years to come.
Take the Leap Toward Professional Precision
Installing your own cabinetry can be intimidating, but the reward of a perfectly fitted piece is worth every bit of sawdust. When you finally maximize your space with custom vanities that fit like a glove, you aren’t just adding storage; you’re adding value and character to your home. Don’t be afraid to make mistakes—that’s just part of the craft. The goal isn’t perfection on the first try, but the persistence to keep refining until that cabinet looks like it was born in the wall. You have the tools, the tips, and the technique—now go out there and build something that lasts. Have you ever tried to scribe a cabinet and ended up with a gap you couldn’t hide? Let me know your biggest installation struggle in the comments below!