

I remember the smell vividly. It was that earthy, slightly sweet scent of wet MDF and stagnant water that hits you the moment you step into a finished basement. I had spent three weeks tiling that bathroom, and I was so proud of the sleek, modern vanity I’d bolted down. I thought I was a pro. But six months later, the bottom edges of the cabinet were starting to look like a soggy biscuit. I’d made the classic mistake: I treated a below-grade floor like it was a dry, upstairs guest bath. I didn’t account for the relentless nature of ground moisture. If you are planning a remodel, don’t let this happen to you. Today, I’m going to share the exact moisture barrier strategy that saved my subsequent projects and will keep your built-ins bone-dry.
Why My First Basement Vanity Ended Up in the Dumpster
It is absolutely heartbreaking to watch your hard work warp and delaminate. In my early days, I figured a little bit of floor sealant and a bead of caulk were enough. I was wrong. Concrete is essentially a giant sponge. It breathes, it sweats, and it stays cool, which creates a perfect storm for condensation. According to the University of Minnesota Extension, moisture can move through concrete slabs and foundation walls as liquid water or vapor, often going undetected until you see the mold. I learned the hard way that you need more than just a surface-level fix. You need a comprehensive approach that includes 5 moisture proof bases for bathroom cabinets on wet floors. This isn’t just about the floor, though; it is about the cold outer walls too. I’ve seen many DIYers skip the moisture barrier rule for cabinets on cold outer walls, only to find their vanity back panel rotting within a year. Have you ever pulled a drawer open only to find that fuzzy green mold starting to take root in the corner of your cabinet? It is a nightmare that stays with you.
Does a thin plastic sheet really make that much difference?
You might think that a sophisticated moisture barrier is overkill for a small bathroom or a simple vanity setup. Trust me, it isn’t. When I finally ripped out that ruined cabinet, I realized that the moisture-proof finish on the wood only protected the parts I could see, not the raw edges sitting directly against the slab. This is why I now swear by the moisture proof base tactic for basement built-ins. We are going to look at how to create a physical break between the masonry and the wood. Whether you are following an expert guide to flawless vanity installation or trying out some vanity installation hacks that save time and money, the foundation—literally—must be moisture-proof. By the time we’re done here, you’ll know how to install your vanity so it survives even the dampest basement environments.To stop moisture from claiming your vanity, you have to think like a dam builder. You aren’t just placing a cabinet; you are creating a multi-layered defense. The most effective way to do this is by employing the moisture-proof base tactic for basement built-ins. Instead of letting the cabinet’s bottom edges touch the floor, build a ‘riser’ or a sub-base out of pressure-treated lumber or PVC trim boards. This riser acts as a sacrificial layer. Even if your basement floor gets a little damp, the moisture hits the rot-resistant material first, never reaching the furniture-grade wood of your vanity.
Build a sub-base that refuses to rot
While a step-by-step guide to vanity installation for beginners might suggest simple shimming, a basement environment demands more. I always build a frame that is exactly 1/4 inch smaller than the footprint of the vanity. By using materials like those found in 5 moisture-proof bases for bathroom cabinets on wet floors, you create a waterproof platform that keeps the cabinetry high and dry. 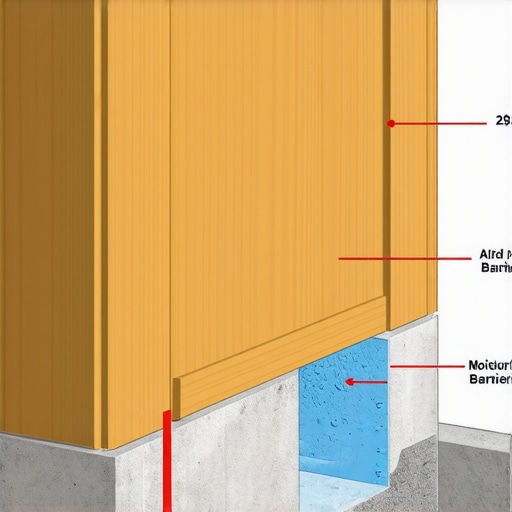
Ditch the shims for a solid pressure-treated riser
Using thin cedar shims in a basement is like using a paper towel to stop a flood; they eventually compress and rot. Instead, use a solid riser made of 2×4 pressure-treated wood. I rip mine down on a table saw to the height of the toe kick. When I did this for a massive double-vanity project last year, I even went a step further and applied a thick bead of silicone to the bottom of the pressure-treated wood. It created an airtight seal against the concrete, ensuring no moisture could even creep underneath the riser.
Give the back panel some breathing room
The floor isn’t your only enemy. Concrete walls are notorious for ‘sweating’ behind cabinets. This is why you must follow the moisture barrier rule for cabinets on cold outer walls. Think of your cabinet like your skin under a raincoat. If the raincoat is pressed tight against you, you will get damp from your own sweat. You need an air gap. I use 1/4-inch plastic spacers between the cabinet back and the wall. This allows air to circulate, preventing the stagnant, humid environment where mold thrives.
Level the unit without creating a sponge
Most basement floors are about as level as a stormy sea. You will be tempted to use wood blocks to level things out, but don’t. I learned this the hard way on a job where I was installing innovative storage solutions to transform your bathroom. The floor had a two-inch drop across four feet. I used the leveling move for vanities on slanted bathroom floors by using heavy-duty plastic leveling legs hidden behind a removable toe kick. These legs are impervious to water. When a pipe leaked three months later, the water flowed harmlessly around the plastic legs. If I had used wood shims, the vanity would have soaked up that water like a biscuit in tea. These small vanity installation hacks that save time and money in the long run because you won’t be replacing a moldy cabinet in two years.I often hear DIYers and even some contractors say, “Just slap a thick bead of silicone around the base and you are golden.” I used to believe that too. But here is the contrarian truth: over-sealing your vanity base can actually accelerate rot. If you create a perfectly airtight, watertight seal around the toe kick, you have essentially built a swimming pool for any internal leaks. I’ve seen cases where a minor drip from a P-trap—exactly like what I discuss in my guide on why your vanity plumbing is leaking into the cabinet base—stayed trapped inside the base for months. Because the water could not escape onto the floor where it would be seen, it sat there until the entire floor of the cabinet turned into a spongy mess of black mold.
Can you actually waterproof a cabinet too well?
The nuance here is vapor permeability. According to the USDA Forest Products Laboratory, wood is a hygroscopic material, meaning it constantly gains or loses moisture to stay in equilibrium with its environment. When you “trap” wood between a concrete slab and a layer of non-breathable silicone, you prevent this natural exchange. This is why I advocate for a “weep hole” approach. Even when using the best 5 moisture-proof bases for bathroom cabinets on wet floors, I leave a tiny 1/8-inch gap in the silicone at the lowest point of the floor. This allows any internal moisture to “telegraph” out, alerting you to a leak before the wood is destroyed. One of the biggest traps is choosing the wrong material for the internal structure while focusing on creative storage solutions for vanities. Many “solid wood” units still use thin, untreated plywood or MDF for back panels. Even with an expert guide to flawless vanity installation tricks and tips, these components will fail if the environment is too humid. 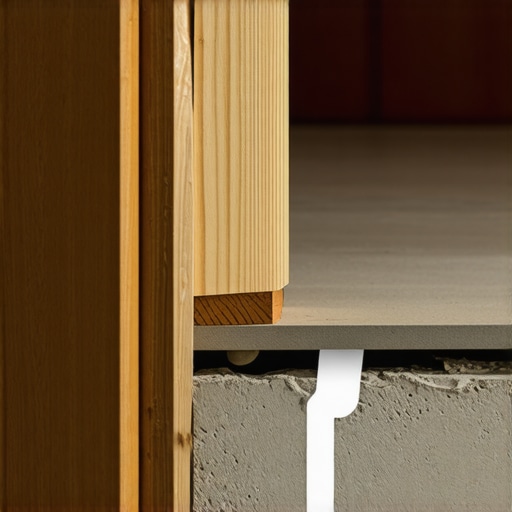 Another nuance I have discovered is the “capillary break” necessity. Even if your base is waterproof, moisture can travel up the screws you used to anchor the unit. If you have read about the moisture-proof base hack for mudroom lockers, you know that metal fasteners can act as a bridge for moisture. Always use stainless steel or coated deck screws for any part of the installation that touches the base or the outer walls. This is the kind of over-engineering that separates a weekend project from a legacy build. Have you ever fallen into this trap of over-sealing a project only to have it backfire? Let me know in the comments.To get these results, I don’t just rely on luck; I rely on a very specific kit. First, if you aren’t using a self-leveling cross-line laser, you are fighting a losing battle against gravity. I personally use a Bosch green-beam laser because it is visible even in bright basement lighting. It ensures that when you are executing how we fixed a tilted floating vanity with hidden leveling shims, your line is dead-on. Second, I never start a basement project without a pinless moisture meter. I want to see the invisible moisture in the slab. If the reading is over 12%, I know I need to double down on my moisture barrier strategy before a single screw goes into the wall. This kind of prep is what separates a DIY look from sleek built-in vanities with design tips for 2025.
How do I keep my bathroom cabinets in top shape for years?
Maintenance isn’t just about cleaning; it’s about surveillance. Every six months, I do a flashlight test. I crawl under the sink and check the P-trap and the supply lines. You’d be surprised how many slow drips start because of house settling or temperature shifts. This is exactly why your vanity plumbing is leaking into the cabinet base and ruining the floor of your cabinet. I also inspect the weep holes I mentioned earlier. If they are clogged with dust or hair, I clear them out. According to the Kitchen Cabinet Manufacturers Association (KCMA) A161.1 standard, cabinet finishes are designed to resist humidity, but they aren’t meant to be submerged. If you see the edges of your doors starting to swell, you need to stop cabinet doors from warping in humid bathrooms by increasing your ventilation immediately. 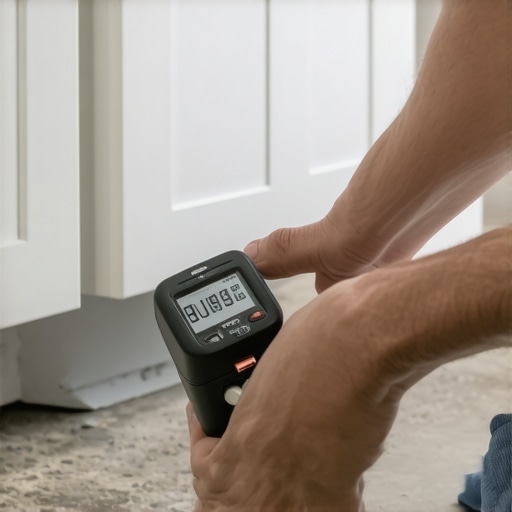 Looking ahead, I predict we are going to see a massive shift toward smart cabinetry in basements. We are already seeing Bluetooth-enabled leak sensors that integrate directly into your home automation system. In five years, your vanity will likely text you the moment a drop of water hits the baseboard. For now, we have to stick to solid engineering. If you are working with tight quarters, check out these smart storage solutions to optimize small bathroom spaces to ensure your vanity remains functional and organized while staying dry. I challenge you: grab a flashlight tonight and check the base of your own bathroom vanity. If you see any swelling or soggy edges, it’s time to rethink your moisture strategy.
The Hard Lessons That Changed How I Handle Concrete
Looking back at my early failures, I realized that moisture isn’t just an inconvenience; it’s a slow-motion wrecking ball. One of the biggest ‘lightbulb moments’ for me was realizing that moisture doesn’t just come from spills; it’s the invisible vapor rising constantly from the earth. I now always test the slab with a moisture meter before I even look at a step-by-step guide to vanity installation for beginners. Another realization? MDF is basically a compressed sponge. If you see it in a basement vanity, keep looking for something better. Always prioritize plywood or solid wood cores that can breathe without delaminating. Finally, I’ve learned that a tiny ‘weep hole’ in your caulk line is worth more than ten tubes of silicone. If you seal every single gap, you’re just trapping the moisture inside with your wood. These are the kinds of vanity installation hacks that save time and money because they ensure you only do the job once.
The Tools I Never Leave Behind
To get professional results, I rely on a very specific kit. I always use a Bosch green-beam cross-line laser because basement lighting is notoriously dim, and you need that perfect level line to avoid structural stress. I also swear by PVC trim boards for the actual ground contact; they look like wood but could sit in a lake for a decade without rotting. For anyone looking for 4 moisture-proof base fixes for rotting bathroom vanity cabinets, these synthetic boards are the gold standard. I also keep a stash of coated stainless steel screws, as standard zinc fasteners will corrode in a damp basement environment surprisingly fast. Lastly, I always recommend the USDA Wood Handbook for anyone who wants to truly understand the science of how moisture moves through wood fibers.
Your Next Step Toward a Mold-Free Home
Building in a basement can feel like a battle against the elements, but with the right preparation, you can create a space that is both beautiful and incredibly resilient. By applying the moisture-proof base tactic for basement built-ins, you aren’t just installing furniture; you are protecting your financial investment and your family’s health from hidden mold. You have the knowledge now—don’t be afraid to get your hands dirty and build something that lasts through the dampest seasons. Even if you are just starting out with innovative storage solutions to transform your bathroom, remember that the foundation is everything. Have you ever discovered mold or rot behind a cabinet you thought was perfectly sealed? Let me know in the comments below!