

I stood there for twenty minutes, just staring at a half-inch gap that looked like a canyon between my new cabinet and the wall. I had spent weeks picking out the wood for this project, but as soon as I pushed the unit against my 1940s-era plaster—which honestly looked more like a topographical map of the Andes—my heart sank. I thought I could just fill it with a bead of caulk. Big mistake. It looked like a DIY disaster, and within two weeks, the caulk started to crack and pull away from the crumbling texture. If you have ever felt that pit in your stomach when a project hits a wall—literally—you are in the right place. Have you ever tried to hide a massive gap with filler only to have it look like a total mess?
The Secret to Making Cabinets Look Like They Grew Out of the Wall
The truth is, no wall is perfectly flat, especially those charming, crumbly plaster ones that give older homes their character. If you want effortless storage solutions that actually look professional, you can’t just slap a box against a wall and call it a day. You have to learn the art of the scribe. It sounds intimidating, but it is really just a fancy word for tracing the wall’s unique personality onto your cabinet. When I first started, I was terrified of cutting into a finished cabinet. I actually ruined a side panel once by being too aggressive with a jigsaw. But once I figured out vanity installation hacks that account for these wonky surfaces, everything changed. Today, we are going to bridge that gap between your beautiful cabinetry and those uneven surfaces.
Will cutting my cabinet frames actually ruin the piece?
It is a valid fear. You are taking a saw to something you just paid a lot of money for or spent hours building. But here is the reality: leaving the gap makes the whole room look unfinished and cheap. According to the Architectural Woodwork Institute (AWI) standards, high-quality installations should have minimal gaps, often requiring field-scribing to ensure a custom fit. It is not just about looks; it is about structural integrity. When you have a tight fit, your heavy built-in shelves or cabinets have more points of contact for stability.
Why textured plaster is a cabinet installer’s worst nightmare
Plaster walls are unpredictable. One spot might bow out half an inch, while three inches higher, it dives back in. This creates point loading where the cabinet only touches in one or two spots, making it wobbly. It is a similar challenge to fitting cabinets against uneven masonry, where the texture is even more aggressive. If you do not scribe, you are basically fighting physics. We are going to stop the fight today and start working with the wall instead of against it by using a simple compass and a steady hand. [image_placeholder]
Level Everything Before You Touch a Pencil
You cannot scribe a cabinet that is leaning. It is like trying to tailor a suit while the person is slumped over; as soon as they stand up straight, the fit is ruined. Before you even think about marking your cut line, you must ensure the unit is perfectly plumb and level. I use hidden leveling shims to get the box exactly where it needs to live. If your floor is sloped, which it usually is in a home with plaster walls, start at the highest point. Once the cabinet is locked into its final vertical position, you will see the ‘canyon’—that irregular gap between the wood and the plaster. This is where the magic happens. If you are working with multiple units, ensure they are joined together first, or you will be chasing gaps all day long.
Set Your Compass to the Widest Point
Take a standard school compass or a dedicated scriber tool. Find the largest gap between the cabinet and the wall. Open the compass so the point touches the wall and the pencil touches the cabinet face. This distance is your constant. As you drag the point along the texture of the plaster, the pencil mimics every hump and dip onto your cabinet. It is a slow, steady dance. I remember doing this on a project with uneven brick where the ‘bumps’ were nearly an inch deep; the trick is to keep the compass perfectly horizontal. If you tilt it up or down, you change the distance of the scribe and end up with a line that does not match the wall. 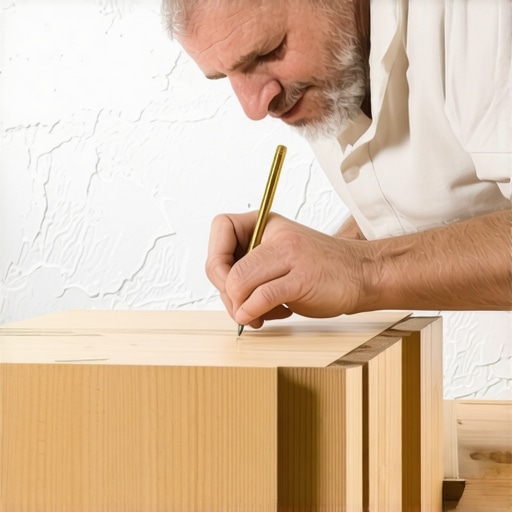
Angled Cuts Make the Best Connections
Once your line is drawn, do not just cut straight through the wood. If you cut a flat 90-degree edge, the slightest high spot on the plaster will prevent the entire piece from sitting flush. Instead, you want to ‘back-bevel’ your cut. This means angling your saw or sander so that you are removing more material from the back of the wood than the front. This creates a sharp ‘leading edge’ that meets the wall. It is the same logic used in a step-by-step guide to vanity installation for tight corners. This thin edge can ‘bite’ into the plaster slightly, creating a seamless look that requires zero caulk.
Why I Stopped Using a Jigsaw for Finish Work
I used to reach for my jigsaw for every scribe, but I quickly learned that on a finished cabinet face, the blade can vibrate and chip the veneer. I once spent four hours trying to fix a jagged edge on a custom walnut built-in because my jigsaw blade deflected mid-cut. Now, I cut about 1/16th of an inch away from my line with a saw and then use a belt sander or a power planer to creep up on the final mark. This gives you surgical precision. If you are worried about the unit moving during the process, you can use hidden steel plate tactics to temporarily anchor the base while you fine-tune the top. This prevents the cabinet from shifting and ruining your scribe line as you test-fit the piece multiple times.
Refine the Fit With a Block and Sandpaper
Your first cut will rarely be 100% perfect because plaster is deceptive. It has micro-textures that a pencil line might skip over. After your main cut, push the cabinet back against the wall. You will see ‘hot spots’ where the wood is hitting the wall and preventing the rest of the scribe from closing. Take a sanding block and hand-sand those specific high points. It is tedious, but this is what separates a DIY job from a professional flawless cabinet gap. When you finally push that unit home and the wood follows every ripple of the plaster with no visible daylight, that pit in your stomach will be replaced by pure satisfaction.
Scribing is about more than just a pretty face
Most people think the goal of scribing is purely aesthetic—that it’s just about making the wood look like it was poured into place. But let’s dig deeper. In my years of designing creative built-ins for seamless storage, I have learned that a poor scribe is the number one cause of structural joint failure. If your cabinet only touches the wall at two or three high points, all the pressure from the mounting screws is concentrated on those tiny spots. This is called point loading. When you load those shelves with heavy books or add a stone countertop, the cabinet frame begins to ‘rack’ or twist to close the gap, eventually snapping the glue joints in your face frame. According to the Architectural Woodwork Institute (AWI) Quality Standards, a professional installation requires uniform support along the primary bearing surfaces to prevent this exact type of mechanical fatigue. If you aren’t scribing for the sake of the cabinet’s lifespan, you are just building a ticking time bomb. 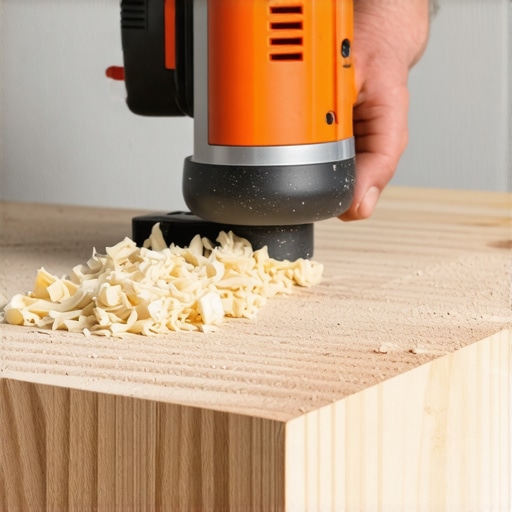
Does a tight scribe actually damage the wall over time?
It is the question I get from every homeowner who watches me shave down a side panel. The answer is a resounding ‘maybe,’ depending on how you handle seasonal movement. Wood is a living material that expands and contracts with humidity. If you scribe a unit into a corner with zero tolerance during a dry winter, that wood will expand in the summer and can exert enough pressure to crack your plaster or buckle your own cabinet side. The advanced trick is the back-bevel I mentioned earlier. By removing material from the rear and leaving only a 1/16th-inch ‘leading edge’ to touch the wall, you create a sacrificial point that can slightly compress or flex without destroying the wall’s integrity. This is a level of detail you won’t find in a basic expert guide to flawless vanity installation tricks, but it is what separates the masters from the amateurs.
The hidden danger of a ‘perfect’ fit
Here is the ‘oops’ factor that ruins many high-end projects: ignoring the internal clearance. I once saw a beautiful floor-to-ceiling unit where the installer had scribed the side panel perfectly to a bowing wall, but in doing so, he pushed the side of the cabinet inward by nearly a quarter of an inch. When he went to install the drawers, they wouldn’t slide because the cabinet box was no longer square. You must ensure your scribe doesn’t compromise the internal geometry of the unit. This is especially critical when dealing with the hidden sub-frame move for supporting massive quartz top vanities. If the box isn’t square because you forced it against a wonky wall, that expensive stone top will not sit flat, and you’ll be left with a permanent wobble. This is often why your built-in cabinets are pulling away from the ceiling or walls later on; the tension in the wood is constantly trying to pull itself back to square. Have you ever fallen into this trap where a ‘perfect’ fit turned into a functional nightmare? Let me know in the comments.
Stop fighting your tools and start using a dedicated scriber
If you are still using a 99-cent school compass with a floppy hinge, you are setting yourself up for a headache. I switched to a dedicated star-wheel scriber years ago because it locks the offset distance in place with a brass thumb screw. This is non-negotiable when you are working on built-in storage ideas to declutter and enhance your home because if that pencil moves even a millimeter while you are tracing a six-foot tall pantry, your final cut will be crooked. I also recommend keeping a set of sharp Japanese pull saws and a fine-grit power planer in your kit. The planer is the secret weapon; it allows you to shave off ribbons of wood as thin as a hair, which is exactly the precision you need for creative built-ins for seamless storage. Unlike a jigsaw, the planer doesn’t vibrate the cabinet face, meaning you won’t see those ugly micro-chips in the finish. 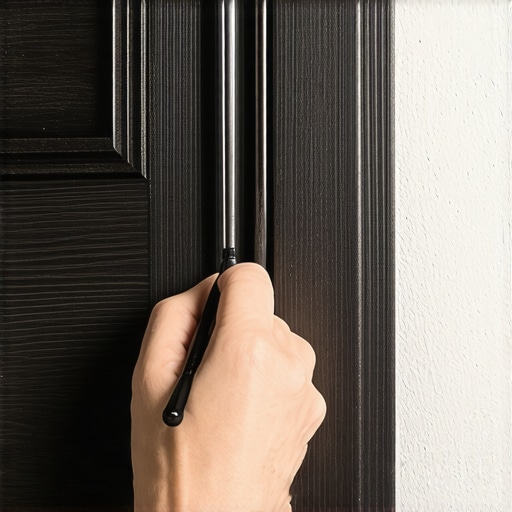
How do I keep my scribed units from cracking or pulling away?
Long-term maintenance is where most people fail. You finish the project, it looks tight, and you walk away. But then winter hits, the heater turns on, and the wood shrinks. To prevent the gap from reappearing, I always leave a tiny ‘micro-reveal’ that I fill with a high-performance siliconized acrylic caulk. The National Kitchen & Bath Association (NKBA) technical manuals emphasize that in high-moisture environments, a 100% silicone bead is actually less effective for aesthetics because it can’t be painted. By using a paintable hybrid, you can match the wall color perfectly. This is a vital part of expert guide to flawless vanity installation tricks, ensuring that as your house breathes, the joints don’t fail. For units in damp areas, don’t forget the moisture-proof base tactic for basement built-ins to stop water from wicking up into your scribe lines.
Digital templating is the next frontier for DIYers
Looking ahead to 2025 and beyond, we are seeing a massive shift toward digital scribing. I’ve started experimenting with LiDAR-based apps on my phone that can generate a 3D mesh of a wall in seconds. While it doesn’t replace the hand-eye coordination of a good block plane, it allows you to pre-cut your panels on a CNC machine before you even arrive at the job site. This is going to revolutionize effortless storage solutions, making high-end custom fits accessible to people who don’t have twenty years of carpentry experience. However, even with a 3D scan, you still need to understand the structural fundamentals, like stop wobbly custom built-ins with 4 hidden steel plate fixes, because a pretty fit won’t save a weak frame.
Try the double-scribe method on your next project
If you want to move from ‘good’ to ‘master’ level, try the double-scribe. Trace your line, cut it 1/8th inch proud, and then scribe a second time once the unit is sitting closer to the wall. This removes any error introduced by the cabinet being too far away from its final home. It takes twice as long, but the result is a seam that looks like it was laser-etched into the plaster. If you are struggling with a unit that keeps shifting while you mark it, check out how to stop mudroom bench rocking with a stealth ledger to lock the piece in place during the scribing process. I challenge you to ditch the caulk gun on your next side panel and try to get the wood to touch the wall perfectly—it is the most satisfying feeling in all of woodworking.
What Pros Know About Scribing That Beginners Often Miss
After years of fitting cabinetry into wonky alcoves, I’ve realized that the most common mistake isn’t the cut itself; it’s the lack of ‘shadow gap’ awareness. If you scribe a cabinet too tight without a back-bevel, the wood will eventually groan against the house as it settles. Always leave yourself a tiny margin for the house to breathe. I’ve seen beautiful built-in storage ideas to declutter and enhance your home ruined by a fit that was literally too perfect, causing the face frame to crack under pressure months later.
Another lightbulb moment for me was realizing that your scribe is only as good as your lighting. If you’re working in a dark corner, use a headlamp to see the exact point where the pencil tip meets the wood. This precision ensures you don’t over-cut, which is vital when you’re working on creative built-ins for seamless storage. Finally, remember that the wall is never wrong; if the line looks crazy, it’s because the wall is crazy. Trust the trace.
Tools That Make Scribing Feel Less Like Surgery
To get that custom look, you need more than just a standard pencil. Here are the items that never leave my tool bag:
- The Star-Wheel Scriber: Unlike a school compass, these lock in place and don’t ‘creep’ while you’re moving along a long vertical run. This is a staple in any expert guide to flawless vanity installation tricks.
- Low-Angle Block Plane: This is my go-to for ‘sneaking up’ on the scribe line. It allows you to remove shavings thinner than paper for a fit that looks like it grew out of the wall.
- Blue Painter’s Tape: Always tape your scribe area before marking. It protects the pre-finished wood from scratches and makes your pencil line much easier to see.
The Future of Your Custom Built-ins Starts Now
Scribing might feel like an intimidating hurdle, but it is the literal bridge between a box in a room and a truly custom home. Once you master this skill, you’ll find yourself looking at every gap in your house as an opportunity rather than a problem. Whether you are aiming for effortless storage solutions or a massive library wall, the patience you show during the scribing process will pay off every time you walk into the room and see those clean, seamless lines. Don’t be afraid to make a mistake—every scrap piece of wood is just a lesson in disguise. Have you ever attempted a scribe that went perfectly right (or hilariously wrong)? Let me know in the comments below!