

I remember the sound vividly—a slow, agonizing creak followed by a sickening thud that echoed through the house. It was 2019, and I had just finished what I thought was a masterpiece: a seven-foot walnut floating shelf for my media setup. I’d used the standard brackets that came in the box, feeling confident. Three weeks later, my expensive soundbar was on the floor, and my drywall looked like it had been through a war zone. That moment of failure was my wake-up call. I realized that if you want that sleek, minimalist look without the structural disaster, standard hardware just isn’t enough. Have you ever walked into your living room and noticed your shelf looks a little… tired? Like it’s bowing toward the floor? You aren’t alone, and it’s likely not the wood’s fault. Today, I’m going to walk you through the hidden wall plate strategy, a professional-grade method to ensure your shelves stay rock-solid forever.
The Day My Media Shelf Almost Took Down the TV
In my early days of DIY, I made the classic mistake of overestimating the power of a few two-inch screws and some plastic anchors. I didn’t account for leverage. When you have a shelf sticking out 12 to 14 inches from the wall, every pound of equipment acts like a pry bar against your mounting points. If you’ve noticed why your floating media unit is pulling away, it’s usually because the fasteners are literally being teased out of the studs by gravity. I’ve seen beautiful homes where the owners tried to create built-ins for seamless storage only to have them tilt forward within a year. The hidden wall plate strategy involves a horizontal steel or heavy plywood plate that spans multiple studs, distributing the load across the entire wall rather than two tiny points. It’s the same logic used to stop wobbly custom built-ins, and it is a total game-changer for floating furniture.
Does This Strategy Really Work for Heavy Equipment?
You might be thinking that a piece of steel hidden behind wood is overkill for a shelf. It isn’t. According to technical data from the Forest Products Laboratory, fasteners in structural lumber can lose up to 25% of their withdrawal strength if the wood experiences significant moisture fluctuations over the seasons. This means that even if your shelf feels tight in July, it might be loose by January. By using a wall plate, you create a massive surface area of friction and mechanical grip. It’s the difference between holding a heavy box with two fingers versus using your whole palm.
Why Traditional Brackets Keep Failing You
Most off-the-shelf brackets are designed for lightweight decor, not for the heavy-duty realities of 75-inch TVs and gaming consoles. When I first started, I ignored the signs of cabinets pulling away from the wall because I thought it was just ‘settling.’ It wasn’t. It was structural fatigue. The hidden wall plate acts as a sub-frame, much like the sub-frame moves used for massive quartz vanities. It provides a flat, rigid surface that prevents the shelf from ever developing that dreaded ‘forward lean.’ Have you ever had a shelf fail on you, or are you currently staring at a gap between your shelf and the wall? It’s a stressful spot to be in, but it is fixable. Let’s look at how we can prep the wall to support a truly massive load without ruining the aesthetic.
Build a Structural Spine Behind the Drywall
To stop the sag, you have to stop the leverage. The first step in the hidden wall plate strategy is selecting your material. While heavy 3/4-inch plywood works for smaller projects, if you are supporting a media console or a heavy vanity, you want 1/4-inch cold-rolled steel. I once worked on a project where a client wanted a massive oak desk to float over a radiator. We used a custom-cut steel plate that spanned four studs. By the time we were done, I could literally stand on the edge of that desk without a millimeter of movement. This is the same principle used to stop wobbly custom built-ins. You aren’t just screwing into wood; you are creating a secondary ‘skeleton’ for the wall.
Find the Studs and Mark Your Level
Forget the small battery-operated stud finders that beep at every nail. Use a neodymium magnet to find the actual screws in the studs. Once you’ve mapped out three or four studs, mark a perfectly level line. This is where your plate will sit. If you are dealing with a heavy bathroom setup, these vanity installation hacks can save you hours of frustration. You want your plate to be at least 2 inches shorter than the total length of your shelf so the ends remain hidden once the ‘skin’ of the shelf is installed. 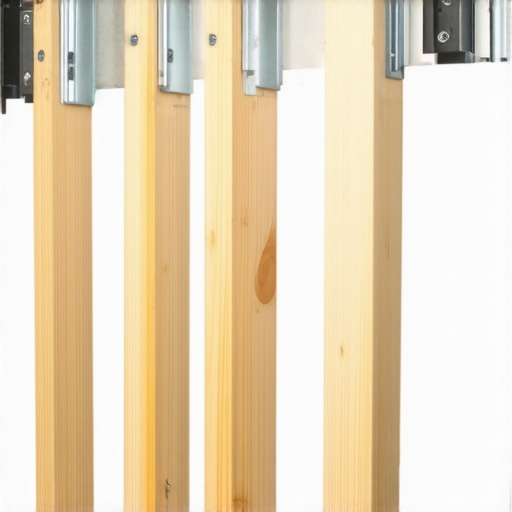
Why Steel Plates Beat Individual Brackets Every Time
Most people think more brackets equals more strength, but that is a myth. Individual brackets are islands; they don’t talk to each other. If one stud is slightly softer than the next, that bracket will pull more, causing your shelf to twist. A continuous wall plate forces the entire wall to act as one unit. This is exactly how professionals stop floating vanities from dipping with steel plates. When you bolt that plate into four different studs using 3-inch lag bolts, you are distributing thousands of pounds of pressure across a six-foot span.
The Secret to Recessing the Plate
If you want the shelf to sit flush against the wall, you can’t just slap the plate on top of the drywall. You need to ‘surgical’ your way in. Use a multi-tool to cut out a strip of drywall exactly the size of your plate. Screw the plate directly to the studs. Now, your mounting surface is flush with the rest of the wall. This is a pro-level move, similar to the sub-frame move for supporting massive quartz top vanities. It looks cleaner and provides a much more stable foundation for the internal arms of your shelf.
Defeating the Forward Lean for Good
Once the plate is in, you attach your shelf’s internal ribs or the torsion box to it. This is where you stop floating shelf sag with internal torsion box engineering by ensuring the connection between the plate and the shelf is rigid. I remember a kitchen remodel where we had to fix a tilted shelf that was holding a heavy collection of cast-iron pots. The original installer had used plastic anchors. We ripped it out, installed a ledger-style plate, and suddenly, those pots felt as light as feathers to the wall. If things aren’t perfectly square, you can use the same methods we used to fix a tilted floating vanity with hidden leveling shims. A few thin stainless steel shims between the plate and the shelf arm can correct a lean that developed because the house’s original framing was out of plumb.Most people think that once they’ve hit the center of a stud with a lag bolt, the job is bulletproof. But here is the hard truth: wood is a living, breathing material even after it’s been milled into a 2×4. I’ve seen perfectly installed built-ins develop massive gaps a year later not because the installer missed the stud, but because they ignored the ‘seasonal creep’ of the home’s framing. Everyone says ‘just hit the studs,’ but in my experience, the stud itself can be the weak link if it bows as it dries out. This is a common trap in new construction where the lumber is often still ‘green’ or has high moisture content.
Can Your Wall Actually Handle the Weight of That Quartz Top?
When you’re dealing with high-end materials, like when you support quartz counters on custom floating vanities, you aren’t just fighting gravity; you’re fighting the wall’s internal structure. A study by the USDA Forest Products Laboratory highlights how ‘withdrawal resistance’ of fasteners varies wildly based on the wood species and its moisture cycle. If you’re installing in a basement or a high-humidity bathroom, you need more than just a screw. You need a moisture barrier strategy for below grade vanities to prevent the wall plate from rotting out the very studs it’s attached to. 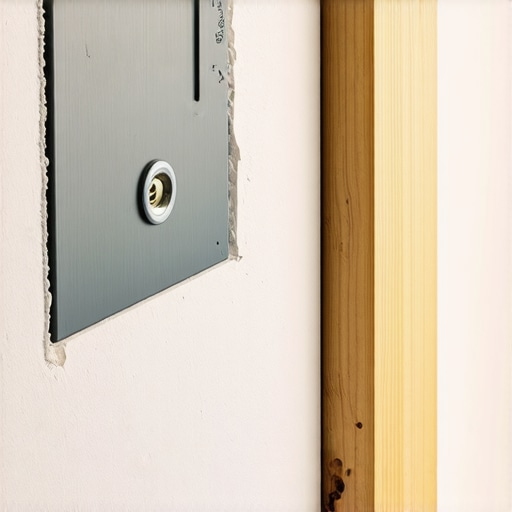 I once saw a gorgeous mudroom setup fail because the installer didn’t realize the wall was an exterior ‘cold wall.’ Condensation formed behind the cabinets, the wood swelled, and the fasteners literally popped out. Have you ever fallen into this trap? Let me know in the comments because it’s a heartbreaking mistake that’s easily avoided with a simple vapor barrier.
The Scribing Mistake That Ruins High-End Finishes
The biggest ‘oops’ factor I see with advanced DIYers isn’t the strength—it’s the fit. Most try to force a square cabinet against a non-square wall. If you don’t use a scribing move for flawless cabinet gaps, you create tension points that will eventually cause the wood to split or the finish to crack. It’s better to cut the cabinet to fit the wall than to try and pull the wall to the cabinet with screws. This is especially true when you enhance your home with sleek built-in vanities; that tiny 1/16th-inch gap will look like a canyon once the house settles in the winter. You also have to watch out for vanity plumbing leaking into the cabinet base because even the strongest steel plate won’t save a cabinet that’s been turned into a sponge by a slow P-trap leak. Always prioritize a moisture-proof base for bathroom cabinets if you’re working on tile that sees a lot of water.Once you’ve moved past basic brackets and embraced structural plates, you need the right kit to keep everything precise. I don’t go anywhere without my green beam laser level; specifically, the Bosch GLL3-330CG. Why green? Because in a bright, sun-drenched bathroom where you’re trying to choose the perfect vanity style, a red laser simply disappears. If your level is off by even a fraction of a degree, that six-foot walnut shelf will look like it’s sliding off the wall. I also strictly use GRK structural screws rather than standard zinc wood screws. Zinc is brittle and can snap under the shear force of a heavy load, whereas structural screws are heat-treated to bend rather than break, ensuring your step-by-step guide to vanity installation results in a unit that stays put for decades. 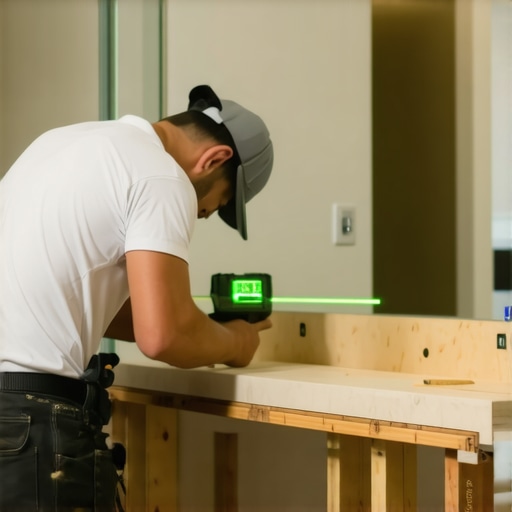
How do I maintain my floating installations over time?
Even the best installation requires a check-up. The Architectural Woodwork Institute (AWI) Quality Standards, Section 10, notes that heavy-duty casework must withstand specific load-bearing tolerances without permanent deformation. I recommend doing a ‘gap check’ every six months during the first two years. Use a flashlight to look at the seam where the wood meets the wall. If you see a hairline fracture in the caulk, it’s a sign of settling. You should also check your drawers; if you notice why your large kitchen drawers drag, it’s often because the cabinet box has slightly shifted, requiring a quick turn of the adjustment screws on your slides. Keeping the hardware lubricated with a dry PTFE spray prevents the ‘stick-slip’ phenomenon that puts unnecessary horizontal stress on your wall anchors.
Why You Will Soon See Carbon Fiber in Your Kitchen Cabinets
Looking ahead to the top trends in vanity designs for 2025, we are moving away from bulky wood supports. I’m already seeing high-end shops experiment with carbon fiber resin strips embedded into the undersides of shelves. This allows for a profile that is only 1/2-inch thick but can support hundreds of pounds without a hint of a sag. It is the same tech used in aerospace, and it is going to make the ‘floating’ aesthetic even more impossible-looking. If you want to stay ahead of the curve, I challenge you to try the ‘recessed plate’ move on your next project. Stop relying on what the box provides and start building your own structural spine. It is the only way to sleep soundly knowing your expensive gear isn’t going to end up in a heap on the floor.
Why Even the Best Screws Fail Without a Structural Spine
Over the years, I’ve realized that hitting the stud is only half the battle. One thing experts rarely mention is ‘creep’—the way heavy hardware slowly deforms the wood fibers over a decade. I’ve seen lag bolts that were rock-solid during installation hanging by a thread years later because of constant weight and seasonal wood movement. Another lightbulb moment for me was realizing that drywall acts like a soft cushion; if you do not mount your plate directly to the studs, you are essentially resting your heavy vanity on a layer of chalk. Combining a recessed steel plate with the internal torsion box move is the only way I’ve found to guarantee a shelf won’t dip even a fraction of an inch.
The Gear That Makes Gravity-Defying Shelves Possible
I do not trust my reputation to the hardware store bargain bin. For every major install, I rely on GRK RSS Structural Screws because they provide incredible shear strength that standard wood screws simply lack. If you are working on a complex bathroom project, I highly recommend following an expert guide to flawless vanity installation to ensure your plumbing and structural supports do not conflict. I also swear by the Bosch GLL3-330CG laser and heavy 1/4-inch cold-rolled steel plates sourced from a local fab shop. These aren’t just tools; they are insurance policies for your walls.
Your Move Toward a Sag-Free Home
The transition from using basic brackets to building structural sub-frames is what separates a standard DIYer from a master craftsman. As we look toward the top trends in vanity designs, it is clear that the ‘impossible’ floating look is here to stay. Do not let the fear of a little drywall dust stop you from creating a rock-solid media center or vanity. The peace of mind you get from a shelf that does not groan when you put a book on it is worth every bit of extra effort. Have you ever had a piece of ‘floating’ furniture slowly start to sag, or are you about to attempt your first steel-reinforced install? Let me know your project plans in the comments below!