

I’ll never forget the sound of a slow, agonizing “crrrr-ack” echoing through my newly renovated master bath. It was 2:00 AM, and my beautiful, minimalist floating vanity—the one I spent three weekends staining—was slowly peeling away from the wall. I had made a classic mistake: I assumed that double-layer drywall meant double the strength. In reality, that extra inch of gypsum was just a giant lever working against my screws, pulling them straight out of the pine studs like a hot knife through butter. It was a mess, and quite frankly, it was embarrassing.
The Night My Dream Bathroom Literally Hit the Floor
Most folks think that having double-layer drywall (often installed for soundproofing or fire ratings) makes a wall “beefier.” But when you’re dealing with vanity installation hacks, you quickly realize that thickness is actually your biggest hurdle. The further your fastener has to travel before it hits solid wood, the more it wants to bend or shear. I’ve seen seasoned pros get overconfident, thinking a standard 3-inch deck screw is enough. Trust me, it isn’t. When you add a heavy stone top, you really need to know how to support quartz counters on custom floating vanities or you’re inviting a structural disaster into your home.
I learned the hard way that you can’t just “feel” for the stud and hope for the best. You need a strategy that accounts for the gap created by that second layer of board. Since that midnight disaster, I’ve refined a technique using vanity installation hacks that save time and money to ensure that your furniture stays exactly where you put it—permanently. If you’ve ever stared at a wall and wondered if your expensive cabinets were actually going to stay up, you’re in the right place. Have you ever felt that sinking feeling when a screw just keeps spinning and spinning?
Is This Extra Layer of Drywall Actually Your Enemy?
It’s easy to be skeptical. Why would more material be a bad thing? The problem is the “fulcrum effect.” According to The Family Handyman, a standard bathroom vanity can weigh upwards of 100 pounds before you even turn on the faucet. When that weight is hanging off a wall, the top of the vanity wants to pull out while the bottom wants to push in. With double-layer drywall, that “pull” is happening much further away from the stud than in a standard 1/2-inch setup. Without the right reinforcement, you’re basically asking your drywall to do the job of a structural beam, which it’s definitely not designed for. This is why many homeowners find themselves searching for ways to how to stop floating vanities from dipping with steel plates after the initial installation fails.
The good news is that you don’t have to rip the whole wall down to the studs (though I almost did out of pure frustration). By understanding the physics of the load and using the right heavy-duty fasteners, you can achieve a “rock-solid” mount that looks effortless. We’re going to talk about why skipping the pilot hole is the fastest way to split a stud and how to ensure your vanity doesn’t just hang, but thrives.
Secure Your Vanity with the Right Structural Strategy
When you are staring at two layers of 5/8-inch Type X drywall, you are looking at an inch and a quarter of gypsum before you even touch a structural stud. Think of that drywall like a layer of thick, stiff marshmallow fluff; it looks solid, but it has zero structural integrity for holding a 150-pound cabinet. To get a professional finish, you need to follow an expert guide to flawless vanity installation tricks and tips that prioritizes mechanical connection over hope. I learned this the hard way while working on a condo project in the city. I used what I thought were ‘long enough’ screws, only to watch the vanity tilt forward by three degrees the second we set the marble top down. That ’tilt’ is the sound of your fasteners crying for help.
Find the Wood Through the Drywall Fog
Standard stud finders often get confused by the density of double-layered boards. They’ll give you false positives or show the stud as twice as wide as it actually is. I’ve found that using a strong neodymium magnet to find the drywall screws in the first layer is the most reliable way to map out your studs. Once you find the vertical line of screws, you know exactly where the center of the timber is. If you miss that center by even a half-inch, your fastener is only grabbing the ‘meat’ of the stud’s edge, which will eventually blow out under the stress of a heavy sink. When you are planning custom vanities with expert design tips, always mark your stud locations on a piece of painter’s tape on the floor so you don’t lose them once the cabinet covers the wall.

Ditch the Standard Hardware for Structural Lags
If you use a 3-inch screw, you are only getting about 1 inch of penetration into the wood (subtracting the vanity back and the double drywall). That’s not an anchor; that’s a suggestion. For double-layered walls, I move straight to 4.5-inch or 5-inch structural lag screws (like GRK or Spax). These fasteners are heat-treated and designed to carry shear weight without snapping. I remember a specific bathroom renovation where the client insisted on a massive 72-inch floating unit. We didn’t just screw it in; we utilized the hidden sub-frame move for supporting massive quartz top vanities to distribute the load across four separate studs. This prevented the drywall from crushing under the downward pressure of the cabinet’s bottom edge.
Stop the Dip with Steel Plate Reinforcements
The most common failure point isn’t the screw snapping; it’s the bottom of the vanity sinking into the soft drywall, causing the top to pull away. This is where you need to know how to stop floating vanities from dipping with steel plates. By placing a thin steel mending plate or a specialized bracket behind the lower mounting points, you increase the surface area of the ‘push.’ It’s like wearing snowshoes on deep snow; the plate prevents the vanity from ‘sinking’ into the gypsum. If you’re still worried about the weight, especially with a stone top, consider how to support quartz counters on custom floating vanities using internal bracing that transfers weight directly to those long structural lags.
How to Level a Cabinet When the Wall is Bowed
Double-layer drywall is rarely perfectly flat. If you tighten your screws all the way, you might actually pull the vanity out of square, causing the doors to rub. I always use a ‘shim-as-you-go’ approach. I’ll drive the center screw 90% of the way in, then check for level. If there’s a gap between the cabinet and the wall, I slide in a composite shim before final tightening. I’ve used hidden leveling shims on almost every floating install to compensate for these ‘belly’ walls. This ensures that the vanity stays perfectly level, even if the wall behind it looks like a mountain range. Once it’s locked in, that unit shouldn’t budge even if you sit on it—though I wouldn’t recommend testing it that way!”,”image”:{“imagePrompt”:”A detailed cross-section diagram of a bathroom vanity being mounted to a wall with two layers of drywall, showing long structural lag screws going through the cabinet back and the drywall into the center of a wooden stud.”,”imageTitle”:”Structural Mounting Diagram for Double Drywall”,”imageAlt”:”Cross-section showing floating vanity lag screw penetration through double drywall layers into a stud.”},”categoryId”:1,”postTime”:””}
I see it all the time on professional forums: a guy thinks that if four screws are good, twelve must be bulletproof. This is the first major myth I want to dismantle. In the world of vanity installation hacks, over-fastening is a silent killer. When you drive too many large-diameter structural lags into a narrow 1.5-inch stud, you aren’t making it stronger; you’re effectively performing a ‘woodworking lobotomy’ on your home’s framing. Each screw removes wood fiber, and if they are spaced too closely, you create a perforated line that makes the stud snap under the weight of a heavy quartz top. I’ve transitioned to a ‘less is more, but better’ philosophy that prioritizes the quality of the bite over the quantity of the hardware.
Why More Screws Might Actually Weaken Your Wall
The contrarian truth is that the structural integrity of your 2×4 is finite. According to the Wood Handbook by the USDA Forest Service, the shear strength of a fastener is only as good as the wood surrounding it. If you ‘Swiss cheese’ your studs with a dozen lag bolts, you’ve reduced the effective cross-section of the timber to the point where it can no longer resist the downward force of a massive cabinet. Instead of a dozen standard screws, I now rely on four strategically placed 5-inch structural lags combined with how to fix wobbly built-ins with 4 hidden steel plate tactics to spread the load vertically rather than just horizontally. This avoids the ‘perforation effect’ while providing a vastly superior grip.
Does Your Fastener Choice Ignore the Laws of Physics?
Most DIYers focus entirely on ‘pull-out resistance’—the force required to yank a screw straight out. But for a floating vanity, the real enemy is ‘shear.’ Shear is the downward force that wants to snap the screw in half right where the vanity meets the wall. When you have double-layer drywall, that shear point is shifted an inch away from the stud, creating a massive amount of leverage. If you aren’t using a screw with a high-rated shear strength, the metal will actually bend or fatigue over time. This is why I always recommend an expert guide to flawless vanity installation tricks and tips that accounts for the specific alloy of your fasteners. A standard drywall screw has almost zero shear strength; a structural lag is designed for it.
The Invisible Trap of the Split Stud
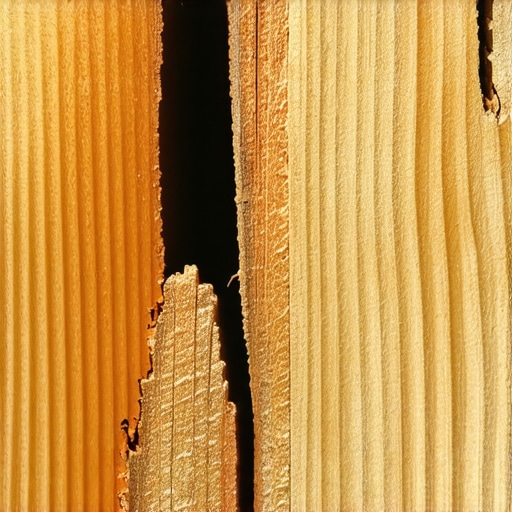
Here is the ‘oops’ factor that ruins most weekend projects: the invisible split. When you drive a thick 1/4-inch lag into a 50-year-old, kiln-dried stud without a pilot hole, the wood doesn’t just ‘move’ out of the way. It compresses until the internal pressure causes a hairline crack to run 12 inches up the stud. You won’t see it because it’s behind two layers of drywall, but your screw is now sitting in a loose canyon of wood rather than being gripped by tight fibers. I’ve seen vanities hold for three months and then suddenly drop two inches because the split finally reached the end of the board. I never, ever drive a structural fastener without a 1/8-inch pilot hole first. It’s a five-second step that prevents a five-thousand-dollar disaster.
Even the most experienced pros run into trouble when walls aren’t square. If you’re dealing with a corner install, you might need the the scribing secret for perfect built-ins on rounded drywall corners to ensure the cabinet doesn’t put lateral tension on your mounting screws. And if you’re installing safety features nearby, don’t forget the hidden blocking strategy for heavy bathroom grab bars, as the same double-drywall rules apply there. Have you ever fallen into this trap of over-fastening or skipping the pilot hole? Let me know in the comments!
Once you have successfully navigated the minefield of structural lags and pilot holes, you might think the job is done. But a floating vanity isn’t a ‘set it and forget it’ feature; it is a dynamic piece of engineering that lives in the most hostile environment in your home: the bathroom. Over the next few years, the weight of your quartz top and the humidity from your morning showers will work in tandem to test every fastener you drove into those studs. To keep everything rock-solid, you need to transition from the installation mindset to a long-term maintenance strategy.
The Gear That Keeps Your Cabinets from Shifting
I have a rule: I never trust a standard bubble level for a floating install on double-layer drywall. The risk of parallax error is too high when you are trying to align a heavy cabinet across a six-foot span. Instead, I rely on a self-leveling cross-line laser. This tool allows me to see exactly how the wall bows or dips in real-time as I tighten the structural lags. If you see the laser line begin to dive as you torque the screw, it’s a red flag that the drywall is compressing, and you need to back off and add a shim. I’ve found that using an expert guide to flawless vanity installation tricks and tips is only as effective as the precision of your measurement tools. If the foundation is off by even an eighth of an inch, your drawers will eventually begin to bind, forcing you to learn how to fix uneven gaps in custom built-in doors much sooner than you’d like.
How do I maintain structural integrity over the years?
Maintenance starts with a flashlight and a wrench. Every six months, I recommend opening your cabinet and inspecting the points where the fasteners meet the back rail. Look for ‘crushing’—where the washer has started to sink into the wood. According to the National Kitchen & Bath Association (NKBA) Planning Guidelines, the failure of wall-mounted units is frequently caused by dynamic loads, such as a child leaning on the counter or someone using the vanity for balance. If you notice any movement, don’t just tighten the screw further; check to see if the wall itself is flexing. This is also the perfect time to address the hardware. If your drawers feel sluggish, it might be a simple tension issue. Knowing why your soft-close drawers are slamming and the tension fix can prevent the vibration from loosening your wall anchors over time.

Stop Moisture from Rotting Your Hard Work
In a double-drywall setup, moisture is a silent assassin. If water seeps behind the vanity, it gets trapped between the layers of gypsum, turning your structural support into a soggy mess. I am religious about using the waterproof sealant move for vanity backsplashes. This isn’t just for aesthetics; it creates a literal dam that keeps water from ever reaching those structural lags. I’ve seen beautiful smart storage solutions to optimize small bathroom spaces ruined because the homeowner skipped a five-dollar tube of 100% silicone. Remember, the drywall is the weakest link in the chain; keep it dry, or the ‘fulcrum effect’ we talked about earlier will eventually win.
The Future of Heavy Wall Mounts
Looking ahead to 2025 and beyond, I predict we will see a shift away from individual screws toward integrated steel mounting tracks that are installed *before* the second layer of drywall goes up. This ‘cleat-first’ architecture is already gaining traction in high-end European kitchen design. Until then, we have to rely on our own precision and the right hardware. I challenge you to do one thing today: go grab a tube of high-grade 100% silicone and check the bead behind your vanity. It’s the cheapest insurance policy you’ll ever buy to ensure your dream bathroom doesn’t end up on the floor again.
The Hardest Lessons I Learned Behind the Drywall
After years of fixing ‘failed’ installs, the biggest lightbulb moment for me was realizing that a bathroom isn’t static; it’s a living environment that moves with every shower. One of the most pervasive myths is that ‘snug is enough.’ In reality, wood and metal expand and contract at different rates. If you don’t use structural lags, you are essentially setting a countdown for when that vanity will start to pull away. I also learned that the vanity back itself is often the weak point; if your cabinet has a thin mounting rail, you will definitely need to learn how to fix wobbly built-ins with 4 hidden steel plate tactics to prevent the frame from buckling under its own weight. It’s not just about the wall holding the screw; it’s about the screw holding the cabinet.
#IMAGE_PLACEHOLDER_E#
My Go-To Toolkit for Heavy Mounting
If you want to move beyond the guesswork, there are three things I never step onto a job site without. First, a high-quality cross-line laser—it’s the only way to catch a bowing wall before it ruins your drawer alignment. Second, I swear by 5-inch GRK structural fasteners; they have a built-in washer head that prevents the ‘crush’ effect on the back of your unit. Finally, always have an expert guide to flawless vanity installation tricks and tips handy for those weird corner cases. I also keep a stash of composite shims because wooden ones can rot or compress in high-moisture environments, leading to the dreaded ‘vanity tilt’ over time.
Go Build Your Dream Sanctuary
Installing a heavy unit on double-layer drywall might feel like a high-stakes engineering project, but once you master these vanity installation hacks, you’ll have the confidence to tackle any bathroom renovation. Don’t let the fear of a heavy quartz top keep you from the minimalist look you want. By prioritizing structural lag penetration and moisture sealing, your vanity will be as permanent as the house itself. If you’re looking for more inspiration on what to install next, check out these top trends in vanity designs you need to know in 2025 to see what’s possible with a rock-solid foundation. Have you ever had a mounting screw ‘spin out’ on you during an install, or did you find a different way to hit those hidden studs? Let me know in the comments!