

I still have a deep gouge on my workbench from the day my ‘heavy-duty’ storage system decided to introduce itself to the floor. I thought I knew what I was doing; I bought the biggest cabinets the home center sold, used the screws that came in the box, and felt like a DIY king—for about forty-eight hours. Then, the drywall anchors pulled out like loose teeth, and I realized that hanging five hundred pounds of tools requires more than just hope and a cordless drill. If you are tired of seeing your shelves sag or, worse, watching them pull away from the studs, you are in the right place. Today, I am sharing the hard-won lessons that transformed my garage from a disaster zone into a rock-solid workshop. We are not just talking about putting up a few shelves; we are mastering the physics of heavy-load management to ensure your investment stays exactly where you put it.
That Midnight Crash Was My Wake-Up Call
I made the classic blunder of ignoring the total weight of my gear once it is actually inside the cabinet. I did not account for the ‘live load’—that extra weight added every time you throw a bag of rock salt or a heavy floor jack onto a shelf. This oversight is exactly why your garage wall tracks are failing under load when you least expect it. It is not just about the track itself; it is about how that track communicates with your wall’s skeleton. According to structural guidelines in the Wood Handbook by the USDA Forest Products Laboratory, the load-carrying capacity of fasteners can be significantly reduced by factors like wood grain orientation and moisture levels in a typical garage. To get it right, you need the steel rail strategy for secure garage wall cabinets that distributes weight across multiple studs rather than straining a single point. Have you ever walked into your garage only to find your cabinets leaning an inch away from the wall? It is a terrifying sight, and I would love to hear your ‘near-miss’ stories in the comments below.
Is steel really going to keep my heavy gear from falling?
It is a fair question to ask. You see these relatively thin metal tracks and wonder if they can actually handle a hundred-pound cabinet plus your entire collection of power tools. The skepticism is healthy. In fact, one of my biggest early fails involved using a track that was too thin for the spans I was trying to cover, leading to a visible bow in the metal. The secret is not just the material; it is the geometry and the anchoring method. When you move beyond basic plastic plugs and start using integrated steel wall-track systems, you are creating a structural union with your home. It is the difference between hanging a picture and building a bridge. We are going to dive into the specific tactics—including the ‘steel stud’ approach and specialized mounting plates—that make the difference between a project that lasts twenty years and one that lasts twenty minutes, ensuring your built-in storage ideas to declutter and enhance your home actually stand the test of time.
Stop Trusting Your Stud Finder Without a Backup Plan
Before you drive a single screw, you have to find the ‘spine’ of your garage. Most people run a battery-powered stud finder across the wall, mark a line, and call it a day. That is how disasters start. I remember installing a massive locker unit for a neighbor; I was confident I’d hit three studs, but my sensor was actually picking up a rogue electrical conduit. The second I loaded the shelves, I heard the sickening crunch of drywall giving way. Now, I always use a tiny finishing nail to ‘drill’ pilot holes behind where the cabinet will sit to find the exact 1.5-inch width of the wood. This ensures your fasteners are biting into the center of the timber, not just grazing the edge.
Why the Steel Rail Outperforms Individual Brackets
Instead of trying to hit a stud perfectly for every single cabinet bracket, you should adopt the steel rail strategy for secure garage wall cabinets. Think of this rail like the foundation of a skyscraper. It runs horizontally across multiple studs, distributing the weight so that no single screw is doing all the heavy lifting. If one stud is slightly weaker or has a wood knot, the others pick up the slack. This is also how the pros handle an expert guide to flawless vanity installation tricks tips when dealing with heavy stone tops. The rail gives you a level, continuous mounting surface that allows you to slide your cabinets left or right for perfect positioning without losing structural integrity.
Pick the Right Fastener for Your Wall Skeleton
Your choice of ‘ammo’ depends entirely on what is behind the paint. If you are mounting into standard 2x4s, dump the cheap drywall screws immediately. They are brittle and will snap under shear tension. You need structural screws that can flex slightly without breaking. However, if you are dealing with a different beast, like a commercial-style garage or a modern apartment, you will need 6 steel stud tactics for garage racks that actually hold. Steel studs are thin; they will not hold a screw thread like wood does, so you have to use toggle bolts or the cleat hack for mounting vanities to steel studs to create a mechanical ‘sandwich’ against the metal.
Switch to Concrete Sleeve Anchors for Masonry Walls
If your garage walls are exposed block or poured concrete, forget about plastic plugs. They will vibrate loose over time as you open and close heavy cabinet doors. I prefer using the concrete sleeve anchor for wall mounted tool chests because the metal sleeve expands against the entire circumference of the hole. For the absolute heaviest loads—like a wall-mounted engine hoist or a full rack of cast iron tools—you need the concrete wedge anchor for heavy garage tool cabinets. These are the ‘nuclear option’ of fasteners; once they are in, the wall will likely come down before the anchor does. Just make sure your alignment is perfect before you tighten them, because there are no second chances with wedge anchors.
Why More Screws Might Actually Weaken Your Wall
Most DIYers think that if two screws are good, ten must be better. I used to be the guy who would ‘stitch’ a stud with a dozen fasteners, thinking I was creating a fortress. In reality, I was creating a perforated line that made it easier for the wood to split under stress. This is a common reason why your built-in face frames are separating from the wall over time. When you drive too many large-diameter screws into a single 1.5-inch wide stud, you destroy the structural integrity of the timber. According to the Architectural Woodwork Institute (AWI), the spacing and gauge of your fasteners must be calculated based on the substrate density. Instead of Swiss-cheesing your studs, use fewer, high-quality structural screws and focus on proper vertical alignment. Have you ever fallen into this trap of over-fastening only to have the wood split on you? Let me know in the comments.
The Leverage Trap You Are Probably Ignoring
It is not just the weight; it is the depth. A 24-inch deep cabinet exerts significantly more ‘pull-out’ force on the top screws than a 12-inch shelf, even if they hold the exact same weight. This is basic physics—the longer the lever arm, the more torque is applied to the anchor point. This is the exact same principle we use when discussing the hidden sub-frame move for supporting massive quartz top vanities 4. If you are mounting deep garage lockers, your top fasteners are doing 90% of the work to keep the unit from tipping forward. If those fail, the whole thing rotates off the wall. To counter this, I always reinforce the top mounting rail with 4 hidden steel plate fixes that spread that tension across a larger surface area of the wall.
Can you really trust a floating cabinet on old masonry?
If you are working in an older home with brick or lath-and-plaster, the ‘standard’ rules of garage storage go out the window. Brick can be surprisingly brittle, and mortar joints are notoriously weak. You cannot just blast a sleeve anchor into the first hole you drill. I have learned the hard way that you need to know how to anchor floating vanities to old brick bathroom walls by using epoxy-set anchors for maximum security. Unlike mechanical anchors that create internal pressure (which can crack old brick), epoxy creates a chemical bond that distributes the load without stress. It is a more advanced technique, but when you are hanging a heavy tool chest over a finished floor, it is the only way to sleep soundly at night. If you are dealing with modern interiors, you might even need how to secure floating vanities to double layer drywall 2 to ensure the lever-arm force does not crush the gypsum. Don’t let the simplicity of a wall rail fool you; the real magic happens in the nuances of the fastener-to-substrate relationship.
The Yearly Tighten That Saves Your Tools
Most people treat garage storage like a ‘set it and forget it’ project, but that is a dangerous mindset when you are hanging hundreds of pounds over your workbench. Wood shrinks and expands with the seasons, and concrete can settle, meaning those rock-solid anchors you installed in July might be slightly loose by January. This is especially true if you are dealing with moisture-prone environments where you need a moisture barrier strategy for below-grade vanities and cabinets. I make it a habit to do a ‘torque check’ every autumn. I take a manual socket wrench to every visible bolt on my wall rails just to ensure nothing has backed out. If you notice a cabinet has even a millimeter of play, you might need how to fix wobbly built-ins with 4 hidden steel plate tactics 3 to reinforce the connection points before a minor wobble becomes a structural failure.
How do I keep my heavy storage safe long-term?
Maintenance is simpler than the initial install but arguably more important. Aside from tightening fasteners, you should regularly inspect the ‘straightness’ of your units. I use a digital inclinometer—a tool I swear by—to check the pitch of my shelves and cabinets. If I see a shelf dipping more than 1/8th of an inch, I know I’ve overloaded it or the internal support is failing. This is the same level of precision required in an expert guide to flawless vanity installation tricks tips. Furthermore, listen to your hardware. If your soft close drawers are slamming, it is often a sign that the cabinet box has shifted slightly out of square, putting uneven tension on the glides. 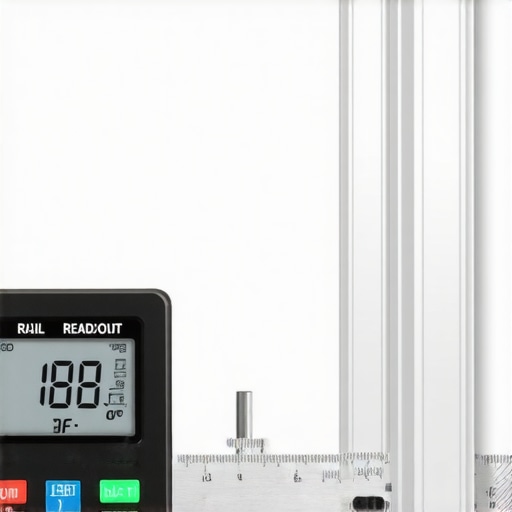
Why Your Fasteners Might Be Slowly Stretching
There is a phenomenon in structural engineering known as ‘creep,’ where materials slowly deform under permanent mechanical stress. According to technical reports in Fastener World magazine, even high-tensile steel can experience microscopic stretching if the load exceeds its recommended long-term ‘working load’ rather than its ‘break strength.’ This is why I always over-engineer my systems. If a cabinet weighs 200 pounds, I use fasteners rated for 800. For anyone scaling up their workshop or adding massive overhead racks, using 4 heavy-duty garage rack bolts that wont snap under load 2 is non-negotiable. I personally use GRK structural screws because their washer-head design prevents the screw from pulling through the cabinet back, a failure point I’ve seen too many times with standard wood screws.
The Future of Smart Garage Systems
Looking ahead to 2025 and beyond, we are moving away from ‘dumb’ shelves toward integrated, modular systems. I predict we will soon see wall tracks equipped with integrated load-sensors that sync to your phone, alerting you if a stud is beginning to pull away or if a shelf is reaching its weight capacity. We are already seeing these precision trends in home design, such as top trends in vanity designs you need to know in 2025, where technology and cabinetry are merging. For now, the best ‘smart’ move you can make is to grab a wrench this weekend and check your anchors. Don’t wait for a crash to tell you something is loose. Go out there and give every structural bolt a quarter-turn today—your tools will thank you.
The Hard Truth About My Failed Drywall Anchors
Looking back at that heap of shattered particle board and bent tools, I realized that hope is not a mounting strategy. Gravity does not take days off, and it certainly does not care how much you spent on fancy cabinets. One lightbulb moment for me was realizing that the cabinet back itself is often the weakest link; if you do not reinforce it, the screws stay in the wall while the cabinet box simply shears off the fasteners. I have also learned that the wood in your garage walls is a living thing that breathes, shrinks, and swells with the seasons. This is why the steel rail strategy for secure garage wall cabinets is a game-changer—it creates a structural union that handles these shifts without losing its grip on the studs.
The Arsenal I Carry for Every Install
I do not step into a garage without a few specific tools and fasteners that have earned my total trust over years of trial and error. First, GRK Structural Screws are my go-to ammo because their shear strength is far superior to any hardware found in a standard cabinet box. Second, I never trust a bubble level alone anymore; I use a digital inclinometer to ensure my rails are dead-on, preventing uneven torque from pulling the anchors sideways. This level of precision is exactly what I recommend in my expert guide to flawless vanity installation tricks tips because even a tiny tilt at the wall becomes a major hazard once you load up the shelves. Finally, if I am hitting masonry or concrete block, I only use the concrete wedge anchor for heavy garage tool cabinets—it is the ultimate fail-safe for weight management.
Take Back Your Garage One Stud at a Time
Building a workshop that stands the test of time is about more than just utility; it is about the peace of mind that comes from knowing your investment is safe. When you apply the right physics and use the proper hardware, you are not just organizing—you are engineering a better, safer home environment. These built-in storage ideas to declutter and enhance your home are meant to serve you for decades, not just until the first time you slam a heavy door. Don’t let the fear of a midnight crash hold you back from the workshop of your dreams. Grab your drill, find the center of those studs, and build something permanent. #IMAGE_PLACEHOLDER_E#
Have you ever had a shelf or cabinet pull away from the wall when you least expected it? Let me know your biggest garage storage ‘oops’ moment in the comments below.