

I still remember the heart-stopping thud of my heavy-duty tool cabinet meeting the concrete floor at 3:00 AM. It wasn’t a burglar; it was just gravity finally winning its long-term war against the three measly lag screws I’d “guessed” were into the studs. Walking out there in my bathrobe to find my expensive cordless drills scattered like confetti was the moment I realized my mounting game was weak. If you’ve ever noticed why your garage shelves are pulling away from the wall, you know that sickening feeling of impending disaster. Today, I am going to show you how to sleep through the night by using a continuous steel rail system that anchors your cabinets with military-grade precision.
Stop Relying on Luck and Start Using Steel
The problem with standard cabinet hanging is that we ask way too much of a few tiny points of contact. You’re hanging eighty pounds of cabinet and another hundred pounds of hardware on a couple of screws that might—if you’re lucky—be biting into the center of a 2×4. My big mistake early on was assuming that “good enough” was enough for a garage environment. It isn’t. Garages deal with temperature swings, humidity, and the constant vibration of garage doors or heavy power tools. We are going to stop garage tool walls from sagging with horizontal steel bracing by distributing that weight across every single stud in the wall, rather than praying that a single screw holds. By using a steel rail, you create a load-bearing backbone that makes it virtually impossible for the unit to shift. For those of you working with masonry, you should also check out the concrete sleeve anchor move for wall-hung tool cabinets to ensure that rail never budges.
Is This Massive Overkill for Your Space?
I get the skepticism. Why buy extra hardware when the cabinet came with a couple of basic brackets? The truth is, most manufacturer hardware is designed for light-duty kitchen use, not the high-impact life of a workshop. According to reports from the National Association of Home Builders (NAHB), residential storage failures frequently occur because DIYers fail to account for the dynamic load—the extra force applied when you’re rummaging through a drawer or slamming a cabinet door. A steel rail isn’t just about strength; it’s about peace of mind. To get the best results, I often recommend starting with the hidden plywood cleat for mounting heavy tool walls as a base before the steel even touches the wall. Have you ever noticed a terrifying gap starting to form at the top of your wall units? Drop a comment below and let me know if your cabinets are currently winning the fight against gravity or losing it.
Map the Wall Before You Touch a Drill
Before you even think about lifting a heavy cabinet, you need to treat your garage wall like a crime scene. Grab a high-quality stud finder and mark every single vertical 2×4 across the span where you want the cabinets to live. Most people just mark a single point, but I want you to find both edges of the stud so you can hit the ‘dead center.’ If you miss by even half an inch, you’re just tearing through drywall and hoping for friction. This is exactly why your garage wall tracks are failing under load—they aren’t actually anchored to the structure. Once you have your vertical lines, use a long level or a laser level to snap a perfectly horizontal line. This isn’t just about aesthetics; if the rail is crooked, the weight distribution becomes uneven, putting massive shear stress on the highest bolt.
Lock the Rail into the Stud Centers
The steel rail acts as a bridge. Instead of the cabinet fighting the wall, the rail creates a unified surface that turns the entire wall into a support structure. When you’re ready to mount, start at one end and drive your first fastener through the rail and into the center of the stud. I learned the hard way in 2018 that using standard wood screws is a recipe for disaster. I was helping a neighbor hang a massive pantry unit, and the screw heads literally popped off under the tension. Now, I only use 4 heavy duty garage rack bolts that wont snap under load. These fasteners have the tensile strength to handle the ‘pull-away’ force that heavy cabinets exert. 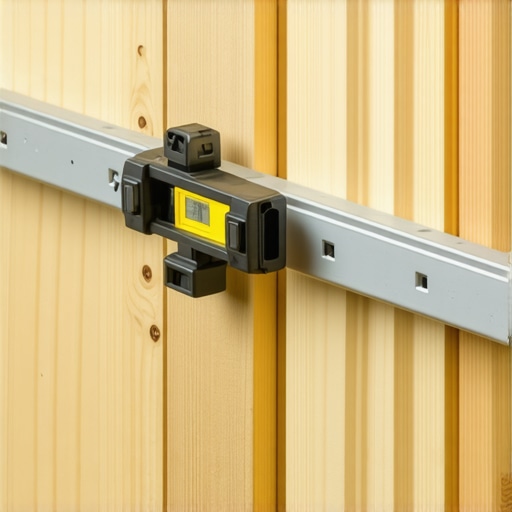
Don’t Trust Your Eyes—Trust the Bubble
I remember a job where I thought I could ‘eyeball’ the level because the garage floor looked flat. Big mistake. After hanging three units, I realized the whole run was diving two inches toward the floor drain. I had to rip everything out and start over, leaving the wall looking like Swiss cheese. Now, I check for level after every single bolt I tighten. The rail might shift a fraction of a millimeter as the bolt bites into the wood, and that’s enough to throw off the far end of a ten-foot run. If you’re dealing with a masonry wall instead of studs, don’t try to force wood screws into plastic plugs. You need to pivot your strategy and use the concrete wedge anchor for heavy garage tool cabinets to ensure that rail is essentially fused to the building.
Fine Tune the Fit with Hanging Brackets
Once the rail is up and you’ve confirmed it’s level enough to satisfy a NASA engineer, the hard work is mostly over. The hanging brackets on the back of your cabinets should hook onto the rail with a satisfying ‘click.’ The beauty of this system is adjustability. Most high-end rails allow you to slide the cabinet left or right to bridge gaps or center the unit perfectly. If you find the cabinets are still tilting forward slightly, check the adjustment screws on the internal brackets. This is a similar mechanical principle to the steel cantilever fix for floating garage workbenches, where the hardware does the heavy lifting so the wood doesn’t have to. If things still feel a bit shaky, you might need to look into how to fix shaky garage workbenches with cantilever brackets to add that extra layer of rigidity to your workstation base.
Moving from the rugged environment of a garage to the high-finish world of your bathroom or bedroom requires a shift in mindset. In the garage, we want to see the steel; in your living space, the strength needs to be invisible. A common myth I see in every home improvement forum is that ‘furniture-style’ vanities are just like dressers—you just slide them into place and hook up the pipes. In my experience, treating a heavy vanity like a piece of loose furniture is a recipe for cracked grout and leaking P-traps. The National Kitchen & Bath Association (NKBA) actually specifies that even floor-standing units should be mechanically fastened to the wall to prevent the slight shifts that occur when heavy drawers are opened. If you’re not careful, that 100-pound quartz top will eventually cause the unit to settle, and you’ll find yourself looking for the leveling move for vanities on slanted bathroom floors before the first year is up. Vanity installation hacks that save time and money often focus on the plumbing, but the real pro secret is in the structural marriage between the cabinet and the wall studs.
Does Your Floor Meet the Flatness Tolerance for Large Built-ins?
One of the biggest ‘oops’ moments I’ve witnessed involved a massive floor-to-ceiling library unit. The homeowner assumed the floor was flat because the house was ‘new.’ It wasn’t. They built the unit directly on the subfloor, and within months, the weight caused the entire assembly to rack, making the doors stick. This is why I always preach that you cannot trust a floor to stay level under load. You need to understand how to scribe cabinets to slanted kitchen floors or use a moisture-proof base. If you’re working in a basement, the stakes are even higher. I’ve seen beautiful custom work ruined by capillary action because the wood touched the concrete directly. You should always use the moisture-proof base tactic for basement built-ins to create a thermal and moisture break. Have you ever spent days on a project only to realize the floor was fighting you the whole time? Let me know in the comments if you’ve fallen into the ‘flat floor’ trap.
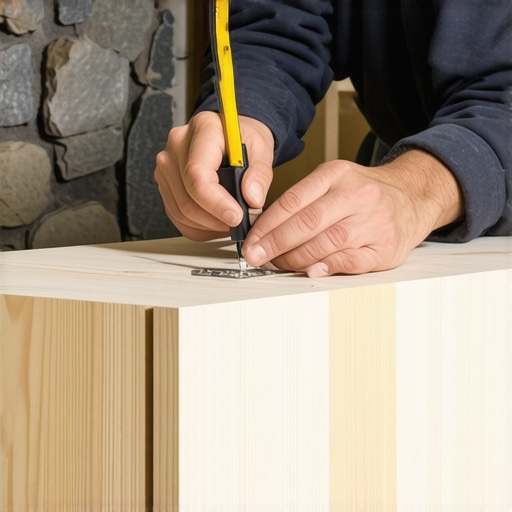
When it comes to floating vanities, people often underestimate the leverage involved. Think of it as a giant lever prying against your drywall. If you’re mounting onto an older home with plaster, you need to be especially cautious. Standard screws will just turn that old lath into dust. In those cases, I swear by the secret to mounting heavy floating vanities on old lath and plaster, which often involves opening the wall to install solid horizontal blocking between the studs. This isn’t just ‘over-engineering’; it’s a necessity when you’re planning on how to support quartz counters on custom floating vanities. Without that internal skeleton, the weight of the stone will eventually cause the vanity to dip. To combat this, I’ve often used how to stop floating vanities from dipping with steel plates to reinforce the primary stress points. By the time you’re done, your storage solutions won’t just look like they’re part of the house—they’ll be structurally fused to it. For more creative ideas, check out innovative storage solutions to transform your bathroom and make sure your next build is as solid as it is stylish.
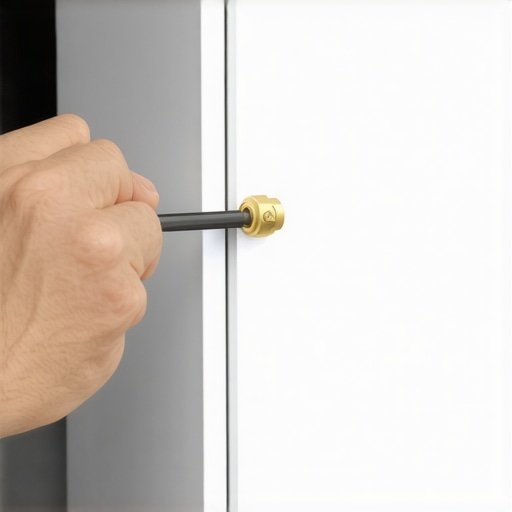
Once the dust settles and your cabinets are finally on the wall, the real test of your craftsmanship begins. It’s easy to look like a pro on day one, but if you want your storage to remain rock-solid for a decade, you need to think about the ‘forever’ phase. I stopped using cheap, plastic-bodied compasses for fitting years ago. If you want a fit that looks like the cabinet grew out of the wall, you need a dedicated scribing tool with a brass locking nut. I personally swear by the FastCap AccuScribe because it handles everything from offset lines to consistent radius marking without slipping. This is the difference-maker when you’re mastering the scribing secret for perfect built-ins on rounded drywall corners. A tight fit isn’t just about looks; it prevents the unit from racking when the house inevitably settles.
How do I keep my custom built-ins from sagging or sticking over the years?
Maintenance isn’t just about cleaning the surfaces; it’s about mechanical upkeep. Wood is a living material that breathes with the seasons. In the humid summer months, your drawers might start to feel sluggish. This is when you need to revisit your hardware. According to technical documentation from Blum, the global leader in hinge technology, dynamic load capacities are often calculated based on specific drawer lengths and slide extensions. If you’ve overloaded a unit, you’ll start to see the hardware complain. This is exactly why your large kitchen drawers drag and the support fix you need usually involves realigning the runners rather than just greasing them. I recommend a semi-annual check of your soft-close mechanisms. If they’re hitting the frame, you’ve got to learn why your soft-close drawers are slamming and the tension fix that saves your face frames from repeated impact damage.
Protect Your Investment from the Ground Up
For any installation in a bathroom or basement, moisture is your number one enemy. I’ve seen $5,000 custom vanities ruined because the homeowner didn’t spend $10 on a proper silicone seal at the floor line. In my own home, I don’t just rely on the finish; I implement the moisture barrier strategy for below-grade vanities using a thin layer of HDPE plastic between the cabinet base and the subfloor. This prevents capillary action from pulling moisture into the MDF or plywood core. If you’re currently dealing with a unit that’s already seen better days, don’t panic. You can still apply 5 moisture-proof bases for bathroom cabinets on wet floors to stop the rot before it spreads to the structural side panels. Also, keep an eye on how to fix uneven gaps in custom built-in doors, as these are often the first ‘canary in the coal mine’ indicating that your base has shifted or absorbed water.
The Future of Home Storage is Integrated
Looking toward the next few years, I predict we’re going to see a massive shift toward ‘smart’ modularity. We are already seeing top trends in vanity designs you need to know in 2025 moving toward integrated wireless charging and internal climate control for high-end skincare. This means your mounting strategies need to account for hidden wire chases and heat dissipation. The days of just ‘slapping a box on a wall’ are over. If you really want to level up your game right now, I challenge you to try one advanced move: the next time you hang a heavy unit, don’t just hit the studs—incorporate a hidden steel plate. It’s a small extra step that ensures your work will outlast the house itself. Go grab a high-quality scribing tool today and stop settling for ‘good enough’ gaps.
The One Mistake That Costs More Than the Cabinet
If there is one thing I’ve learned from decades of sawdust and stripped screws, it’s that the wall is rarely your friend. I used to think a bit of construction adhesive could solve anything, but I was wrong. Relying on glue or small brads is how you end up with a vanity that “walks” away from the wall. You need to embrace an expert guide to flawless vanity installation tricks tips that prioritizes mechanical fasteners over chemistry every single time. Here are a few lightbulb moments from my own shop: Studs are just the beginning: Sometimes the studs aren’t where you need them. In those cases, I always use the hidden blocking strategy for heavy bathroom grab bars even for standard cabinets to ensure there is meat for the screws to bite into. Weight is dynamic, not static: A cabinet doesn’t just sit there; people lean on it, children hang from it, and drawers slam. If you don’t account for this, you’ll find yourself wondering why your built-in face frames are separating from the wall. The floor is a liar: Never assume a floor is level. I always use how to scribe built-in cabinets to slanted kitchen floors to ensure the weight is transferred directly to the structure, not hanging off the wall fasteners.
A Pro’s Survival Kit for Seamless Storage
I don’t go into any job without a few specific tools that have saved my reputation more than once. First, get yourself a dedicated scribing tool with a brass locking nut; it’s the only way to handle the scribing secret for perfect built-ins on rounded drywall corners. Second, I never trust “free” hardware included in the box. I keep a stash of the toggle bolt trick for hanging heavy mirrored cabinets ready for those awkward spots where a stud just isn’t an option. Finally, for the big stuff, I always look for ways to implement the hidden sub-frame move for supporting massive quartz top vanities. These tools and techniques aren’t just about finishing the job; they are about making sure you never have to do it twice.
#IMAGE_PLACE_HOLDER_E#
Build for the House You Want to Keep
At the end of the day, your home should be a sanctuary of order, not a collection of sagging shelves and sticking drawers. When you take the time to anchor your units correctly, you’re doing more than just organizing; you’re adding real structural value to your property. Whether you are looking for creative built-ins for seamless storage and home aesthetics or just trying to survive a weekend DIY project, remember that precision is your best friend. Don’t be afraid to over-engineer. There is a deep satisfaction in knowing that your effortless storage solutions for a tidy stylish home are actually backed by steel and smart planning. Go grab your level, find those studs, and start building something that lasts. Have you ever found a ‘surprise’ behind your drywall while trying to mount a cabinet? Let me know in the comments below—I’d love to hear your horror stories!