

I will never forget the smell of damp particle board that greeted me just six months after I finished what I thought was a flawless basement bathroom remodel. I had spent weeks picking out a beautiful oak unit, only to watch the bottom edges swell and peel like a bad sunburn because I ignored the invisible enemy lurking right under my feet. It was a $1,200 lesson in physics that I do not want you to repeat. Basement floors are notoriously cold and deceptive; they look dry, but they are constantly wicking up moisture from the earth. When you trap that moisture under a heavy piece of furniture, you create a petri dish for mold.
Your Basement Floor is Actually a Giant Sponge
Most homeowners think of concrete as a solid, impenetrable block, but it is actually a highly porous material that acts like a wick. This process, known as capillary action, pulls ground moisture up through the slab and releases it as vapor. When you set a wooden vanity directly on that cold concrete, you are essentially inviting rot to move into your cabinetry. In my early days, I thought a simple bead of silicone would be enough to protect my work, but I quickly learned that traditional methods fail when faced with constant vapor pressure.
Is a moisture barrier actually worth the extra effort?
You might be skeptical, thinking that a dry basement doesn’t need the extra prep work. However, the Concrete Sealers Foundation notes that moisture vapor can exert incredible pressure as it moves through a slab, often enough to delaminate finishes that aren’t designed for below-grade use. Even if you follow a step-by-step guide to vanity installation, skipping the floor protection is the fastest way to ruin a custom build. I have seen beautiful projects destroyed in a single season because the installer didn’t understand the moisture-barrier strategy for below-grade vanities. Have you ever opened your vanity doors and noticed a faint, musty scent even though there are no visible leaks? That is the floor talking to you.
Stop the Rot Before It Starts
The good news is that solving this does not require a degree in engineering, just a shift in how you think about the base of your cabinets. Today, we are going to dive into the physical hacks that create a permanent break between your wood and the wet floor. We will explore using moisture-proof bases for bathroom cabinets and how to adapt techniques like the moisture-proof base hack for mudroom lockers to ensure your bathroom stays pristine for decades. It is about working smarter, not harder, to protect your home’s value.Moving from theory to the job site requires a change in your toolkit. If you treat a basement like a standard second-story bathroom, you are essentially setting a timer on your cabinet’s lifespan. Building a basement vanity is like building a pier; if the wooden posts touch the water without a physical break, the structure is doomed. Here is exactly how to execute a barrier that actually works.
Test Your Slab Before Setting the Base
Do not trust your eyes when it comes to concrete. I once worked on a renovation where the floor looked bone-dry, but after leaving a rubber mat down overnight, the bottom was soaked with condensation. You can perform a DIY moisture test by taping a 2-foot square of clear plastic to the floor for 48 hours. If there is fog under the plastic, you have a high vapor emission rate. This is where you apply vanity installation hacks that save time and money by identifying the problem before the wood ever touches the ground.
Create a Physical Break with Plastic Shims
The most common mistake is using cedar or pine shims to level a cabinet on concrete. These act like tiny straws, sucking moisture directly into the end grain of your vanity. Instead, you must use non-porous materials. I exclusively use the moisture-proof shim strategy for basement built-ins, which involves using PVC or high-density plastic shims. 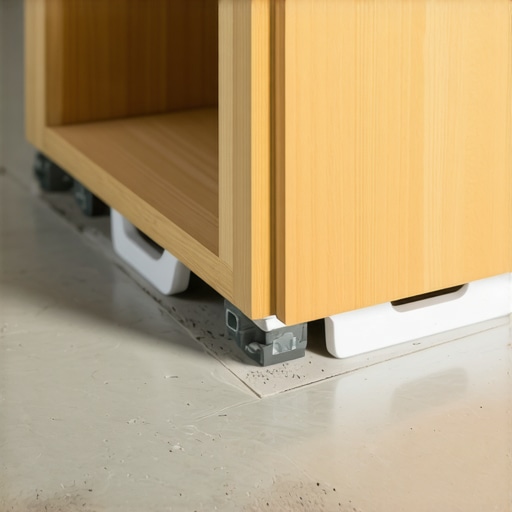 During a particularly tricky install in an old Victorian basement, I had to stack nearly an inch of plastic shims to find level. Had those been wood, the vanity would have been sitting in a puddle within a year. Instead, that air gap allowed the concrete to breathe without transferring rot to the oak.
Ditch the Standard Base for a Composite Sub-Frame
If you want a permanent solution, don’t let the cabinet’s toe-kick touch the floor at all. Build a separate ‘ladder’ base out of pressure-treated lumber or, better yet, PVC boards. This acts as a sacrificial layer that is impervious to water. You can adapt the sub-frame strategy for rock-solid entryway benches to create a hidden platform for your bathroom cabinets. This technique ensures that even if the basement floods an eighth of an inch, your expensive cabinetry stays high and dry.
Level Your Unit on Uneven Concrete
Basement floors are rarely flat; they are pitched toward floor drains. This creates a nightmare for heavy stone tops. Use 7 tactics for leveling vanities on sloping tile floors 2 to ensure your cabinet doesn’t rack or twist. If you are using a furniture-style vanity with legs, you will likely encounter a wobble. I’ve found that knowing how to fix wobbly vanity legs on uneven tile is essential for preventing the cabinet from leaning away from the wall over time.
Seal Every Single Floor Penetration
When you anchor the vanity, you are drilling holes through the slab’s natural ‘skin.’ Each screw is a potential highway for moisture. When using the concrete sleeve anchor move for wall hung tool cabinets or floor anchors, I always squirt a bit of 100% silicone into the hole before driving the bolt. This creates a gasket that prevents vapor from rising through the hardware. I learned this the hard way after a client called me back because the heads of her floor bolts were rusting—moisture was traveling up the threads and attacking the metal from the inside out. For more permanent protection, always review 4 moisture-proof base fixes for rotting bathroom vanity cabinets 2 to see which sealants pair best with your specific flooring type.While sealing floor penetrations is a must, there is a dangerous trap most DIYers—and even some pros—fall into: the ‘hermetically sealed’ cabinet. Everyone tells you to caulk every single edge where the wood meets the floor or wall to keep water out. In my experience, if you create a perfectly airtight box in a high-moisture basement, you are asking for trouble. According to research by the Building Science Corporation, ‘vapor drive’ is a relentless force; if moisture vapor gets trapped behind a non-breathable seal, it has nowhere to go but into the wood fibers. By over-caulking, you might actually be preventing the cabinet from drying out after a minor humidity spike. It is often better to allow a ‘managed’ path for vapor to escape than to try and trap it indefinitely.
How do you manage massive stone weights on a moisture-proof base?
This is where the ‘oops’ factor usually hits. You have built a beautiful, rot-proof PVC or pressure-treated sub-frame, but then you realize that these materials can compress or flex differently than standard kiln-dried lumber. If you do not use the hidden sub-frame move for supporting massive quartz top vanities 4, that heavy stone top can cause the cabinet to shift just enough over time to break your plumbing seals or create hairline cracks in the stone. I have seen expensive quartz slabs fail because the installer did not account for the slight ‘give’ in a moisture-proof composite base. To avoid this, I always double-up on internal bracing using galvanized steel. You should check out 7 tactics for supporting heavy quartz counters on standard wood vanities 2 to ensure your structural integrity matches your moisture protection.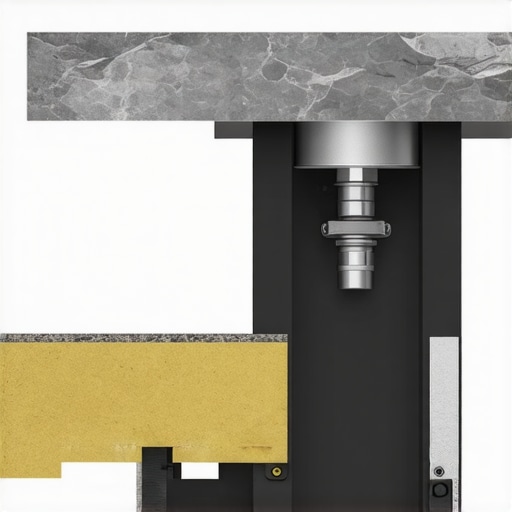 Another hidden nuance involves the air micro-climate inside the cabinet. In a basement, the air inside your vanity is often significantly colder and more stagnant than the air in the room. When you combine this with a moisture-wicking slab, you get ‘micro-condensation’ on your cold-water supply pipes. People often see a puddle on the floor and assume they need a plumber, but why your vanity plumbing is leaking into the cabinet base 3 is often more about physics than an actual pipe failure. A pro-level move is to incorporate a small gap in your toe-kick for airflow or even a discrete ventilation grille. It sounds counter-intuitive, but a little breathing room can save your cabinet floor from rot that comes from the inside out.
Don’t Mistake Condensation for a Plumbing Leak
I always tell my clients that following an expert guide to flawless vanity installation tricks tips is really about anticipating what the house will do five years from now, not just how it looks on day one. Even when you are focusing on creative storage solutions for vanities declutter in style, the skeleton of the project must be bulletproof against the invisible basement environment. This is where the difference between a renovator and a cabinet maker becomes clear: one focuses on the finish, the other on the foundation. Have you ever fallen into the trap of over-sealing a project only to find mold or swelling a year later? Let me know in the comments—I would love to hear how you solved it.To move beyond simple fixes, I have to talk about my ‘secret weapon’ for basement jobs: the pinless moisture meter. I personally use an Extech MO257 because it uses high-frequency electromagnetic technology to ‘see’ through the wood without leaving those ugly pin-prick holes. This tool is non-negotiable for me. Before I even think about an expert guide to flawless vanity installation tricks tips, I scan the floor and the cabinet. If the wood’s moisture content is already above 12% before installation, you are essentially sealing in a fungal time bomb. According to technical documentation from the USDA Forest Products Laboratory, wood used indoors should ideally be kept between 6% and 8% moisture content to minimize dimensional change. In a basement, hitting that target requires active monitoring.
The Future of Smart Cabinetry is Damp-Proof
In the next few years, I predict we will see vanity manufacturers integrating low-voltage humidity sensors directly into the toe-kick as a standard feature. Imagine your phone getting a notification because the micro-climate under your sink has crossed the ‘mold threshold.’ Until then, you can DIY this by hiding a $15 Wi-Fi hygrometer behind your drawers. This is how you transition from just having smart storage solutions to optimize small bathroom spaces to having a truly intelligent, protected home. 
How do I maintain my vanity’s moisture barrier over time?
The real work starts after the silicone dries. Every six months, I recommend a ‘sniff and touch’ test. Remove the bottom drawers and feel the back side of the base. If it feels cool or clammy, your airflow is failing. This is when you should revisit 4 moisture-proof base fixes for rotting bathroom vanity cabinets 2 to see if you need to retroactively add a composite spacer.
The One Tool I Refuse to Work Without
I also swear by using a specific moisture-proof base hack for mudroom lockers—applying a coat of epoxy resin to the bottom two inches of every structural member before assembly. It creates a plastic-like shell that moisture cannot penetrate. If you are planning for creative built-ins for seamless storage and home aesthetics, remember that the scale of the project does not change the physics. Whether it is a small vanity or a wall-to-wall library, that concrete slab is still a sponge. Go grab a pinless moisture meter today—it is the single best investment you can make for your basement’s longevity.
Hard-Earned Lessons from the Basement Trenches
Over the years, I’ve realized that the biggest mistake is treating the basement like a normal room; it’s an ecosystem that requires a different set of rules for your built-ins. One major lightbulb moment for me was realizing that “sealing” a cabinet can actually trap moisture inside, leading to faster rot than if I had left a small air gap. I’ve also learned that wood-to-concrete contact is a ticking time bomb—never let your finish lumber touch the slab. Finally, always trust the meter over your eyes; a floor that feels dry can still be venting enough vapor to ruin a custom finish in weeks.
My Non-Negotiable Kit for Below-Grade Projects
If you want a result that rivals an expert guide to flawless vanity installation tricks tips, you need the right gear. I never start a basement job without a pinless moisture meter to check the slab’s health. I also rely heavily on PVC trim boards for creating sacrificial sub-frames that never rot. For those aiming to maximize your space with custom vanities expert design tips, keep a stash of high-density plastic shims on hand—they are the only way to level heavy units without creating a wick for groundwater. Finally, high-quality 100% silicone is the only sealant I trust for gasketing my floor anchors.
Go Build Something That Lasts a Lifetime
Taking these extra steps might add a few hours to your timeline, but it adds decades to the life of your home. Whether you are installing creative built-ins for seamless storage and home aesthetics or just a simple sink unit, protecting the foundation of your work is the mark of a true craftsman. You now have the blueprint to beat the basement’s moisture cycle once and for all. It is time to stop worrying about rot and start enjoying your beautiful, dry storage solutions. Have you ever dealt with a “phantom leak” that turned out to be basement condensation? Let me know in the comments below!