

I stood there, staring at a gaping hole in my drywall and a pile of tangled silver chains, feeling like a complete amateur. I had spent hours choosing the perfect vanity style for my bedroom, only to have the installation end in a dusty heap on the floor. It’s a classic DIY trap. You find the perfect lighting, the perfect height, and then—bam—the stud finder stays silent. Most people think if you can’t hit a wood beam, you’re stuck with wobbly furniture or, worse, a hole in the wall. But I’ve learned the hard way that you don’t need a 2×4 to get a professional-grade hold. Today, I’m going to show you exactly how to secure that heavy cabinet so it stays put forever, even if your walls feel like they’re made of crackers.
Stop Trusting Those Cheap Plastic Plugs
When I first started trying to maximize my space with custom vanities, I made the rookie mistake of thinking all anchors were created equal. I used those little white plastic sleeves that come free in the box. Big mistake. According to the Gypsum Association, standard 1/2-inch drywall is only as strong as the fastener you put into it, and those friction-based plugs are notorious for creeping out under constant weight. If your jewelry cabinet has a mirror or a heavy wood frame, those plugs are basically just a countdown to a crash. I once tried to hang a heavy mirrored cabinet with them, and it didn’t last a week.
Will my wall actually hold a heavy cabinet?
It’s the question that keeps us up at night. You’re worried about waking up to the sound of crashing glass. I get it. But the secret isn’t in the wall itself; it’s in the mechanical bond you create. By using the toggle bolt trick, you’re effectively sandwiching the drywall between two metal plates. It’s the difference between leaning a ladder against a fence and bolting it to the ground. Have you ever had a shelf or cabinet pull away from the wall when you thought it was secure? Tell me your horror stories—I’ve seen it all. We’re moving past the hope and pray method of installation. Whether you are dealing with innovative storage solutions for your bathroom or a massive jewelry armoire in the master suite, the physics remains the same. You need a solution that distributes the load across the surface rather than relying on a tiny bit of plastic friction.
Get Your Marking Exactly Right Before You Drill
It sounds basic, but 90% of failures start with a crooked line. When you are looking to maximize your space with custom vanities, you need a high-quality level, not just a good eye. I always use blue painter’s tape on the wall to mark my heights first. This simple trick prevents the drywall from chipping when the drill bit bites in. If you are working solo, following a step-by-step guide to vanity installation for beginners can act as your mental safety net. I once hung a beautiful mahogany cabinet that looked perfect until I stepped back and realized it was slanted just enough to make the doors swing open on their own. Now, I mark the top edge, find the mounting holes on the back of the cabinet, and transfer those exact measurements to the tape with surgical precision.
The Mechanical Secret of the Toggle Bolt
This is where the engineering magic happens. Unlike a standard screw that relies on the wall’s density to stay put, a toggle bolt uses a spring-loaded wing mechanism. You drill a hole large enough for the folded wing to pass through; once it is inside the wall cavity, it snaps open like a tiny metal umbrella. When you tighten the bolt, that metal wing pulls flat against the back of the drywall, effectively clamping the cabinet to the entire wall surface. For anyone wondering how to anchor jewelry cabinets to bedroom walls without studs, this is the only reliable method for heavy loads.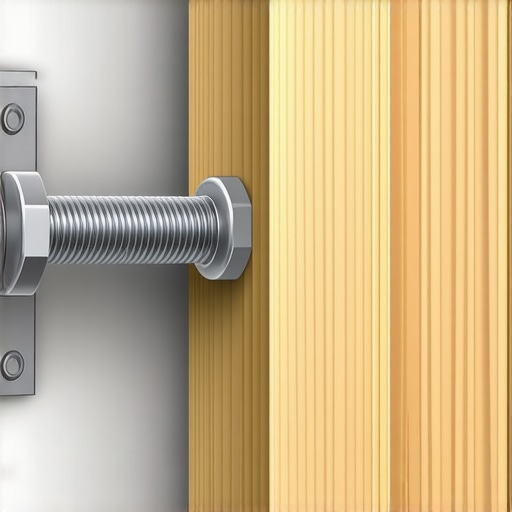 I remember a frantic Sunday afternoon helping a friend fix a floating shelf that was currently resting on his toe. We replaced his failing plastic anchors with 1/4-inch toggles, and that shelf is still holding twenty pounds of books three years later. It is all about surface area. The more wall you grab, the less likely the drywall is to crumble under pressure.
Create a Safety Net With a Hidden Ledger
If you are dealing with something truly massive, you might need a secondary support system. Think of it like a helper for your anchors. A thin strip of wood—a ledger—screwed into the wall at the very bottom of where the cabinet will sit provides a lip for the unit to rest on. This shifts the force from pulling outward to resting downward. Even if you cannot find a stud for the main anchors, getting a small screw into a stud for just the ledger can change the entire physics of the install. This is one of those vanity installation hacks that save time and money because it prevents the need for expensive wall reconstruction later.
Don’t Over-Tighten Your Hardware
There is a massive temptation to crank the bolt until it won’t move another millimeter. Don’t do it. Drywall is just compressed gypsum and paper; if you crush the core, you lose the structural integrity of the bond. Tighten until the cabinet is snug against the wall and doesn’t wiggle when you give it a firm tug. If you are looking for effortless storage solutions for a tidy stylish home, the firm tug test is your best friend. If it moves even a fraction, back it out and check your toggle alignment. Consulting an expert guide to flawless vanity installation tricks will help you recognize that sweet spot where the hardware is secure but the wall remains intact.One of the biggest lies in the DIY world is the idea that if two anchors are good, ten must be invincible. I see this all the time: a wall that looks like it’s been hit by birdshot because someone thought they were being ‘extra safe.’ In reality, you’re just turning your drywall into a perforated sheet of paper. According to structural guidelines from the Architectural Woodwork Institute (AWI), the integrity of the substrate—that’s your wall—is just as important as the fastener. When you cluster heavy-duty toggles too close together, you create a ‘fault line’ where the gypsum can simply crumble as a single block. It’s a classic case of over-engineering yourself into a disaster. If you are worried about the wall’s capacity, instead of more holes, look into the hidden sub-frame hack for massive library built-ins to distribute weight vertically rather than just horizontally. 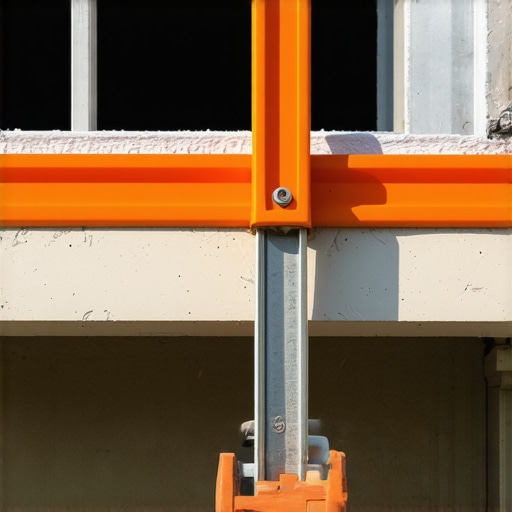
Beware the physics of the forward tilt
Most amateurs check if a cabinet is ‘tight’ against the wall and call it a day. But the real enemy isn’t the cabinet falling down; it’s the cabinet rotating away. This is especially true for deep units or sleek built-in vanities. When you load up a jewelry armoire with heavy necklaces and glass trays, the center of gravity shifts forward. This puts ‘tension’ on the top anchors—literally trying to pull them straight out—and ‘compression’ on the bottom. If your unit isn’t perfectly plumb, that leverage will eventually win. I’ve had to help people with stealth wall anchor fixes for forward tilting floating seats because they ignored this basic principle. Have you ever noticed your shelves or cabinets starting to gap at the top after a few months? Let me know in the comments—I’d love to help you diagnose if it’s a fastener failure or a leverage issue.
How much weight is actually too much for a toggle bolt?
This is where we get into the nitty-gritty of ‘shear’ versus ‘tension.’ A standard 1/4-inch toggle bolt is often rated for over 200 pounds in 1/2-inch drywall for shear (downward) weight. However, that rating drops significantly for tension (pulling out). If you’re hanging something with a massive stone top, you need to know why your heavy quartz vanity is cracking the cabinet frame before you even worry about the wall. The frame often fails before the toggle does. For truly heavy-duty scenarios, I often suggest using the plywood plate move for secure entryway bench anchoring. This involves mounting a thin, high-grade plywood plate to the wall first with multiple toggles, then mounting your cabinet to that plate. It’s a professional-grade workaround that creates a rock-solid foundation where none existed.
Stop the wobble before it starts
Another nuance people miss is the ‘micro-wiggle.’ If a cabinet can move even a fraction of a millimeter, every time you open a door or drawer, you are essentially hammering the drywall with the anchor. Over time, this turns the hole into a dry, dusty mess, and the anchor loses its grip. This is why I advocate for hidden steel plate tactics to lock everything in place. Whether you are aiming for effortless storage solutions for a tidy stylish home or a complex media center, the goal is total immobility. If it moves, it’s failing. By applying these advanced strategies, you move from just ‘hanging things up’ to creating permanent architectural features that won’t budge for a decade.To stop that ‘micro-wiggle’ I mentioned earlier, you need the right arsenal. I used to think a bubble level and a prayer were enough, but if you’re serious about innovative storage solutions to transform your bathroom, you need to invest in a self-leveling cross-line laser. I personally use the Bosch GLL series because it projects a perfectly plumb vertical line and a level horizontal line simultaneously. It’s the only way to ensure that your marking is consistent across an entire wall, especially when you are trying to maximize your space with custom vanities. When you’re drilling for toggles, an impact driver is your best friend—it provides the torque needed to bite into tough substrates without the ‘cam-out’ that strips screw heads.
Stop your doors from sagging with a simple turn
Once the cabinet is on the wall, the job isn’t over. Over time, the weight of the doors and the items inside will cause things to settle. I’ve seen beautiful built-in storage ideas to declutter and enhance your home ruined because the owner didn’t know how to adjust the hinges. Most modern European-style hinges have three adjustment screws: one for depth, one for height, and one for side-to-side alignment. If you notice your doors clinking or overlapping, you likely need to fix uneven gaps in custom built-in doors by tweaking that side-to-side screw. According to the National Kitchen & Bath Association (NKBA), hardware should be inspected and adjusted every six months to account for seasonal wood expansion and contraction. 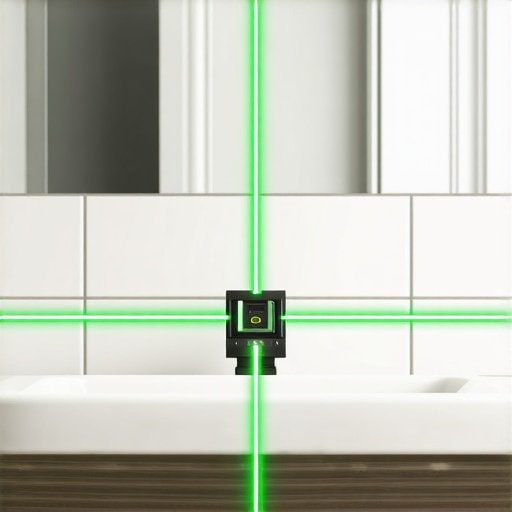
How do I maintain my custom built-ins over time?
Maintenance is mostly about moisture management and hardware tension. If your installation is in a high-humidity area, you must implement the waterproof sealant move for vanity backsplashes to prevent water from seeping behind the cabinet and softening the drywall. Soft drywall is the primary cause of ‘anchor creep.’ I also recommend a ‘quarter-turn’ check. Every year, take your screwdriver and give your mounting bolts a tiny nudge. You aren’t looking to crank them down; you’re just checking that the vibration of the house hasn’t loosened the mechanical bond. This is a crucial part of an expert guide to flawless vanity installation tricks.
Why your soft-close features might be failing
If you’ve noticed your drawers starting to bang shut, don’t assume the hardware is broken. Usually, the tension setting has just drifted. Many people overlook why your soft close drawers are slamming and the tension fix, which often involves a small slider on the underside of the drawer glides. Adjusting this can restore that premium feel to your smart storage solutions to optimize small bathroom spaces. Looking ahead, I predict we will see more ‘smart’ anchors—fasteners equipped with simple color-changing indicators that let you know if the tension has dropped below a safe threshold. For now, we rely on the firm tug test. I want you to go to your heaviest wall-mounted unit right now and give it a firm, steady pull. If it groans or moves even a fraction of an inch, it’s time to swap those old plugs for toggle bolts. Don’t wait for the crash.
The Hardest Lesson I Learned About Gravity and Drywall
After years of working with custom vanities, I realized that the wall isn’t your enemy—impatience is. Most failures happen because we want to see the finished result so badly that we skip the secondary support or use the wrong drill bit size. I have learned that a toggle bolt isn’t just a fastener; it is genuine peace of mind. If you find yourself staring at a wall and doubting its strength, remember that the right mechanical bond can support far more than you think. Also, never assume your floor is perfectly level. If you are installing sleek built-in vanities, always check the pitch of the room first to avoid gaps that no amount of caulk can hide.
The Precision Kit I Never Leave Behind
To get professional results, you need more than just a standard drill. I always carry a self-leveling laser for innovative storage solutions to transform your bathroom because it eliminates the margin for human error during marking. I also swear by 1/4-inch Toggler Snaptoggles; they are miles ahead of the old spring-wing versions because the plastic strap holds the metal channel in place even if you need to remove the bolt temporarily. For those looking to declutter in style, a set of composite shims and a high-quality deep-scan stud finder are non-negotiable. Finally, I always keep a tube of premium silicone on hand for the waterproof sealant move to protect the drywall integrity from hidden moisture.
Stop Waiting and Start Building Your Dream Space
There is a unique satisfaction that comes from looking at a heavy cabinet and knowing it is never going to budge. Whether you are implementing built-in storage ideas to declutter and enhance your home or finally mounting that heavy jewelry armoire, the technical skills you have picked up here will serve you for every future renovation. Don’t let the lack of a wall stud stop you from creating the organized, beautiful home you deserve. Use these storage solutions to reclaim your space and your confidence as a DIYer. Have you ever had a mounting project go wrong because of a missing stud? Let me know your biggest DIY challenges in the comments below!