I remember the first time I realized my home lacked proper storage—every drawer was overflowing, and finding my favorite mug or a simple pair of socks felt like a treasure hunt. That lightbulb moment made me appreciate how crucial smart storage really is—not just for keeping things tidy, but for creating a space that genuinely feels welcoming and functional. Ever been there? You think you have enough space until the chaos takes over, and suddenly, your home feels more cluttered than cozy.
Why Everyone Is Rethinking Built-ins and Vanities This Year
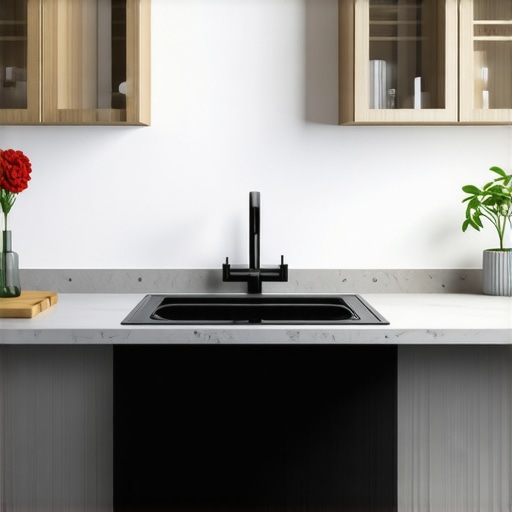
This isn’t just about finding a place for your belongings; it’s about redesigning your home to serve your needs. With the trends in 2025 pushing towards clean, seamless aesthetics, a well-designed built-in storage can be a game-changer. It helps maximize every inch of space, especially in smaller rooms where every square foot counts. Gone are the days of bulky furniture filling up the room and making it feel cramped.
Research shows that organized homes not only look better but also reduce stress and improve overall well-being. The National Institute of Mental Health reports that clutter can negatively impact mental health, leading to feelings of anxiety and overwhelm. That’s why investing in custom vanities and smart storage solutions isn’t just a luxury—it’s a vital upgrade for your mental clarity and daily comfort.
But here’s the kicker: choosing and installing these solutions can seem daunting. I’ve made my fair share of mistakes, like rushing into a project without proper measurements or ignoring the importance of style in the design. Early on, I learned that a little research and planning make all the difference. And trust me, a step-by-step guide can turn a daunting process into a rewarding DIY adventure.
Facing the Fear: Is Installing Built-ins Actually Worth the Effort?
Many people hesitate because they worry about costs, time, or making mistakes. That’s a fair concern. I once thought a quick DIY fix would do, only to realize that rushed installations led to uneven surfaces and ill-fitting cabinets. A mistake like that not only wasted time but also money, and the frustration was real. Now, I always recommend consulting experts and doing thorough research to avoid costly errors. For real success, check out trusted tips on installation tips that ensure your investment pays off.
In the upcoming sections, I’ll share proven strategies and insights that will help you achieve sleek, functional, and durable built-ins and vanities. Whether you’re planning a renovation or just looking to optimize your current space, you’ll find practical advice that’s easy to follow and results that speak for themselves. Ready to take the guesswork out of your home upgrade? Let’s get started!
Measure Precisely to Avoid Surprises
My first attempt at installing a built-in cabinet was a case of rushed measurements. I used a basic tape measure and guessed the space. The result? A mismatch that required rework and additional costs. To avoid this, invest in a quality laser measure—it’s like having a GPS for your space, providing accurate dimensions swiftly. Before starting, mark out the area with painter’s tape and double-check all measurements with a second tool or helper.
Plan Your Design with Purpose
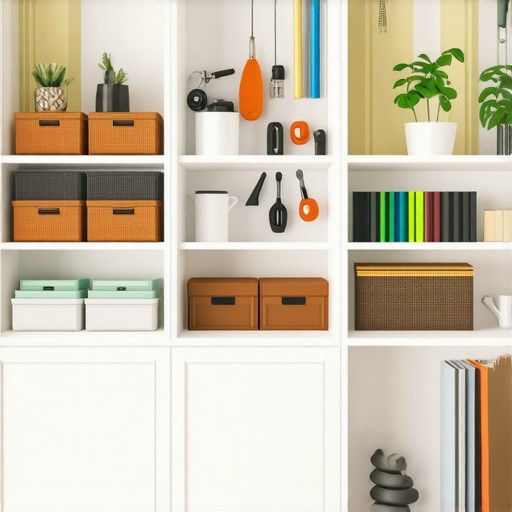
Next, sketch a layout tailored to your needs. Think of your storage like a toolbox: each section should serve specific items—offering easy access to everyday essentials and concealed spots for less-used items. For example, allocate drawer space for smaller accessories and open shelves for larger objects. If you’re unsure about styles or configurations, browse built-in storage ideas for inspiration before finalizing your plan.
Choose Quality Materials for Longevity
Using subpar materials is like building a house on quicksand—lacking durability ruins the project straight away. Opt for plywood or MDF with a veneer finish, offering strength and aesthetic appeal. Heavy-duty hinges and soft-close slides transform the experience, making the storage seamless and frustration-free. When selecting these components, make sure they align with your design and budget. Resources like the Effortless Storage Solutions guide can assist in choosing the right hardware.
Prep the Space and Create a Structural Skeleton
Before installing the actual cabinetry, prepare the space by removing obstructions and leveling the floor and walls. Think of this phase as setting the foundation before building a skyscraper. Use shims and a level to ensure the frame is perfectly horizontal and vertical. This prevents cabinet doors from misaligning later and makes the installation process smoother. Remember, precision here saves hours of realignments in the final steps.
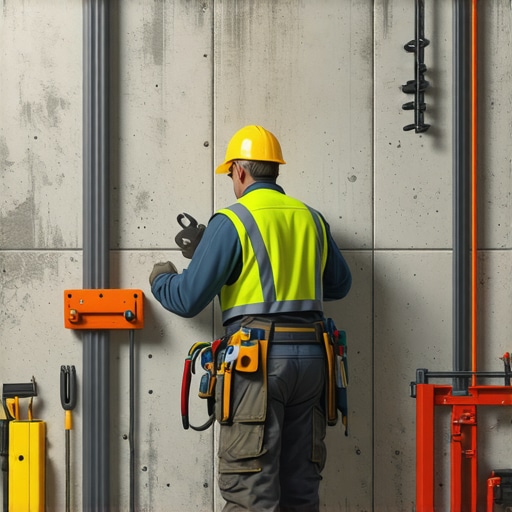
Attach Frames Securely for a Seamless Look
When fixing the frame to the wall, use appropriate anchors for your wall type—whether drywall, plaster, or brick. Drill pilot holes to prevent splitting and secure the frame with screws that reach into studs or solid backing. This step is like anchoring a ship—it must be firm to handle daily use. During my last project, I used a stud finder and heavy-duty screws, which eliminated wobbling and ensured longevity for years to come.
Install Doors and Hardware with Precision
Fine-tune door alignment by adjusting hinges after mounting. Use a carpenter’s square to ensure they are perfectly straight and level—think of it as aligning the stars for a clear night. Attach handles and knobs after verifying the doors operate smoothly. For added convenience, consider soft-close hinges, which make opening and closing effortless, especially in high-traffic areas.
Finish with a Personal Touch
Final details like paint, stain, or decorative trim seal the project with personality. I once painted my built-in with a sleek matte finish, transforming the space into a modern showcase. If you want a polished look, consider sealing the surface with a clear topcoat for durability. Remember, the finishing touches reflect your style and make the space truly yours.
While many enthusiasts focus on choosing stylish cabinets or sleek vanities, a common misconception is that installation details are straightforward. In reality, rushing the installation process without understanding the subtle nuances often leads to misalignment and long-term frustration. One prevalent myth is that measurement accuracy isn’t critical if you’re using good quality hardware—nothing could be further from the truth. Precise measurements, especially with professional tools like laser measures, prevent costly rework and ensure seamless integration, as discussed in detail on [built-in storage ideas](https://customcabinetrypro.com/built-in-storage-ideas-to-declutter-and-enhance-your-home).
A nuanced point often overlooked is the choice of materials. Opting for cheaper plywood or MDF might seem cost-effective initially, but these materials can warp over time, especially in humid environments. Professional-grade plywood ensures durability and longevity—and it’s worth the investment if you want a lasting solution. For insights on material selection, see [effortless storage solutions](https://customcabinetrypro.com/effortless-storage-solutions-for-a-tidy-stylish-home).
Another snag that’s rarely discussed is the importance of structural stability during installation. Many assume that attaching cabinets directly to drywall is sufficient, yet in reality, anchoring into studs provides the strength needed for heavy doors and frequent use. This technique prevents wobbly doors and misalignment down the line. For expert tips on secure installation, explore [top installation tips](https://customcabinetrypro.com/top-built-in-storage-solutions-installation-tips-for-2025).
Advanced enthusiasts might wonder about the optimal door hardware for smooth operation. While soft-close hinges are fashionable, they can be installed improperly if not calibrated correctly, leading to doors that sag or fail to close properly. Precision during hinge adjustment is crucial, and guided tutorials can be found on [vanity installation hacks](https://customcabinetrypro.com/vanity-installation-hacks-that-save-time-and-money).
Understanding these nuances transcends mere aesthetics—it’s about creating a functional, durable, and beautifully integrated space. Don’t fall into the trap of underestimating the complexity of installation. Let me know in the comments if you’ve ever encountered surprises during your projects! Remember, planning with an eye for these details makes all the difference in achieving professional results.
Maintaining your built-in storage and vanities is key to ensuring their long-term functionality and aesthetic appeal. From choosing the right tools to adopting effective cleaning routines, ongoing care can prevent common issues like warping, misalignment, or hardware failure. One essential aspect is investing in high-quality equipment—I’ve personally found that a precision cordless drill with adjustable torque is indispensable during installation and periodic adjustments. It’s lightweight and offers the control needed to tighten or loosen screws without damaging cabinetry.
Additionally, a digital angle finder can help you maintain perfect alignments over time, especially in homes with settling foundations. For cleaning, a soft microfiber cloth combined with mild, non-abrasive cleaners preserves finishes without stripping away protective coatings. Using a vacuum with a brush attachment during routine upkeep removes dust from hard-to-reach areas, preventing buildup that can cause hinges or slides to malfunction.
Looking ahead, the trend is moving towards integrating smart maintenance technologies. Wireless sensors that monitor humidity and temperature can alert you to conditions that threaten materials, helping you take preventative action early. For example, maintaining consistent indoor humidity levels can significantly prolong the life of wooden cabinetry, as explained in expert guides on built-in storage solutions.
How do I maintain my built-ins and vanities over time?
The key is regular inspection—checking for loose hardware, uneven surfaces, or signs of wear. Tighten screws periodically and reapply protective finishes as needed. For hardware, I recommend lubricating hinges and slides every year with a silicone-based spray, which prevents squeaks and ensures smooth operation. To keep surfaces pristine, use a high-quality furniture polish every few months; I prefer options that contain natural ingredients to avoid harmful residues. Lastly, staying mindful of environmental factors like humidity and sunlight can prevent warping and fading. Consider installing a dehumidifier in damp areas or using UV-protective window films to reduce sun damage. If you want to get serious, investing in a smart sensor system can provide real-time data about your home’s microclimate, helping you adapt your maintenance approach accordingly. This proactive stance helps preserve your investment and guarantees your spaces stay beautiful and functional for years to come. Want to learn about more advanced strategies? Check out smart storage solutions for maintenance that keep your home in top shape effortlessly. Don’t forget—regular upkeep isn’t just about appearance; it’s about making sure each component continues to serve you effectively over the long haul. Try implementing a scheduled maintenance routine this month and enjoy the peace of mind that comes with well-cared-for built-ins.
Opportunities I Wish I Had Seized Sooner
One of the most valuable lessons I learned about built-ins and vanities is the importance of internal planning—visualizing every item’s place before starting really streamlines the entire process. Early mistakes, like neglecting to account for hardware clearance, cost me time and additional refinements. Now, I know that detailed sketches and 3D models can prevent surprises and ensure a perfect fit. Additionally, I underestimated the value of durable, high-quality materials; opting for cheaper options initially led to warping and frustrations. Investing in solid plywood and resilient hardware from the start has paid dividends in longevity and satisfaction.
Another insight was the power of patience—rushing to finish a project often undermines the end result. Taking the time to double-check measurements, align hinges perfectly, and allow finishes to cure properly results in a sleek, professional appearance. Lastly, I discovered the significance of maintenance routines—regularly inspecting hardware, cleaning surfaces with appropriate products, and monitoring environmental factors extend the life of custom storage solutions and vanities, keeping them stunning for years to come.
Tools and Resources That Changed My Approach
Over time, I found that certain tools made the whole process more manageable. A laser measure is an absolute game-changer for precise dimensions, saving hours of re-measurement. For design inspiration and planning, I trust built-in storage ideas, which are packed with innovative solutions tailored to modern needs. When selecting materials and hardware, effortless storage solutions offers guidance on durable, stylish options that stand up to daily use. Lastly, tutorials on installation guides have empowered me to undertake complex projects confidently, transforming my living space without excessive expense.
Your Next Venture Starts Today
Planning and installing built-ins and vanities is both a challenge and an incredible opportunity to personalize your home. The journey might seem daunting at first, but with the right tools, knowledge, and patience, you can create spaces that are not only beautiful but also highly functional. Remember, every successful project begins with a single step—so why not start today? Whether you’re looking to revamp a single room or tackle an entire renovation, embracing these lessons will ensure your efforts pay off in lasting style and comfort. Ready to bring your vision to life? Share your plans or questions below, and let’s make your dream home a reality.
One Reply to “Best Built-in Storage Solutions & Vanities Installation Guide 2025”
Leave a Reply
Related Posts
Stop the Sag: 3 Hinge Fixes for Heavy 2026 Custom Cabinets
I remember the first time I installed a massive, custom-built…
7 Pro Anchor Tactics for 2026 Floor-to-Ceiling Built-ins
I remember the first time I tried installing a custom…
Fixing 2026 Built-in Sag: 4 Heavy-Duty Wall Anchor Tactics
I remember the moment clearly. I was in the middle…
Reading through this post really resonated with my own experience of trying to organize my home better. I used to underestimate how much planning and quality materials can impact the long-term success of a storage project. I particularly agree with the emphasis on precise measurements—I’ve learned that investing in a good laser measure saved me from countless rework headaches. Additionally, I found that swapping out cheap hinges for soft-close, resilient hardware made a visible difference in how smoothly everything operates and how durable it feels. For anyone considering their first built-in project, I would add that prioritizing accessibility and your daily habits can further tailor the design, making life so much easier. Do others have tips on balancing style with functionality, especially in smaller spaces? Would love to hear how others have managed to optimize both without sacrificing aesthetics.