

I walked into my laundry room last Tuesday, coffee in hand, ready to tackle the mountain of socks, and there it was: the dreaded ‘smile.’ No, the cabinets weren’t happy to see me. The bottom edge of the shaker door was bowing outward, and the laminate was starting to peel away like a bad sunburn. It is a sinking feeling when you realize your expensive cabinetry is essentially melting in front of your eyes. I have spent years helping folks with vanity installation and custom built-ins, but even I fell into the trap of underestimating just how much abuse a laundry room takes. Today, I am going to show you exactly why this happens and how to stop the rot before you have to tear everything out and start over.
Stop Blaming the Humidity and Start Looking at Your Materials
Most people think a little steam from the dryer is harmless, but your cabinets are basically sponges. I made the classic mistake early on of choosing ‘budget-friendly’ particle board because I thought it was ‘just a laundry room.’ Big mistake. According to research from the Forest Products Laboratory, wood-based panels can expand significantly when exposed to consistent relative humidity above 60%. In a tight laundry space, you hit those numbers faster than you would think. If you did not implement a moisture barrier strategy during the initial build, you are essentially on a countdown to warping. We often focus on aesthetic custom vanities for the master bath, but the laundry room is where the real environmental battle happens. Have you noticed your cabinet doors starting to rub against each other or failing to close flush? Drop a comment and tell me if you have seen that tell-tale peeling—it is more common than you think.
Is high-end plywood actually worth the extra cost?
You might be wondering if you really need to drop the extra cash on marine-grade or high-quality plywood for a room that sees more detergent than guests. The short answer? Yes. I have seen beautiful built-ins survive decades in bathrooms, yet laundry cabinets fail in five years because of poor material choice. If things get too far gone, you might even find that your vanity plumbing is leaking because the base can no longer support the weight. We need to look at how these units are anchored and protected, starting with the very foundation they sit on, especially if you are dealing with moisture-prone areas like a basement or a small, unvented closet.
Seal the base before you anchor the cabinet
I started my last renovation by ripping out a unit that looked like it had been through a flood, even though there was not a single leak in the house. The culprit was bare MDF sitting directly on a cold concrete floor, sucking up ground moisture like a wick. To avoid this, you need to implement a moisture barrier fix for vanities on cold basement floors before you even think about driving the first screw. Think of it like wearing galoshes; you are protecting the feet of your cabinets from the condensation that naturally wicks up through the slab. I always apply a thick bead of 100% silicone to the bottom edge of the kickplate. Better yet, use a sacrificial plastic riser or a moisture-proof shim strategy to keep the wood an eighth of an inch off the ground. That tiny gap is the difference between a cabinet that lasts twenty years and one that turns into oatmeal in three.
Defeat the floor drain slope with composite shims
Laundry rooms are notorious for having floors that slope toward a central drain. If you just slap your cabinets against the wall, they will follow that slope, leaving you with doors that never align and a countertop that lets detergent bottles slide off. You have to fight the floor to keep the cabinet level. In my own laundry room, the floor dropped nearly half an inch over a three-foot span. I utilized 7 tactics for leveling vanities on sloping tile floors to get the base rock-solid. Never use wood shims here; they rot the second they get wet. Use composite or plastic shims to lift the low side, then cover the gap with a PVC shoe molding that will not swell when the washing machine inevitably overflows one day.
Close the gaps to keep the steam out
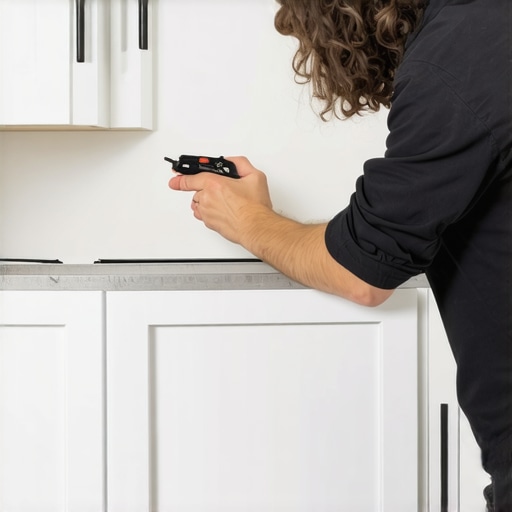
Steam is the silent killer of laundry cabinetry. It finds its way into the tiny gaps between your cabinet and the wall, attacking the unfinished back panels. This is where you need to get surgical with your tools. I once spent four hours on a single utility cabinet because the plaster walls were so wavy they looked like the rolling hills of Ireland. By using the scribing tool for cabinets against textured plaster walls, I was able to shave the side panel to follow the wall’s contour perfectly. A tight, scribed fit means there is nowhere for moisture to settle and grow mold. If you skip this, you are just inviting rot to live behind your built-ins. For those dealing with particularly stubborn masonry, the scribing move for flawless cabinet gaps on natural stone is a lifesaver that creates a professional, watertight seal.
Reinforce the sink base for heavy-duty use
Most laundry cabinets are built with the same flimsy specs as a kitchen cupboard, but they hold way more weight. Between the cast-iron utility sink and the heavy gallon jugs of bleach, the floor of that cabinet is under constant stress. I remember a neighbor whose entire laundry sink collapsed because the floor of the unit bowed until the plumbing snapped. To prevent this, I always add the hidden internal bracing trick for extra deep kitchen sink bases. Adding 2×4 cleats under the floor panel transforms the cabinet from a decorative box into a structural workbench. While you are inside the cabinet, make sure you plan your drawer layout carefully. We have often seen deep vanity drawers that kept hitting plumbing because the installer did not account for the P-trap. If you are mounting heavy wall units above the machines, forget the standard screws and use the toggle bolt strategy for heavy walk-in pantry racks to ensure those cabinets stay on the wall even when they are fully loaded with heavy detergents.
I walked into my laundry room last Tuesday, coffee in hand, ready to tackle the mountain of socks, and there it was: the dreaded ‘smile.’ No, the cabinets weren’t happy to see me. The bottom edge of the shaker door was bowing outward, and the laminate was starting to peel away like a bad sunburn. It is a sinking feeling when you realize your expensive cabinetry is essentially melting in front of your eyes. I have spent years helping folks with vanity installation and custom built-ins, but even I fell into the trap of underestimating just how much abuse a laundry room takes. Today, I am going to show you exactly why this happens and how to stop the rot before you have to tear everything out and start over.
Stop Blaming the Humidity and Start Looking at Your Materials
Most people think a little steam from the dryer is harmless, but your cabinets are basically sponges. I made the classic mistake early on of choosing ‘budget-friendly’ particle board because I thought it was ‘just a laundry room.’ Big mistake. According to research from the Forest Products Laboratory, wood-based panels can expand significantly when exposed to consistent relative humidity above 60%. In a tight laundry space, you hit those numbers faster than you would think. If you did not implement a moisture barrier strategy during the initial build, you are essentially on a countdown to warping. We often focus on aesthetic custom vanities for the master bath, but the laundry room is where the real environmental battle happens. Have you noticed your cabinet doors starting to rub against each other or failing to close flush? Drop a comment and tell me if you have seen that tell-tale peeling—it is more common than you think.
Is high-end plywood actually worth the extra cost?
You might be wondering if you really need to drop the extra cash on marine-grade or high-quality plywood for a room that sees more detergent than guests. The short answer? Yes. I have seen beautiful built-ins survive decades in bathrooms, yet laundry cabinets fail in five years because of poor material choice. If things get too far gone, you might even find that your vanity plumbing is leaking because the base can no longer support the weight. We need to look at how these units are anchored and protected, starting with the very foundation they sit on, especially if you are dealing with moisture-prone areas like a basement or a small, unvented closet.
Seal the base before you anchor the cabinet
I started my last renovation by ripping out a unit that looked like it had been through a flood, even though there was not a single leak in the house. The culprit was bare MDF sitting directly on a cold concrete floor, sucking up ground moisture like a wick. To avoid this, you need to implement a moisture barrier fix for vanities on cold basement floors before you even think about driving the first screw. Think of it like wearing galoshes; you are protecting the feet of your cabinets from the condensation that naturally wicks up through the slab. I always apply a thick bead of 100% silicone to the bottom edge of the kickplate. Better yet, use a sacrificial plastic riser or a moisture-proof shim strategy to keep the wood an eighth of an inch off the ground. That tiny gap is the difference between a cabinet that lasts twenty years and one that turns into oatmeal in three.
Defeat the floor drain slope with composite shims
Laundry rooms are notorious for having floors that slope toward a central drain. If you just slap your cabinets against the wall, they will follow that slope, leaving you with doors that never align and a countertop that lets detergent bottles slide off. You have to fight the floor to keep the cabinet level. In my own laundry room, the floor dropped nearly half an inch over a three-foot span. I utilized 7 tactics for leveling vanities on sloping tile floors to get the base rock-solid. Never use wood shims here; they rot the second they get wet. Use composite or plastic shims to lift the low side, then cover the gap with a PVC shoe molding that will not swell when the washing machine inevitably overflows one day.
Close the gaps to keep the steam out
Steam is the silent killer of laundry cabinetry. It finds its way into the tiny gaps between your cabinet and the wall, attacking the unfinished back panels. This is where you need to get surgical with your tools. I once spent four hours on a single utility cabinet because the plaster walls were so wavy they looked like the rolling hills of Ireland. By using the scribing tool for cabinets against textured plaster walls, I was able to shave the side panel to follow the wall’s contour perfectly. A tight, scribed fit means there is nowhere for moisture to settle and grow mold. If you skip this, you are just inviting rot to live behind your built-ins. For those dealing with particularly stubborn masonry, the scribing move for flawless cabinet gaps on natural stone is a lifesaver that creates a professional, watertight seal.
Reinforce the sink base for heavy-duty use
Most laundry cabinets are built with the same flimsy specs as a kitchen cupboard, but they hold way more weight. Between the cast-iron utility sink and the heavy gallon jugs of bleach, the floor of that cabinet is under constant stress. I remember a neighbor whose entire laundry sink collapsed because the floor of the unit bowed until the plumbing snapped. To prevent this, I always add the hidden internal bracing trick for extra deep kitchen sink bases. Adding 2×4 cleats under the floor panel transforms the cabinet from a decorative box into a structural workbench. While you are inside the cabinet, make sure you plan your drawer layout carefully. We have often seen deep vanity drawers that kept hitting plumbing because the installer did not account for the P-trap. If you are mounting heavy wall units above the machines, forget the standard screws and use the toggle bolt strategy for heavy walk-in pantry racks to ensure those cabinets stay on the wall even when they are fully loaded with heavy detergents.
Stop over-tightening and start thinking about shear strength
Most installers obsess over the number of fasteners they use, assuming that a dozen screws in a single cabinet back will make it invincible. But in my decades of doing this, I have seen that more often leads to messier failures. The real nuance is not the quantity of screws; it is the shear strength of the fastener and the structural integrity of the cabinet’s hanging rail. If you are just driving screws through a thin MDF backer, the cabinet is essentially hanging by a thread. You need to understand why your heavy quartz vanity is cracking the cabinet frame—it is almost always because the load-bearing points were not properly reinforced to handle the vertical pressure of stone. Everyone tells you to hit the studs, but nobody mentions that if you over-tighten a structural screw into a soft pine stud, you might actually be weakening the wood’s grip. Have you ever fallen into this trap where ‘just one more screw’ ended up stripping the hole? Let me know in the comments. According to the Architectural Woodwork Institute (AWI), high-load cabinetry requires specific attachment methods that account for both the weight of the unit and the contents inside. This is why 6 heavy-duty wall fixes for massive quartz top vanities are mandatory for modern, high-end designs.
Can your old plaster walls handle a modern floating unit?
If you are working in a home built before 1950, you are not just fighting gravity; you are fighting crumbling lime and wood lath. Standard toggle bolts or plastic anchors will fail here because the plaster itself has no structural integrity to resist the outward pull of a floating cabinet. I have discovered the secret to mounting heavy floating vanities on old lath and plaster involves using a secondary plywood mounting plate that spans multiple studs, spreading the load so the plaster is not crushed. Without this spread, even innovative storage solutions to transform your bathroom can become a liability. A floating vanity is essentially a giant lever; the heavier the contents, the harder it tries to pry itself off the wall.
Why static load is only half the battle
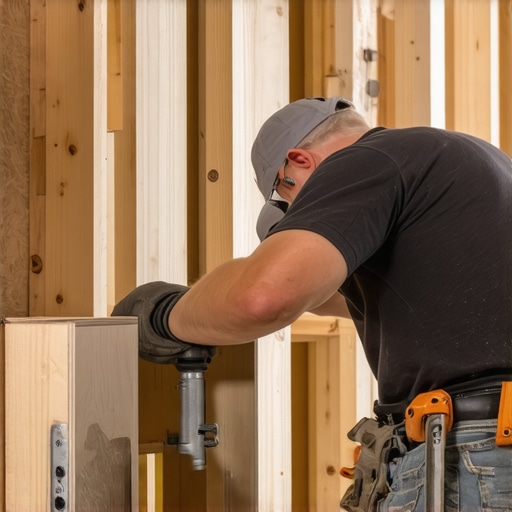
The biggest ‘oops’ factor I see with laundry built-ins is ignoring dynamic weight. A cabinet might look solid when it is empty, but once you fill it with thirty pounds of detergent and start pulling on the drawers, the force changes completely. This leads to drawer fronts that won’t stay aligned because the cabinet box is slightly racking under the shifting weight. To combat this, I always integrate creative storage solutions for vanities that keep the center of gravity low and centered. If your unit is pulling away, it is likely because you did not account for the additional leverage when those deep drawers are fully extended. Always check why your floating media unit is pulling away and the stud fix principles, as they apply just as much to your utility room as they do to your living room entertainment center.
I’ve learned the hard way that the difference between a pro and an amateur isn’t just the speed of the install; it’s the toolkit. One tool I never walk onto a job site without is a digital pinless moisture meter. I use it to check the subfloor before any moisture barrier strategy is even discussed. If you’re seeing higher than 12% moisture in your wood framing, you’re asking for trouble down the line. I personally recommend the Wagner Meters Orion series—it doesn’t leave holes in your expensive custom vanities but gives you a crystal clear picture of what’s happening beneath the surface. Using this tool ensures that your creative built-ins don’t end up warped by a slab you thought was dry. 
How do I keep these cabinets looking new for a decade?
Maintenance isn’t just about cleaning spills; it’s about preventative structural checks. Every six months, I recommend doing a ‘hinge and slide’ audit. According to technical documentation from Blum, their hardware is engineered for over 200,000 cycles, but that rating assumes the cabinet remains square and level. If you notice why your soft-close drawers are slamming, don’t just ignore it. It’s usually the first sign that the box is racking. You can often save the unit by applying how to fix wobbly built-ins with 4 hidden steel plate tactics to pull the frame back into alignment before the wood fibers permanently set in a warped position. I also swear by the FastCap Fat 25 tape measure because it has a built-in notepad on the side. When you’re measuring for 7 slim pull-out fixes, those sixteenths of an inch matter. One miscalculation on a scribe and you’ve ruined a $200 side panel.
Get the right light on your lines
If you are still using a bubble level for your laundry room build, you are working in the dark ages. I switched to a 360-degree green beam laser level years ago, and it changed everything. Red lasers disappear in bright utility rooms, but green is visible even with the sun pouring through the window. It allows you to project a perfectly level line across all four walls simultaneously, which is critical for effortless storage solutions that span long distances. This tool ensures that your toe kick ventilation fix aligns perfectly with your baseboards, creating that ‘built-in’ look that makes people think you spent double what you actually did.
The future is looking dry
Looking ahead, I predict we are going to see a massive shift toward ‘smart’ moisture detection integrated directly into cabinet bases. We already have smart leak detectors for water heaters; it is only a matter of time before high-end innovative storage solutions come with built-in sensors that ping your phone the moment they detect a rise in humidity behind the wall. Until then, you have to be the sensor. I challenge you to grab a moisture meter this weekend and check the area behind your washer—it might just save you a $5,000 renovation bill later. Stop guessing and start measuring!
Lessons Bought with Sawdust and Swollen MDF
After years of installing cabinets in humid environments, I’ve realized that the small details you skip on day one are the ones that wake you up at night three years later. First, never assume a ‘new’ house is dry; concrete retains moisture for months, which is why an expert guide to flawless vanity installation tricks tips always emphasizes floor prep. Second, if you’re torn between aesthetics and structure, choose structure every time. A beautiful cabinet that sags is just expensive trash. Third, the most expensive tool you own is your patience—take the time to scribe that side panel perfectly. It doesn’t just look better; it prevents the airflow that brings moisture behind the unit.
The Gear That Keeps My Installations Standing
I don’t go into any laundry room without my Wagner Orion moisture meter; it’s my first line of defense before deciding on a moisture barrier strategy. For hardware, I stick with Blum because their adjustment range is forgiving when a house eventually settles. I also recommend keeping a notebook handy—the FastCap Fat 25 is perfect for this—to jot down your built-in storage ideas to declutter and enhance your home as you measure. Finally, a 360-degree green laser level is the only way to ensure your effortless storage solutions look professionally integrated across the entire room. #IMAGE_PLACEHOLDER_E#
Turn Your Utility Room into a Fortress
Your laundry room doesn’t have to be a place of peeling laminate and warped wood. By choosing the right materials, sealing your bases, and using proper anchoring techniques, you can create a space that is as durable as it is beautiful. Whether you’re working on choosing the perfect vanity style for your bedroom or bath or a heavy-duty utility setup, the principles remain the same: protect against moisture and respect gravity. You’ve got the knowledge now, so grab your tools and get to work on those vanity installation hacks that save time and money.
Have you ever discovered unexpected water damage behind your cabinets? Let me know how you handled it in the comments below!