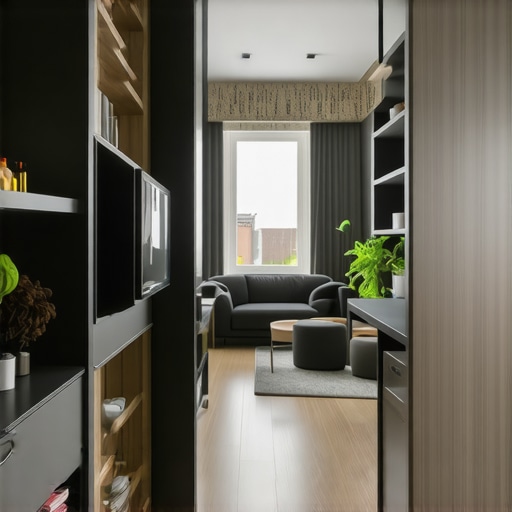
It was a chilly Saturday morning when I finally snapped. My kitchen counter was buried under a mountain of random utensils, canned goods, and mismatched containers. No matter how many bins or shelves I added, my space felt chaotic—until I realized I’d been trying to force a square peg into a round hole. That was my lightbulb moment: traditional storage just doesn’t cut it anymore. If your home feels like an endless game of Tetris with your belongings, you’re not alone—and the good news is, there’s a smarter way.
Why Storage Solutions for 2025 Are a Game-Changer
Smart storage isn’t just a trend; it’s a necessity, especially with the way our homes are evolving. As urban living spaces shrink and our belongings multiply, the need to maximize every inch becomes urgent. Built-in cabinets and innovative storage systems are no longer luxury upgrades but essentials for a tidy, functional home. Over the years, I’ve tried countless DIY hacks, but I learned the hard way—mistakes like installing shelves too high or buying off-the-shelf solutions that don’t fit your space can turn into costly lessons. To truly transform your home, it’s worth investing in custom, integrated options that blend seamlessly with your design and adapt to your lifestyle.
Is All This Storage Hype Actually Worth It?
I used to be skeptical about the buzz around built-ins and custom solutions. I thought, “Isn’t this just over-engineering?” But after a botched DIY project left my bathroom cluttered and unmanageable, I knew I needed expert help. To be honest, I almost skipped consulting professionals, fearing it would blow my budget and delay my renovation. But I discovered that proper planning and quality craftsmanship—like consulting detailed guides on easy storage solutions—can be surprisingly affordable and freeing. As design expert trends for 2025 suggest, strategic built-ins are shaping the future of home aesthetics and function.
Now, I want to help you avoid my early pitfalls and embrace the smartest storage options for your space. Whether it’s a closet overhaul, a custom vanity, or clever kitchen cabinets, getting it right from the start saves time, money, and endless frustration. Ready to discover practical, stylish solutions that can truly make a difference? Let’s dive into the top tips and ideas that will elevate your home for 2025 and beyond.
Plan Your Space Like a Pro
Start by analyzing your room’s layout and identifying clutter hotspots. For example, I once tackled my cluttered bathroom by sketching a floor plan and marking areas for potential built-in cabinets. Use painter’s tape to outline the desired storage zones, ensuring measurements are precise. This visual step helps prevent costly mistakes during installation and clarifies exactly what you need from your storage solution.
Choose Your Materials Carefully
Select durable, high-quality materials that match your decor and withstand daily wear. I opted for moisture-resistant plywood in my bathroom, which prevented warping over time. Think of your storage as the backbone of your organization—investing in quality reduces future repairs and replacements. Visiting local suppliers to compare finishes and textures will help you find the perfect style for your space.
Build or Buy: Assess Your Options
If you’re handy, consider building custom cabinets. Use a circular saw and cordless drill, following a step-by-step guide like this detailed tutorial, to ensure precise cuts and secure joints. For those preferring a quicker fix, browse customizable pre-made options, but remember, these can be limiting if your space isn’t standard. Tailoring your choice ensures your storage functions flawlessly and fits seamlessly.
Prepare Your Workspace Thoroughly
Clear the area and protect surrounding surfaces with drop cloths or painters tape. During my last project, I covered my entire hallway with old sheets, which minimized cleanup after dust and debris. Setting up a clean, organized workspace streamlines the installation process and minimizes mishaps. Keep all tools within reach and check your measurements twice to prevent errors that can stall progress or cause rework.
Implement Precise Installation Techniques
Follow a logical assembly sequence: start with framing, then attach backing panels, and finally install doors or drawers. Use a spirit level to ensure everything is perfectly aligned. I once installed a built-in bookshelf, where a slight tilt made the entire unit look uneven. Using shims and clamps stabilized the structure during fixing—small steps that prevent future wobbling or gaps. Don’t rush; patience and attention to detail pay off with a sleek finish.
Seal and Finish for Longevity
Apply sealant or paint to protect your craftsmanship and match your interior. I used a semi-gloss finish on my bathroom cabinets, which resisted moisture and was easy to clean. Consider adding soft-close hinges and handles to enhance usability. This step transforms your built-in into a functional centerpiece, elevating the entire room’s aesthetic. Proper finishing not only extends lifespan but also adds a professional touch that lasts for years.
Assess and Adjust Post-Installation
After installation, test all doors, drawers, and shelves for smooth operation. I found that minor adjustments with a screwdriver fixed misalignments effortlessly. Pay attention to small details like gaps or uneven surfaces—they can affect overall appearance and usability. Regular maintenance, like tightening hardware and cleaning, keeps your storage solutions looking pristine and functioning flawlessly for years to come.
Even seasoned DIY enthusiasts often fall prey to misconceptions when installing built-in storage or vanities. A prevalent myth is that measuring once is enough—nothing could be further from the truth. Precise, repeated measurements and cross-checks are essential to prevent misalignments that can distort the entire aesthetic and functionality. Rushing through this step often results in gaps, uneven surfaces, or doors that won’t close properly, leading to costly rework. To avoid this, always double and triple-check your dimensions, especially when working with complex corners or unique wall angles.
Why does precision matter so much in custom storage installations?
Expert installers understand that tiny deviations can amplify over time, causing hardware failures or aesthetic issues. Studies in industrial design emphasize that tolerances lower than 1/16th of an inch are critical for professional-standard outcomes—that’s why many reputable brands and professionals prioritize meticulous measuring and calibration during the process. Relying solely on generic guides or templates often neglects the subtle variances particular to your space, which can lead to frustrated troubleshooting later.
Another common mistake is assuming that standard solutions fit all spaces. While off-the-shelf cabinets may seem convenient, they rarely accommodate irregular room shapes or specific storage needs. Overlooking this leads to awkward gaps or wasted space, which contradicts the goal of maximizing efficiency. This is why custom-built options, although seemingly more expensive upfront, provide better longevity and tailored functionality—something you can explore more at innovative storage solutions.
Many underestimate the importance of proper anchoring and support during installation. Bolts, shims, and braces are not mere accessories—they’re the backbone of stability. Insufficient reinforcement can cause sagging, squeaking, or even structural failure over time. Handy homeowners might skip these steps, thinking their weight is minimal, but daily usage and minor shifts in wall structures make reinforcement crucial. Professional installers often use specific hardware like toggle bolts or wall anchors designed for heavy loads, as recommended in storage installation guides.
Are you aware of the advanced tricks that professionals use to ensure seamless integration? Things like adjusting for wall imperfections, aligning for level and plumb, and determining optimal hinge positions can save hours and headaches. It’s worth investing time into learning these nuances—your home’s aesthetic and durability depend on it. Many of these tips are detailed in expert articles, which can be invaluable for ensuring a flawless finish, as discussed in this in-depth guide.
Have you ever fallen into this trap? Let me know in the comments. Remember, the devil is in the details—taking the time to understand these nuances leads to a cleaner, more reliable, and stunningly professional result in every storage project you undertake.
To ensure your custom storage solutions and vanities stay functional and look pristine over time, investing in the right tools and adopting regular maintenance routines is crucial. Personally, I rely on a few precise instruments and methods that make upkeep manageable and efficient, enabling long-term results that truly elevate your home’s aesthetic and organization.
Precision Alignment with a Quality Spirit Level
First and foremost, the importance of accurate alignment cannot be overstated. I use a high-quality digital spirit level that provides precise readings to the millimeter, making it easy to correct any tilt during installation or adjustments. This tool ensures every door, drawer, and shelf is perfectly level, preventing issues like misaligned hinges or wobbling surfaces, which can diminish the professional look of your built-ins. Consider investing in a magnetic or laser spirit level for even more accuracy—that small upgrade makes a significant difference in the lifespan and appearance of your storage solutions.
Secure Fastening with Impact Drivers and Proper Hardware
For fastening and reinforcement, I prefer a reliable impact driver combined with professionally recommended hardware such as toggle bolts or heavy-duty wall anchors. This combo allows me to quickly and securely fix cabinets to walls, especially in areas prone to moisture or wall irregularities like bathrooms. Proper hardware paired with an impact driver minimizes the risk of sagging or detachment over the years, keeping your storage stable and safe. Regularly checking hardware is also vital; a simple torque check twice a year can prevent hardware failure and maintain structural integrity.
Maintaining Surfaces with Suitable Cleaning and Sealants
Maintaining the finish of your built-ins involves choosing the right cleaning products. I avoid harsh chemicals, instead opting for gentle, pH-neutral cleaners that preserve finishes like semi-gloss or matte. Periodically, applying a fresh coat of sealant or protective wax helps guard your surfaces against moisture and dirt buildup. For vanities and bathroom cabinets, I recommend sealing all penetrations and joints with mold-resistant sealants to prevent water damage and mold growth, extending the life of your investment.
Future trends hint at smarter, more integrated maintenance tools
Looking ahead, technological innovations like IoT-enabled maintenance sensors or self-cleaning coatings could revolutionize how we care for built-in furniture. Imagine a future where moisture sensors alert you to leaks before damage occurs or coatings that automatically repel water and stains, reducing cleaning frequency. Embracing these tools now—like smart moisture monitors—can dramatically reduce long-term upkeep and preserve your craftsmanship. Begin by experimenting with smart sensors for humidity and moisture detection, and you’ll soon see how they proactively maintain your investments.
How do I keep my storage solutions in top shape over time?
Routine inspection plays a key role. Periodically check hinges, pulls, and hardware—tightening or replacing parts as needed. Clean surfaces with appropriate, gentle products, and reapply protective finishes when wear becomes noticeable. These small but consistent efforts significantly prolong the lifespan of your built-ins and vanities. To streamline maintenance, consider creating a schedule — for instance, a quarterly check-up to spot minor issues before they escalate. Remember, a little proactive care can save you hours of repair work in the future and keep your home’s storage solutions looking and functioning like new for years. For more in-depth guidance on high-end maintenance techniques, explore our expert tips page.”}} {
{
As I look back at my early DIY mishaps, I realize that the journey toward functional, beautiful built-ins and vanities is as much about patience and precision as it is about creativity. Every mistake, from mismeasured cuts to overlooked reinforcements, became a valuable lesson steering me toward professionalism. The real game-changer was understanding that my home could be a canvas for tailored solutions that reflect my lifestyle and aesthetic dreams—not just a space to store clutter. This insight transformed my approach and, ultimately, my living space.
The Little Secrets That Make a Big Difference in Custom Storage
One of the most profound lessons I learned was the importance of integrating smart design with durable craftsmanship. Choosing the right materials, such as moisture-resistant plywood, ensures longevity, especially in humid areas like bathrooms. Additionally, concealing hardware behind panels or within cabinetry creates a sleek, modern look that’s effortlessly sophisticated. Paying attention to these subtle details amplifies both functionality and style, and you’ll find yourself appreciating the craftsmanship long after the project wraps.
Where to Find the Tools and Inspiration You Need
My essential toolkit includes a high-quality digital spirit level for flawless alignment, impact drivers for quick assembly, and protective sealants to maintain surfaces over time. For inspiration and detailed guidance, I rely heavily on expert resources like effortless storage solutions and trend reports such as top vanity trends for 2025. These provide practical tips and fresh ideas that keep my projects aligned with current designs and innovations.
Embracing the Artist Within Your Renovation Journey
Starting a storage or vanity project can feel overwhelming, but remember, every expert was once a beginner. Embrace the learning curve and view each step as a chance to personalize your home in ways that off-the-shelf solutions simply can’t match. Whether it’s adding a hidden drawer or customizing a cabinet to fit an awkward corner, these details bring character and efficiency. Now’s the perfect time to take that first step—your home’s transformation awaits.
3 Replies to “Storage Solutions & Built-in Cabinets: Top Tips for 2025”
Leave a Reply
Related Posts
Innovative Storage Solutions & Built-ins to Maximize Your Space Today
My Journey to a Clutter-Free Home: Discovering Innovative Storage SolutionsLiving…
Effective Built-in Cabinets & Storage Ideas for Seamless Organization
Ever opened a closet or bathroom cabinet and felt overwhelmed…
Efficient Installation of Storage Solutions & Built-ins in 2025
Ever spent hours trying to cram that last box of…
Reading this post really resonated with my recent renovation experience. I used to think that standard shelving units sufficed for my kitchen, but after struggling with clutter and mismatched containers, I realized that custom storage was the smarter choice. I paid attention to the detailed planning steps you mentioned, especially sketching the layout and double-checking measurements—those small steps saved me hours of rework later. I also appreciated the emphasis on quality materials; choosing moisture-resistant plywood for my pantry made a significant difference, especially in humid weather here. One thing I’d add is considering future needs—like adjustable shelves or modular units—so storage can evolve as your needs change. Has anyone here added multi-purpose or flexible storage solutions in their home? I’d love to hear ideas on how to keep efficiency high while maintaining a sleek look.
This post really hit home for me because I recently undertook a kitchen renovation to incorporate more built-in storage. What I found most helpful was the emphasis on precise measurements and considering future needs like adjustable shelving. I learned the hard way that rushing through the measurement process can cause headaches later, especially with irregular wall angles that off-the-shelf cabinetry can’t accommodate. I added soft-close hinges and concealed hardware, which made a huge difference in maintaining a sleek look while improving functionality. One challenge I faced was choosing materials that withstand daily use yet match my decor—I went with moisture-resistant plywood for its durability and subtle grain finish.
Thinking about future adaptability, I’m curious—has anyone here designed their storage to be flexible or expandable? Do you have clever solutions for modular furniture that can evolve as your needs change? It seems like smart planning now can save a lot of hassle down the line, and I’d love to hear what worked well for others.
This post really hits home about the importance of custom storage solutions. I recently faced a similar chaos in my kitchen, and the thought of building in smarter cabinets actually sparked my current project. I love the idea of sketching out the layout beforehand and using painter’s tape to visualize space—such simple steps can prevent so many headaches down the line. I particularly appreciate the tip on selecting high-quality materials; I’ve learned that investing in moisture-resistant plywood or similar durable options really pays off, especially in humid areas like bathrooms or kitchens.
One thing I’ve been exploring is adjustable shelving within built-ins, which offers flexibility as needs change over time. Have others here had success with modular elements or multi-purpose storage designs that can grow with your family? I believe that planning for future adaptability right from the start makes a huge difference in maintaining both aesthetics and functionality. Would love to hear more ideas on how to optimize custom storage to save space and reduce clutter long-term!”
,