

I remember the smell of fresh sawdust and the absolute pride I felt after finishing my first ‘heavy-duty’ garage workbench. It was a beast—or so I thought. Two weeks later, I was manhandling a cast-iron engine block onto the surface, and I heard it: a sickening, metallic *snap*. In an instant, the left corner gave way, sending my project sliding toward my toes. I had used standard #8 gold wood screws for the entire frame. I thought if I used enough of them, they’d hold anything. I was wrong. Those screws are designed for pulling boards together, not for resisting the massive shear forces of a thousand-pound load. That failure taught me that when you are building for the long haul, the fastener is the most important part of the blueprint. Today, I’m going to show you why structural screws are the unsung heroes of the workshop and how to choose the right ones so your bench never lets you down.
Standard Screws Are for Trim Not for Real Weight
Early in my DIY journey, I made the classic mistake of thinking all screws were created equal. I’d grab whatever was on sale at the big-box store, usually thin-shanked wood screws. The problem is that these fasteners are brittle. If the wood shifts or the load gets too heavy, the heads just pop off. If you’ve ever seen why your garage wall tracks are failing under load, you know that the wrong hardware is almost always the culprit. Structural screws, on the other hand, are heat-treated and engineered to bend rather than snap. They have a much thicker shank and a built-in washer head that clamps the wood like a vice. When I moved on to more complex projects, like figuring out 4-steel-cantilever-fixes-for-floating-garage-workbenches-3, I realized that the lateral strength of the screw is what actually keeps the joints from racking. According to the American Wood Council, the shear strength of a fastener is a critical calculation in any load-bearing structure, and standard wood screws simply don’t have the documented values required for heavy engineering.
Is spending three times more on screws actually worth it?
I get this question from my neighbors all the time. They see the price tag on a tub of GRK or Spax structural screws and winced. But here is the reality: you can spend $10 now on the right fasteners, or you can spend $200 later replacing the lumber and the equipment that got smashed when your bench collapsed. I’ve seen beautiful custom built-ins ruined because someone tried to save five bucks on hardware. Using structural screws also means you can often skip the pre-drilling, which saves your wrists and your drill batteries. Have you ever had a project fail because a screw snapped at the worst possible moment? It’s a frustrating rite of passage, but it’s one you only need to go through once to become a believer in the good stuff. Before we get into the specific lengths and gauges you need, let’s talk about the specific types of loads your workbench is going to face.
Get to know the two ways your workbench tries to break
To build a bench that survives a lifetime of abuse, you have to understand that your fasteners are fighting two different battles: shear and tension. Tension is when a load tries to pull the screw straight out of the wood—think of a heavy cabinet hanging on a wall. Shear is when the weight tries to snap the screw sideways, like a guillotine. In a workbench, your legs and stretchers are almost always under shear stress. When I was building a massive storage unit for a client last year, I realized that many people ignore this. I actually saw a project where the builder used deck screws for a frame; over six months, the screws didn’t pull out, they literally snapped because they couldn’t handle the lateral movement. Just like when you are applying 6-heavy-duty-l-brackets-for-reinforcing-custom-built-in-units-2, the goal is to create a connection that doesn’t just hold, but resists shifting.
Shear force is the real silent killer
Standard wood screws have a thin ‘neck’ that is incredibly brittle. Structural screws, however, use a much thicker shank. If you look at a #10 or #12 structural screw, the metal core is nearly double the diameter of a standard hardware store screw. This extra ‘meat’ in the middle of the screw is what prevents your workbench from developing that annoying side-to-side wobble. If you have ever had to stop wobbly custom built-ins, you know that once a joint starts to rack, the fasteners are already failing.
How to size your hardware for maximum grip
The biggest mistake I see in my shop is people using screws that are way too short. You need to follow the two-thirds rule: two-thirds of the screw length should be embedded in the ‘holding’ piece of wood. For a standard 2×4 frame where you are going through the broad side of one board into the end of another, a 3-inch screw is the bare minimum, but a 3.5-inch structural screw is the gold standard. I once tried to mount a floating media console using 2.5-inch screws into old studs; it felt solid for a week, then I noticed a 1/8-inch gap at the top. I had to pull the whole thing down and use the heavy-duty lag bolt rule for garage ceiling racks as a reference for my hardware choice. I ended up using 4-inch RSS structural screws to ensure the threads bit deep into the heart of the timber.
Always aim for two inches of thread engagement
While length matters, thread engagement is where the actual strength lives. Structural screws often have a ‘C-tap’ or a knurled shoulder that enlarges the hole in the first board. This is brilliant because it allows the head of the screw to pull the two boards together tightly without the threads getting stuck in the first piece of wood. This ‘clamping force’ is what makes a workbench feel like it was carved out of a single block of wood. If you are working on something more delicate, like 7-reinforcement-tactics-for-wall-hung-bedroom-vanities-2, you might use smaller gauges, but for the garage, you want the heavy-duty stuff that requires a T-25 or T-30 Star bit. This prevents stripping the head, which is the most common reason people stop driving a screw before it’s fully seated.
Let’s dig deeper into a nuance that even some seasoned pros overlook: the difference between static and dynamic loads. Most DIYers test their work by pushing on it once and saying, ‘Yeah, that’s solid.’ But a bathroom vanity isn’t just holding a sink; it’s holding a person leaning on the edge to brush their teeth or a toddler trying to reach the faucet. If you haven’t accounted for that leverage, you’re essentially building a giant wooden crowbar designed to rip your drywall apart. I see this constantly with how to support quartz counters on custom floating vanities; people underestimate the sheer rotational force exerted on the wall fasteners.
Stop over-tightening your fasteners
Here is the ‘oops’ factor that ruins more projects than anything else: over-torqueing. There is a common belief that the tighter you drive a screw, the stronger the joint. In reality, once the head of the screw is flush, every extra turn is actually destroying the wood fibers around the threads. This is especially dangerous in manufactured woods. If you over-drive a screw into MDF, you turn the ‘holding’ material into sawdust, leaving the screw with zero withdrawal resistance. Have you ever fallen into the ‘more is better’ trap with screws and ended up splitting your wood? Let me know in the comments. When I’m working on a high-stakes install, I always use a clutch setting on my drill to ensure I’m not snapping the internal ‘grip’ of the timber.
Why hitting the stud isn’t always enough
Everyone tells beginners to ‘just hit the stud,’ but that’s a dangerous oversimplification. In many modern homes, studs are made of fast-growth pine that is soft and prone to splitting. If you drive a massive lag bolt into the center of a narrow stud without a pilot hole, you can actually compromise the stud’s own structural integrity. Furthermore, if the wall isn’t square, your cabinet won’t sit flush, leading to why your built-in face frames are separating from the wall. This is where you need to master the scribing hack for fitting vanities against out-of-plumb walls to ensure the weight is distributed evenly across the entire back-plate rather than hanging off a single point of failure.
Can your cabinet actually support a 200-pound quartz top?
This is the advanced question I get from homeowners planning a luxury remodel. They buy a beautiful custom cabinet but forget that the cabinet itself is often held together by little more than staples and glue. According to the USDA Forest Products Laboratory, the withdrawal resistance of a fastener is directly proportional to the density of the wood and the depth of the threads. If you are placing a heavy stone top on a floating unit, the cabinet box itself becomes the point of failure. I’ve seen cases of why your heavy quartz vanity is cracking the cabinet frame simply because the installer didn’t add internal corner blocking to transfer the load from the stone directly into the wall-mounted structural rail. To prevent this, I always recommend the hidden wall plate strategy for floating media shelves as a blueprint for any heavy wall-hung unit. It’s about creating a secondary skeleton that does the heavy lifting so your ‘pretty’ cabinetry doesn’t have to.
I used to think my job was done the second I drove the last screw and wiped away the excess glue. But over a decade of building, I’ve learned that the first day is actually the easiest day for any installation. The real test comes three years later when the house has settled, the humidity has cycled through four seasons, and the owner has overloaded the shelves with three times the weight they intended. To make your work last a lifetime, you need to transition from a ‘builder’ mindset to a ‘maintenance’ mindset. This starts with the gear you keep in your truck and the way you prep the wood for its long-term battle against gravity.
Stop guessing and start measuring with professional scribing tools
If you want your built-ins to stay tight against the wall, you have to stop relying on generic plastic compasses that slip mid-mark. I personally swear by the AccuScribe Pro. It allows me to account for every lump and dip in a drywall surface, which is essential when you are trying to maximize your space with custom vanities expert design tips. When the cabinet sits perfectly flush, the load is distributed across the entire surface of the wall rather than being concentrated on the fastener heads. This is the difference between a vanity that stays put and one that eventually requires 6-heavy-duty-wall-fixes-for-massive-quartz-top-vanities-3 because it started to pull away from a wavy wall.
How do I maintain my heavy-duty installations over time?
Maintenance for heavy-duty storage isn’t about refinishing the wood; it’s about checking the structural integrity of the joints. Every six months, I recommend doing a ‘torque check’ on the main structural screws of any bench or rack. Wood is an organic material that shrinks and expands. According to APA Technical Note N395, the lateral load resistance of a fastener can be significantly compromised if the surrounding wood fibers have experienced extreme moisture cycling, leading to ‘loose’ threads. If you find a screw that turns easily, don’t just tighten it—remove it, inject a bit of structural epoxy or a wood sliver, and re-seat it. For bathrooms, checking for leaks is the best maintenance you can do, as moisture is the silent killer of structural integrity. If you ignore a small drip, you’ll eventually be looking for why your vanity plumbing is leaking into the cabinet base-4 and dealing with rotted sub-frames.
Invest in a clutch-based impact system
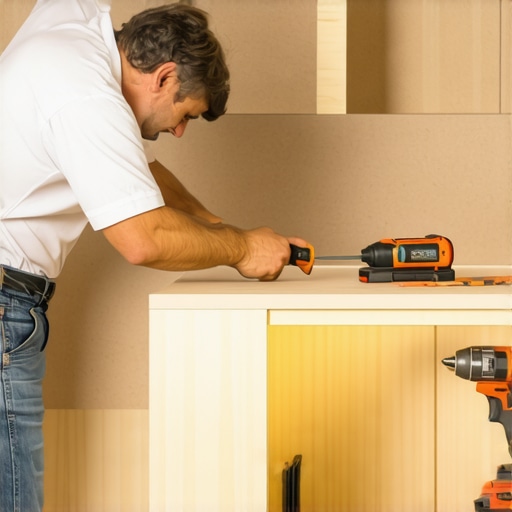
Most DIYers use a standard impact driver for everything, but the raw hammering action can actually micro-fracture the wood grain around structural screws. I’ve switched to using a high-torque drill with a precision clutch for the final two inches of a drive. This ensures that the head of the screw provides a firm clamp without ‘spinning out’ the hole. This precision is vital when you are following a step-by-step guide to vanity installation for beginners or setting up 6-steel-stud-tactics-for-garage-racks-that-actually-hold-3. If you strip the wood at the installation phase, the project is on a countdown to failure from day one. I recommend the Wera Kraftform Kompakt series for manual fine-tuning; it gives you the tactile feedback to know exactly when the fastener has reached its maximum holding power.
The future of storage is smart and modular
Looking ahead to 2025 and beyond, we are seeing a massive shift toward ‘smart storage.’ I predict that within the next five years, high-end top trends in vanity designs will include integrated moisture sensors and load-cell brackets that can alert your phone if a shelf is beginning to sag or if a leak has started behind the wall. We are already moving toward modular steel-frame skeletons that sit behind the cabinetry, and mastering these ‘hidden’ structures now will put you ahead of the curve. If you want to level up your game today, try this: on your next heavy-duty build, use a thread-locking compound even on wood-to-wood structural screws. It’s a small, ‘over-engineered’ step that ensures your bench stays as rock-solid in ten years as it is today.
What 15 Years of Stripped Screws Taught Me
It’s never the wood that gives up first; it’s the connection. I used to think I could out-smart physics with more glue, but a true heavy-duty build relies on the tension only a structural screw can provide. Another lightbulb moment was realizing that the weight capacity of your floor matters just as much as the bench—always check for settling if you’re building massive units. If you’re ever in doubt about a specific load calculation, it’s always better to contact us or consult a pro before you drive that first screw.
Finally, don’t be afraid to over-engineer; I’ve never regretted using a screw that was too strong, but I’ve definitely regretted the opposite. If you’re looking for more inspiration, check out these creative built-ins for seamless storage and home aesthetics to see how professional fasteners disappear into high-end design.
The Hardware I Would Take to a Desert Island Workshop
If you are serious about your shop, you need a dedicated set of T-star bits—don’t rely on the cheap ones that come in the box. I also highly recommend following maximize your space with custom vanities expert design tips to see how professional hardware integrates with aesthetics. For any project involving water, like a kitchen or bath, I always reach for 316 stainless steel structural screws to prevent the black ring of corrosion. Lastly, keep a reliable scribing tool and a copy of the Wood Handbook in your kit; they are the true secrets to a flush finish.
Build It Once and Build It for Your Grandkids
There is a specific kind of peace that comes from knowing your work isn’t just good enough, but truly solid. Whether you are tackling a step-by-step guide to vanity installation for beginners or framing out a massive garage storage system, the confidence you gain by using the right fasteners is worth every extra penny. You’re not just making a box; you’re creating effortless storage solutions for a tidy stylish home that will serve your family for decades. #IMAGE_PLACE_HOLDER_E#
What’s the heaviest thing you’ve ever built, and did you have any oh no moments with the hardware? Let me know in the comments below!