

I stood there in my pajamas at 2:00 AM, heart hammering against my ribs, staring at a half-detached steel rack dangling precariously over the hood of my SUV. I heard the *creak-snap* from the bedroom, a sound that every DIYer fears in the middle of the night. It wasn’t a ghost; it was gravity winning a fight against my poor hardware choices. That night, I realized that when you are hanging three hundred pounds of holiday decorations and power tools over your family car, ‘good enough’ is a recipe for a very expensive disaster. I’d already experimented with the plywood ledger trick for heavy garage overhead racks on my side walls, but the ceiling? That is a different beast entirely. Today, I am going to walk you through the heavy-duty lag bolt rule that changed how I approach storage, so you never have to stand in your garage at midnight wondering if your ceiling is about to fail.
The Night My Ceiling Storage Almost Met My Car
I made the classic rookie mistake. I went to the big-box store and grabbed the first box of ‘heavy-duty’ screws I saw, thinking that as long as they were long enough to hit wood, I was golden. I was wrong. The reality is that overhead storage relies entirely on ‘withdrawal strength’—the bolt’s ability to resist being pulled straight out of the joist. It is a completely different stress test than mounting heavy garage racks without hitting a stud on a vertical wall. My failure wasn’t just about the bolt; it was about the math. If you don’t account for the diameter, the thread engagement, and the pilot hole size, you’re just putting a ticking time bomb in your rafters. Have you ever felt that sinking feeling when you see a gap forming between your rack’s bracket and the drywall? That is the sound of your bolts giving up.
Is a specific lag bolt rule really worth the hassle?
You might think a bolt is just a bolt, but the American Wood Council’s National Design Specification shows that even a 1/8-inch difference in pilot hole diameter can reduce a bolt’s holding power by over 20%. I learned that the hard way when I snapped a zinc-plated head off by over-torquing it into a hole that was way too small. Now, I only trust heavy-duty garage rack bolts that won’t snap under load, specifically Grade 5 or higher steel. We are going to fix your overhead setup by following the ‘Half-Inch Rule’—a personal standard I developed after that near-disaster to ensure every rack I install stays put for a lifetime. Whether you are dealing with garage shelves pulling away from the wall or a sagging ceiling unit, the solution starts with the steel you choose. Let’s get into the mechanics of why your current bolts might be lying to you.
Hit the Dead Center of the Joist Every Single Time
The most dangerous mistake I see is ‘near-miss’ anchoring. You think you hit the joist because the drill bit came back with some wood shavings, but if you are only catching the outer half-inch of a 2×4, that bolt is going to cheese-wire its way right out under load. When I was refining the structural cleat strategy for heavy mudroom lockers, I learned that off-center loading creates a twisting force that snaps wood fibers. In the garage, I now use a ‘triple-probe’ method: drill a tiny pilot hole where you think the center is, then drill two more 1/4-inch to the left and right. If you don’t hit solid wood on all three, you aren’t in the center. I learned this the hard way while installing a massive shelving unit for a client; I thought I was centered until the entire unit shifted two inches to the left, nearly taking out a water heater because the bolts were only biting air and drywall dust.
Why the Half-Inch Rule Saves Your Windshield
My Half-Inch Rule is simple: use a bolt with a 1/2-inch shank diameter and ensure it penetrates at least 2.5 inches into solid lumber. Anything thinner is just a glorified nail when gravity is pulling it straight down. Most kit-supplied hardware is garbage. I always swap them out for 4 heavy-duty garage rack bolts that won’t snap under load, specifically looking for Grade 5 steel. This isn’t just about weight; it’s about vibration. Every time your garage door opens, your ceiling joists flex slightly. Over five years, that micro-vibration backs out cheap, thin screws like a loose tooth. By using a 1/2-inch bolt, you create enough friction and surface area contact that the bolt becomes part of the house’s skeleton rather than just an accessory hanging from it.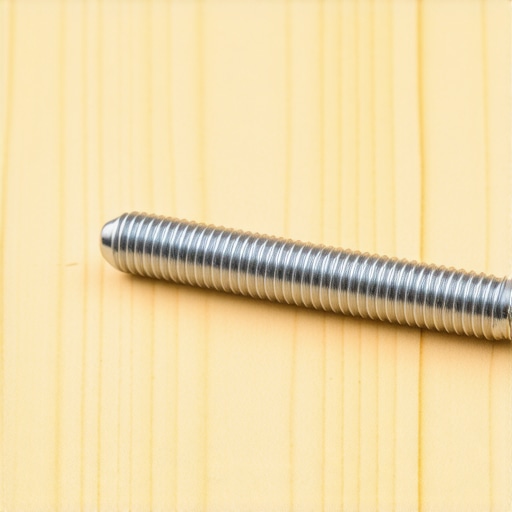
The Math of Not Snapping Your Steel
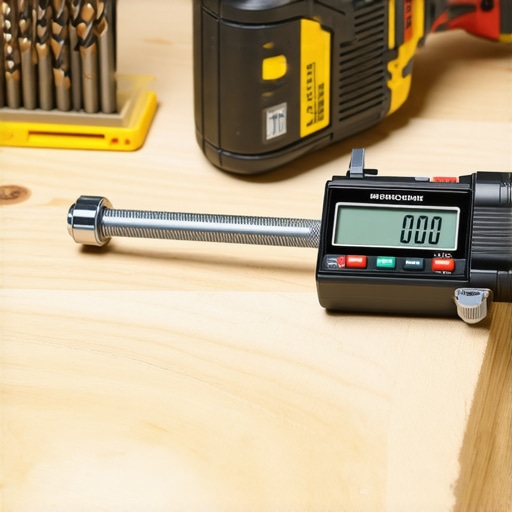
If you drive a half-inch bolt into a joist without a proper pilot hole, you will split the wood, and your ‘secure’ rack is now held up by a cracked piece of kindling. The pilot hole must be exactly 70% to 80% of the bolt’s root diameter. I once skipped this step while rushing through the floor-to-ceiling bolt move for massive pantry units in my own kitchen. I heard a sickening *CRACK* and realized I’d split a structural stud from top to bottom. Now, I use a digital caliper to measure the bolt’s inner shank (the solid part between the threads) and match my bit to that. This ensures the threads cut deep into the wood without the shank acting like a wedge that blows the joist apart. If you’re dealing with metal structures, you’ll need to pivot to 6 steel stud tactics for garage racks that actually hold, as the mechanics of ‘grip’ change entirely when you lose that organic wood compression. Much like why your garage wall tracks are failing under load, most overhead failures start with the wrong hole size, not the wrong weight limit.I used to think that if two bolts were good, ten would be bulletproof. I was wrong. In fact, one of the most common myths in the DIY world is that ‘more fasteners equals more safety.’ I call this the Swiss Cheese Trap. By driving too many large-diameter bolts into a single section of a ceiling joist or wall stud, you aren’t making it stronger; you are essentially perforating the wood and creating a failure line where the grain can split wide open. I’ve seen entire shelving units come down because the installer thought they were being extra safe, but they actually turned their structural lumber into a row of postage stamps ready to be torn off. If you’ve ever noticed built-in face frames separating from the wall, it’s often because of this over-fastening panic. Let’s dig deeper into why precision beats quantity every single time.
Why your ‘over-engineered’ rack might actually be a liability
The hidden nuance that most beginners miss is ‘creep’—the long-term deformation of wood under a constant load. According to the USDA Forest Products Laboratory’s ‘Wood Handbook,’ wood is a viscoelastic material. This means that a bolt that feels tight today might technically ‘move’ over the next five years as the wood fibers compress and shift under the relentless pull of gravity. This is why I stopped using standard hardware for heavy-duty wall fixes for massive quartz-top vanities and shifted toward high-tensile steel with specific thread pitches. If you don’t account for how the wood will relax over time, your rack will eventually develop that dreaded ‘garage lean.’
What happens when gravity meets the ‘creep’ of old wood?
When you are dealing with older homes, the joists have already undergone decades of seasonal expansion and contraction. Driving a massive 1/2-inch bolt into a 60-year-old 2×8 requires more than just a drill; it requires an understanding of how brittle that wood has become. I once watched a friend try to mount a heavy bike hoist using three-inch deck screws because ‘the box said they were rated for 100 pounds.’ Within a week, the screws hadn’t snapped—they had simply slid out of the aged, dry wood fibers like a hot knife through butter. To prevent this, I now swear by internal torsion box engineering principles even for simple garage racks to distribute the load across multiple points without over-stressing a single joist. If you find your setup is slightly off, don’t just keep drilling new holes; use hidden leveling shims to correct the angle before you tighten the final bolt. Have you ever fallen into this trap of adding ‘just one more screw’ only to hear the wood crack? Let me know in the comments.
I don’t just buy tools; I buy insurance for my sanity. When you are moving from garage racks to high-end interiors, your equipment has to evolve from ‘basic DIY’ to ‘precision engineering.’ I learned this the hard way while struggling with heavy-duty wall fixes for massive quartz-top vanities that weighed more than my first car. If you aren’t using a digital caliper to verify your bit size against your bolt’s root diameter, you are essentially guessing with your drywall’s life. I personally rely on a high-torque 18V impact driver for the initial drive, but I always finish the last three turns with a long-pattern ratcheting wrench. Why? Because an impact driver is too loud and too fast to tell you when a joist is about to strip. That manual ‘feel’ of the wood’s resistance is the only way to ensure you’ve achieved maximum withdrawal strength.
Stop Guessing and Start Measuring with These Professional Grade Tools
For any project involving heavy-duty wall fixes for massive quartz-top vanities or ceiling-mounted steel, I treat the technical specs as law. As noted in the Simpson Strong-Tie technical bulletins regarding SDS Heavy-Duty Connector screws, the shear and tension loads are only valid if the installation follows exact pilot hole depth and diameter. I’ve seen 1/2-inch bolts fail because the installer used a 3/8-bit instead of a 5/16, leaving too little wood for the threads to bite into. This precision is equally vital when you are figuring out how to support extra long closet shelving without center studs. You need a high-quality stud finder—specifically one that uses deep-sensing radar—to ensure you aren’t just hitting a thick piece of lath or a plumbing pipe.
How to Scale These Heavy-Duty Tactics for Every Room
Once you master the garage, the rest of the house becomes much easier to tackle. I recently applied the same structural principles to creative built-ins for seamless storage and home aesthetics in a client’s library. Instead of relying on standard cabinet screws, we used modified floor-to-ceiling bolt moves. This prevents the common issue of built-in cabinets pulling away from the ceiling, especially in homes that experience seasonal shifting. Whether you are performing a step-by-step guide to vanity installation for beginners or hanging a 400-pound pantry unit, the secret is distributing the load through a structural rail rather than individual points. I predict that in the next few years, we’ll see ‘smart’ mounting brackets with built-in strain gauges that alert your phone if a load is shifting or if a bolt is loosening due to vibration.
How can I maintain my heavy-duty storage over many years?
Maintenance is where most people fail. Every six months, I perform what I call the ‘Paper Gap Test.’ I try to slide a single sheet of paper between the mounting bracket and the wall or ceiling. If that paper slides in, the wood has compressed or the bolt has ‘crept’ out. This is a common precursor to garage shelves pulling away from the wall. A simple quarter-turn with a wrench is usually all it takes to reset the tension. This habit is especially critical for bathrooms where humidity fluctuates wildly, affecting wobbly vanity legs on uneven tile or causing structural wood to expand and contract. My final piece of advice: go to your garage right now and check the rack directly above your car. If you see even a hairline gap between the bracket and the drywall, it’s time to break out the wrench and tighten those lags before gravity takes its toll.
The Hard Truths I Learned While My Car Was at Risk
After years of tinkering, I realized that the best setup isn’t the one with the most bolts; it’s the one with the smartest placement. First, never ignore the sound of ‘wood grain protest.’ If you hear a high-pitched creak while tightening, back off immediately. Second, I learned that the steel l-bracket hack for heavy closet organizers applies just as well to stabilizing the lateral swing of overhead racks. Third, always check your work after the first change of season—wood shrinks in the winter, and what was tight in July might be loose in January.
#IMAGE_PLACE_HOLDER_E#
The Toolbelt Additions That Actually Matter
I don’t go into any heavy install without three specific items. First, a digital caliper. If you are guessing between a 5/16 and a 3/8 bit, you are guessing with your family’s safety. Second, a deep-sensing radar stud finder is non-negotiable; standard sensors often get fooled by double-layered drywall or thick plywood. Finally, I highly recommend checking out manufacturer technical bulletins for real-world shear ratings. If you are moving from the garage to the master bath, you will need that same level of precision for a step-by-step guide to vanity installation for beginners to ensure your heavy stone tops do not sag over time.
Taking the Fear Out of the Ceiling
Installing overhead storage can be intimidating, but when you respect the physics of the joist and the grade of your steel, you gain more than just floor space—you gain peace of mind. Whether you are tackling creative built-ins for seamless storage and home aesthetics or just clearing out the garage clutter, remember that every turn of the wrench is a step toward a more organized, safer home. Don’t let the fear of a creak stop you from maximizing your home’s potential. Start small, measure twice, and always use the right heavy-duty garage rack bolts for the job. Have you ever had a DIY project give you a scare in the middle of the night? Let me know in the comments below!