

I remember the morning the “pop” happened. It wasn’t a loud explosion, just a sickening, hollow sound as my eight-year-old hopped onto the mudroom bench to tie his shoes. I looked down, and there it was: a quarter-inch gap between the wood and the wall that wasn’t there yesterday. It felt like my house was literally rejecting my handiwork. I had spent three weekends building what I thought were perfect built-in storage ideas to declutter my home, only to realize I’d made the most amateur mistake in the book: I’d trusted drywall anchors to do a heavy-duty job. This wasn’t just an eyesore; it was a safety hazard waiting to happen. If you’ve noticed your built-in face frames are separating from the wall, you know that sinking feeling of wondering if you have to rip the whole thing out and start over.
Stop Watching Your Bench Walk Away from the Wall
The reality is that mudroom benches take an absolute beating. Between kids jumping on them and the sheer weight of grocery bags and boots, a simple decorative nail or a cheap plastic anchor simply won’t hold. I learned the hard way that when you’re dealing with seating, you have to find the “bones” of your house. We’re talking about a permanent, mechanical connection to the wall studs. Today, I’m walking you through the stud-find fix and the plywood plate move for secure entryway bench anchoring that will save your sanity and your drywall. According to the American Wood Council, wood-to-wood connections provide significantly higher withdrawal resistance than any masonry or drywall alternative, which is why hitting that 2×4 is non-negotiable for any piece of furniture you plan to actually sit on. Have you ever felt that slight wobble when you sit down and wondered if today was the day the whole thing finally gave way?
Is This Fix Really Worth the Extra Effort?
You might be thinking that a few more screws driven in at an angle will do the trick, but that’s exactly how I ended up with a wall that looked like Swiss cheese. The skepticism is fair—why tear into your beautiful finish work just to find a hidden piece of lumber? But here’s the truth: if you don’t fix the root cause, the gap will only get wider, the creaking will get louder, and eventually, the bench will fail completely. I wasted months trying to hide the gap with caulk before I finally embraced the structural cleat strategy for heavy mudroom lockers. We are going to solve this by making your bench a literal part of your home’s skeleton, ensuring it’s as rock-solid as the day your house was framed.
Locate Every Single Stud Without Making a Mess
The first step isn’t just grabbing a stud finder; it is about mapping the entire wall. I used to think hitting one stud was enough, but for a bench that carries human weight, you need a connection every 16 inches. Use a high-quality sensor to find the edges of the studs, then mark them with painter’s tape. If you find yourself in a situation where the framing is irregular, you might need to look into how to secure built-in cabinets to walls with no studs by using specialized toggles, but for a bench, we really want that lumber-to-lumber contact. I remember a kitchen remodel where I ignored a slightly off-center stud and just used a heavy-duty anchor; three months later, the weight of the dishes had the cabinet sagging. Don’t let that be your mudroom.
The Plywood Plate Move for Rock Solid Support
When your bench’s internal framing doesn’t line up with your house’s studs, you use a bridge. This is the plywood plate move for secure entryway bench anchoring that I swear by. You take a piece of 3/4-inch plywood, cut it to the width of your bench, and screw that plate directly into every stud available. Now, you have a massive, solid wooden surface to which you can attach your bench. It’s the same logic used in the ledger board move for level mudroom benches where the support is distributed across the entire wall rather than focused on a few weak points.
Stop Using Cheap Screws and Get Structural
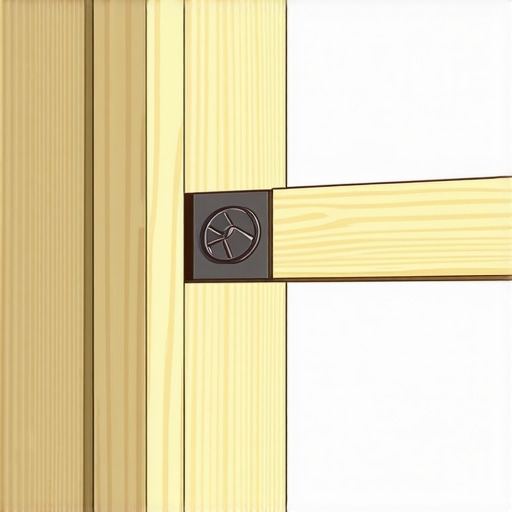
Your standard gold screws or drywall screws have zero shear strength; they will snap like twigs under the weight of a grown man sitting down. You need to switch to the structural screw choice for heavy duty garage workbenches—think GRK or Spax. These screws are engineered to bend rather than break. I once spent an afternoon helping a neighbor fix a vanity installation where they used finish nails and glue. The second the stone top went on, the whole thing shimmied. We replaced those nails with structural screws, and you could have stood a horse on that vanity afterward. If your bench is currently making noise, why your mudroom bench is creaking and the hidden screw fix usually boils down to the fact that the fasteners are rubbing against the wood rather than gripping it.
Deploy the Structural Cleat Strategy
If you have heavy cubbies sitting on top of your bench, you need the structural cleat strategy for heavy mudroom lockers. This involves installing a 2×4 or 2×2 cleat that the bench actually sits on, effectively transferring the downward force directly into the wall studs. This takes the pressure off the face frame and prevents the gap from ever returning. It’s a similar concept to 6 heavy duty L-brackets for reinforcing custom built in units, ensuring that the piece is physically tied to the home’s structure. By the time you’ve combined a plywood plate with structural screws and a support cleat, your bench will be the safest place in the house during a storm.
Why Your Level is Actually Your Worst Enemy
Everyone tells you that ‘level is king,’ but in the world of high-end built-ins, that’s a half-truth that often leads to disaster. If you are working in an older home where the floor slopes, a perfectly level bench will create a tapering gap at the base that draws the eye straight to the flaw. I’ve seen homeowners spend thousands on creative built-ins for seamless storage and home aesthetics only to have the project look ‘off’ because they didn’t account for the house’s settling. The pro move isn’t just leveling; it’s scribing. Using the scribing hack for fitting vanities against out-of-plumb walls allows you to trim the wood to follow the exact contour of your floor and walls. This creates the illusion of a perfect fit, even when nothing in the room is actually square.
Avoid the Bowed Wall Trap Before You Tighten That Screw
Here is a trap I see even seasoned contractors fall into: over-tightening fasteners against a bowed wall. Drywall is rarely flat. If you screw a rigid face frame into a concave wall without shimming the gap first, you will rack the entire cabinet box. This is usually how to fix uneven gaps in custom built-in doors—it’s not a hinge problem; it’s a structural distortion problem. You’ve effectively pulled the box out of square. Always check the wall with a long straightedge first. If you see light behind it, shim that space before the screw goes in. According to the National Kitchen & Bath Association (NKBA), structural integrity in cabinetry relies on keeping the box ‘plumb, level, and true,’ which is impossible if the wall is forcing the wood into a curve.
Why is your heavy quartz vanity cracking the cabinet frame?
We are seeing a massive trend toward heavy stone tops in 2025, but many people don’t realize that standard cabinetry isn’t designed for that vertical load. If you’ve noticed hairline fractures or doors that suddenly stick, why your heavy quartz vanity is cracking the cabinet frame usually comes down to a lack of internal bracing. You need 6 heavy duty wall fixes for massive quartz top vanities to distribute that weight. I once worked on a master bath where the homeowner used a beautiful expert guide to flawless vanity installation but skipped the corner blocks; six months later, the 3cm granite had crushed the particle board gables. Have you ever fallen into the ‘it looks level but looks wrong’ trap? Let me know in the comments.
Don’t Forget the Invisible Threat of Humidity
Finally, let’s talk about what happens after the tools are put away. In mudrooms and bathrooms, moisture is your silent enemy. Even a perfectly anchored bench can fail if the wood swells and shrinks, loosening your fasteners over time. Applying 7 moisture barriers for vanities in high humidity bathrooms is just as important as the screws you choose. Protecting the end grain of your lumber—especially where it touches a tile or concrete floor—prevents the ‘wicking’ effect that leads to rot. It’s these small, hidden details that separate a weekend project from a lifetime fixture.
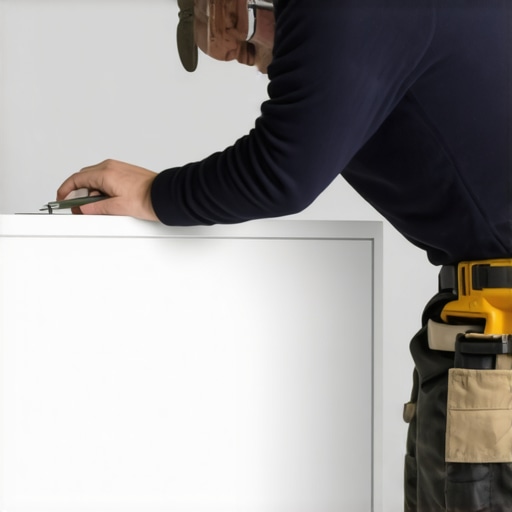
If you’re serious about the long-term survival of your custom work, you need to invest in a real scribing compass. I wasted years with a cheap plastic school compass that slipped every time I hit a bump in the plaster. Now, I use a dedicated Accu-Scribe, and it’s the difference between a gap you can hide with caulk and a fit so tight it looks like the cabinet grew out of the wall. This is especially vital when using the scribing tool for cabinets against textured plaster walls. Having the right mechanical advantage isn’t just about speed; it’s about the precision that prevents structural stress later on.
How do I keep my built-ins from shifting over the years?
The biggest mistake homeowners make is thinking “done is done.” Your house is a living thing that breathes. The USDA Forest Products Laboratory’s Wood Handbook states that wood is hygroscopic, meaning it constantly gains or loses moisture to match its environment. This can lead to a 1×12 board expanding or shrinking significantly across its width. In the first year after using a vanity installation hack, you should perform a “six-month snug-up.” Go back and check your structural screws. You’d be surprised how much a little vibration and seasonal wood movement can loosen a fastener. If you see movement, it’s time to look at how to fix drawer fronts that won’t stay aligned because usually, it’s the cabinet box itself that has slightly shifted under the weight of the home’s settling.
Protect Your Investment from Hidden Water Damage
Keep an eye on the wet zones too. I’ve seen beautiful work ruined because a tiny drip went unnoticed behind a face frame. Routinely check why your vanity plumbing is leaking into the cabinet base before it rots out your bottom shelf. For basements or laundry rooms, I always implement the moisture proof baseboard move for basement built ins to keep that ground-level humidity from wicking into your lumber. Taking ten minutes to inspect your seals every season can save you thousands in a total tear-out later.
Prepare for the Smart Cabinetry Revolution
By 2030, I predict we’ll see built-ins with integrated moisture sensors and smart-leveling legs that can compensate for minor floor settling automatically. We are already seeing high-end European hardware moving toward tool-free micro-adjustments that allow a homeowner to realign a massive wardrobe in seconds. But until those become standard, your best defense is a heavy-duty, manual approach. If your drawers feel sticky, don’t just sand the wood; stop drawer bind on heavy pantry pull outs by checking the rail alignment and lubricating the glides with a dry PTFE spray. My challenge to you: Grab your impact driver this weekend and check the anchors on your heaviest unit—if they move even a millimeter, swap them for structural screws immediately to prevent a future collapse.
Hard Lessons from a Decade of Sagging Shelves
Looking back at my early mistakes, I realized I was treating my built-ins like standalone furniture rather than an extension of the house. Here are the lightbulb moments that changed how I approach every project:
- Drywall is just a decorative skin: I used to think a heavy-duty toggle was ‘fine.’ It is not. If you are not tied into the studs, you are just hanging weight on paper and gypsum.
- The Scribe is your best friend: Your eyes will lie to you, but a scribe tool won’t. Using the scribing tool for cabinets against textured plaster walls is the only way to get that professional, gap-free finish.
- Over-engineering is actually under-stressing: Adding an extra structural cleat feels like overkill until three people sit on the bench at once. It is much better to sleep well than to save five dollars on fasteners.
The Bench-Builder’s Must-Have Gear List
If you are ready to stop the wobble and prevent your built-in face frames from separating from the wall, these are the tools I trust on every job site:
- Accu-Scribe Pro: This is the specific tool that allows for the precision needed for creative built-ins for seamless storage and home aesthetics. It handles curves and bumps that a standard compass misses.
- GRK RSS Structural Screws: These are the gold standard for heavy seating. They have the shear strength to ensure your bench stays put even under heavy loads.
- Zircon StudSensor HD900: Finding the exact center of the stud is the difference between a secure anchor and a hole in the wall that does nothing.
#IMAGE_PLACEHOLDER_E#
Give Your Home the Strength It Deserves
Building something that lasts is not about being a master carpenter on day one; it is about respecting the physics of your home. When you take the time to implement a structural cleat strategy for heavy mudroom lockers, you are not just building storage—you are building peace of mind. Your home is where life happens, and your handiwork should be able to handle every muddy boot and heavy bag that comes its way. Don’t be afraid to pull that bench back off the wall and do it right; the satisfaction of a rock-solid seat is worth every extra screw. Have you noticed a gap forming behind your mudroom bench, or is your installation still holding strong? Let me know in the comments!