It was a typical weekend morning when I finally decided to upgrade my bathroom vanity. I envisioned sleek, modern lines floating effortlessly on my wall, but reality hit hard—literally. As I tried to hang that heavy 2026 floating vanity, I watched in horror as it wobbled, tilted, and even threatened to come crashing down. That moment? A lightbulb went off in my head: mounting heavy vanities isn’t just about screwing into the wall; it’s about *getting it right* so it stays put for years.
If you’ve ever wrestled with an unstable vanity or worried about whether it can handle daily forces, you’re not alone. A poorly mounted heavy fixture can lead to not just aesthetic disappointment but serious safety hazards. After some trial, error, and quite a few missteps (including that embarrassing wobble I had early on), I cracked the code. Today, I’ll share three rock-solid mounting fixes that will transform your installation experience and give you peace of mind.
Why Going Heavy-Duty Matters More Than Ever
With the 2026 models pushing the boundaries of design and durability, heavy floating vanities are becoming the standard choice for modern bathrooms. But guess what? The weight—while impressive—also demands a stronger, smarter mounting approach. Installing a vanity isn’t just about drilling holes; it’s about ensuring those holes, brackets, and the wall support can handle the load long-term.
Early mistakes I made? I underestimated the importance of wall material and used standard anchors for a heavy piece. Turns out, that was a recipe for disaster. According to experts from the Vanity Installation Hacks guide, proper support and reinforcement are critical, especially for sizeable, weighty fixtures. The good news? You don’t have to be a DIY wizard to do it right, but understanding the core principles is a must.
Now, if you’re wondering whether all this effort is worth it—that’s a valid concern. I thought so too before I experienced my first wobble. But once I discovered how these fixes transformed my bathroom into a safe, sturdy space, I realized the importance of doing it once and doing it right. Can’t wait to show you the tricks)
Let’s dive into the steps that will keep your vanity firmly in place, no matter how much weight it bears or how busy your mornings get. Ready? Great! And if you’ve already faced these mounting frustrations, share your experience below—I’d love to hear your stories.
Anchor the Vanity to the Wall Studs for Maximum Support
First, locate the wall studs using a reliable stud finder—think of it as your bathroom’s backbone. Mark the positions clearly. When I installed my vanity, missing the studs led to a wobble that took hours to fix. To prevent this, drill pilot holes directly into the studs using a level to ensure perfect alignment, securing sturdy bracket anchors into these solid points. This method distributes weight evenly and reduces stress on wall materials.
Use Heavy-Duty Hardware for Long-Lasting Stability
Next, select high-quality mounting brackets rated for the weight of your vanity. I once tried cheap anchors—after a few months, one pulled out, causing damage and a mess. Instead, opt for toggle bolts or molly bolts, which expand behind the drywall, providing a secure hold that can handle the load. Always double-check weight ratings and follow manufacturer instructions for best results.
Implement Reinforcement Plates for Extra Strength
If your wall material is weak or you’re installing a particularly heavy piece, add reinforcement plates behind the drywall. These distribute the load over a larger surface area, much like spreading the weight across a broad platform. When I added a steel reinforcement plate before mounting my vanity, it eliminated any wobbling and offered peace of mind. For detailed guidance, refer to the vanity installation guide.
Level and Secure Before Final Fixing
Always use a high-quality level during installation to ensure your vanity is perfectly aligned—no one wants a crooked fixture. Once the brackets are in position, tighten all bolts gradually, checking alignment regularly. When I installed my vanity, rushing the process resulted in adjustments later. Careful, incremental tightening, paired with consistent leveling, ensures a flush, stable finish. Consider using temporary shims to hold everything in place while tightening.
Check and Test for Stability
After installation, give the vanity a gentle shake to test stability. If it wobbles, identify loose points and reinforce them immediately. I learned this the hard way when a slight wobble after several months revealed a loose bracket. Regular inspection—especially in high-traffic bathrooms—ensures your installation remains solid over time.
Additional Tips for Heavy Vanity Installations
For more expert tricks and to maximize your space effectively, visiting resources like this design tips page can be invaluable. Remember, precise placement and heavy-duty support are your best allies in preventing future mishaps and ensuring your bathroom’s safety and style.
 When it comes to bathroom storage solutions, many homeowners operate under myths that can hamper their renovation projects. One pervasive misconception is that simply installing shelves or cabinets will automatically keep things organized. In reality, without considering factors like wall integrity and proper mounting methods—such as reinforcing brackets—you risk future wobbling or even collapse. Experts from the industry leaders warn that neglecting these nuanced details leads to costly repairs and safety hazards.
A common trap involves underestimating the importance of wall material compatibility. For example, using standard drywall anchors when installing heavy built-ins often results in failure. Instead, employing toggle bolts or molly bolts designed for high weight loads is essential. Additionally, many assume that the aesthetics of built-ins are enough, but the real benefit lies in functional design tailored to your space—something best achieved through custom solutions rather than generic imports. This is where custom-crafted built-ins outperform off-the-shelf options.
Have you ever fallen into this trap? Let me know in the comments.
Are Built-In Storage Solutions Truly Seamless or Are We Missing the Details?
Achieving seamless bathroom storage is more complex than it appears. Many installation novices overlook the importance of precise measurement and leveling, leading to crooked cabinets or uneven gaps. This not only spoils visual harmony but also causes long-term wear and tear. My recommendation? Invest in high-quality leveling tools and take the time to plan your layout meticulously—an extra step that pays dividends. For advanced insights, check out modern installation tips that emphasize the nuances of flawless integration.
Another nuance is the importance of proper space planning. Deep cabinets can trap dust and impede access, while shallow shelves may not accommodate larger items. The optimal solution? Custom-designed dimensions that match your daily use. This ensures your storage is both functional and aesthetically pleasing—making your bathroom truly seamless.
Lastly, don’t underestimate the value of reinforcing your wall supports. Heavy fixtures require more than just anchors; they need a reinforced framework to stay level and safe over time. As trendsetting experts advise, integrating steel reinforcement and smart mounting techniques elevates your project from amateur to professional standards.
Thinking about your next bathroom upgrade? Remember, mastering these nuanced details keeps your space safe, stylish, and long-lasting. Dive deeper into the world of installation expertise to ensure you’re not just installing, but creating a functional aesthetic marvel.
How do I maintain my bathroom storage and vanities over time?
Regular maintenance is key to ensuring your bathroom storage and vanity setups stay functional and attractive. Personally, I rely on a combination of specific tools and routine practices. For instance, I always keep a high-quality cordless drill like the Dewalt DCD791D2 on hand. Its lightweight design and powerful torque make tightening brackets and reinforcements effortless, especially when dealing with heavy fixtures or reinforcing plates. Using a cordless drill instead of manual screwdrivers saves time and ensures consistent fastening, preventing loose fittings that can cause wobbling over time.
Another vital tool is a digital level such as the Bosch Digital Feng Shui Spirit Level. It provides precise readings to ensure your cabinets or vanities are perfectly aligned, which is crucial for long-term stability. I use it before tightening all bolts, especially when installing custom-built units where slight misalignments can lead to sagging or gaps after a few months. Additionally, an inspection mirror helps access hard-to-see areas behind or beneath fixtures, making routine checks more thorough.
Beyond tools, software like SketchUp has become indispensable for planning and verifying storage layouts before installation. This 3D modeling helps me visualize spacing, ensure proper clearances, and avoid future adjustments that could compromise stability. It’s particularly useful when scaling solutions for larger or more complex built-ins—predicting potential issues before mounting physically.
When considering long-term performance, using reinforcement plates behind drywall—matched to the wall material—is crucial. As detailed in the article here, these plates distribute the load evenly and prevent sagging or wobbling, especially for heavy floating vanities or built-in cabinets. Investing in high-quality toggle bolts rated for the weight of your fixtures further enhances durability.
Finally, scheduling periodic inspections—every 6 to 12 months—can catch loose fittings or signs of wear before they become serious issues. Use your digital level to verify alignment, and tighten brackets with your cordless drill if needed. This proactive approach preserves your investment, ensures safety, and maintains aesthetics.
Thinking ahead, the trend leans toward integrating smart tools and materials that notify you when fittings loosen or materials degrade. For example, moisture sensors combined with IoT-enabled brackets could signal when reinforcement is needed—an exciting development for future-proofing bathroom setups.
To get started, try incorporating a digital level into your next installation. Its precise readings can make all the difference in achieving a long-lasting, wobble-free vanity. For detailed installation methods, check out this guide for perfect results.
The Hard-Earned Truth About Mounting Heavy Vanities
One of the biggest lessons I learned was that even a small oversight—like ignoring wall stud locations—can compromise safety and durability. That wobbling vanity I faced early on taught me to prioritize precision and robust hardware from the start. Real expertise comes from understanding that every weight-bearing point needs intentional reinforcement, not just superficial fixes.
Another insight? The myth that standard drywall anchors suffice for heavy fixtures is dangerous. Upgrading to toggle bolts or molly anchors was a game-changer for me, offering peace of mind that my vanity stays put. It’s a reminder that investing in quality hardware saves time, money, and stress down the line.
Finally, I realized that reinforcement behind the drywall—like steel plates—can be a project saver. It distributes weight evenly and shields wall materials from strain. This extra step set my installation apart, making it not just secure but also a lasting solution. These lessons, though learned the hard way, now inform my approach to all heavy fixtures, ensuring safety and longevity.
One Reply to “3 Rock-Solid Mounting Fixes for Heavy 2026 Floating Vanities”
Leave a Reply
Related Posts
![Stop Heavy Quartz Vanities from Ripping Out Drywall [2026 Fix]](https://customcabinetrypro.com/wp-content/uploads/2026/02/Stop-Heavy-Quartz-Vanities-from-Ripping-Out-Drywall-2026-Fix.jpeg)
Stop Heavy Quartz Vanities from Ripping Out Drywall [2026 Fix]
I'll never forget the frustration I felt when my heavyweight…
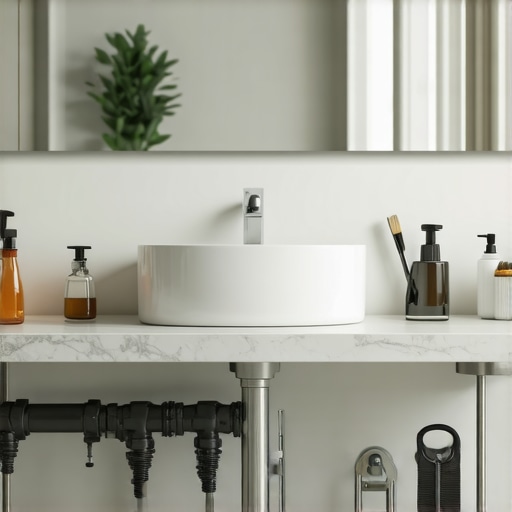
3 Quick Plumbing Fixes for 2026 Floating Vanities
I remember the first time I tried to install a…
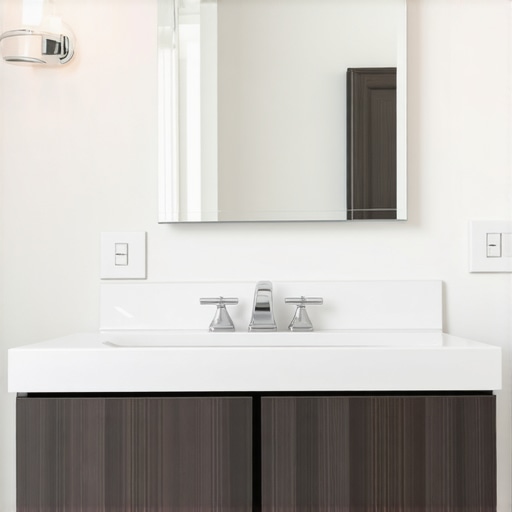
5 Costly Bathroom Vanity Installation Errors to Fix in 2026
I still remember the moment my bathroom vanity slipped unexpectedly…
This post offers some really practical insights, especially about using reinforcement plates behind drywall for heavy vanities. I recently installed a sizeable floating unit in my bathroom and thought the standard anchors would suffice—big mistake! The added reinforcement really made a difference, eliminating any wobbling and giving me confidence in the stability long-term. I’ve learned firsthand how small details like wall material and support hardware can make or break such projects. My question is, what are some tips for ensuring perfect alignment when working with uneven or textured walls? Sometimes, leveling can be tricky, especially in older homes. Would love to hear how others have tackled this challenge effectively! Overall, this was a timely reminder that investing time in proper prep work and high-quality hardware can save you a lot of headaches later on.