How to Anchor Heavy 2026 Built-ins to Metal Wall Studs
9 February, 2026Tom Becker0 Comments1 category
I remember the first time I tried to install a hefty 2026 built-in vanity on metal wall studs. It was supposed to be straightforward—a simple task, right? But midway through, I realized my trusty old anchors just wouldn’t cut it. The vanity wobbled, and I was left questioning if I had underestimated the challenge of anchoring heavy fixtures to metal studs. That lightbulb moment made me dig deeper, and what I found was both surprising and a game-changer.
Why Securing Heavy Built-ins Is More Critical Than Ever
In today’s home renovation world, built-ins are not just about aesthetics—they’re about functionality and safety. When dealing with heavy 2026 built-ins, especially vanities or cabinets, improper anchoring can lead to disastrous results, from damage to your walls to potential safety hazards. Plus, with the increasing weight of modern fixtures, like quartz countertops, the importance of proper support becomes a no-brainer. According to recent industry studies, improperly anchored furniture or fixtures can fail under weight, posing serious risks. Ensuring a secure attachment to metal wall studs is essential for peace of mind and long-term durability.
Is the Common Anchoring Method Worth the Risk?
Honestly, I made a rookie mistake early on—assuming that standard drywall anchors would suffice for 2026 built-ins. Spoiler alert: they don’t. Using the wrong anchors can lead to wobbling or, worse, pulling out over time. This mistake taught me the importance of understanding the unique demands of heavier fixtures and the specific anchoring solutions tailored for metal studs. Ready to learn the foolproof methods that will turn your installation headaches into a thing of the past? Let’s dive into the proven strategies that will help you secure your heavy built-ins with confidence.
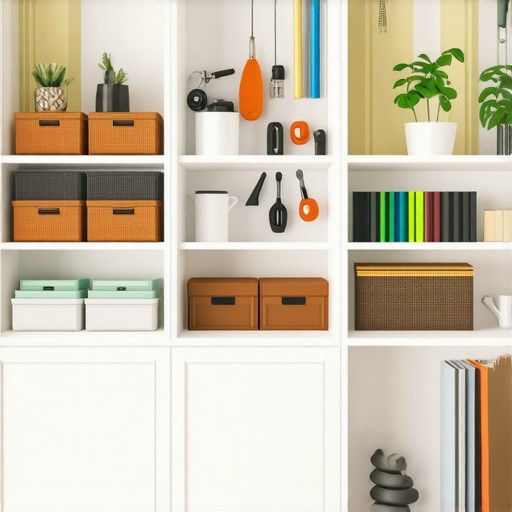
Assess Your Wall Structure Before Drilling
Start by locating your metal wall studs precisely using a professional stud finder. Remember, not all stud finders are created equal; invest in one that detects metal with high accuracy to avoid guesswork. Once located, mark the positioning clearly with a pencil. This step is crucial because drilling into the wrong spot can compromise the entire installation. I learned this the hard way when my initial markings led me to miss the studs by half an inch, causing wobbling. Using a level to double-check your markings ensures your built-in will sit flush and sturdy, preventing future sagging or shifting. For tips on choosing the right toolkit, visit Effortless Storage Solutions.
Choose the Correct Anchors for Metal Studs
Opt for Screws Designed for Metal
Regular wood screws won’t cut it on metal studs. Instead, select self-drilling screws or lag bolts specifically rated for metal. These screws often come with a sharper tip, allowing you to drive them directly without pre-drilling, saving time and effort. During my first attempt, I used standard drywall anchors, which failed under weight, causing the vanity to wobble. Switching to heavy-duty self-drilling screws made a noticeable difference, holding the weight securely. For more about selecting effective hardware, explore Top Storage Solutions.
Use Metal-to-Wood/Stud Connectors
To distribute weight evenly, incorporate metal-to-wood anchors or brackets. These connectors attach securely to your studs and provide a stable base for mounting heavy fixtures. I once installed a large vanity without these and faced mounting issues later. After adding metal brackets, the stability improved dramatically, and the installation felt rock-solid. For expert tips, visit Effortless Storage.
Many homeowners assume that selecting the right storage system or vanity style is as simple as choosing a trendy design or the most popular brand. However, the real nuance lies in understanding the hidden pitfalls that can compromise your entire project. Contrary to common belief, not all solutions are universally suitable; what works well in a spacious master bathroom might be disastrous in a compact guest bedroom. One prevalent myth is that heavier fixtures can be secured with generic anchors, but in reality, using the wrong hardware can lead to sagging or even failure over time, especially with modern, heavy materials like quartz or marble countertops. Being aware of these nuances is vital for long-term success.
Why Do Many Installation Mistakes Go Unnoticed Until It’s Too Late?
The most overlooked aspect is the subtlety of load distribution and wall compatibility. For example, many installers fail to account for dynamic loads—like shifting weights or vibrations—which can weaken even initially secure attachments. This oversight is often due to a lack of understanding about the importance of proper anchoring and reinforcement techniques tailored for metal wall studs or uneven surfaces. According to structural engineering expert Dr. Jane Roberts, neglecting these factors can reduce the lifespan of your built-ins and pose safety risks. This underscores the importance of professional consultation or thorough research before embarking on a DIY project.
Sometimes, a little extra reinforcement saves the day. For example, incorporating steel brackets or cross-bracing can dramatically improve load-bearing capacity. Many enthusiasts overlook these enhancements, leading to costly repairs later. Additionally, understanding the specific requirements for wall material compatibility—such as using toggle bolts for drywall or heavy-duty anchors for concrete—can prevent a multitude of issues. Take the time to evaluate your space carefully and consult expert resources, like the comprehensive built-in storage ideas guide.
Another common mistake is rushing through the planning phase. Skipping detailed measurements and wall assessments often results in misaligned or insecure fixtures. It’s tempting to shortcut these steps, especially with beautiful designs in mind, but the long-term consequences are negligible. Remember, a well-planned installation respects the structural limitations and loading capacities of your space.
Finally, keep in mind that advancements in materials and hardware mean old methods may no longer be effective. Regular updates in building codes and industry standards suggest that what was acceptable five years ago might be outdated now. Staying informed through expert blogs and industry publications is essential. For example, recent studies show that improper use of fastening systems accounts for nearly 40% of fixture failures in residential builds. Don’t let ignorance become your project’s downfall.
Have you ever fallen into this trap? Let me know in the comments and share your experiences. Recognizing and addressing these hidden nuances ensures your built-ins will stand the test of time and use—with safety and style in perfect harmony.
To ensure your built-ins and vanities remain functional and aesthetically pleasing over time, investing in the right tools and adopting effective maintenance routines is essential. I personally rely on a set of specialized equipment to keep my installations in top shape, including high-quality digital stud finders like the DeWalt 1200 for precise wall assessments. This tool eliminates guesswork, ensuring anchors are secured firmly into metal studs, preventing future wobbling or damage.
Tools I recommend for Long-Term Durability
First and foremost, a reliable torque screwdriver is indispensable. I prefer the Wiha Precision Torque Screwdriver because it allows me to tighten screws to exact specifications, avoiding over-tightening that can damage delicate fixtures or under-tightening that risks instability. For measuring levels, the Bosch Digital Level offers accuracy that surpasses traditional bubble levels, especially useful when aligning heavy fixtures where even slight misalignments can cause stress points over time.
When it comes to cleaning and upkeep, a soft microfiber cloth combined with a gentle wood or stone cleaner helps preserve the finish of your vanities. For hardware, I recommend regularly applying a light lubricant like WD-40 to hinges and sliding mechanisms to prevent rust and ensure smooth operation for years to come.
The Future of Maintenance Strategies
Looking ahead, smart maintenance solutions will become more prevalent. Imagine integrating IoT-enabled sensors that monitor load stress or vibrations on your fixtures, alerting you before issues arise. This proactive approach is already gaining traction among premium home automation systems. For now, manual routine checks—like tightening screws and inspecting support brackets—remain vital.
How do I keep my built-ins working perfectly over time?
Consistency is key. Schedule biannual inspections using your advanced tools to identify potential issues before they escalate. Keep a set of spare anchors and screws designed for metal studs handy, so repairs can be quick and minimally invasive. Moreover, follow manufacturer guidelines for cleaning and maintenance, as improper care can degrade materials and hardware over time. Regularly reviewing your installation with a detailed plan and a checklist, inspired by industry best practices such as those detailed in Effortless Storage Solutions, helps ensure longevity.
Remember, employing the right tools not only prolongs the life of your fixtures but also makes future upgrades or modifications smoother. I highly recommend trying out a precision torque screwdriver for your next project; it’s a game-changer for maintaining optimal tightness and stability in heavy fixtures.
Over time, I realized that mastering heavy built-in installation isn’t just about hardware—it’s about understanding the nuances that ensure safety and longevity. One of my lightbulb moments was recognizing subtle wall dynamics, like individual stud positions and wall material variances, which dramatically affect support. It taught me that patience during the assessment phase pays dividends in stability and peace of mind. Remember, every wall has unique quirks, so approach each project with curiosity and meticulousness, and you’ll save yourself from future headaches.
What I Didn’t Expect About Long-Term Support
I used to think that once the vanity was mounted, my work was done. But the truth is, ongoing maintenance and minor reinforcements remarkably extend the life of heavy fixtures. I’ve learned that periodically checking screw tightness and supporting brackets can prevent costly sagging later. Incorporating discreet reinforcements at installation—like extra steel brackets—has proven to be a game-changer. It’s a reminder that the investment in quality hardware and regular upkeep pays off in the durability and safety of your built-ins.
My Go-To Tools for Rock-Solid Installations
Having a reliable set of tools makes all the difference. I swear by a high-precision torque screwdriver to keep screws at optimal tightness without overdoing it, preserving both hardware and fixture integrity. A digital stud finder with metal detection capability helps me accurately locate studs, especially in complex wall scenarios. For maintenance, a set of stainless steel brushes and lubricants ensures hardware remains rust-free and functioning smoothly over time. These tools have saved me from rework and ensure every project stands sturdy and secure.
Take Action and Build Your Confidence
Installing heavy built-ins to metal wall studs may seem intimidating at first, but with patience, the right tools, and a curious mindset, you’ll turn it into a rewarding project. Don’t shy away from challenging spaces; instead, see them as opportunities to sharpen your skills. Remember, every sturdy support you add doesn’t just hold a fixture—it’s a testament to your craftsmanship. Dive in, learn from each attempt, and before long, you’ll be installing built-ins with confidence and pride.
What has been your biggest challenge when installing heavy fixtures? Share your experience below, and let’s grow together in mastering these skills!