I remember staring at my living room one evening, frustration bubbling up as I tried to clear yet another pile of clutter. Despite countless DIY projects, something always seemed to slip through the cracks, turning my space into a chaotic mess just months after I thought I’d finally organized everything. That lightbulb moment hit me hard: I needed a smarter, more tailored solution — something built-in, sleek, and capable of hiding those everyday clutter monsters.
The Real Challenge of Living Room Clutter
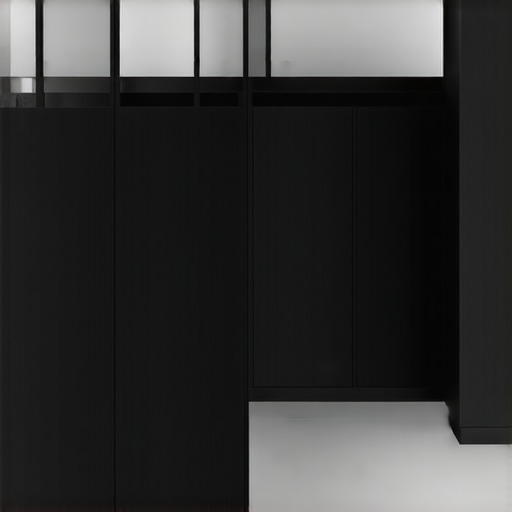
Let’s face it, living rooms are the heart of our homes. They’re where we relax, entertain, and sometimes work. But the more functional they are, the more clutter seems to accumulate. Standard storage options often fall short, leading to unsightly piles on couches or cluttered coffee tables. The struggle is real. I started to realize that traditional furniture simply couldn’t keep up with the amount of stuff I wanted to hide, especially in a modern home that values clean lines and minimalist aesthetics.
I knew I had to get creative and implement solutions that blend seamlessly into my space. That’s when I discovered the power of custom built-in storage. These are designed specifically to maximize your space and hide clutter effectively. Today, I want to share with you the seven fixes I found most effective for hiding that stubborn 2026 living room clutter — practical, stylish, and surprisingly easy to implement.
Is hiding clutter really worth all the fuss?
Early on, I made the mistake of underestimating how much clutter adds up — about 60% of household clutter comes from everyday items that seem to multiply overnight. According to a study by the National Organization for Organizing, clutter not only impacts aesthetics but also affects mental clarity and stress levels.
But here’s the thing: I once dismissed the idea that built-in solutions could truly make a difference. I thought they’d be too expensive or complicated. Spoiler: I was wrong. Properly installed, these fixes can be affordable and transform your living room into a sanctuary of order. Curious? Let’s dive into how you can do it yourself or with professional help. For detailed tips on installation, check out my guide on top installation tips for built-in storage.
Start with Precise Measurements and Planning
Begin by measuring your available wall space meticulously, including alcoves, corners, or underutilized areas. I once decided to convert an awkward corner in my living room into built-in shelving. I used a tape measure and a measuring tape on the wall, marking dimensions with painter’s tape. This step ensures your design fits seamlessly, preventing costly mistakes.
Select the Right Materials and Design Style
Choose materials that match your existing decor—whether sleek MDF, rich hardwood, or modern laminate. For my project, I opted for MDF painted in a neutral tone to blend with my wall color. Consider functionality: do you need open shelves, closed cabinets, or a combination? Resources like creative built-ins can inspire your design.
Build or Purchase Custom Components
If DIY-ing, assemble panels, shelves, and supports with precision, using right-angle clamps and a level to ensure accuracy. I used a carpenter’s square and a bubble level to keep everything aligned during construction. For a professional finish, consider ordering custom components from a supplier—this guarantees a perfect fit and reduces time. Professional help might be necessary for complex shapes or heavy materials.
Prepare and Reinforce Your Wall Surface
Before mounting, examine your wall studs and reinforce weak spots. I installed steel brackets directly into wall studs to support the weight of my shelves, especially since I planned to store heavier items. Use a stud finder to locate studs accurately, and anchor brackets securely with lag bolts. For heavy built-ins, consulting online guides like storage solutions can provide detailed recommendations.
Assemble and Mount Fixtures Carefully
When mounting shelves or cabinets, use a spacer for level placement—imagine it as mounting a picture frame: small adjustment makes a big difference. Secure each component firmly into wall studs or appropriate anchors. I faced some wobbling initially, which I fixed by adding cross-braces behind the fixtures for extra stability.
Finish with Seamless Trims and Paint
Seal any gaps with caulk for a clean look. Painting or staining the built-ins to match your wall color or trim accents creates a cohesive appearance. I painted the edges in a semi-gloss finish, which made my custom shelves look like they were part of the original wall. Small touches like adding decorative trim or molding can elevate the appearance further, akin to the creative ideas discussed in innovative storage solutions.
Test and Adjust for Long-Term Durability
After installation, load the shelves gradually to test stability. I initially overloaded my shelves with heavy coffee table books; when they sagged slightly, I reinforced supports from behind and added steel braces. Regular checks and minor adjustments prevent sagging or wobbling over time, ensuring your living space remains sleek and clutter-free.
While many believe that installation is simply about following step-by-step guides, the truth runs deeper. A widespread misconception is that generic methods suit all spaces, which often leads to costly mistakes and long-term durability issues. For example, assuming that wall studs are always perfectly aligned can cause mounts to wobble or fail over time, especially when dealing with uneven walls. In my experience, meticulous wall scribing and reinforcement are critical details overlooked by most DIYers, risking increased sagging or damage. Another myth is that pre-fabricated units always fit perfectly; however, a significant nuance is customizing dimensions to match unique spaces, which often involves minor scribing and adjustments—details that can make or break a seamless finish. For advanced installations, understanding the load-bearing capacity of your chosen materials is vital. Heavier solutions like stone countertops require steel framing support, not just superficial anchors, as advocated by industry experts. Neglecting this nuance can lead to structural failures and costly repairs later. When installing built-ins, avoid the trap of ignoring the importance of precise measurement and planning of interior hardware placement, which impacts functionality and accessibility. For instance, improper drawer slide alignment might cause jamming or uneven closure, undermining user experience. Want to ensure long-lasting, professional results? Dive into expert tips like top installation strategies or storage ideas for experts. Remember, understanding these nuances can save you time and money in the future, turning a good project into a stellar one. Have you ever fallen into this trap? Let me know in the comments.
Maintaining your custom-built storage solutions and vanities is crucial for ensuring they remain functional, safe, and visually appealing over the years. The right tools, regular upkeep, and a proactive approach can extend the lifespan of your installations, saving you time and money in the long run.
Invest in Quality Calibration and Alignment Equipment
One of the most overlooked aspects of upkeep is ensuring your fixtures stay perfectly aligned. I personally rely on digital laser levels like the Bosch GLL 55 to achieve precise horizontal and vertical lines during routine checks. This tool is lightweight, easy to use, and provides accurate readings within seconds, making it ideal for verifying the alignment of floating vanities or wall-mounted shelves. Regular calibration prevents sagging, wobbling, and uneven closures, maintaining a polished aesthetic.
Power Tools for Repairs and Adjustments
Having a universal cordless drill, such as the Dewalt DCD791D2, has become indispensable in my maintenance routine. Whether tightening loose screws, replacing damaged supports, or re-securing brackets, a quality drill makes repairs effortless. Pair it with a screwdriver bit set that includes Torx, Phillips, and flat-head bits to handle various fasteners encountered in built-in installations. These tools allow quick fixes without risking damage to the cabinetry or wall surfaces.
Adopt a Scheduled Maintenance Routine
Implementing periodic inspections—say every six months—helps catch issues early. Walk around your space, checking for signs of stress like creaking, wobbling, or gaps. For example, I inspect my shelves for sagging supports or loose fittings, tightening or replacing components as needed. Regularly cleaning and polishing surfaces with a gentle wood or laminate cleaner preserves finishes and prevents buildup that may obscure hardware or cause joints to loosen.
Use Specialty Adhesives and Reinforcements
For long-term stability, I recommend reinforcing critical joints with high-strength adhesives like Liquid Nails Heavy Duty. When combined with mechanical fasteners, this provides an extra layer of security against weight strain or accidental bumps. Additionally, steel brackets and braces—sourced from hardware stores—can be added behind or underneath supports to prevent sagging, especially in areas prone to heavy loads.
Understanding Future Trends in Maintenance
In the coming years, automation and smart home integrations will likely influence maintenance practices. Sensors capable of detecting structural shifts or load stress could alert homeowners before visible issues develop, much like recent advancements discussed in industry expert insights. Embracing these technologies now prepares you for seamless long-term care.
If you’re ready to elevate your maintenance game, try installing a digital level as part of your routine inspection toolkit. It’s a small investment that offers significant long-term benefits by highlighting issues before they escalate.
Over the years, I realized that the biggest breakthroughs in managing living room clutter came from embracing unconventional approaches. The lessons I learned from installing built-in storage taught me that sometimes, the most effective fix is a simple tweak that others overlook—like reinforcing a support with steel brackets or customizing a piece to fit those tricky corner spaces. The key is paying attention to details that most DIYers often miss, such as wall stud alignment or load distribution, which makes all the difference in creating truly durable storage. My experience also underscored the importance of blending function with style; knowing that an elegant, built-in cabinet can hide a mountain of clutter while elevating the overall aesthetic inspired me to think outside the box. The takeaway? Never underestimate the power of meticulous planning and small details—they’re the secret sauce that turns good storage solutions into lifelong investments. If you’re ready to elevate your space, consider revisiting the fundamentals with an eye for nuance, and you’ll uncover new possibilities that truly transform your living room ambiance.
Related Posts

Expert Guide to Built-in Cabinets & Storage Solutions Installation
I remember the exact moment I realized I had bitten…
Expert Built-in Cabinets & Storage Solutions for Seamless Spaces
I remember the moment clearly. I opened my bathroom cabinet,…

Smart Built-in Cabinets & Storage Solutions for Modern Homes
Ever opened a closet or bathroom vanity and felt overwhelmed…