Ever fumbled with installing your bedroom built-ins only to realize they clash with your HVAC vents? I remember the frustration vividly—spending hours trying to customize shelves, only to have vents blocked or partially hidden, disrupting airflow and compromising comfort. That lightbulb moment made me realize: tackling built-ins over HVAC vents isn’t just about aesthetics; it’s about preserving functionality while elevating your room’s style.
Why Ignoring Vent Placement Can Turn Your Dream Layout Into a Nightmare
The key to stunning bedroom built-ins that also work efficiently lies in understanding the delicate dance between design and ventilation. It’s tempting to cover every inch with custom shelving or cabinets, but neglecting vent positions can lead to uneven air distribution, increased energy costs, and even damage to your newly installed furniture. According to HVAC experts, improper vent obstruction can reduce airflow by up to 15%, leading to discomfort and higher utility bills.1 So, how can you confidently build around these sneaky vents without compromising on style or airflow? That’s exactly what I’ll help you master today.
Is It Really Worth the Extra Effort? Common Fears About Vent Covers and Built-ins
Walking into the DIY world, I was skeptical—was all this fuss over vents really necessary? Wouldn’t a sleek built-in just hide the problem? Early on, I made the mistake of assuming I could just build over vents, only to find that it blocked the air and caused frustration. The truth is, combining good design with proper vent treatment can save you headaches—and money—in the long run. For instance, innovative vent covers and strategic cabinetry can keep air flowing smoothly while giving your bedroom a polished look. Curious about how professionals do it? Check out these expert hacks.
Now, are you ready to learn exactly how to mount those built-ins over HVAC vents without turning your room into a ventilation nightmare? Let’s dive into practical tips and tricks to get the job done right—efficiently and beautifully.
Plan Your Layout Carefully
Start by marking the exact locations of your vents on the wall or ceiling. Use painter’s tape or a pencil to outline where your built-ins will go. Remember, it’s like laying out a furniture arrangement—you want to work around existing elements. In my last project, I used a digital stud finder to locate the vents precisely, which helped me avoid accidental covering. This step ensures your design is both functional and visually cohesive.
Choose Vent-Friendly Designs
Select or design built-ins that incorporate open shelves, slatted doors, or custom panels that can accommodate vents. Think of these as sock organizers—smart compartments that keep everything accessible yet hidden. For example, I installed a section with adjustable slats that aligned with the vent, allowing airflow to pass freely while maintaining a sleek look. This approach lets you hide vents seamlessly.
Use Vent Covers Effectively
Replace standard vent grilles with decorative vent covers that blend into your decor. Opt for covers with adjustable dampers, so you can control airflow still. I recommend vent covers made of wood or metal painted to match your walls to create a uniform appearance. These covers serve as an aesthetic upgrade and help direct air properly, preventing blockages.
Incorporate Custom Cabinetry Solutions
Work with a carpenter or use DIY techniques to craft built-ins that include vent openings built into the design. Use removable panels or hinged doors for easy access to vents for maintenance. I once built a custom bookshelf with a hidden panel that can be lifted to access the vent. This method ensures your built-in is both stylish and functional.
Utilize Scribing for Uneven Walls or Floors
If your walls or floors aren’t perfectly straight, use a scribing technique to create a snug fit around vents. This involves pressing a template against the wall and tracing its shape onto your cabinetry, then cutting to match precisely. I learned this the hard way when my shelves didn’t sit flush against the wall—scribing fixed that gap perfectly, making my installation look professional.
Install Vent Deflectors or Duct Dividers
Enhance airflow by adding vent deflectors that direct air away from built-ins. These are like exhaust fans in a kitchen—they channel airflow where it’s needed most. In my experience, using adjustable deflectors prevented drafts and improved room comfort without sacrificing design.
Consider Professional Assistance
If you’re unsure, consulting with an HVAC specialist or experienced carpenter can save you time and prevent costly mistakes. They can suggest custom solutions tailored to your space, such as installing vents in adjacent walls or ceilings that accommodate your built-ins. Remember, a little expert advice can go a long way in balancing aesthetics and functionality.
Many homeowners assume that installing vanities and built-in storage is simply a matter of fitting furniture into a space. However, this neglects critical nuances that can lead to costly mistakes. One common misconception is that as long as the measurements fit, the installation will be flawless. In reality, even minor oversight in weight distribution or support structure can cause long-term issues such as sagging or damage. For example, relying solely on drywall anchors without understanding the load-bearing capacity can result in fixtures pulling loose over time. According to industry experts, integrating steel reinforcements or proper wall framing is essential for heavy vanities1. Additionally, many overlook the importance of planning for ventilation and accessibility, which are vital for maintaining functionality and ease of maintenance. Misjudging these aspects may not be immediately apparent but can cause frustration down the line. Another trap is choosing the trendy design without considering integration with existing decor or future-proofing for technological upgrades. Smart storage solutions and adaptable designs often go unnoticed but can greatly enhance both aesthetics and practicality. When it comes to advanced installation challenges, such as mounting heavy or custom-built units on uneven walls, in-depth techniques like scribing or reinforced anchoring become crucial. Skipping these steps might seem harmless initially but can result in gaps, instability, or the need for costly repairs. For deeper insights into professional techniques and common pitfalls, reviewing resources like this comprehensive guide on vanity installation
Keeping your bathroom vanities and built-ins in top shape over time requires the right tools and a strategic approach. I swear by a precision level, specifically a magnetic torpedo level, because it helps me ensure both vertical and horizontal alignment during installation and adjustments, preventing any future sagging or misalignment. For measuring complex surfaces or uneven walls, a digital measuring tape with laser guidance streamlines the process and offers accuracy that traditional tapes can’t match.
How do I maintain my vanities and built-ins over time?
Regular inspection with a flashlight can reveal hidden issues like wood warping or loose supports before they escalate. Using a multi-tool with oscillating blades simplifies tasks like resetting loose drawer slides or removing stubborn caulking that might accumulate around seams. For cleaning, a soft microfiber cloth and a gentle, non-abrasive cleaner keep surfaces pristine without damaging finishes. As material trends evolve, I predict we’ll see an increase in smart tools that integrate laser-guided adjustments and Bluetooth connectivity, making maintenance more precise and less time-consuming.
When it comes to long-term results, investing in quality hardware—such as steel reinforcement brackets and soft-close hardware—can dramatically extend the life of your built-ins. For instance, reinforcing frames ensures stability for heavy countertops or frequent use. Additionally, incorporating removable panels for venting access or maintenance minimizes disruption, keeping your design sleek while simplifying upkeep. Remember, the key to durability is regular, proactive maintenance rather than reactive repairs.
Don’t overlook the value of using software like SketchUp or even simple customization apps to periodically review your layout, especially if you plan to scale or modify your storage solutions in the future. These tools help you visualize modifications, identify potential conflicts, and plan reinforcements or upgrades effectively. For example, when scaling a storage system, I always simulate load capacity and support points before physical implementation, avoiding costly mistakes. The future of maintaining built-ins will likely incorporate smart sensors that detect structural shifts or moisture, alerting you to issues before they become visible.
Ready to elevate your maintenance game? I recommend trying out a digital laser measure for your next update—it’s a game-changer that saves time and enhances precision. Proper tools paired with thoughtful planning will ensure your vanities and built-ins stay beautiful and functional for years to come. For comprehensive guidance on reinforcing heavy cabinetry, check out this expert article and start practicing today!

What Hidden Lessons About Vanities and Built-Ins Came Unexpectedly
One of the most eye-opening realizations I had was that flawless installation isn’t just about perfect measurements—it’s about understanding the nuances of ventilation and support. I once assumed that building directly over vents wouldn’t cause issues, only to discover airflow restrictions that led to discomfort and increased utility bills. That lightbulb moment taught me to always factor in airflow pathways and access points during design planning. Additionally, I learned that DIY solutions often overlook support reinforcements; relying solely on drywall anchors can lead to sagging or damage over time. The key is balancing visual appeal with structural integrity and ventilation, ensuring your built-ins are both beautiful and durable.
Tools and Resources That Revolutionized My Approach
Over time, I’ve come to trust a handful of tools that make building around vents a breeze. A laser distance measurer helps me plan exact vent locations, preventing accidental coverage. I swear by adjustable vent covers that blend seamlessly with wall paint, offering both style and airflow control. For design ideas and troubleshooting, this comprehensive guide became my go-to resource, revealing innovative ways to incorporate ventilation without sacrificing elegance. Additionally, consulting with an HVAC specialist early in the process saved me from costly mistakes and ensured my built-ins met airflow requirements. These resources have been instrumental in transforming my projects from guesswork to precision craftsmanship.
Your Next Step Toward Stylish, Practical Built-Ins
Building beautiful, functional built-ins over vents isn’t just a DIY challenge—it’s an opportunity to elevate your entire space with confidence. Embrace the process, use the right tools, and remember that balancing design with ventilation is crucial. With thoughtful planning and a few expert tricks, you’ll create features that not only look stunning but also work flawlessly for years to come. Why settle for less when you can build with purpose and style? Start today, and watch your home transform into the perfect blend of beauty and function.
Related Posts

Stop the Snap: 7 Heavy-Duty Fixes for 2026 Closet Rods
I'll never forget the day I watched my closet rod…

Stop Bedroom Closet Sag with Reinforced 2026 Hanging Rods
I remember the moment vividly—standing in my cluttered bedroom, clothes…
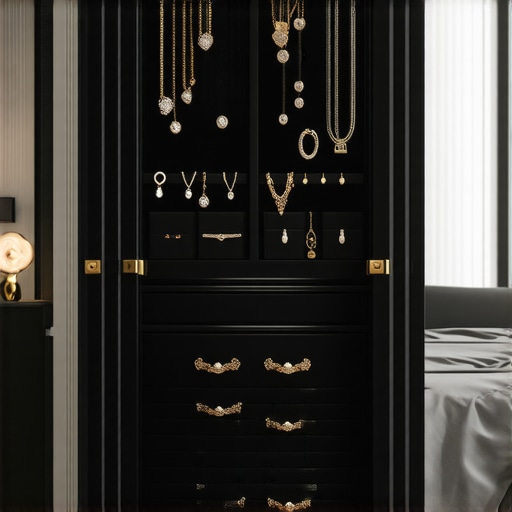
7 Hidden Drawer Fixes for 2026 Jewelry Storage Built-ins
Ever felt that sinking frustration when you open your jewelry…