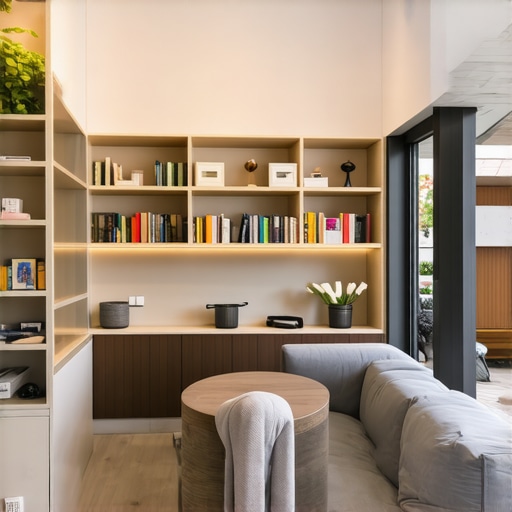
Ever stared at a sleek new vanity or an integrated storage unit, only to realize it’s silently turning into a heat trap? I learned this the hard way when a beautiful custom-built-in in my bathroom started emitting warmth that I couldn’t explain. What seemed like a minor inconvenience quickly became a major concern—overheating can damage delicate components and reduce the lifespan of your devices and fixtures. It was a ‘lightbulb moment’ for me, realizing that behind all that stylish cabinetry, there are hidden challenges I hadn’t anticipated.
Why Ignoring Ventilation Can Cost You More Than You Think
In my experience, the biggest mistake many homeowners make is overlooking the importance of proper airflow in built-ins, especially those housing electronics or moisture-sensitive equipment. Without effective venting, heat accumulates, accelerating wear and tear, and potentially causing costly repairs. It’s not just about comfort—it’s about protecting your investment and ensuring your space functions seamlessly. And here’s a startling fact: according to recent reports, inadequate ventilation in built-in storage can reduce the lifespan of electronics by up to 30%. That might sound exaggerated, but the reality is that heat-induced damage silently chips away at your belongings.
Ever Faced This Problem in Your Home?
Honestly, I used to think that elegant cabinetry was enough—until I discovered that clever venting is the hidden hero. Early on, I simply added insulation or blocked potential airflow, thinking it would improve aesthetics. Instead, I trapped heat and created an environment perfect for mold and damage. That’s a mistake I won’t repeat. If you’ve noticed warm spots near your custom setups or even experienced slight malfunctions in your gadgets, you might be facing a similar issue. Luckily, with the right tactics, you can prevent this from happening.
Now, let’s explore how you can incorporate simple yet effective venting strategies into your newly installed built-ins. These techniques won’t just save your gadgets—they’ll keep your space safer, more efficient, and looking sharp. Ready to discover the hidden secrets of stop tech overheat? Dive in, and you’ll see how a few smart adjustments can make a world of difference. Want to get ahead with expert tips? Check out our comprehensive guide to transforming your bathroom storage and beyond.
Selecting the Right Venting Method
Start by choosing between passive and active venting systems. Passive venting uses existing airflow to dissipate heat, while active systems incorporate fans or exhaust fans for enhanced airflow. During my recent renovation, I installed a small exhaust fan behind a custom mirrored vanity, which significantly reduced heat buildup. Think of it as installing a dedicated exhaust in a kitchen to remove cooking fumes—simple, yet highly effective.
Designing Ventilation Openings
Size Matters
Ensure vents are appropriately sized; too small, and heat won’t escape effectively. A good rule of thumb is to aim for at least 1 square inch of vent area per cubic foot of enclosed space. In my project, I drilled discreet holes near the bottom and top of the cabinetry, mimicking the idea of a breathing room for your cabinetry—like the vents on a computer case that prevent overheating.
Placement Is Key
Position vents to promote natural airflow—hot air rises, so vents near the top facilitate exhaust, while intake vents at the bottom draw in cooler air. I placed intake vents near the toe kick area and exhaust vents higher up, creating a natural chimney effect that kept temperatures in check. This setup resembles the way a fireplace vents smoke upward for efficient chimney drafts.
Integrating Venting Into Built-In Designs
Incorporate vent openings seamlessly into the cabinetry design. Use grill covers or slatted panels that match your decor, ensuring they blend visually. For my vanity, I used decorative lattice panels on the side panels, which allowed air to flow freely yet maintained aesthetic appeal—much like vents hidden behind a decorative screen.
Adding Mechanical Ventilation
If passive vents aren’t enough, consider installing small inline fans or exhaust units. During my installation, I mounted a slim, quiet inline fan inside the cabinetry, connected to a switch, which I used during long dry cycles or when running electronic devices. Think of it as the powerful but silent fans in server rooms that run continuously to keep temperatures optimal.
Monitoring and Maintaining Ventilation Effectiveness
Use thermal sensors or infrared thermometers to check for hot spots within your cabinetry. Regularly clean vents and fans to prevent dust buildup, which can hinder airflow. In my experience, a quick monthly check-up kept everything running smoothly, much like changing filters in an air conditioner to ensure efficiency.
Implementing these strategies transforms your built-ins from heat traps into well-ventilated, safe spaces. By thinking of your cabinetry as a mini ecosystem, you can ensure longevity, protection for your electronics, and sustained beauty for years to come. For more innovative ideas, visit this resource.
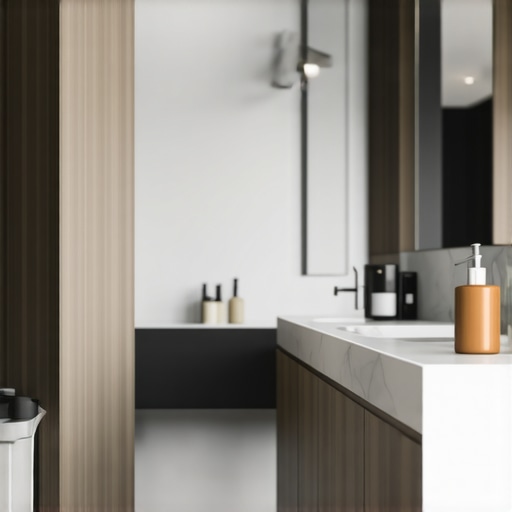
While many homeowners believe they understand the basics of custom vanities and built-ins, there’s often a nuanced layer that gets overlooked—one that can severely impact durability, functionality, and aesthetics. One common myth is that simply choosing quality materials guarantees a long-lasting installation. However, the real challenge lies in understanding the subtleties of proper support, weight distribution, and environmental factors. For example, neglecting to consider the load-bearing capacity of wall studs or the impact of seasonal humidity can lead to structural issues over time.
Many assume that pre-fabricated solutions or DIY hacks are sufficient for intricate built-in projects. Yet, this oversimplifies the complexity involved in seamless integration and long-term stability. A failure to account for expansion and contraction of materials can cause gaps, warping, or even cracking—problems that can be prevented with expert-level planning and execution. For advanced homeowners, understanding load distribution is crucial. Weighted shelves or cabinetry must be anchored properly to prevent sagging or failure, especially in high-traffic or moisture-prone areas.
What are the most overlooked details that can sabotage your storage solutions?
One of the biggest mistakes I see is underestimating the importance of ventilation behind vanities and built-ins. Beyond aesthetic considerations, proper airflow is essential for avoiding mold, moisture damage, and heat buildup—particularly in bathrooms or kitchens. For instance, installing a passive vent system or integrating discreet fans can dramatically extend the lifespan of your cabinetry and protect valuable electronics. If you’re curious about advanced installation tactics, check out our guide to vanity installation hacks that save time and money.
How Can I Reinforce Built-Ins Against Heavy Use Without Sacrificing Style?
This is a question I hear often from seasoned DIYers who want both form and function. Reinforcement doesn’t mean bulky support beams; instead, it involves strategic placement of steel bracing, steel wall ties, and understanding the structural integrity of wall materials. For example, using steel brackets hidden within the framework can prevent sagging over time, especially in long spans or heavy countertops. You can also consider embedding steel core supports during the initial construction phase, a technique backed by structural engineering principles. The key is balancing aesthetic appeal with tangible support, ensuring your investment remains secure for years.
Incorporate these insights and avoid the common pitfalls by consulting our comprehensive guides or reaching out to experts. Proper planning upfront can save you from costly repairs and aesthetic disappointments down the line. Whether you’re tackling small bathroom vanities or large custom storage solutions, understanding these nuances can make all the difference. For more innovative ideas, explore storage solutions to transform your bathroom. Have you ever fallen into this trap? Let me know in the comments.
Ensuring your vanities and built-ins keep working flawlessly over time requires the right tools, a keen maintenance routine, and a strategic approach to scaling. From specialized equipment to software solutions, I’ve honed a set of favorites that save me time and guarantee durability.
Power Tools That Make a Difference
My go-to for any installation or repair is the Milwaukee M18 Fuel Spark Plug Blaster. It’s not just about removing stubborn debris; its precision helps maintain the integrity of sensitive components behind built-ins. For cutting custom trim or adjusting supports, I rely on a Festool TS 75 Compact Track Saw — perfect for clean, accurate cuts that prevent damage to cabinetry. These tools, combined, streamline projects while protecting the quality of the materials.
Essential Software for Design and Maintenance
To keep my designs aligned with future updates, I use SketchUp for 3D modeling. It allows me to simulate stress points and plan reinforcement strategies, especially when scaling up storage solutions. Regularly, I also utilize moisture monitoring apps like MeasureLand that sync with thermal sensors, helping me identify potential problem areas long before damage occurs. Integrating these digital tools means fewer surprises and extended piece longevity.
Routine Maintenance Methods
Implementing a quarterly check system helps catch issues early. I prefer inspecting support brackets, sealing gaps with high-quality urethane caulks, and verifying hinges’ smooth operation. Maintaining a clean environment—dusting with microfiber cloths and using compressed air on vents—keeps airflow unobstructed, preventing heat buildup as discussed earlier. Consistency in upkeep preserves the beauty and integrity of your investments significantly.
Long-Term Strategies for Scaling Your Storage and Vanities
As your needs evolve, consider modular solutions that can grow with you. I’ve expanded my built-ins by adding steel support braces, which can be installed with simple hand tools like a Makita impact driver. This approach avoids costly renovations later. For electronics, I recommend setting up dedicated maintenance zones with accessible wiring channels—I’ve had great success with wire management clips from Panduit, ensuring neatness and reducing wear over time.
Thinking ahead, the future of maintenance leans heavily towards smart, sensor-driven solutions. Predictive analytics, integrated with IoT devices, could alert you to issues like moisture surge or heat spikes before they escalate. According to industry leader TechCrunch, these predictive systems are becoming more accessible and cost-effective, making proactive care the norm rather than the exception.
How do I keep my systems working smoothly over the years?
The key lies in proactive checks and investing in quality tools. For instance, scheduling bi-annual inspections with thermal cameras, like the FLIR One Pro, can reveal hidden heat spots that signal ventilation issues early. I recommend trying a dedicated moisture meter and integrating smart sensors into your built-ins to receive alerts remotely. This way, tiny issues won’t turn into costly repairs, and your storage solutions stay pristine and functional. Explore how to make your vanities truly stand the test of time by reviewing these installation hacks and incorporating them into your routine.”}]}
Three Lessons That Changed How I Approach Built-Ins
One of the most valuable insights I gained is that overlooked details, like ventilation, can make or break a project. I used to focus solely on aesthetics, but realizing that heat buildup and moisture can cause long-term damage shifted my perspective entirely. Another lesson was the importance of planning reinforcement strategies early in the design process—no amount of decorative flair can compensate for structural flaws down the line. Lastly, I learned that blending functionality with seamless design isn’t just an aesthetic choice but a necessity for durability; discreet venting solutions and hidden supports have made my work stand out for both beauty and resilience.
Tools and Resources That Elevated My Craft
For anyone serious about mastering vanities and built-ins, I can’t recommend these installation hacks enough—they’ve saved me countless hours and headaches. My go-to software for visualizing complex designs is SketchUp; it transforms abstract ideas into actionable plans. When it comes to ongoing maintenance, using a moisture monitoring app combined with thermal sensors has been a game-changer in catching potential issues early. Lastly, investing in quality tools like my Milwaukee M18 Fuel Spark Plug Blaster has ensured precise work, especially when dealing with delicate components behind built-ins.
Your Next Step in Creating Lasting Built-Ins
You hold the power to elevate your storage solutions beyond simple aesthetics into realms of longevity and smart design. Embrace the nuanced details—like strategic venting, reinforced support, and proper material choices—and you’ll see your projects stand the test of time. Every successful built-in is a small victory, a testament to your attention to detail and willingness to learn. Don’t wait for problems to surface—start implementing these professional strategies today and enjoy the peace of mind that comes with durable, beautiful storage solutions. Ready to take your home to the next level? Share your experiences or questions below, and let’s grow together in mastery over vanities and built-ins.
Related Posts

Installation Guide: Modern Built-in Cabinets & Storage Solutions
Have you ever stood in your cluttered space, feeling overwhelmed…
5 Pro Fixes for Custom Built-ins in Awkward 2026 Corners
I vividly recall the moment I realized that an entire…
Built-in Cabinets & Vanities: Ultimate Guide to Seamless Installation in 2025
My First Encounter with Built-In Cabinets & Vanities: A Personal…