One morning, I caught my reflection in the mirror as my robot vacuum unexpectedly rolled out from its concealed spot, wobbling awkwardly. It was a lightbulb moment—my entryway bench, though stylish and functional, had become an unintentional stage for my clever little cleaning companion to expose itself, disrupting the sleek vibe I worked so hard to achieve. Have you ever felt that pinch of frustration when your home’s design is compromised by tech quirks? You’re not alone.
Why Concealing Your Robot Vacuum Matters More Than Ever
The way we design our homes now, blending technology seamlessly with aesthetics, can sometimes backfire. When a device like the 2026 Robot Vacuum is left exposed or poorly integrated, it’s not just about appearances; it’s about maintaining a tidy, clutter-free space that feels both modern and welcoming. A study by the National Association of Home Builders highlights that integrated storage solutions can increase home value and livability, but only if executed thoughtfully. Early on, I made the mistake of installing a basic hidden compartment without considering weight support, leading to sagging issues that took days to fix. That experience underscored how crucial it is to plan for both form and function.
Will a stealth entryway bench really hide the vacuum—and keep it accessible?
Let’s face it: the challenge isn’t just hiding the vacuum; it’s doing so without making it a hassle to access for daily cleaning. Are some mods overhyped or actually worth the effort? I’ll share proven strategies I’ve used that strike the perfect balance. Ready to turn your entryway into a sleek, tech-friendly space? Let’s dive into the specific mods that transformed my home—and can do the same for yours.
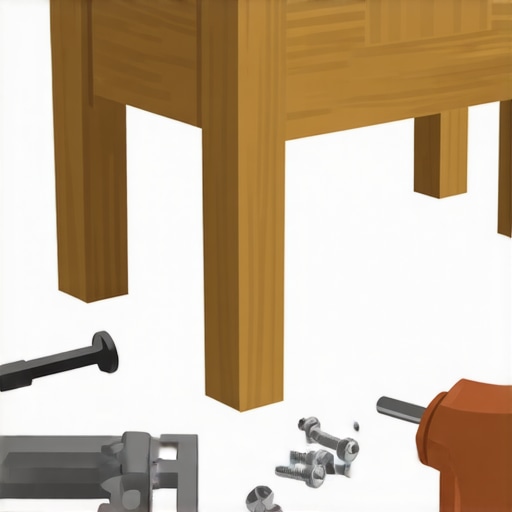
Building a Hidden Storage Compartment
Start by measuring your robot vacuum’s dimensions accurately, including height, width, and depth. I once made the mistake of rushing this step, resulting in a tight fit and frequent jamming. Use these measurements to plan a custom compartment within a sturdy piece of furniture or a dedicated bench. Consider using built-in storage ideas for inspiration. Select durable materials like plywood or MDF, which are easy to work with and can be painted to match your decor. Cutting the compartment should be precise; I recommend marking carefully and using a fine-tooth saw to avoid splintering. Secure the sides with corner brackets and reinforce the base with additional support, especially if you plan to place heavier items on top.
Creating Easy Access Without Compromising Looks
Design a lid or door that opens smoothly, mimicking a drawer or panel. I retrofit a hidden panel using installation hacks with soft-close hinges to ensure quiet operation. Use a magnetic catch to keep the door shut when not in use, providing a sleek, flush appearance. During my first attempt, I underestimated the importance of aligning hinges properly, leading to misalignment. Take your time to mark the hinge placements meticulously and test several times before securing fully. This approach ensures effortless access for daily cleaning and maintains a clean aesthetic.
Stealth Entryway Bench Modifications
To reinforce the furniture and prevent sagging or wobbling, upgrade your entryway bench with steel brackets. I installed steel L-brackets underneath, similar to bracket fixes for heavy vanities, which provided sturdy support without sacrificing style. Drill pilot holes to avoid splitting the wood, and secure the brackets with heavy-duty screws designed for furniture. Once fixed, load it gradually to test stability—this hack transformed a creaky bench into a solid piece, ready to handle daily use.
Camouflaging the Vacuum and Cables
Hiding the vacuum’s charging cables prevents visual clutter. Use adhesive cable clips along the back and underside of your custom compartment, routed discreetly to outlets behind the furniture. For a cleaner look, consider installing recessed cable ports, similar to cable route fixes. I hid the cables beneath a false panel that I painted to match the wall, making them virtually invisible. This not only keeps your space tidy but also prevents tripping hazards and accidental unplugging.
Final Integration and Testing
Once everything is assembled, thoroughly test the access mechanism, stability, and the hiding of cables. Move the vacuum in and out multiple times, checking for ease of reach and concealment. I found that adding a small lip at the edge of the panel helped prevent accidental slamming and preserved a seamless look. Adjust hinges and clips as needed. With these steps, your entryway becomes a functional, stylish space where tech gadgets hide in plain sight, maintaining your home’s sleek aesthetic and convenience. For detailed guidance on installation techniques, or to consult with experts, visit our contact page.
Many homeowners assume that installing built-in furniture or storage solutions is straightforward, but there’s a depth of nuance often overlooked even by seasoned DIY enthusiasts. A prevalent misconception is that a clean, minimalist look can be achieved simply by choosing sleek materials and minimal hardware. However, the real challenge lies in understanding load-bearing capacities, material compatibilities, and long-term stability—factors that can make or break your project. For instance, using standard drywall anchors for heavy-duty built-ins can lead to disastrous sagging over time, an issue easily avoided by employing steel framing techniques or specialized anchors, as discussed in our comprehensive guide on heavy-duty anchoring solutions.
Why do so many people get the installation wrong, even with detailed plans?
The mistake often stems from underestimating the importance of precise measurements and structural reinforcement, especially in older homes where walls may not be perfectly plumb or studs may be spaced irregularly. This oversight results in wobbly shelving, misaligned panels, or worse, structural damage. A key lesson is investing in thorough site assessments—using a laser level or stud finder—to ensure your foundation is solid before proceeding. Additionally, selecting hardware suited for the specific load requirements prevents common issues like shelf sagging or panel bowing. Remember, a well-designed built-in isn’t just about aesthetics; it’s about durability and safety that stands the test of time.
How can advanced construction techniques improve your built-in projects?
Employing methods like steel framing, hidden steel brackets, and reinforcement with steel wall plates can drastically enhance your project’s longevity. For example, integrating steel brackets behind a vanity provides additional support for heavy countertops and resist sagging, especially in moisture-prone environments. Experts underline that these sophisticated tactics, often underutilized in DIY projects, contribute immensely to stability. To navigate these advanced options confidently, consider consulting specialists or exploring our detailed technical guides available on our website, such as the steel bracket fixation techniques. Remember, investing in these nuanced solutions can save you from costly repairs and frustration down the line.
One common trap is neglecting to account for environmental factors like humidity, temperature fluctuations, or vibrations, which can compromise the integrity of your installation over time. For laundry rooms, kitchens, or bathrooms where moisture is intense, opting for waterproof adhesives and corrosion-resistant hardware is essential. Moreover, precise planning for cable routing, ventilation, and future access ensures your built-ins remain functional and neat without requiring frequent modifications. The subtle details—such as adding a small lip to prevent tools from falling behind or reinforcing corners with steel brackets—are often what separate an average installation from an outstanding one. For more insights into these advanced practices, check out our dedicated articles on vanity installation methods and effortless storage solutions.
Have you ever fallen into this trap? Let me know in the comments and share your experiences or questions about perfecting your built-in projects. Remember, understanding these hidden nuances can turn a decent DIY project into a professional-quality installation that stands the test of time.
Investing in the Right Tools for Durable Installations
Maintaining your built-in furniture and storage solutions over time demands precision and quality. I personally rely on a laser level like the Bosch GLL 55 to ensure perfectly aligned installations, especially when dealing with wall-mounted vanities or custom shelving. Its self-leveling feature saves me from tedious manual measurements and guarantees consistent results. For fastening heavy panels or supports, I prefer steel stud anchors such as the Simpson Strong-Tie TS internal braces, which provide exceptional load-bearing capacity and prevent sagging or detachment in high-humidity environments.
Additionally, a cordless impact driver from Milwaukee or Makita speeds up assembly, allowing for effortless tightening of brackets and screws — crucial for long-term stability. I avoid cheap drill bits or screwdrivers, as they can strip or damage materials, leading to costly repairs later. Investing in these reliable tools delivers peace of mind, ensuring your installations stand the test of time and usage.
Software and Planning Strategies that Extend Your Built-ins’ Lifespan
Meticulous planning with software like SketchUp or AutoCAD, which I use personally, helps visualize support loads, cable routes, and ventilation. Accurate digital models enable you to preempt issues such as sagging or electrical obstructions, saving time and resources during installation. For example, I simulate support weight distribution to confirm that steel brackets or reinforcements will handle the anticipated load, especially in custom vanities with heavy countertops.
Embracing these digital planning methods not only enhances precision but also reduces the likelihood of costly repairs down the line. As technology progresses, integrating smart sensors into your built-ins—monitoring humidity or weight—will become standard practice, further extending durability. Predicting future trends, I believe that IoT-enabled monitoring systems will help homeowners detect structural stress before deterioration occurs.
How do I maintain my built-in solutions over time?
Regular inspections are key. Check for loose screws, misaligned panels, or signs of wear—especially in moisture-prone areas. Applying a fresh coat of protective sealant or water-resistant finish every few years can prevent warping or rot. Maintaining a balanced environment with proper humidity control reduces expansion and contraction cycles, which are often culprits behind early failure. I recommend using a digital hygrometer to monitor indoor moisture levels, keeping them below 50% to minimize wood distortion.
Incorporating these tools and habits guarantees your investments remain functional and attractive. For advanced stabilization techniques, I suggest exploring steel reinforcement options like the steel-plate reinforcement guides. With the right equipment and maintenance routine, your built-in features will serve you reliably for decades. Ready to try a high-impact tip? Start by installing steel wall brackets behind heavy vanities—this is my go-to method for preventing long-term sagging and damage. For personalized guidance or expert support, don’t hesitate to reach out to us.
Over the years, I’ve realized that one of the most overlooked yet crucial aspects of successful built-in projects is patience. Rushing through measurements or choosing the first hardware store option often results in misaligned, unstable fixtures down the line. The lightbulb moment for me was understanding that the devil truly is in the details—investing extra time in precise measurements, reinforcement, and testing transforms a good installation into an enduring one. Remember, every successful built-in in my home has been a result of waiting for the right tools and taking the time to plan thoroughly; it’s a lesson worth embracing as you embark on your own projects.
Unspoken Gems That Elevated My Built-Ins Experience
- Smart Planning Before You Cut: Using digital tools like SketchUp took my visualization from guesswork to accuracy, saving me countless adjustments later. Trust me, a well-executed plan is your best investment.
- Prioritize Reinforcement: Steel brackets and steel wall plates might seem like overkill initially, but they are the backbone of longevity—especially in high-humidity environments or when supporting heavy countertops. These small additions pay big dividends.
- Don’t Neglect Environment: Moisture levels, temperature fluctuations, and vibrations can compromise your built-ins. Incorporating waterproof hardware, moisture-proof finishes, and vibration dampers are often the unsung heroes of durable installations. Be proactive rather than reactive.
- Seek Expert Advice When Uncertain: It’s tempting to DIY everything, but consulting with experienced specialists or reviewing comprehensive guides ensures you don’t overlook critical nuances. Remember, the goal isn’t just aesthetic—it’s safety and durability too.
Tools That Turn Vision Into Reality
- Laser Level (Bosch GLL 55): No other tool improved my installation accuracy more. It’s a game-changer for ensuring perfect alignment and saving time on adjustments.
- Steel Stud Anchors (Simpson Strong-Tie TS): These anchors give peace of mind, especially when supporting heavy or moisture-prone fixtures. They make the difference between a shaky shelf and a steadfast built-in.
- Impact Driver (Milwaukee or Makita): Speed up assembly and ensure tight fastening—crucial for long-term stability. Investing in quality tools like these is a small price for lasting results.
- Digital Planning Software: Whether you prefer SketchUp or AutoCAD, meticulous digital modeling minimizes errors and streamlines your project. It’s a step that pays for itself in saved time and frustration.
Keep Building and Improving Your Space
Remember, each project is a learning journey. With patience, the right tools, and a strategic mindset, your home can seamlessly blend function and style. Don’t hesitate to reach out if you need tailored advice or wish to explore professional options—our contact page is always open for questions or support. Embrace the process, celebrate small wins, and watch your space transform into a testament of your craftsmanship and vision.
What has been the most surprising lesson you’ve learned while customizing your built-ins or vanities? Share your experience below—I’d love to hear your story!
Related Posts
Stop 2026 Entryway Bench Wobble: 5 Hidden Sub-Floor Fixes
Ever stepped onto your entryway bench and felt it wobble…
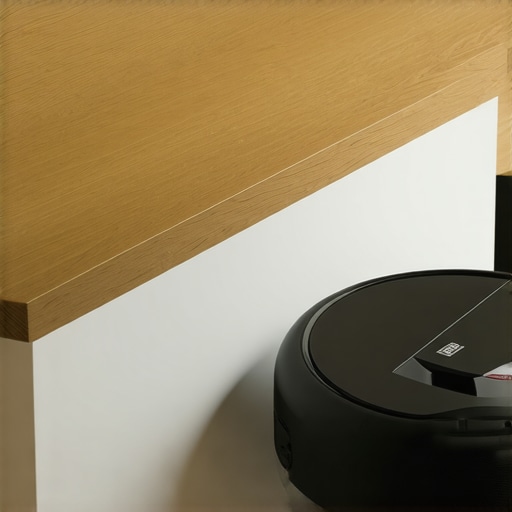
Hide Your 2026 Robot Vacuum: 4 Stealth Entryway Bench Mods
It was one of those mornings where I opened my…

4 Heavy-Duty Mudroom Bench Fixes for Sagging Seats in 2026
Have you ever stepped into your mudroom and immediately noticed…