Ever stepped onto your entryway bench and felt it wobble or creak like it’s about to give way? I remember the moment I first experienced this frustrating shimmy; it was right after I installed my new bench, and I honestly thought I might have overlooked a major step. That lightbulb moment hit me hard — the wobble wasn’t just a minor annoyance, but a sign of underlying issues beneath the surface. If this sounds familiar, you’re not alone. Many homeowners face this problem but often dismiss it as a simple fix when, in reality, it’s more complex.
Why Your Entryway Bench Isn’t Stable and How to Fix It
Before diving into the solutions, let’s understand why this wobbling happens in the first place. The most common culprit is uneven or damaged sub-flooring that causes instability. When the sub-floor is compromised — perhaps due to moisture, shifting foundation, or poor initial installation — your carefully placed bench starts to wobble, creak, or even become a safety concern. Addressing this issue early is crucial to prevent further damage and ensure your entryway remains a welcoming, safe space. Given how often I see this problem in client homes, I can’t stress enough how important it is to get it fixed promptly.
Is a Wobbly Bench Really That Serious?
You might think, “It’s just a little wobble; no big deal.” But over time, this instability can lead to more significant damage, like cracking or splitting of materials, and even pose a safety risk, especially if you have kids or elderly family members. Early on, I made the mistake of simply tightening screws, thinking that would resolve everything. Turns out, the root cause was hidden beneath the visible surface. Relying solely on superficial fixes can be a false economy, so I recommend taking proactive measures by inspecting and repairing the sub-floor. For a comprehensive walkthrough, I highly suggest looking into [step-by-step guide to vanity installation](https://customcabinetrypro.com/step-by-step-guide-to-vanity-installation-for-beginners). It offers insights that can be adapted for your entryway fix too.
Now, let’s explore some of the hidden sub-floor issues that could be causing this instability and how to tackle them effectively. Ready to restore your entryway’s stability? Keep reading — the solutions might be simpler than you think.
Identify the Root Cause of Instability
Start by removing any items from the bench to get a clear view. Use a level to check if the surface is even; if not, note where the highest and lowest points are. Walk around and gently shake the bench to determine if wobbling occurs at the legs or the surface. Remember, the wobble often stems from uneven sub-flooring or loose connections beneath the bench. That day, I faced a wobble that was caused by a slightly sloped sub-floor; simply tightening screws didn’t do the trick, so I decided to address the underlying structure.
Disassemble and Inspect Components
Carefully unscrew or pry off the bench’s legs or supporting framework. Analyze the attachments—look for cracked joints, loose screws, or damaged wood components. Use a flashlight to peer beneath the bench if it has a skirt or paneling obstructing the view. During my repair, I found a couple of loose screws and a small crack in one leg that needed reinforcement. This step helps prevent wasting time on superficial fixes that won’t last.
Level and Prepare the Sub-floor
If uneven flooring contributes to the wobble, consider leveling it or installing a shim system. For minor slants, place self-adhesive shims or adjustable furniture pads under the legs. If the sub-floor is damaged or rotted, remove the affected section and replace it with a new plywood patch. I once renovated a foyer where moisture had warped the sub-floor, and installing a plywood patch with construction adhesive made the base perfectly flat for the bench.
Reinforce and Secure the Components
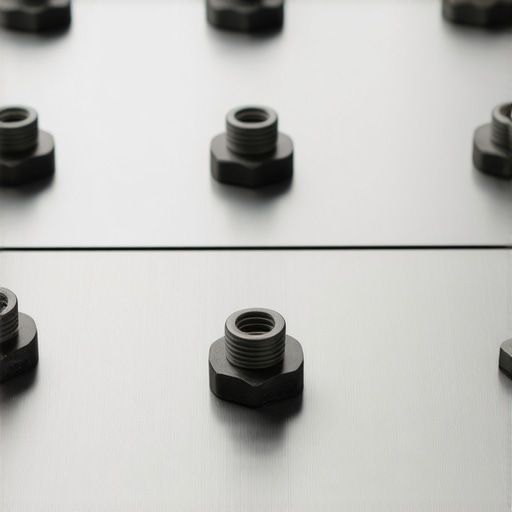
Reattach the legs using appropriate fasteners—preferably long wood screws—adding wood glue to joints before securing. Use a drill with a screwdriver bit for tight connections. For extra stability, install metal reinforcement brackets at joints or support points. When I fixed my bench, I used heavy-duty steel L-brackets at each leg-to-seat junction, which dramatically improved stability and prevented future wobbling.
Install Additional Supporting Elements
If the original structure lacks stability, add cross braces or diagonal supports between legs. For example, attaching a wooden or metal brace from the front-left to back-right leg creates a sturdy triangle that resists wobbling. During one project, I cut a scrap piece of wood into a triangle and nailed it between the legs, turning a wobbly fixture into a rock-solid piece. This technique adapts well to existing furniture where modifying the frame is possible.
Test and Finalize
Before putting everything back, test the bench on all sides. Apply gentle pressure to ensure it remains steady. If it wobbles, identify which supports are still loose or improperly installed. Adjust as needed—tighten screws, re-position shims, or add more braces. Once secure, reassemble the original components carefully.
If you need guidance on disassembly or more advanced fixing techniques, consult the step-by-step guide to vanity installation. Remember, the key is to address the root cause thoroughly rather than applying quick fixes that won’t last. With patience and precise execution, you’ll have a sturdy, wobble-free entryway bench that stands the test of time.
Many homeowners believe that installing built-in storage or vanities is a straightforward task, but the reality is far more nuanced. One prevalent misconception is that off-the-shelf solutions or standard installation techniques will suit every space equally. In my experience, this often leads to poorly integrated or inefficient storage, especially when homeowners overlook the importance of custom measurements and site-specific adjustments. For instance, many assume that a standard vanity height fits all users, but it neglects ergonomic differences and wall angles, resulting in discomfort or misalignment. Exploring advanced mounting techniques reveals that anchors and support systems designed for typical drywall might fail when applied to plaster or brick walls, risking future damage or collapse, as I detail in my guides on [anchoring heavy built-ins](https://customcabinetrypro.com/how-to-anchor-heavy-2026-built-ins-to-metal-wall-studs).Maintaining your built-in furniture, storage solutions, and vanities requires more than just initial installation knowledge; it demands the right tools, regular upkeep, and understanding of long-term care strategies. Over the years, I’ve found that investing in specialized equipment ensures durability and helps prevent common issues like wobbling, sagging, or hardware failure. For example, a high-quality stud finder such as the Zircon MultiScanner is invaluable when locating precise anchoring points behind drywall, especially when installing heavy vanities or wall-mounted cabinets. Its multi-sense capabilities give me confidence that I’m securing fixtures into stable structures, reducing future risks. Additionally, a digital level like the Stabila 37440 ensures that all components remain perfectly aligned over time, crucial when dealing with long-term aesthetic and functional goals. Regular inspections, including checking the tightness of fasteners or the integrity of support brackets, can significantly extend the lifespan of your built-ins. These small steps save time and money, preventing extensive repairs later.
How do I maintain built-ins and vanities over time?
Integrating smart storage solutions, such as adjustable shelves or modular units, can adapt your space to changing needs without requiring complete replacement. Applying a protective sealant or veneer oil annually helps ward off moisture damage or warping, especially in humid environments. I recommend scheduling routine checks every 6-12 months; this proactive approach allows you to catch issues early—like loose screws or minor cracks—before they escalate. For instance, re-tightening support brackets or applying additional reinforcement where needed can restore stability. Remember, consistent maintenance also involves cleaning dust and debris that might accumulate in corners or beneath components, which can impede proper function. As I advise in my detailed guide on [effortless storage solutions for a tidy home](https://customcabinetrypro.com/effortless-storage-solutions-for-a-tidy-stylish-home), using soft cloths and non-abrasive cleaners preserves finishes and prolongs the life of your furniture. Looking ahead, the trend is leaning toward integrating smart hardware—like automated closers or sensor-activated lighting—which not only enhances functionality but also simplifies upkeep in the future. Start today by experimenting with one of these maintenance routines or tools, and watch your built-in investments stand the test of time.
Lessons from the Wobble Trap That Changed My Approach
One of the most valuable lessons I learned was that superficial fixes, like tightening screws or adding shims, are just Band-Aids. True stability requires digging into the root causes, such as sub-floor integrity or improper anchoring. This insight transformed how I plan and execute built-in projects, emphasizing thorough inspections and preemptive reinforcement rather than reactive repairs.
Another awakening was realizing the importance of supporting elements that often go unnoticed, like steel braces or cross supports. Incorporating these during installation not only prevents wobbling but extends the lifespan of your custom-built fixtures. I now view these reinforcements as essential investments, much like choosing quality hardware over cheap alternatives.
The third insight was the significance of site-specific adjustments. Every space has unique challenges—uneven floors, wall irregularities, or weight distribution issues. Embracing flexibility and tailoring solutions accordingly ensures that your built-ins remain sturdy over time, avoiding costly reworks or safety hazards.
Tools and Resources That Make a Difference
My go-to toolkit includes a high-quality digital level like the Stabila 37440, which guarantees precise alignment during installation. For locating the best anchoring points in challenging walls, I rely on a versatile stud finder such as the Zircon MultiScanner. Regular inspections with these tools ensure long-term stability and help catch minor issues before they escalate. Additionally, consulting expert guides on installing built-ins efficiently offers invaluable tips that save time and ensure quality work.
Staying Motivated to Build with Confidence
Taking on built-in projects can seem daunting, but each successful fix boosts your confidence. Remember, every wobble you eliminate is a step toward creating a safer, more functional space. Embrace the process—attention to detail and patience pay off with results that last for years. Your home deserves these efforts, and the satisfaction of a perfectly stable built-in can be truly rewarding. So, get inspired, equip yourself with the right knowledge, and start transforming your space today.
Related Posts
7 Heavy-Duty Floor Bolts for 2026 Entryway Benches
It was a cold Saturday morning when I finally decided…

7 Slim Shoe Storage Tactics for 2026 Entryway Benches
Walking into my hallway one busy morning, I realized my…
4 Heavy-Duty Mudroom Bench Fixes for Sagging Seats in 2026
Have you ever stepped into your mudroom and immediately noticed…