I’ll never forget the time I installed a beautiful set of built-in bookshelves in my living room, only to find out they didn’t sit flush against the wall. The gap was a glaring eyesore, and I felt an immediate wave of frustration. It was a lightbulb moment: walls aren’t always perfectly plumb. This unexpectedly common issue can turn a straightforward cabinet installation into a frustrating puzzle.
Why Gaps in Built-ins Can Sabotage Your Home’s Aesthetic and Function
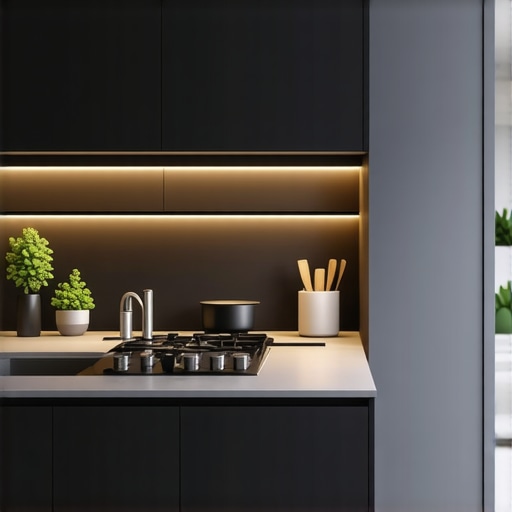
Built-in cabinets are supposed to be seamless, providing both style and storage. But when walls are uneven—something many homeowners overlook—they create those annoying gaps that devalue your project and compromise stability. Ignoring uneven walls can lead to issues like wobbly fixtures, wasted space, and dust traps that make your space look cluttered. According to the National Association of Home Builders, imperfections in wall surfaces are among the top challenges faced during remodeling projects, often overlooked by DIYers. Recognizing this early on saves time, money, and the headache of redoing work later.
Is Fixing Gaps Really Worth the Effort? Why I Almost Gave Up
Early in my journey, I made a crucial mistake: I assumed I could just force the cabinets into place without accounting for wall irregularities. Big mistake. That approach not only looked terrible but also risked damaging the cabinets. Once I understood how to properly scribe and adapt my builds, everything changed. If you’re like I was—skeptical about whether precise fitting matters—consider this: a well-fitted built-in isn’t just about aesthetics. It’s about longevity and your home’s value. For more ideas on enhancing your space, check out built-in storage ideas to declutter and elevate your home.
Are you tired of dealing with unsightly gaps that mar your home’s beauty? If yes, don’t worry. Today, I’ll walk you through how to properly scribe your custom cabinets to accommodate uneven walls, ensuring a perfect, seamless fit.
The Art of Scribing Cabinets to Uneven Walls
Mark Your Walls Accurately Before Cutting
Start by measuring the exact distance between the cabinet’s edge and the wall at several points along the length. Use a pencil to mark these spots, especially where the wall protrudes or recedes. I once installed a built-in bookshelf in my garage where uneven brickwork caused gaps. I measured at multiple points, marked, and transferred these onto the back of the cabinet using a flexible curve.
Bend a Flexible Board or Use Cardboard for the Scribe Line
Next, create a template that follows the wall’s irregularities. Use a thin strip of scrap wood or a large piece of cardboard, bending it gently along the wall’s surface at the marked points. This method helped me trace a precise profile of the wall’s contour, which I then transferred onto the cabinet’s side for cutting. Using this approach ensured a snug fit, even with my uneven wall.
Transferring the Profile Correctly
Clamp the flexible template securely to the cabinet, aligning it with the desired reference edge. Use a pencil or marking knife through the template to trace the wall’s shape onto the cabinet panel. When I did my first scribe, I used a fine marker for clarity. Once transferred, double-check measurements to confirm accuracy before proceeding to cut.
Cutting with Precision
Use a fine-tooth saw or jigsaw to follow the scribed line carefully. Take your time to keep the cut smooth and accurate. I recommend making a series of shallow cuts to gradually approach the line for better control. Remember, it’s easier to trim a little more than to fix a bad cut. This step is crucial for achieving a seamless look, especially when installing detailed cabinetry.
Test Fit and Make Final Adjustments
Place the cabinet into position and check the fit against the wall. Use a flashlight to spot any gaps or high spots. If needed, make small adjustments by sanding or trimming the edges—patience here pays off. In my experience, taking time for a dry fit followed by minor sanding transformed a messy install into a professional finish. For additional tips on optimizing your storage space, visit built-in storage ideas.
Secure the Cabinet Properly
Once satisfied with the fit, securely fasten the cabinet to the wall studs. Use heavy-duty brackets or rebellion anchoring hardware. Remember, uneven walls can sometimes cause wobbling, so reinforce the structure accordingly. For best practices in installation, check out vanity installation hacks. Proper mounting ensures your built-in stays sturdy over time, even in the face of wall imperfections.Many homeowners and even seasoned DIY enthusiasts tend to oversimplify vanity and built-in installations, believing that basic measurements and standard hardware will suffice. However, the real challenge lies in understanding the nuanced details that can make or break a seamless, durable finish. A common myth is that all walls are perfectly plumb and square—this misconception can lead to ill-fitting cabinetry and unattractive gaps if not properly addressed. Expert installers know that walls often have subtle deviations, and recognizing these can save a lot of headaches.
One of the overlooked nuances is the significance of structural support, especially when installing heavy vanities or built-in units. Many assume that anchoring into drywall is sufficient, but in reality, secure fastening into wall studs or using backers is critical to prevent wobbling or sagging over time. Relying solely on developer-supplied fasteners or generic mounting brackets is a mistake that can compromise both safety and aesthetics.

Another false belief is that a perfect finish can be achieved without precise planning and advanced tools. While a simple saw and level can get you started, a laser level and a scribing tool are invaluable for ensuring tight, gap-free fits against uneven walls—something I learned after countless redoes. Advanced cutting techniques, like hand-scribing with a flexible profile or using template guides, can dramatically improve installation quality. If you’re tackling a custom build or renovation, exploring professional tips for vanity installation can help you avoid common pitfalls and achieve professional results.
Madison Reed, an expert in cabinetry, emphasizes that successful built-ins are not just about aesthetics but also about longevity. Proper consideration of room irregularities, material expansion, and securing methods ensures your investment stands the test of time. For instance, high-end designs often incorporate adjustable shims and fillers, which allow for fine-tuning in response to wall imperfections or seasonal shifts.
How Can You Prepare for Unexpected Wall Irregularities during Installation?
Understanding the subtle structural variations in your walls can save you from costly reworks. Use a long, flexible ruler or inspection mirror to detect hidden deviations, and invest in tools like a contour gauge or flexible sanders to adapt your cabinetry accordingly. Remember, optimal results come from anticipating potential challenges rather than reacting to visible flaws after installation. This proactive approach aligns with the latest trends in vanity design advancements and ensures your project remains both beautiful and functional. Have you ever fallen into this trap? Let me know in the comments.Maintaining your custom vanities and built-in storage solutions over time is key to preserving their beauty and functionality. As technologies and trends evolve, so do the tools that make upkeep more efficient and precise. One indispensable tool I personally recommend is a digital angle finder. Unlike traditional bubble levels, a digital angle finder provides exact readings, allowing me to detect and correct subtle misalignments—especially critical when adjusting cabinets for wall irregularities or ensuring doors and drawers operate smoothly. I find it essential during periodic check-ups, preventing minor shifts from becoming major issues, which ties into the trend of smart maintenance approaches. Looking ahead, integrating IoT devices like sensor-based door closers or humidity monitors will likely become mainstream, offering real-time health checks for your cabinetry.
To keep your storage solutions performing impeccably, I also advocate for a high-quality cordless oscillating tool. Its versatility makes tasks from sanding rough edges to cleaning hinges straightforward. For example, removing dust and debris around hinges with a brush attachment keeps mechanisms functioning smoothly, extending the lifespan of your hardware. Pairing this with magnetic screwdrivers simplifies hardware adjustments, minimizing frustration and damage.
How do I maintain my built-ins and vanities over time? Regular inspections and cleaning are vital. I schedule quarterly checks, using my digital angle finder to verify cabinet alignments and adjust as needed. Lubricating hinges with silicone spray prevents squeaking and ensures effortless opening. Additionally, sealing any exposed wood surfaces with a protective finish guards against moisture damage, which is especially important in bathrooms or kitchens.
For larger projects or frequent updates, I utilize a CAD software tailored to cabinetry design. This allows me to simulate modifications and identify potential issues before physical work begins, saving time and resources. As this technology becomes more accessible, even DIY enthusiasts can plan maintenance or upgrades efficiently. For more on optimizing small bathroom spaces—where smart storage plays a big role—consider exploring smart storage solutions.
Remember, adopting proper tools and routine practices not only prolongs the life of your cabinetry but also ensures your investment remains stunning and functional for years to come. If you’re ready to elevate your maintenance game, try implementing a digital angle finder during your next check-up—you’ll be amazed at how much this small investment can save you in repairs down the line.
Through my years of tackling built-in vanities and storage projects, I’ve uncovered invaluable insights that go beyond basic instructions. These lessons, often learned the hard way, can dramatically accelerate your success and elevate your home renovations.
How I Discovered That Flexibility Trumps Rigid Plans
One of my biggest lightbulb moments was realizing that walls are rarely perfectly straight, regardless of how meticulously measurements are taken. Embracing flexible tools like contour gauges and bending templates allowed me to adapt on the fly instead of forcing square pegs into round holes. This adaptability not only saved time but created a seamless finish that mocked professional craftsmanship.
The Power of Preparing For the Unexpected
I learned early on that every wall has its quirks, and rushing into a project without contingency plans leads to frustration. Investing in tools like digital angle finders and inspecting hidden deviations beforehand proved invaluable. It’s a reminder that smart preparation transforms potential obstacles into mere details, making your installation smoother and more satisfying.
Balancing Aesthetics and Durability Requires Mindful Support
Another lesson was understanding that beautiful built-ins must also be sturdy. Reinforcing heavy vanities with steel frames and securing into wall studs safeguards against sagging and wobbling over time. Recognizing that structural support is the backbone of longevity ensures your efforts last—and look great—long after installation.
The Importance of Continuous Learning and Inspiration
I found that staying updated with innovative storage ideas and installation techniques keeps projects fresh and efficient. Regularly browsing trusted resources, like built-in storage ideas or exploring new trends enhances my craftsmanship. Plus, connecting with experts through webinars or forums expands my perspective and sharpens my skills.
Where Your Next Step Begins
Mastering built-in vanities and storage solutions isn’t just about following instructions; it’s about embracing a mindset of adaptability, preparation, and continuous improvement. When you approach your project with curiosity and patience, the results become a reflection of your personal touch and expertise. Ready to refine your skills further? Explore innovative ideas and expert tips at creative built-ins and take your home to new heights.
Your Turn to Transform
Have you ever faced a wall irregularity that seemed impossible to work around? How did you manage it? Share your experiences below—I’d love to hear how you turned setbacks into stunning solutions!
,
One Reply to “Fixing Gaps: How to Scribe Custom Built-in Cabinets to Uneven Walls”
Leave a Reply
Related Posts

Expert Guide to Built-in Cabinets & Storage Solutions Installation
I remember the exact moment I realized I had bitten…
Smart Built-in Cabinets: Top Installation & Storage Solutions
I used to walk into my bathroom and feel overwhelmed…

Smart Built-in Cabinets & Storage Solutions for Modern Homes
Ever opened a closet or bathroom vanity and felt overwhelmed…
This post really resonates with me, especially the part about wall irregularities often being overlooked during installations. I recall a project where I had to install custom cabinetry in a living room with a notoriously uneven wall. I used a contour gauge to map out the wall’s profile and then transferred that onto my cabinetry pieces. It took patience, but the final fit was seamless, and it made such a difference in the finished look. I also agree that tools like a digital angle finder and flexible templates are game-changers for ensuring accuracy. It’s amazing how small adjustments can elevate a project from good to professional quality. Has anyone experimented with using thin shims behind cabinets for final adjustments? I’d love to hear if that’s effective for fine-tuning and handling slight wall shifts after initial mounting.