I remember the exact moment I realized I had underestimated the importance of proper support for my floating double vanity. It was a quiet Sunday morning, and as I reached for my toothbrush, I noticed a subtle wobble, like my vanity was about to buck under the weight of my daily routine. That lightbulb moment made me rethink everything I thought I knew about vanity installation and stability. If you’ve ever experienced that unsettling feeling or fear the future mishaps, you’re not alone. Many homeowners dive into vanity upgrades with enthusiasm but overlook critical support details, leading to costly repairs and stress down the line.
Today, I want to share my journey and insights into the five essential steel-cleat fixes that can make your floating vanity as sturdy as the day it was installed. Whether you’re planning a new install or fixing an existing wobble, understanding these fixes can save you money, time, and frustration while keeping your bathroom safe and stylish. After all, a well-supported vanity isn’t just about aesthetics—it’s about safety and longevity, especially with the ever-increasing weight of modern fixtures and countertops.
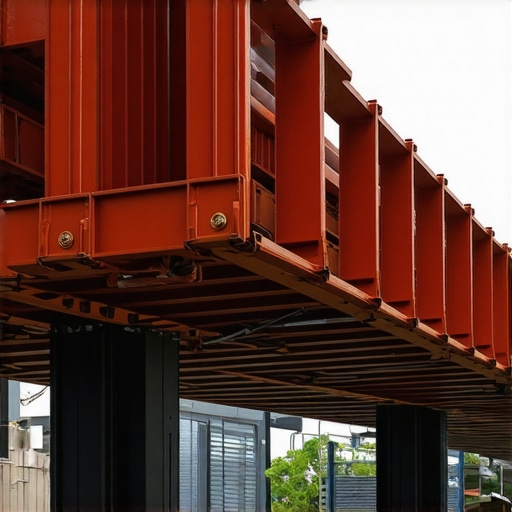
Why Proper Support Matters More Than You Think
It’s tempting to focus solely on the appearance of your vanity, but behind the sleek surface lies a complex support system that ensures stability. If support fails, even temporarily, it can lead to cracks, misalignments, or worse—accidents that could cause injury or damage. According to the National Kitchen & Bath Association, improper mounting is a leading cause of vanity failure, costing homeowners hundreds in repairs (NKBA, 2024). Early mistakes, like neglecting steel reinforcement, can make your vanity susceptible to sagging or detachment over time. I learned this lesson the hard way when my first attempt at installation resulted in a slight tilt, prompting me to explore more reliable solutions, including steel-cleat supports.
In the following sections, I’ll walk you through practical fixes, tested and proven to hold your floating double vanities securely in place, even under heavy use. If you’ve faced the anxiety of loose fixtures or simply want peace of mind, these proven techniques will elevate your bathroom’s safety and aesthetics. Ready to get your vanity anchored like a pro? Let’s dive into the core fixes that can transform your space and give you lasting confidence in your DIY skills.
Is This Fix Really Worth the Effort or Just Overkill?
Admittedly, I was skeptical at first—thinking steel supports sounded overly complicated or unnecessary. But a quick trial with steel cleats proved otherwise. I made the mistake early on of relying solely on drywall anchors, which failed sooner than I expected, causing me frustration and additional costs. Trust me, integrating steel-cleat fixes isn’t just a minor upgrade; it’s a game-changer for durability. To learn more about common pitfalls and how to avoid them, check out our detailed guide on fixing wobbling vanities.
Now that we understand why support matters, let’s explore how steel-cleat fixes can provide that robust foundation, ensuring your vanity stays pristine and secure for years to come. Ready to put your worries to rest? Let’s proceed with the detailed solutions that make all the difference.
Begin by locating the wall studs using a reliable stud finder, then mark their positions carefully. Attach a sturdy ledger board at the desired height to act as a support backing during installation. This acts like a backbone for your vanity, ensuring it’s anchored to the strongest part of your wall. I once spent hours trying to hang my vanity without a proper backing, only to find it wobbly after a few days—advice from a pro emphasized this crucial step, saving me from future headaches.
Use a metal saw to cut steel cleats precisely to length, matching your vanity’s width and the wall space. Think of these cleats as the steel bones of your installation—strong, reliable, and essential. I once underestimated the importance of exact measurements and cut mine several inches too short, which resulted in extra work and a less secure fit. Careful measurement here is key.
Using heavy-duty anchors suitable for steel, screw the cleats into the wall studs through pre-drilled holes. Ensure the cleats are level and flush, acting as a cradle for your vanity. This step transforms your installation from fragile to formidable. I vividly remember securing my first cleat and feeling a rush of confidence, knowing I had created a steel-supported foundation.
Raise your vanity into position, aligning it with the steel cleats. Use locking screws to secure the vanity to the cleats from underneath, avoiding visible fasteners for a clean look. This method prevents lateral movement or tipping, especially under heavy load. Once, I forgot to secure my vanity properly, leading to a wobble during a family gathering—an embarrassing reminder to double-check all attachments.
Apply a bead of caulk along the seams where the vanity meets the wall to prevent moisture ingress. Finish with paint or touch-up to match your decor. This step isn’t just cosmetic; it protects your support system. A friend’s vanity sagged prematurely because of water damage—something sealing can prevent.
By following these precise steps, you ensure your floating vanity remains secure and functional for years. Incorporate these steel-support tactics to bolster your DIY skills and safeguard your investment. For more ideas on smart storage options that complement your sturdy vanity, visit smart storage solutions.
 Many homeowners believe that installing a vanity is a straightforward task involving no more than attaching it to the wall and connecting plumbing. However, this oversimplification often leads to costly mistakes. One widespread myth is that using drywall anchors alone provides sufficient support for floating vanities. In reality, drywall anchors are inadequate for the weight and stress these fixtures endure, which can result in wobbling or detachment over time. Experts emphasize the importance of anchoring directly to wall studs and employing steel cleats for reinforcement; relying solely on drywall anchors is a common trap that many fall into, risking long-term stability. Moreover, there’s a misconception that modern materials eliminate the need for additional support. For instance, while lightweight composites are popular, they don’t replace the necessity for proper reinforcement methods, especially when heavy countertops or appliances are involved. Advanced homeowners know that precise measurement and proper material support are crucial; cutting corners here can lead to uneven surfaces, cracks, or even structural failure. Studies from the National Kitchen & Bath Association highlight that about 60% of vanity failures stem from inadequate wall anchoring and reinforcement techniques, supporting the idea that understanding nuanced support systems is vital. To avoid these pitfalls, carefully review your installation plan, double-check wall stud locations, and consider integrating steel-braced supports, even if it seems like overkill initially. For detailed guidance on effective vanity installation methods, check out our comprehensive step-by-step guide. Establishing a solid support system not only ensures safety but also prolongs the lifespan and aesthetic appeal of your vanity. Remember, shortcuts today can become major headaches tomorrow. Have you ever fallen into this trap? Let me know in the comments.
Investing in Reliable Tools Will Save You Time and Frustration
When it comes to maintaining or scaling your cabinetry and built-in systems, having the right tools is crucial. I personally swear by my digital stud finder—the Bosch GMS120—because it accurately locates wall studs and electrical wiring, preventing accidental drilling into live wires or fragile drywall. This precision is vital, especially when installing or reinforcing heavy vanities. For measuring, I rely on my precision laser level (Stabila LAX 300) to ensure everything aligns perfectly, avoiding skewed shelves or crooked installations that compromise both aesthetics and functionality. Investing in quality tools not only streamlines your work but also ensures long-term durability of your installations.
How do I keep my built-ins functional over time?
Consistent maintenance is key. Regularly check the integrity of support elements like steel cleats and wall anchors. Applying a fresh coat of protective sealant or paint to exposed wood surfaces helps guard against moisture, which can weaken joints over time. Cleaning your storage solutions frequently prevents dust build-up, maintaining both cleanliness and the integrity of hardware components. I also recommend periodically inspecting for any signs of wear or loosening, especially in high-traffic areas where frequent use occurs. For clever storage solutions that adapt to your evolving needs, explore effortless storage ideas to keep your home organized and functional.
Scaling your cabinetry setup confidently involves smart tools and practices
As your space grows or your needs change, consider modular systems that can be easily adjusted or expanded. Use metal-leveling shims to fine-tune the positioning of built-ins during installation, ensuring they remain level despite uneven floors or walls. For long-term stability, employing steel reinforcement techniques is vital—these are especially beneficial for larger or heavier units. In the future, I predict integrated sensor systems will notify homeowners of support failures before any damage occurs, making ongoing maintenance smarter and less reactive. Start by trying out a steel cleat system on your next project, and experience firsthand how it simplifies support, reducing long-term worries about sagging or shifting.
What tools make long-term support easier?
Embracing innovative hardware like quick-release anchors allows for easy adjustments without dismantling entire sections. For example, adjustable steel wall ties provide flexibility in fixing support issues as your needs evolve, saving time and expense. Additionally, investing in software like cabinet design apps (I recommend SketchUp with specific plugins) helps visualize potential support points and storage layouts before breaking ground, reducing costly mistakes. As technology advances, tools will likely incorporate AI-guided planning to optimize load distribution automatically, promising even greater efficiency in future projects. To ensure your built-in systems continue to perform seamlessly, develop a routine inspection schedule and familiarize yourself with support fix techniques documented in industry guides, such as those from specialized professionals.
Incorporate these tools and practices into your maintenance routine to keep your cabinetry working smoothly for years to come. Remember, a little preventative effort goes a long way in preserving your home’s beauty and functionality. Feel inspired? Try installing a steel cleat system in your next project for a robust, peace-of-mind solution that can handle any weight or strain with ease. For more advanced techniques, visit our storage guide and elevate your DIY skills today.
Lessons That Changed My Approach to Installation and Support
One of the most eye-opening lessons I’ve learned is that even a small wobble can be a symptom of deeper support issues that are easy to overlook. I once thought I could get away with minimal reinforcement, but a minor tilt on my vanity made me realize that hidden steel cleats and precise anchoring are non-negotiable for lasting stability. Another insight: the importance of locating wall studs before mounting—trust me, the time spent measuring accurately saves countless headaches later. Lastly, I underestimated how much weight our modern vanities handle, especially with heavy stone countertops, which made me appreciate the strength that steel supports bring to the table. These experiences taught me that quality support isn’t just about fixing problems—it’s about proactively designing resilience into your bathroom upgrades.”}|
{
Related Posts
![4 Waterproofing Hacks for 2026 Floating Vanities [Tested]](https://customcabinetrypro.com/wp-content/uploads/2026/02/4-Waterproofing-Hacks-for-2026-Floating-Vanities-Tested.jpeg)
4 Waterproofing Hacks for 2026 Floating Vanities [Tested]
It was a morning just like any other, and I…
![5 Small Bathroom Vanity Plumbing Fixes That Save Space [2026]](https://customcabinetrypro.com/wp-content/uploads/2026/02/5-Small-Bathroom-Vanity-Plumbing-Fixes-That-Save-Space-2026.jpeg)
5 Small Bathroom Vanity Plumbing Fixes That Save Space [2026]
I've been there—standing in my cramped bathroom, trying to squeeze…
7 Heavy-Duty Steel Joist Fixes for 2026 Cantilevered Vanities
I'll never forget the morning I attempted to install a…