

I’ll never forget the sound my kitchen shelf made at 3:00 AM—a slow, agonizing creak that ended with my favorite ceramic bowls sliding onto the floor. I had spent all weekend installing what I thought was a masterpiece of floating design. In reality, I had just created a wooden diving board for my dinnerware. I made the classic rookie mistake of assuming a thick piece of oak and a few long lag bolts could defy gravity forever. The result? A sad, downward-tilting mess. If you’ve ever walked into a room and felt your heart sink because your beautiful built-ins look like they’re wilting, I’ve been exactly where you are.
Torsion Boxes Are the Secret to Shelves That Never Bow
Most people think strength comes from weight. They buy the heaviest, densest lumber they can find, but that’s actually part of the problem. You’re adding load before you even place a book on the shelf. When I finally discovered internal torsion box engineering, it was like a lightbulb went off. Instead of fighting the wood’s weight, we’re going to use a stressed-skin structure. This is the same principle used in airplane wings and high-end hollow-core doors. It’s light, it’s rigid, and it won’t give up on you.
Does This Extra Engineering Actually Pay Off?
You might be wondering if it’s worth the hassle of building a hollow frame when you could just buy a bracket from a big-box store. Trust me, those cheap brackets are exactly why your floating shelf is tilting down after just six months. A torsion box creates a structural honeycomb inside the shelf that resists the bending forces of gravity. It’s the difference between a shelf that lasts a season and one that survives a decade of heavy use. Have you ever had a shelf start to droop right after you finally got everything styled perfectly? Tell me, has your latest DIY project started the slow-motion lean yet?
Why Your Solid Wood Shelves Are Bound to Fail
Gravity is a patient enemy. In my early days, I didn’t realize that even a perfectly level shelf can succumb to creep—a slow deformation under constant load. According to the structural principles outlined by Fine Woodworking, the strength of a torsion box lies in the skin being glued to the internal grid, preventing the top and bottom layers from sliding past each other when weight is applied. It’s physics, not magic. By implementing the internal brace move, you’re effectively turning your shelf into a structural beam. Today, I’m going to show you how to stop the sag before it starts, so you can finally trust your walls again.
Assemble the Internal Grid for Maximum Rigidity
To start, you need to think of your shelf as a hollow bridge rather than a solid plank. The magic happens when you create a ladder-like frame of thin wood strips—usually 3/4-inch plywood—spaced no more than 6 to 8 inches apart. This isn’t just about filling space; it’s about creating a series of interconnected structural squares. I remember a project where I thought I could get away with wider spacing on a long media console for a client. I was wrong. The shelf sounded hollow and lacked that rock-solid thud when you tapped it. Since then, I’ve learned that stop floating shelf sag with internal torsion box engineering is all about the density of that internal grid. You’re building a skeleton that distributes the load across every square inch of the shelf’s surface area.
Fuse the Plywood Skins to Create a Stressed-Skin Structure
Once your grid is assembled, you’ll sandwich it between two thin layers of plywood, typically 1/4 inch thick. This is where most DIYers fail: they just nail the boards on. If you want this to work, you must use a high-quality wood glue and clamp the entire surface. When that glue dries, the skins and the grid become a single unit. It’s like a piece of corrugated cardboard—on its own, the paper is flimsy, but the wavy layer in the middle makes it incredibly stiff. If you’re worried about the weight of your items, implementing the internal brace move ensures the skins can’t shift even a fraction of a millimeter under pressure. 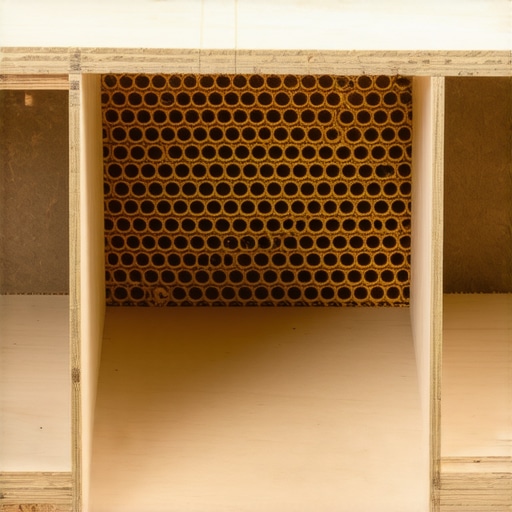
Lock Your Shelf to the Studs with a Recessed Cleat
The best shelf in the world is useless if the connection to the wall is weak. This is why your floating shelf is tilting down in most cases—the anchors are pulling through the drywall or the bracket is bending. Instead of relying on retail brackets, your torsion box should have a receiving end. This is a solid wood cleat that you screw directly into at least three wall studs. The hollow back of your torsion box then slides over this cleat like a glove. To take it a step further, especially for heavy entertainment setups, I often use the hidden wall plate strategy for floating media shelves to ensure there is zero leverage for the shelf to pull away. I once installed a series of these in a 1920s bungalow with crumbling plaster. By using a wider mounting plate hidden behind the shelf, we distributed the weight so effectively that the wall felt stronger than before we started.
Avoid the Trap of Overtightening Your Fasteners
When you’re finally sliding the shelf onto the cleat and securing it from the top or bottom, don’t go overboard with huge lag bolts that might split your internal frame. You want a snug fit, not a crushed one. If the tolerances are tight, a few well-placed trim screws into the cleat will keep everything immobile. If you find yourself fighting a gap between the shelf and the wall, remember that scribing your shelf to the wall is always better than trying to force a straight board against a crooked house. It’s these small, disciplined steps that prevent your project from looking like a DIY disaster six months down the road.Building the torsion box is half the battle, but there’s a trap most seasoned woodworkers still fall into: the obsession with mass. We’ve been conditioned to think that a solid piece of furniture is the gold standard, but when it comes to modern storage—especially floating units—excessive mass is actually your enemy. In my experience, why your heavy quartz vanity is cracking the cabinet frame often comes down to the wood fighting its own weight before you even add the stone. A lighter, engineered sub-frame is almost always superior to a heavy solid-wood slab because it allows for precise control over stress distribution. If you’re planning a bathroom upgrade, you must understand how to support quartz counters on custom floating vanities by creating a structural skeleton rather than just relying on the thickness of the plywood walls.
Can Your Wall Actually Handle the Dynamic Load of a Floating Vanity?
This is the advanced question nobody asks until the drywall starts to crack. A static load—like a sink and some towels—is predictable. A dynamic load—like a child leaning on the edge of the vanity or a person bracing themselves to clean a mirror—is entirely different. According to research by the USDA Forest Products Laboratory, the withdrawal strength of fasteners depends heavily on the specific gravity of the wood and the moisture content at the time of installation. If you’re mounting into 100-year-old studs, you’re dealing with brittle, dry wood that doesn’t grip like new SPF lumber. This is the secret to mounting heavy floating vanities on old lath and plaster: you aren’t just looking for a stud; you’re looking for a way to bridge the load across multiple structural points to prevent fastener fatigue. 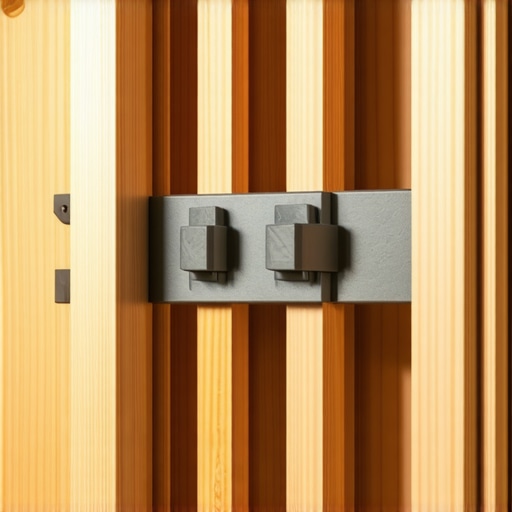 Another major oops factor I see constantly is the failure to account for plumbing clearances during the design phase of custom cabinetry. I’ve been called into dozens of jobs where how we fixed deep vanity drawers that kept hitting plumbing involved expensive, post-installation surgery on the drawer boxes themselves. It’s a preventable mess. You should also be reviewing 6 heavy-duty wall fixes for massive quartz top vanities before the first screw ever hits the wall. Beyond the internal structure, the floor itself is often lying to you. Even if it looks flat, implementing 7 tactics for leveling vanities on sloping tile floors is essential because a vanity that isn’t perfectly plumb will eventually use its own weight to pull its fasteners out of the wall. Have you ever fallen into the trap of over-building the cabinet only to realize the wall was the real weak link? Let me know in the comments.Stop Trusting Your Eyes and Use a Laser Level. If you want your projects to look professional, you have to stop trusting your eyes. I stopped using standard bubble levels years ago because they simply aren’t precise enough for a six-foot span. I now swear by a self-leveling 360-degree green beam laser. It shows you the truth about how much your floor actually slopes and how your walls are bowing in real-time. When you’re following an expert guide to flawless vanity installation tricks tips, the laser is what bridges the gap between ‘good enough’ and ‘perfectly plumb.’
How do I keep my custom built-ins from sagging over time?
The secret is a six-month check-up. Wood is a living material; it breathes and moves with the seasons. I always go back into my projects after the first winter to check the fastener tension. Often, you will find that dry air has caused the wood to shrink slightly, leaving a tiny bit of play in your mounts. This is especially true for creative built-ins for seamless storage and home aesthetics where the aesthetics depend on tight tolerances. If you ignore this, you are just waiting for the joint to fail. According to the Architectural Woodwork Standards (AWS), the load-bearing capacity of a wall-hung unit is only as strong as its weakest connection point, usually where the screw head meets the backing. This is why I only use RSS structural screws—they have a built-in washer head that won’t pull through the plywood like a standard drywall screw will. 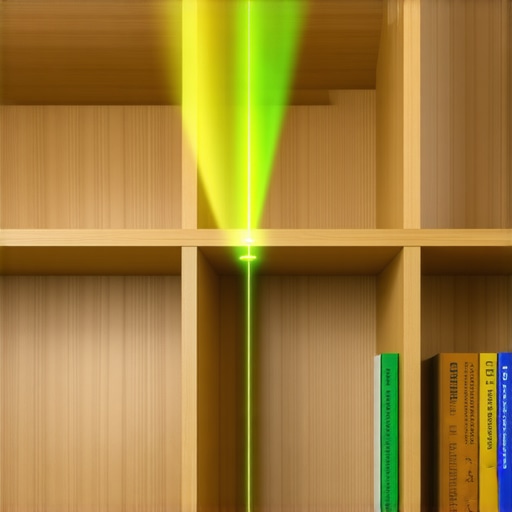 You also need to keep a close eye on the hardware. If you notice your doors are not closing with that satisfying click anymore, do not wait for them to jam. Learning how to fix drawer fronts that wont stay aligned is a skill every homeowner should master to prevent long-term hinge fatigue. We are moving toward an era where cabinetry is not just wood, but a hybrid of metal and composites. I expect to see more integrated aluminum sub-frames in smart storage solutions to optimize small bathroom spaces very soon. This will make the ‘heavy lifting’ easier, but it will never replace the need for a rock-solid installation foundation. Take a moment this weekend to check your mounting points—if you find even a hair of a gap, swap out those old fasteners for structural screws now.
Hard Lessons from the Front Lines of Floating Furniture
After a decade of building, I’ve realized that the most expensive mistake you can make isn’t wasting lumber—it’s losing the trust of a client (or your spouse) when a shelf starts to dip. The biggest ‘lightbulb moment’ for me was accepting that wood is essentially a bundle of straws that expands and contracts. If your mounting system doesn’t account for that movement, something eventually has to give. I also learned that while we love the look of thick oak, a well-engineered creative built-in is always more reliable than a heavy solid slab. Always over-engineer the internal grid; you’ll never regret a shelf being too strong, but you’ll certainly regret one that’s too weak.
The Essential Kit That Keeps My Shop Running
To get professional results, you need more than just a drill and a dream. I never start an installation without my self-leveling 360-degree laser level. It’s the only way to ensure your step-by-step guide to vanity installation for beginners actually results in a level countertop. For fasteners, skip the hardware store specials and invest in RSS structural screws; their high-tensile strength and washer heads are the only things I trust for heavy loads. I also highly recommend keeping a copy of the Architectural Woodwork Standards nearby. It’s the industry bible for tolerances and helps you understand why specific joinery methods exist. Finally, always have high-quality wood glue like Titebond III on hand for those skin-to-grid bonds that make the torsion box so rigid.
Build Something That Outlasts the Trends
There is a unique kind of pride that comes from pressing down on a shelf you just installed and feeling absolutely zero movement. By choosing engineering over bulk, you’re creating effortless storage solutions for a tidy stylish home that won’t become a maintenance headache in two years. Don’t let the complexity of a torsion box intimidate you. Once you build your first one, you’ll never go back to basic brackets again. If you run into a unique wall situation or need specific advice on a custom build, feel free to contact us for professional guidance. Your home deserves furniture that stands the test of time and gravity. Have you ever experienced that dreaded 3 AM shelf collapse, or are you just getting started with your first build? Let me know your project plans below!