

I remember the day I finally finished my ‘dream’ kitchen island. It was 36 inches of wide, deep drawer glory. I loaded it up with my grandmother’s cast iron pans, feeling like a storage genius. But three months later? That satisfying glide turned into a groan. The middle of the drawer was bowing like a wet noodle, scraping the face frame every time I reached for a skillet. It was heartbreaking. I had spent thousands on custom cabinetry only to have the widest drawers fail because I ignored one tiny, crucial piece of hardware.
Stop Watching Your Drawers Slowly Die
It is a common tragedy in modern kitchen design. We want those massive, wide spans because they look sleek and hold everything, especially when we use creative storage solutions for vanities to maximize every inch. But wood and even high-grade plywood have limits. Gravity is a patient thief. If you do not reinforce those spans, you will eventually find yourself searching for how to fix drawer fronts that won’t stay aligned or, worse, replacing the entire box. I have seen beautiful homes where the high-end drawers felt like cheap plastic after just a year because the center support was non-existent.
Is this bracket actually worth the extra effort?
You might think more glue or thicker bottoms are the answer. I did too. I actually tried doubling up the plywood once—big mistake. It just made the drawer heavier and put more stress on the slides without solving the core issue of span-deflection. The real lightbulb moment came when I discovered the anti-sag bracket. It is essentially an invisible spine that takes the tension off the bottom panel and transfers it to the drawer front and back. According to hardware engineering specs from industry leaders like Accuride, even the best drawer slides cannot prevent the bottom panel of a wide drawer from bowing if it is not structurally supported.
The Simple Fix for a Lifetime of Smooth Gliding
Today, I am going to show you exactly how to install these brackets so your drawers never scrape again. We are moving past surface-level aesthetics and getting into the structural guts of your home, much like how you would stop drawer sag in bedroom closets with internal bracing. If you have ever felt that sickening tug of a sticky drawer, have you ever actually crawled underneath with a flashlight to see the curve in the wood? I promise that once you see how simple the fix is, you will never build or buy another wide drawer without one. We are going to turn those groaning cabinets back into the silent, effortless storage you originally paid for.
Give Your Drawers a Structural Backbone
To start, you need to treat your drawer box like a piece of high-performance machinery rather than just a wooden box. When I am tackling a project that involves creative storage solutions for vanities, I always flip the drawer upside down before the first sign of trouble. The goal here is to bridge the distance between the drawer front and the drawer back. This isn’t just about slapping on a piece of metal; it is about creating a tension point that counteracts the weight of your items. Think of it as a pre-stressed beam in a parking garage. Much like the process used to stop drawer sag in bedroom closets with internal bracing, we are creating a structural path for the weight to travel toward the stronger vertical components of the box. Proper bracing ensures that the bottom panel never has the chance to develop a permanent memory of being bowed.
Find the Exact Center and Prep for Tension
Take your measuring tape and mark the dead center of the drawer bottom on the underside. You want the bracket to run perpendicular to the wood grain if you are working with solid wood, or perfectly centered from front to back on plywood. I once rushed this on a set of built-in storage ideas to declutter and enhance your home, and being just a half-inch off-center caused the drawer to pull unevenly, eventually leading to a weird sideways tilt that ruined the glide. Accuracy here prevents you from having to look up how to fix drawer fronts that won’t stay aligned later on. Measuring twice ensures that the tension is distributed equally across the entire span of the material.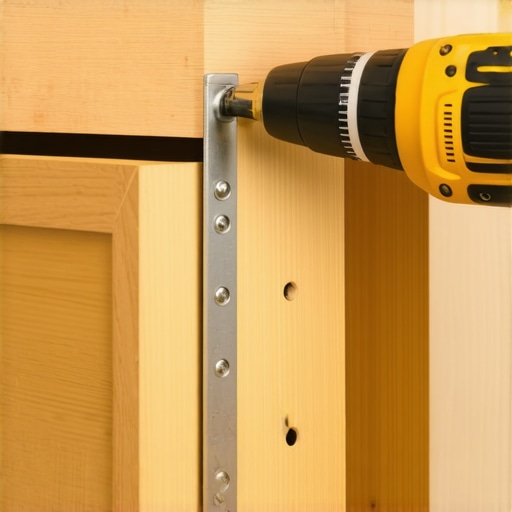
The Right Way to Install Tension Brackets
Once you have your marks, it is time to secure the ends. The secret is to attach the bracket to the solid ‘meat’ of the drawer front and back, avoiding the thin bottom panel entirely for the main screws. If you have ever used an expert guide to flawless vanity installation tricks tips, you know that any load-bearing hardware is only as good as the wood it is anchored into. I prefer using a steel strap or a dedicated anti-sag kit that includes a turnbuckle, as it allows for much finer adjustments over time. This method turns the drawer bottom into a suspended platform rather than a simple shelf.
Tighten Until the Bow Vanishes
This is the part where you see the engineering actually work. With the bracket loosely attached at both ends, start tightening the center tensioning screw. Keep a close eye on the bottom of the drawer. You will see that slight, sagging bulge start to flatten out as the bracket pulls the wood upward. Do not over-tighten; you are not trying to make the bottom convex. In one particularly messy instance, I over-torqued a bracket on a 1/4-inch plywood bottom and actually heard the wood fibers start to splinter. It was a heart-sinking moment that required a total rebuild. Now, I tighten until a straightedge shows the bottom is perfectly flat. When you reach the final turns of the tensioner, you will feel the resistance increase as the bracket ‘takes the load.’ This simple mechanical advantage is what separates high-end cabinetry from the stuff that falls apart after a few months of heavy use.
The Glue Myth That Is Secretly Ruining Your Woodwork
Most DIYers and even some professional cabinetmakers swear by the ‘more is more’ philosophy. They assume that if a drawer is sagging, the answer is a thicker 3/4-inch bottom or a gallon of industrial glue. I used to be in that camp until I realized I was actually accelerating the failure. Adding thickness to the bottom increases the dead load on your slides before you even put a single fork inside. In my experience, relying on glue alone is a recipe for disaster because it creates a rigid bond that doesn’t allow for the natural expansion and contraction of wood. According to engineering data from the Woodworking Network, the structural integrity of a horizontal span depends more on the ‘tension’ of the assembly than the sheer mass of the material. When you over-glue, you’re essentially building a ticking time bomb that will eventually crack under seasonal humidity shifts. Instead, focusing on 6 heavy duty l-brackets for reinforcing custom built-in units or internal tensioners provides the flexibility the wood needs while maintaining a perfectly flat surface.
Does your drawer hardware actually match its load rating?
This is the advanced question that separates the pros from the amateurs. Most standard drawer slides are rated for 75 to 100 pounds, but that rating assumes a ‘static’ load. The moment you pull a wide drawer out, the ‘dynamic’ load—the weight in motion—increases exponentially. If you are working on how to support double sink vanities without center legs, you have to account for the fact that the cabinet frame itself might be flexing. This flex is what leads to the dreaded ‘side-bind’ where the drawer sticks halfway out. If you don’t address the structural frame alongside the drawer bottom, even the most expensive anti-sag bracket won’t save you from a mechanical failure.
Beware of the Over-Reinforcement Trap
One major ‘oops’ factor I see constantly is over-tightening the tension rods. It is tempting to keep cranking until the wood is as stiff as a board, but you can actually create a ‘crown’ in the drawer bottom. A crowned bottom is just as bad as a sagging one; it causes items to roll to the edges and can interfere with the drawer’s internal clearance. I’ve seen homeowners who were trying to maximize your space with custom vanities inadvertently bow their drawer bottoms so high that the drawer wouldn’t even close back into the carcass. This is especially dangerous when you have heavy materials involved, like why your heavy quartz vanity is cracking the cabinet frame, as the weight distribution becomes unpredictable. Always use a straightedge to ensure you are aiming for ‘flat,’ not ‘arched.’ 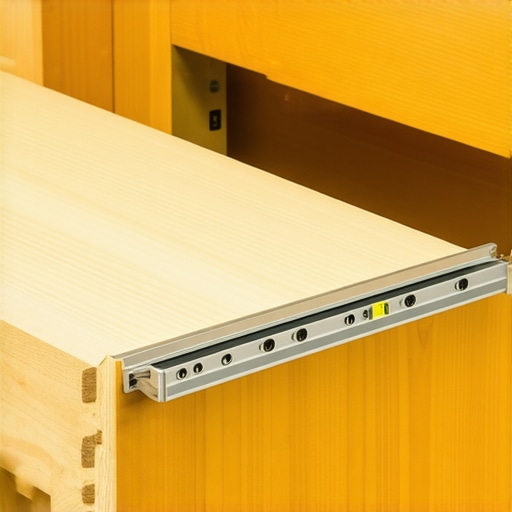 If you find yourself constantly adjusting your hardware, you might be fighting against a frame that wasn’t level to begin with, which is why I always recommend checking out an expert guide to flawless vanity installation tricks tips before finalizing your bracing. Have you ever fallen into the trap of over-building a drawer only to have it fail anyway? Let me know in the comments—I’d love to hear your horror stories and how you fixed them. Once you master the art of tension over mass, you’ll find that even your widest spans stay as smooth as the day they were installed. For more advanced projects, you might also want to look into creative built-ins for seamless storage and home aesthetics to see how these engineering principles apply to the rest of your house.
Once you have solved the immediate crisis of a bowing drawer bottom, the real work of longevity begins. I have learned the hard way that wood never stops moving, especially in high-moisture areas like bathrooms or kitchens. If you have spent time researching smart storage solutions to optimize small bathroom spaces, you know that the tighter the space, the more precision matters. I always tell my clients that the first six months are the ‘settling’ period. During this time, the weight of your grandmother’s cast iron or those heavy spa towels will find every microscopic weakness in your installation. I personally use a digital clinometer to check the level of my drawer boxes every season. It might sound like overkill, but a 0.5-degree shift in your house’s foundation can be the difference between effortless storage solutions for a tidy stylish home and a drawer that requires a shoulder-shove to close.
How do I maintain my drawer tension over time?
Maintenance is not a ‘one and done’ task; it is a ritual. Every six months, I recommend completely emptying your widest drawers and checking the tension on those anti-sag brackets we talked about. Wood fibers compress under load, which means your bracket might need a quarter-turn to maintain that perfectly flat bottom. While you are under there, inspect the slides for ‘witness marks’—tiny trails of metal shavings or grey dust. These are early warning signs that your drawer is tilting, much like why your pantry pull-out is tilting and the rail support fix becomes necessary when the load is off-center. According to Blum’s technical documentation for the Movento runner series, dynamic load capacities are calculated based on a perfectly square cabinet box; any deviation beyond 1mm per 500mm of depth will drastically reduce the lifespan of the bearings. A quick spray of dry PTFE lubricant on the rails (never use WD-40, as it attracts dust) will keep the action smooth for years.
The high-tech gear I actually use
I am often asked what is in my personal install bag. I do not bother with cheap plastic jigs anymore. I rely on the Bosch GLL3-330CG 3-plane leveling laser. It allows me to see the ‘plane’ of the entire cabinet run at once, ensuring that every drawer face sits perfectly flush. If you are struggling with creative storage solutions for vanities, this tool is a lifesaver for identifying if your floor is the culprit behind a sticky drawer. I also swear by a high-end scribing tool like the Starrett 505A-12. Being able to perfectly match your cabinet to an out-of-plumb wall prevents the structural ‘racking’ that leads to drawer failure. 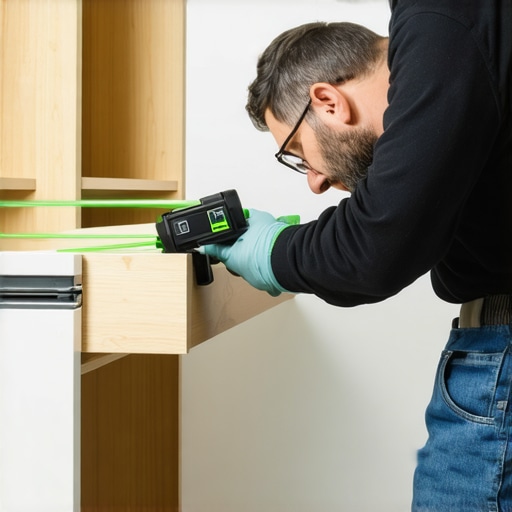
Smart sensors will soon replace your tension rod
Looking at the top trends in vanity designs you need to know in 2025, I predict we are moving away from purely mechanical fixes. We are starting to see the integration of carbon-fiber reinforced drawer bottoms and even ‘smart’ slides that can alert your phone if a load-bearing limit has been exceeded. Imagine getting a notification that your ‘junk drawer’ has reached 45 pounds and is at risk of bowing. Until that tech becomes affordable for the average homeowner, we have to rely on the engineering principles we have covered here. My best advice? Go grab a long straightedge right now and check your widest drawer. If you see even a sliver of light between the wood and the level, it is time to install a tension bracket before the wood develops a permanent memory of that sag. Do not wait for the scrape—fix the spine of your cabinetry today.
Lessons from a Decade of Busted Drawers
Looking back at my earliest projects, I realize I was obsessed with the wrong kind of strength. I thought heavy meant durable, but a heavy drawer without a structural spine is just a faster way to ruin your hardware. One major lightbulb moment was discovering that plywood has a memory; once it sags, it wants to stay that way forever unless you intervene. I also learned the hard way that how to fix drawer fronts that won’t stay aligned usually starts with the bottom panel, not the hinges. If the bottom is bowed, the whole box is racked and will never sit flush. Finally, never underestimate the power of a simple tension rod—it’s the unsung hero of creative storage solutions for vanities.
The Gear That Keeps My Workshop Quiet
You do not need a massive shop to do this right, but you do need precision. I never start a drawer reinforcement project without my Starrett 505A-12 for perfect angles and a high-quality straightedge. For anyone diving into a full room overhaul, consulting an expert guide to flawless vanity installation tricks tips is non-negotiable for getting the frame level before the drawers even go in. I also highly recommend keeping the Blum technical manuals bookmarked on your phone; they are the industry gold standard for understanding load ratings and clearance. If you are tackling more complex layouts, maximizing space innovative built-in solutions for small rooms can provide the structural blueprints you need for high-stress spans.
Build It Once and Build It Right
There is a unique kind of peace that comes from a house that does not groan, scrape, or stick when you use it. By taking these extra twenty minutes to install a tension bracket, you are not just fixing a piece of wood; you are preserving the mechanical integrity and value of your home. Whether you are implementing effortless storage solutions for a tidy stylish home or rebuilding a master suite, remember that the smallest structural details often have the biggest impact on your daily comfort. Now, go grab that level and give your drawers the support they deserve. Have you ever heard that heart-sinking ‘crack’ of a drawer bottom failing under a heavy load? Let me know your worst hardware nightmare in the comments below!