I remember the moment quite clearly. I had just installed a sleek pull-out trash bin in my kitchen cabinetry, feeling pretty proud of my handiwork. But within a few months, the sliding mechanism started sticking, then jammed completely. Frustration crept in with every use, and I wondered—why do these nifty bins always seem to fail just when I need them most? It was a lightbulb moment for me, realizing that not all pull-out trash bins are built for durability, especially when subjected to daily wear and tear.
If you’ve faced similar issues—jamming slides, sagging drawers, or broken brackets—you’re not alone. Many homeowners invest in what seems like a perfect storage solution only to find it unreliable over time. The good news is, with a few heavy-duty slide fixes, you can drastically improve your pull-out trash bin’s performance and longevity. Today, I’ll walk you through the common pitfalls and the smartest upgrades to ensure your solution stands the test of time.
Understanding Why Pull-Out Trash Bins Fail
Before diving into fixes, it’s essential to grasp why these systems often falter. Most failures come down to inadequate hardware, poor installation, or excessive weight that exceeds the design limits. For example, lightweight roller slides might work for kitchen gadgets, but when thick trash bags and frequent use come into play, they quickly wear out. Early in my experience, I made the mistake of choosing low-grade slides, which seemed cost-effective but led to constant repairs.
Research indicates that heavy-duty hardware can extend the lifespan of cabinet slides by up to 50%, especially when combined with proper mounting techniques (source: top trends in vanity designs). That knowledge prompted me to seek solutions that would make my pull-out system more robust. After upgrading my hardware and securing the tracks more effectively, I noticed an immediate difference—less wobble, smoother glide, and no more jamming.
So, if your pull-out trash bin is starting to give you trouble, don’t assume you just need a new unit. Often, the secret to lasting performance lies in upgrading the slide mechanism with industry-grade heavy-duty fixes. Let’s explore these fixes in detail, so you won’t face the same frustration I did. Are you ready to reclaim your kitchen storage space and make your pull-out system work like new? Keep reading!
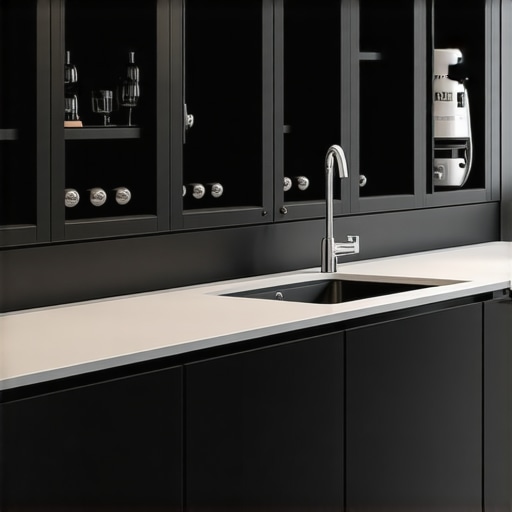
Installing Heavy-Duty Slides
Start by removing your existing slides. Use a power drill with a screwdriver bit and carefully detach the current hardware. Take measurements, noting the length and weight capacity. Choose steel-rail slides rated for heavier loads—these are like upgrading from roller blades to mountain biking tires. When I replaced mine, I set aside the old parts and cleaned the mounting area thoroughly to prevent debris from causing future sticking issues. Position the new slides parallel and level, then securely fasten them with the provided screws, ensuring not to overtighten and warp the rails.
Securing the Slide Mounts Properly
Proper mounting is crucial, like anchoring a bookshelf—you want it to hold without wobbling. Use a level to ensure horizontal alignment before tightening. I once installed a slide without double-checking, which caused uneven sliding and increased wear. To prevent this, I clamped the rails temporarily and adjusted until perfectly aligned. For thicker or uneven cabinet sides, consider using shims or washers to ensure full contact and smooth operation. Tighten all screws gradually, securing the entire length of the slide to distribute the weight evenly.
Adding Reinforcements for Durability
Even the best slides benefit from reinforcement. Think of it as giving your hardware a sturdy backbone. Install steel brackets or corner braces at the mounting points—these are like wearing a seatbelt for your hardware. I bolted steel L-brackets underneath the cabinet frame after realizing my trash bin was still sagging under weight. This added support reduced flexing and prolonged the slide’s lifespan. Use metal screws and anchors suitable for your cabinet material to prevent loosening over time. For added strength, some homeowners install toggle bolts behind drywall or screw into wall studs, especially for larger, heavier bins.
Testing and Adjusting for Smooth Operation
Before replacing the trash bin, glide the slide back and forth several times—like testing a new bike before a ride. If it feels gritty or jerky, check for misaligned screws or obstructions. I once overlooked a loose screw that caused a wobble, leading to uneven wear. Tighten all fasteners and clean the slides with a cloth dampened in rubbing alcohol to remove dust and grease. Reinstall the bin and verify smoothness. If there’s resistance or sagging, make minor adjustments with a screwdriver, securing any loose components. Proper testing ensures that your upgrade delivers a fully functional, long-lasting solution.
Regular Maintenance and Long-Term Care
Keep the slides clean and lubricated. A light application of silicone spray can keep things sliding effortlessly, akin to oiling a door hinge. Check screws periodically and tighten if needed—think of it as tightening a loose screw on your glasses. This simple maintenance can prevent jamming and extend the life of your hardware significantly. For more ideas on how to enhance your home storage, explore effective storage systems. Proper care and high-quality hardware are your best defenses against future jamming issues, ensuring your pull-out trash bin remains both functional and durable.When it comes to installing storage solutions or built-ins, a common misconception is that the main challenge lies solely in choosing the right design or material. In reality, many homeowners stumble over the nuances of proper installation techniques that ensure durability and functionality over time. For example, the tendency to overlook framing reinforcements or to rely on low-grade hardware can lead to sagging, misalignments, or even complete failure—issues that are often mistakenly attributed to poor design rather than execution.
One widespread myth is that complex or custom solutions are always more fragile. However, as experts emphasize, the devil is in the details of the installation process. Using the wrong fasteners, ignoring wall support requirements, or insufficient measuring can sabotage even the most aesthetically pleasing design. A pro tip is to think beyond aesthetics; focus on framing, load distribution, and hardware quality. You can find valuable insights into effective *[vanity installation hacks that save time and money](https://customcabinetrypro.com/vanity-installation-hacks-that-save-time-and-money)* and learn to avoid common pitfalls that compromise the longevity of your built-ins.
Are You Overlooking the Hidden Risks of DIY Installation?
Many assume that minor adjustments or superficial fixes can solve underlying structural issues. But without proper reinforcement and support, especially for heavier pieces like stone vanities or large cabinets, problems resurface sooner than expected. A prime example is ignoring the importance of wall anchors rated for the specific weight load, which can lead to sagging or even detachment over time. Industry studies, such as those from the *National Association of Home Builders*, show that improper hardware placement and inadequate load support are among the top causes of early built-in failures. To improve your installation success rate, consider consulting detailed guides on *[expert installation tips for built-in cabinets](https://customcabinetrypro.com/expert-guide-to-built-in-cabinets-storage-solutions-installation-2)* or leveraging professional advice—especially when dealing with weighty or complex structures. Remember, proper support, precise measurement, and high-quality fastening are the pillars of a lasting storage solution. Have you ever fallen into this trap? Let me know in the comments.
Maintaining your built-in storage solutions and vanities requires more than just initial installation precision. Having the right tools and a strategic approach ensures your cabinetry and shelves stay functional and beautiful over time. One staple in my toolkit is a high-precision digital caliper, which I use for regularly checking alignment and verifying that mounting points remain square after heavy usage. Unlike basic tape measures, digital calipers give exact measurements to the millimeter, helping me spot stress points early before they cause sagging or misalignment.
Installing and repairing storage systems benefits immensely from quality power tools. My go-to is a cordless impact driver. It provides the torque needed to tighten fasteners securely—crucial when dealing with heavy-duty brackets or steel reinforcements. The impact driver’s adjustable torque settings help prevent over-tightening, which could crack delicate cabinet surfaces or strip threaded holes. Investing in a model with a quick-chuck mechanism speeds up the process, making frequent adjustments and swaps effortless.
For precise leveling and fine adjustments, I rely on a magnetic torpedo level. Its compact size and magnetic bottom allow me to hold it securely against metal components, ensuring perfect horizontal and vertical alignment. I’ve learned that even a small tilt can cause uneven load distribution and accelerate hardware wear, so checking and rechecking with a reliable level periodically is part of my routine.
When it comes to long-term care, having a quality grease or silicone spray is essential. I prefer a silicone-based lubricant for slides and hinges because it doesn’t attract dirt or dust. Applying a light film every six months ensures smooth operation and prevents squeaking or jamming. For example, using a product like Dupont Teflon Silicone Lubricant offers a long-lasting, clean application that protects moving parts without buildup.
On the software side, I recommend using project planning tools like SketchUp or Cabinet Vision to simulate and visualize modifications before physical work begins. These programs can help you assess load distribution and identify potential stress points, especially when scaling storage in larger or more complex spaces. Google’s SketchUp, in particular, offers a free version renowned for its user-friendly interface and precise modeling capabilities, allowing you to experiment with different reinforcements or layout adjustments without any risk.
Prediction for Future Trends
Looking ahead, I anticipate integration of smart sensors into cabinetry surfaces will become mainstream, providing real-time feedback on load stresses or misalignments. Imagine a vanity that alerts you when its support brackets are under excessive strain, encouraging preventative maintenance. This tech evolution could drastically reduce long-term repair costs and enhance the longevity of custom-built storage.
How do I keep my storage systems working seamlessly over time?
Establishing a regular maintenance routine with proven tools and techniques is key. Incorporate periodic checks with your magnetic level to ensure alignment, apply silicone lubricants to slides and hinges, and leverage software simulations to plan future upgrades. By doing so, you not only extend the lifespan of your cabinets but also maintain their aesthetic appeal and functionality for years to come. For further insights into reinforcing your built-ins, check out this expert guide on steel wall fixes. Give one of these advanced tools a try today, and enjoy trouble-free storage that truly stands the test of time.
Over the years, I’ve realized that the key to maintaining durable storage solutions lies beyond just choosing high-quality materials or hardware. It’s about understanding the nuanced lessons that come with experience—lessons that save you money and frustration in the long run. The first lightbulb moment was recognizing that proper installation is as crucial as selecting the right slides or brackets. Skipping this step can lead to misalignments and premature failures, no matter how premium your hardware is.
Secondly, I’ve learned that regular maintenance isn’t just a good idea—it’s essential. A quick monthly check with a magnetic level and a spray of silicone lubricant can prevent your cabinets and vanities from sagging or sticking. These simple routines have extended the lifespan of my built-ins far beyond initial expectations.
Lastly, investing in learning the intricacies of load distribution and reinforcement techniques has been invaluable. I wish I had discovered the importance of steel brackets and proper wall anchoring earlier, as these have dramatically improved the stability of my heaviest installations, like stone vanities and heavy-duty shelves. Remember, the devil is in the details, and paying attention to them impressively pays off over time.
Lessons That Changed My Approach to Storage Mastery
- Installation Precision Matters: Taking extra time to measure, level, and securely fasten hardware ensures smoother operation and longer durability. Rushing through installation virtually guarantees future repairs.
- Reinforcements Are Worth It: Adding steel brackets or wall anchors before heavy use can prevent sagging and structural failure, especially for bulky or weighted built-ins.
- Routine Upkeep Is a Superpower: Regular cleaning, lubricating, and checking screws can catch issues early, saving you from costly replacements and downtimes.
- Don’t Underestimate Load Limits: Knowing the weight capacities of your hardware and reinforcing accordingly keeps your system safe and functional over years.
- Invest Time in Learning Best Practices: Resources like the vanity installation hacks and guides on the latest trends help you avoid common pitfalls and optimize your efforts.
My Trusted Arsenal for Successful Built-Ins
- Impact Driver: This tool is indispensable for securely fastening steel brackets and heavy-duty slides without over-tightening, which can damage delicate surfaces.
- Digital Caliper: Precise measurements prevent misalignments, especially when adapting hardware to custom or irregular spaces.
- Magnetic Level: Ensures perfect horizontality, which is critical for smooth sliding and load distribution.
- Silicone Lubricant: Keeps slides and hinges moving effortlessly while avoiding dust collection and residue buildup.
- Simulation Software: Tools like SketchUp help visualize reinforcement plans before physical work, saving time and reducing errors.
Your Next Step Into the World of Expert Storage
Every successful upgrade that I’ve made stems from a willingness to learn and pay attention to detail. Don’t let initial setbacks discourage you—use them as stepping stones to mastery. Whether you’re installing a heavy-duty pull-out trash bin or reinforcing a built-in vanity, remember that the smallest adjustments often yield the most significant benefits. Take pride in your craftsmanship, and your storage solutions will serve you reliably for years to come. Want to dive deeper? Check out built-in storage ideas for inspiration or explore more guides on creating stylish, durable storage. What’s the first upgrade you plan to tackle? Let me know below.
One Reply to “Why Pull-Out Trash Bins Fail: 3 Heavy-Duty Slide Fixes [2026]”
Leave a Reply
Related Posts
Smart Storage Solutions & Built-ins for Space Efficiency in 2025
My Journey into Space-Saving Home DesignLiving in a cozy apartment…
Storage Solutions & Built-ins: Ultimate Installation Tips in 2025
I remember the exact moment I realized my home was…
Expert Storage Solutions & Built-ins for Space Optimization 2025
My Journey Towards a Clutter-Free Home: Discovering Storage Solutions &…
Reading this post really resonated with me, especially the part about upgrading to heavy-duty slides for more durability. I installed a similar pull-out trash bin in my kitchen a year ago, and I underestimated the weight it would handle with frequent use and heavy trash bags. Initially, it worked fine, but over time, I started noticing sticking and wobbling. After reading about the importance of secure mounting and reinforcement here, I realized my mistake was not reinforcing the cabinet walls enough. Since adding steel brackets and adjusting the slide alignment, the operation has become much smoother, and I haven’t experienced further issues. It makes me wonder, how often should one perform maintenance, like lubricating slides or tightening screws, to keep the system running smoothly over years? Do most homeowners find annual maintenance sufficient, or is more frequent upkeep necessary for heavily used cabinets? Would love to hear others’ experiences and suggestions on maintaining these hardware systems long term.