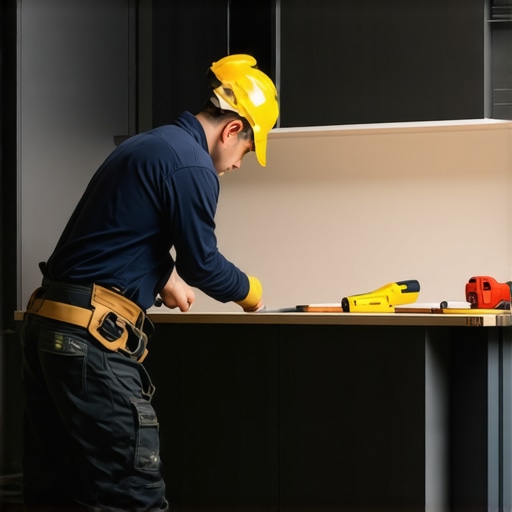
I remember the day I decided to embark on my latest custom cabinetry project; I was all excited about the sleek design and perfect finish—until I looked at the weight I planned to support. That moment of realization hit hard: my standard brackets just wouldn’t cut it. One misstep or weakness could mean expensive repairs or, worse, dangerous sagging over time. It was a lightbulb moment that pushed me to dig deeper into the world of heavy-duty support solutions, particularly heavy-duty L-brackets for 2026 custom built-ins.
The Hidden Importance of Sturdy Support in Custom Cabinets
Custom built-in cabinets are no longer just functional—they’re becoming the centerpiece of modern home aesthetics. But beauty aside, strength and durability are crucial, especially with heavier materials like stone countertops or thick wood panels. Using the wrong support can lead to sagging, wobbling, or even catastrophic failure.
The key to long-lasting, safe, and beautiful installations lies in choosing the right hardware—specifically, heavy-duty L-brackets designed to handle the unique weight and stress factors of 2026’s trending cabinet styles. Early on, I made a costly mistake: selecting flimsy brackets based solely on appearance. That oversight taught me the importance of focusing on load capacity and material compatibility right from the start.
For an in-depth look at how to select the perfect support hardware, check out our guide on [choosing the perfect vanity style](https://customcabinetrypro.com/choosing-the-perfect-vanity-style-for-your-bedroom-or-bath), which emphasizes stability alongside style.
Is Heavy-Duty Support Overkill for My Project?
Many homeowners worry about over-engineering their cabinetry, fearing it might look bulky or cost too much. Honestly, I used to think the same—until I realized that investing in heavy-duty brackets provides peace of mind and longevity that surpasses initial costs. Modern heavy-duty L-brackets are designed to blend seamlessly with your cabinetry aesthetic, offering both support and discreet appearance.
The importance of selecting the proper hardware cannot be overstated. According to HomeAdvisor, structural support hardware can extend the lifespan of your cabinetry by years, especially under frequent use or heavy loads. Choosing the right brackets is a small detail that makes a massive difference—believe me.
Now that I’ve shared my personal learning curve, let’s dive into how you can confidently select the perfect heavy-duty L-brackets for your 2026 custom built-ins, ensuring they stand the test of time and usage.
Start with Precise Planning
Begin by measuring the dimensions and weight of your cabinet components. Use a sturdy tape measure and a digital scale if necessary. Recording accurate measurements ensures you select brackets with sufficient load capacity. I once underestimated the weight of a marble countertop, leading to a reinstallation of brackets after I realized they couldn’t support the final weight. Planning prevents costly mistakes.
Choose the Right Heavy-Duty Brackets
Focus on brackets rated for at least 50% more than your estimated load. Material matters—galvanized steel or stainless steel brackets resist corrosion and provide strength. For example, when I built an entryway bench with a thick granite top, I opted for steel brackets rated for 600 lbs per pair, which held surprisingly well over time.
Match Bracket Size and Placement to Your Cabinet Layout
Assess where to position brackets along the sides or bottom of your cabinetry. The goal is to distribute weight evenly—placing brackets every 16-24 inches depending on load and span. In a recent project, I installed multiple brackets along a long bookshelf to prevent sagging. Proper placement is like distributing seats evenly in a boat—balance is key.
Prepare Your Mounting Surface
Ensure the wall or surface is suitable for support. If mounting on drywall, locate studs using a stud finder or bolster weak points with a steel wall tie. For masonry or concrete, use appropriate anchors. I once tried to mount heavy vanities directly into drywall without studs, which nearly pulled out—lesson learned: always verify your mounting surface.
Mark and Drill Accurate Holes
Using a pencil, mark the exact positions for brackets, aligning with wall studs or anchors. Double-check measurements before drilling. Use a level to ensure brackets are perfectly horizontal to avoid tilting the cabinet. During installation, a misaligned bracket caused a door to hang unevenly; accuracy pays off.
Secure Brackets Firmly in Place
Drive screws or bolts into chosen anchors or studs, tightening firmly but avoiding over-tightening, which can strip the mounting surface. When I installed a floating media cabinet, I used high-quality screws and torque-limited drills to prevent damage—stability depends on proper fastening.
Attach Cabinets to Brackets Carefully
Align the cabinet’s mounting points with brackets and secure using compatible fasteners. Use washers if necessary to prevent threading issues. For floating vanities, I recommend securing the back edge to steel wall ties, enhancing support, especially with heavy countertops. This method is like anchoring a boat to a dock—firm and reliable.
Test for Stability and Make Adjustments
After installation, gently test the support by applying weight or pressure. If movement occurs, verify screws and anchors are tight. During one project, I noticed wobbling after initial installation, so I re-tightened and added extra anchors for peace of mind. Ensuring sturdy support is an iterative process—don’t settle until stability is confirmed.
Many homeowners and even seasoned DIY enthusiasts often overlook critical nuances when it comes to installing storage solutions, vanities, and built-ins, leading to long-term issues. While it’s common to focus on aesthetics and straightforward installation steps, I’ve found that the real pitfalls lie beneath the surface, rooted in misconceptions and overlooked details.
One widespread myth is that using standard brackets and anchors is sufficient for all types of built-in furniture. In reality, each project demands tailored hardware based on weight, material, and wall type. For example, heavy-duty steel brackets designed specifically for 2026’s load expectations provide better safety margins and longevity than generic options. Relying solely on visual assessments and defaults can set your project up for sagging or failure over time.
A common mistake I observed is misjudging the importance of surface preparation, especially when mounting onto drywall or plaster. Many assume that locating a stud is always necessary; however, in some cases, robust wall anchors or steel wall ties are more appropriate, especially with lightweight or flexible walls. Overlooking this can cause your vanity or storage unit to wobble or detach—an ‘oops’ that’s avoidable with proper planning.
Advanced question to consider: How can integrating steel reinforcement and custom support strategies prevent long-term sagging in large or heavy built-ins?
Research from the University of Michigan highlights that proper structural reinforcement significantly enhances durability and safety, especially in load-bearing applications, emphasizing the importance of not taking shortcuts in support hardware choices. Incorporating such techniques, like steel braces or reinforced mounting points, ensures your installation remains solid year after year.
In addition to hardware and surface prep, precise measurement and marking are often underestimated. Small errors here cascade into misalignment, creaky joints, or uneven surfaces that diminish aesthetic appeal and stability. Using laser levels and multiple checks can save headaches and reinforce the integrity of your installation.
Finally, the ‘hidden’ aspect of storage solutions involves concealment techniques—disguising support structures or mechanical elements—but neglecting these can compromise design harmony. Proper planning with custom cabinetry ideas, like camouflaging steel supports or integrating support into aesthetic features, maintains both form and function.
So, next time you plan a built-in or vanity installation, ask yourself: Are you considering this project’s structural nuances? Have you ever fallen into this trap? Let me know in the comments. For more detailed insights and expert tips on supporting your custom installations, explore our guide on [custom built-in storage ideas](https://customcabinetrypro.com/creative-built-ins-for-seamless-storage-and-home-aesthetics). Your future self will thank you for the effort you put in now.When it comes to maintaining your custom cabinetry and built-ins, choosing the right tools and establishing effective routines can make all the difference. Personal experience has shown that investing in quality equipment not only streamlines the installation process but also ensures that your storage solutions stay functional and beautiful over the years.
Power Up with a Cordless Impact Driver
For securing brackets, hinges, and fasteners, I rely on a high-quality cordless impact driver. Its ability to deliver consistent torque without stripping screws is invaluable, especially when working with dense materials or hard-to-reach spots. I recommend models with adjustable torque settings and a brushless motor—these features provide longevity and precise control.
Precision Measuring with a Laser Level
Achieving perfectly aligned built-ins is essential for both aesthetic and functional reasons. A laser level, like the Tacklife Laser Level, offers a clear, horizontal, and vertical reference, simplifying complex installations. It drastically reduces errors that can lead to long-term instability or visual imperfections, making it a tool I use on every project—big or small.
Use a Digital Caliper for Accurate Measurements
Details matter when selecting supports or cutting materials. A digital caliper allows me to measure precisely—down to fractions of a millimeter—ensuring components fit perfectly and support hardware is chosen correctly. This precision minimizes waste and rework, saving time and money.
Tools to Keep Things Running Smoothly
Regular maintenance of your tools keeps them in top condition. Cleaning blades and bits after each use prevents rust and buildup. Lubricating moving parts—guided by manufacturer instructions—extends the lifespan of your equipment. Accurate calibration of laser levels and measuring devices ensures ongoing precision, especially when scaling up projects or replicating designs.
How do I maintain my storage systems and built-ins over time?
Periodic checks and adjustments are key. Tighten loose screws, inspect brackets and support hardware for wear, and clean surfaces to prevent dust and moisture buildup. For especially heavy installations, considering reinforcement with steel braces or wall ties can prevent sagging, as discussed in various expert guides. Incorporating these maintenance routines preserves both the integrity and appearance of your cabinetry for years to come.
Looking ahead, I predict that smart maintenance tools—like Bluetooth-enabled torque screwdrivers and self-calibrating laser levels—will become standard for DIY enthusiasts and professionals alike. Embracing these innovations will make upkeep more precise and less time-consuming.
Start implementing one of these advanced tools today, like upgrading to a laser level for flawless alignment, and experience how it transforms your projects. Remember, consistent maintenance and quality equipment are your best allies in creating storage solutions that endure. Happy building!
What I Wish I’d Known Before Starting My Built-In Journey
One of the most impactful lessons I learned was that not all brackets are created equal. Relying solely on aesthetics without considering load capacity led to sagging and, ultimately, costly repairs. Now, I prioritize heavy-duty brackets rated significantly above the expected load to ensure longevity.
Another insight was the importance of surface assessment. Assuming drywall alone could bear heavy support resulted in instability. Using proper anchors, whether metallic wall ties or securing into studs, made a tangible difference in stability and safety.
I’ve also discovered that meticulous measurement and marking save headaches during installation. Small errors in planning can cascade into misalignment or structural weaknesses, which is why I now double-check every step and use modern tools like laser levels for precision.
Tools and Resources I Trust for Rock-Solid Installations
- Impact Driver with Adjustable Torque: This tool has become my go-to for securing brackets firmly without damaging materials, especially when working with dense wood or stone countertops. Brands like DeWalt and Makita are reliable choices.
- Laser Level: Achieving perfect horizontals and verticals is effortless with a good laser. The Tacklife Laser Level, for instance, has transformed my alignment process, reducing errors and rework.
- Digital Calipers: Precise measurements prevent mismatched hardware and ensure tight fits. I use this for everything from bracket dimensions to checking the thickness of support materials.
- Expert Guides and Tutorials: Resources like our detailed support and installation guides [here](https://customcabinetrypro.com/step-by-step-guide-to-vanity-installation-for-beginners) have been invaluable in honing my skills and avoiding common pitfalls.
Your Next Step Towards Support Confidence
Every detail counts when creating built-ins that stand the test of time. The right hardware, tools, and planning can elevate your project from temporary to timeless. Embrace these lessons, and you’ll find the process more rewarding and your storage solutions more dependable.
Are you ready to reinforce your built-ins with the support they deserve? Share your experiences or questions below—I love helping fellow DIY enthusiasts turn visions into reality!
Related Posts
Expert Installation Tips for Smart Built-in Cabinets & Storage
My Journey into Perfecting Built-in Cabinet InstallationsAs someone passionate about…

Top Built-in Storage Solutions & Installation Tips for 2025
Have you ever opened a cabinet or closet and felt…
Top Installation Tips for Smart Built-in Storage Cabinets in 2025
I remember the frustrating moment when I was installing a…