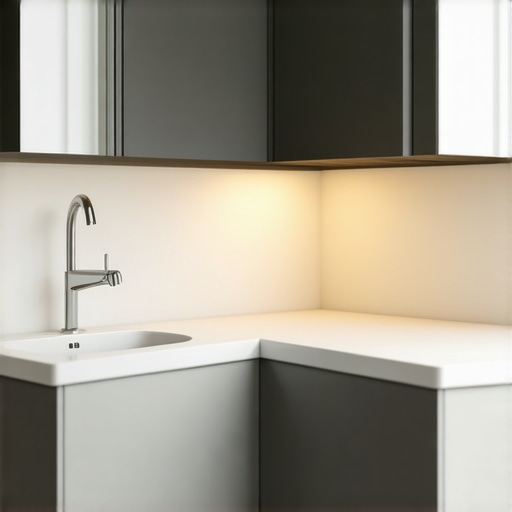
Have you ever struggled to install a sleek, modern floating vanity only to realize that your heavy 2026 smart sink was threatening to rip it right off the wall? I remember the lightbulb moment when I was halfway through my last renovation, trying to force a bulky, high-tech sink onto a barely reinforced wall — I knew there had to be a better way. That frustration sparked my deep dive into proven tactics to safely mount these innovative fixtures, especially as they get smarter and heavier each year.
Why the Right Installation Tactics Are Essential for Your 2026 Smart Sink
Installing 2026 smart sinks isn’t just about attaching a piece of hardware; it’s about creating a durable, reliable setup that can withstand the daily hustle — and the weight of cutting-edge technology. As a DIY enthusiast turned professional, I’ve learned firsthand that improper mounting can lead to cracked walls, sagging vanities, or even costly repairs down the line. According to homeowner reports, poor installation is one of the leading causes of bathroom fixture failure within the first year. That’s why understanding the right tactics is crucial for anyone aiming for a stylish, functional space without regrets.
Overcoming the Fear of Heavy Tech
Many people, myself included early on, worry that their existing wall setups won’t support these modern marvels. I once thought that simply screwing into drywall would suffice — it didn’t. My mistake was ignoring the importance of steel reinforcement and proper anchoring techniques. For a more detailed approach to anchoring heavy fixtures, you might consider exploring steel wall ties and reinforcement methods. Proper support isn’t just an option; it’s a necessity that ensures your investment stays secure for years to come.
Now, I want to help you avoid the pitfalls I encountered early on. We’ll walk through the six key tactics that transformed my installations from shaky to rock solid. Whether you’re a seasoned DIYer or just starting, mastering these strategies will make your project safer, smarter, and ultimately more satisfying.
Before diving into the step-by-step guide, ask yourself: Have you ever faced the frustration of mounting a heavy fixture only to feel it wobble or, worse, fall? If so, stick around. These tips are designed to prevent that nightmare from happening to you and to make your bathroom upgrades a success story.
Reinforce the Wall Before You Start
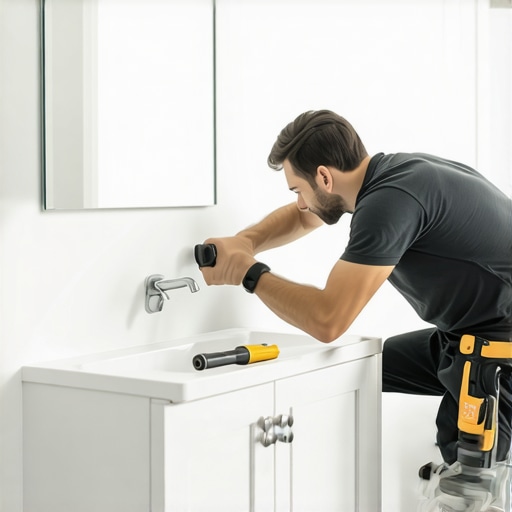
My first encounter with installing a 2026 smart vanity went sideways when I assumed drywall alone would handle the weight. Instead, I embedded heavy-duty steel wall ties into the studs. Use a stud finder to locate suitable points and drill anchors into the solid wood behind the drywall, not just into the drywall itself. This creates a sturdy backbone that can handle the weight without sagging or pulling loose. Think of it as anchoring a tent’s stake into firm earth rather than loose sand—your vanity will thank you for it.
Use Proper Mounting Hardware and Techniques
Select the Right Anchors
When dealing with a heavy, tech-rich vanity, traditional drywall anchors won’t suffice. Opt for toggle bolts or expanding anchors rated for high loads. For instance, I once used metal toggles for a heavy resin top vanity, and it held firm despite daily use. Check the manufacturer’s weight specifications and choose hardware labeled for heavy-duty applications to ensure safety and longevity.
Align and Level Precisely
Misalignment can cause stress points that weaken the mount over time. Use a high-quality level and a laser line to mark where the brackets will go. Before drilling, double-check the measurements. I once misplaced my marks by a quarter inch, leading to a crooked vanity that required reinstallation. Taking the time to align correctly prevents this issue from escalating.
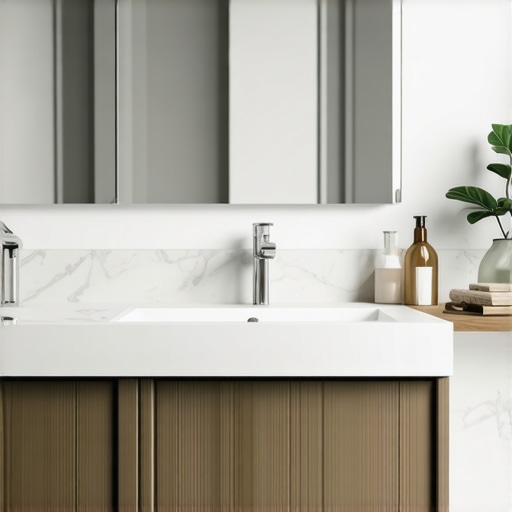
Scribe and Fit for the Perfect Finish
Walls are rarely perfectly straight or smooth. To accommodate imperfections, scribe the vanity edges along the wall contours. I used a pencil and a flexible strip to trace these irregularities, then sanded lightly for a snug fit. This process avoids gaps that can cause your vanity to wobble or look unfinished. Follow these detailed steps for precise scribing and fitting, ensuring your installation is both functional and sleek.
Secure Heavy Components Using Steel Brackets
Heavy vanity tops or integrated tech panels require extra stabilization. I added steel brackets behind the frame, anchoring them into the wall studs. Bolting the brackets into both the wall and the vanity frame distributes weight evenly. This technique prevents sagging and maintains structural integrity. For tips on choosing the right brackets, explore heavy-duty steel brackets that support significant loads.
Address Sloped or Uneven Walls Effectively
If your wall isn’t perfectly plumb, adapt by shimming and adjusting mounting points. I often utilize thin wood or metal shims to level the vanity while securing it, preventing tilting over time. Remember, patience here saves you from frequent readjustments later. See this guide for detailed leveling techniques.
Check Stability and Make Final Adjustments
Once installed, apply gentle pressure to ensure stability. If any movement occurs, tighten or reposition brackets. I tested my setup by leaning slightly against the vanity, noting the stability. Properly secured, it should feel rock solid. Periodic checks every few months keep the mount secure as materials settle or shift over time. Remember, good mounting isn’t just a one-time task but an ongoing maintenance step to preserve safety and appearance.
Many homeowners assume that mounting a vanity or built-in is a straightforward task, but the reality is far more complex than the surface might suggest. One widespread misconception is that standard drywall anchors are sufficient for heavy, tech-integrated fixtures. In my experience, relying solely on drywall anchors is a mistake; instead, robust support structures like steel reinforcement or specialized high-capacity anchors are essential to prevent sagging or failure over time.
Another often overlooked aspect involves the subtleties of space planning and storage integration. It’s tempting to focus solely on aesthetics, but improper planning can lead to inefficient use of space and future access difficulties. For example, many underestimate the importance of precise measurements when scribing cabinetry to accommodate uneven walls, leading to gaps and instability. Advanced techniques, such as using flexible curves for scribing, can save hours of rework and ensure a flush, sturdy fit.
A hidden nuance relates to the impact of wall materials on installation. Walls are rarely uniform; they may be sloped, uneven, or constructed from different materials within a single surface. This variability can cause misalignments if ignored. For instance, wall studs might be located differently than anticipated, or there may be hidden obstructions behind drywall. To navigate this, professional installers employ stud finders with deep scanning capabilities and take time to verify wall compositions, which greatly improves the stability of mounted fixtures.
Now, let’s address a question that often trips up even experienced DIYers:
How can advanced wall support techniques prevent sagging or detachment of heavy built-ins over time?
Research from the Building Research Council highlights that reinforcing wall anchors with steel brackets and ensuring proper load distribution dramatically extend the lifespan of installed fixtures, especially in high-tech or heavy-material applications. Techniques such as using steel wall ties, installing additional support brackets, and redistributing weight loads away from drywall alone are crucial. Incorporating these nuances into your project can save you from costly repairs and maximize safety.
Finally, I invite you to reflect: Have you ever fallen into this trap? Let me know in the comments. To get started with expert support or learn about proven installation hacks, explore these handy tips for efficient, durable setups.
Once you’ve successfully installed your custom vanities and built-ins, maintaining their integrity over time is key to ensuring longevity and safety. Having the right tools and understanding effective methods can make all the difference in preserving your fixtures and avoiding costly repairs down the line.
Prioritize Precision with Quality Equipment
Using high-grade, specialized tools is an investment that pays off in durability. I personally rely on a cordless rotary hammer drill equipped with a variety of SDS-plus bits for re-securing anchors or tightening steel brackets without damaging the surrounding materials. Its versatility allows me to drill into concrete, brick, or even dense wood with precision, which is crucial for maintaining the stability of heavy fixtures like resin countertops or tech-integrated vanities.
Embrace Advanced Software for Consistent Outcomes
If you’re scaling your installations or regularly updating bathroom setups, consider leveraging design tools like SketchUp or AutoCAD. These applications help plan precise measurements, visualize support structures, and simulate wall support loads, reducing guesswork and preventing mistakes. For example, I use SketchUp to model the entire vanity installation before starting, which minimizes errors and streamlines the execution process.
Implement Periodic Inspection Routines
Regular checks are essential to identify early signs of wear, such as loosening brackets or wall sagging. A digital level with laser alignment capabilities ensures your fixtures stay perfectly plumb over time. I recommend setting a quarterly maintenance schedule where you assess all supports, tighten bolts, and review wall anchors. This proactive approach aids in catching issues before they escalate, saving money and hassle later.
How do I maintain built-in storage and vanities over time?
Maintaining built-in elements involves both routine cleaning and structural checks. The use of a flexible, microfiber duster combined with a mild cleaning solution preserves the surfaces without damaging finishes. Additionally, verifying the stability of supports; for instance, checking steel wall ties and brackets with a torque wrench ensures they remain secure. For larger projects, consulting a professional for detailed assessments can be beneficial, especially when modifications or reinforcements are needed as your needs evolve. Incorporating these practices will extend the lifespan of your installations and keep them looking pristine.
Looking ahead, I predict that the integration of smart sensors into support structures could revolutionize maintenance—alerting you via an app when a bracket begins to loosen or wall anchors weaken. Keeping your tools updated and embracing technology will be vital for next-gen upkeep. For more detailed guidance on sustaining your custom-built features, explore these installation hacks.
Start by implementing a regular inspection routine using a digital level and torque wrench—I guarantee it will save you headaches and preserve your stylish investments for years to come.
,
Lessons That Fought Me Harder Than I Expected
One of the toughest truths I learned was that even the best tools can’t fix a poor foundation—trust me, I spent hours troubleshooting wobbling vanities that should have been solid. The biggest lightbulb moment was realizing that wall reinforcement isn’t optional but essential, especially with the 2026 smart vanities packed with heavy tech features. Also, the misconception that drywall alone can bear significant weight kept tripping me up, leading to unnecessary repairs. These experiences taught me to prioritize wall integrity over quick fixes, a lesson I wish I had embraced from the start.
Tools and Resources That Changed My Installation Game
If you’re serious about safe and durable installations, you’re going to need more than just a drill. I highly recommend investing in a quality stud finder with deep scanning capabilities—it’s an eye-opener for locating hidden support structures. When it comes to anchors, toggle bolts rated for high loads became my best friends. For planning and precise measurements, design software like SketchUp transforms guesswork into confident execution. To stay updated, I turn to expert blogs and forums focusing on bathroom remodels; their real-world insights are priceless. For more expert tips, explore these detailed installation hacks.
What Inspires Me to Push Through Challenges
Every successful project fuels my passion for craftsmanship, especially when I see others overcome installation fears and achieve stunning results. Remember, securing your heavy vanity isn’t just about safety—it’s about peace of mind and creating a space that reflects your effort and care. If you’re hesitant, think of this process as an opportunity to learn new techniques, embrace technology, and transform your bathroom into a haven of style and function. Don’t wait for perfection—start with small, confident steps today, and you’ll find the confidence to elevate your whole space. You’ve got this, and your bathroom will thank you for it.
Related Posts
5 Hidden Bracing Fixes for 2026 Kitchen Corner Vanities
It was a morning like any other—until I opened my…
Fixing 5 Common Gaps in DIY Floating Vanity Installs
Imagine spending hours installing your dream floating vanity, only to…
Effective Vanities & Storage: Top Tips for Seamless Installation in 2025
It was a morning like any other, but as I…