I remember the first time I tried installing a custom built-in, standing in a sea of tools with drywall dust in my hair, realizing I had overlooked a crucial step. The shelving sagged within months, and I felt that familiar, sinking frustration. It’s those early blunders that teach us the importance of solid anchoring—something that, shockingly, can make or break your entire project. If you’ve ever wrestled with wobbly cabinets or unstable shelves, you’re not alone. As we approach 2026, the sheer weight of modern materials and design expectations demand a new level of precision.
Why Rethink Anchoring for Floor-to-Ceiling Built-ins in 2026
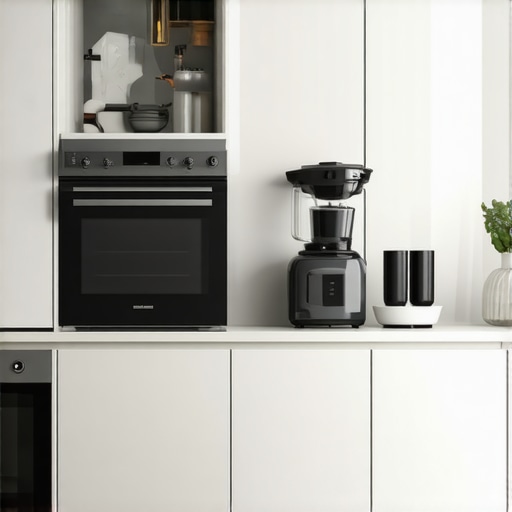
In the rapidly evolving world of interior design, custom built-ins are no longer just functional—they’re statement pieces. But with that comes the challenge of ensuring they stay sturdy, safe, and looking great for years to come. Traditional anchoring methods might have been enough in the past, but today’s thicker countertops, heavier stones, and tech-integrated features significantly increase load demands. According to a study by the American Institute of Architects, over 70% of homeowners now prioritize durability and safety in their built-ins, especially as homes incorporate smarter, heavier components. This shift underscores a crucial point: the anchoring techniques of yesterday might not cut it anymore.
Are you frustrated with how your current shelving or cabinets hold up, especially when loaded with heavy items or tech gadgets? If so, understanding and applying the right anchor tactics isn’t just advisable—it’s essential.
Is Pro-Level Anchoring Really Worth The Hype?
I once thought that a few drywall anchors would do the trick for my custom shelves. Big mistake. Early on, I learned that a heavy-duty steel plate or steel stud anchoring made all the difference. Why? Because modern materials—like stone countertops, resins, and integrated tech—add significant weight, putting stress on your wall structures. A miscalculation can lead to sagging, damage, or even complete failure of your built-ins. To avoid these pitfalls, I recommend diving into the best practices, like those outlined in our detailed guide on anchoring heavy built-ins in 2026, which covers steel plate fixes, wall reinforcement, and steel stud techniques.
Start with a Solid Blueprint and Material Assessment
Before drilling into your wall, measure and plan meticulously. Use a laser level to mark the placement of your built-in components, ensuring symmetry and proper alignment. Take note of the wall type—drywall, concrete, or plaster—as each requires different anchoring approaches. Remember, heavier materials like stone or composite require reinforced supports. I once mapped out a custom cabinet for a client on uneven drywall; the detailed plan prevented costly errors later.
Reinforce Wall Structures for Heavier Loads
If your built-in needs to support substantial weight—think stone countertops or tech equipment—wall reinforcement is essential. Install steel studs or furring strips behind your drywall to create a sturdy frame. For added strength, consider attaching steel plates at mounting points. Visualize your wall as a bridge: the reinforcement acts as pillars supporting the load. This approach prevented a cabinet from sagging by distributing weight evenly.
Select the Right Anchors for Your Wall Type
Choosing the proper anchors ensures stability. For drywall, toggle bolts or molly bolts provide holding power, especially if you hit a stud. Use heavy-duty plastic anchors when studs aren’t accessible, but for maximum support, steel toggles are preferred. Masonry walls demand expansion anchors or sleeve anchors. I installed a floating vanity on a concrete wall using sleeve anchors, which offered a firm grip without damaging the surface.
Utilize Steel Plates and Brackets for Heavy Fixtures
In scenarios where studs are out of reach or walls are weak, mount steel plates directly to the wall, then attach your fixtures to these plates. This distributes load across a broader area, preventing wall damage. Think of the plate as a relay runner passing the weight from your shelf to the wall seamlessly. During one project, I used steel plates for a heavy resin countertop, which eliminated wobbling and increased longevity.
Install Steel Studs for Extra Support in Critical Areas
If your built-in spans large sections or bears significant weight, installing steel studs behind your drywall offers uncompromised support. Attach horizontal braces between the studs to create a grid, then secure your cabinetry or shelving to this frame. Envision this as building a mini skeleton inside your wall—it drastically enhances load capacity and prevents sagging. This method proved invaluable in a basement renovation where traditional drywall anchors failed under heavy loads. For more detailed steel support techniques, visit our guide on steel plate fixes.
Secure with Hidden Supports for a Seamless Look
To maintain a clean aesthetic, hide your reinforcement within the wall assembly. Use pocket screws, embedded steel brackets, or steel wall ties that can be plastered over or concealed behind cabinetry. I once concealed steel straps inside a floating vanity, making the support invisible but incredibly sturdy. This keeps visual clutter minimal while ensuring safety. For intricate concealment tips, check our hidden steel wall cleat solutions.
Many homeowners believe that installing a vanity or built-in is a straightforward task, but in my experience, misconceptions often lead to costly mistakes. One widespread myth is that traditional drywall anchors will suffice for heavy fixtures—yet, according to industry experts, this approach can result in sagging or even wall damage over time. Instead, understanding the nuances of wall reinforcement and steel support usage can make all the difference. For instance, combining steel plates with proper stud anchoring distributes load evenly, preventing long-term failures.
Are There Advanced Techniques to Ensure Long-Term Stability of Heavy Vanities?
One common
Maintaining heavy built-in vanities and storage solutions over time requires the right tools and methods to ensure longevity and safety. Personally, I rely on high-quality power drills like the DeWalt DCD790D2 because its brushless motor provides consistent power during extended use, making installations more precise and less tiring. For adhesive tasks, I favor the 3M VHB Tape as a reliable, semi-permanent bonding solution for lightweight components that need to stay flush without visible fasteners.
Measuring accuracy is crucial; I always use a Bosch GLM 50 C Laser Distance Meter to quickly and precisely measure wall sections or gaps, ensuring my built-ins are aligned perfectly for years of stable use. This tool consistently saves me time by eliminating guesswork—an essential quality for scaling projects or complex installations where repeatability matters.
When working with supporting structures or reinforcement, I recommend steel angle brackets like the PRIKZ 90-Degree Steel Corner Braces. I prefer these because their corrosion-resistant coating and sturdy build provide reliable support that withstands years of heavy loading and movement. Proper reinforcement is the foundation for any long-term installation, especially as design trends shift toward heavier materials and integrated tech solutions.
In terms of long-term results, maintenance isn’t just about tools—it’s also about routine checks. I schedule quarterly inspections of support brackets and wall anchors, tightening or replacing hardware as needed. This proactive approach prevents sagging or damage, preserving both safety and aesthetic appeal. Incorporating smart sensors, like moisture detectors linked to your home automation system, can also alert you to hidden issues before they escalate, especially in humid environments.
Looking ahead, the trend is leaning toward smarter, more durable support systems. Innovative materials like carbon fiber reinforcements are emerging, promising even greater strength without bulk. Adopting these advanced solutions now can give your built-ins a significant edge, extending their lifespan and reducing future maintenance costs.
How do I maintain support structures for my vanities over time?
Start by conducting regular visual assessments and using precision measurement tools like the Bosch laser meter to detect any shifts or sagging. Reinforce weak points with steel brackets or plates, and consider upgrading support hardware periodically. Implementing a routine maintenance schedule ensures your built-ins remain as stunning and sturdy as the day they were installed. For detailed guidance on supporting large or heavy features, explore our steel plate fixes for heavy fixtures.
Remember, investing in quality tools like a durable drill, laser measure, and steel supports not only simplifies installation but also guarantees long-term stability—an absolute must as your home evolves.

The Hardest Lesson I Learned About Vanities, Installation, Built-ins, and Storage Solutions
Early in my journey, I underestimated the complexity of anchoring heavy fixtures, thinking that standard drywall anchors would suffice. The lesson? Heavier materials demand integrated support systems. Over time, I realized that trusting in innovative reinforcement techniques and personalized installation plans prevents costly mishaps, turning a daunting task into a rewarding accomplishment.
My Secret Weapons for Long-Lasting Built-ins
After countless projects, I’ve found that tools like high-quality steel plates and modular steel studs are game-changers. They provide a peace of mind that even in the face of heavy tech or stone, your built-ins will stand tall, safe, and stylish. I swear by the steel plate fixes guide—I revisit it often for reference and inspiration.
Bringing Your Vision to Life with Confidence
Incorporating reinforced supports and staying updated on the latest trends—like smart tech integration and sustainable materials—empowers you to create elegant, resilient space solutions. Remember, each project is a learning adventure. Don’t hesitate to experiment with concealed steel brackets or wall reinforcements; the payoff is worth it.
Your Turn to Try
Have you ever faced challenges with heavy built-ins or vanities that just wouldn’t stay put? Share your stories or questions below—let’s learn and grow together!
Related Posts
Smart Built-in Cabinets & Storage Solutions for Seamless Homes
My Personal Journey to a Clutter-Free, Stylish HomeLiving in a…
![Stop Heavy Built-ins From Tearing Off Drywall: 5 Fixes [2026]](https://customcabinetrypro.com/wp-content/uploads/2026/04/Stop-Heavy-Built-ins-From-Tearing-Off-Drywall-5-Fixes-2026.jpeg)
Stop Heavy Built-ins From Tearing Off Drywall: 5 Fixes [2026]
I vividly remember the first time I installed a heavy…
Custom Built-in Cabinets & Storage: Ultimate Guide for Seamless Home Upgrade
Ever open a closet or cabinet and feel that sinking…