

There’s a very specific, heart-sinking sound a floating shelf makes right before it decides to quit. It’s a slow, agonizing creak—the sound of wood fibers straining and drywall losing its grip. I heard it at 3:00 AM once, followed by the shattering of a vintage ceramic vase that I had spent months hunting down. My “sleek” kitchen shelf hadn’t just tilted; it had basically surrendered to gravity. It’s a frustrating, common failure that turns a beautiful design into a safety hazard. If you’re looking at your wall right now and seeing a gap between the shelf and the paint, or if your pictures look like they’re trying to slide off the front edge, you aren’t alone. We’re going to fix that forward lean today, and I’ll show you how to make those shelves actually stay level for the long haul. Have you ever walked into a room and realized your shelf was looking a little “tired” and drooping toward the floor?
Stop the Sag Before Your Decor Hits the Floor
When I first started installing these, I made the classic rookie mistake: I trusted the “heavy-duty” plastic anchors that came in the box. I thought if the package said it could hold 50 pounds, I was safe. I wasn’t. The problem isn’t usually the shelf itself; it’s the physics of the lever arm. In structural engineering, a floating shelf is a cantilevered beam. According to the American Wood Council, the “moment” or rotational force at the wall connection increases significantly as the shelf gets deeper. This means a 10-inch deep shelf puts way more stress on your wall than a 6-inch one. If you don’t have a rock-solid connection to the studs, that shelf is going to bow. For really long spans, I’ve found that using an internal torsion box move is the only way to keep things stiff. If you’re dealing with a bathroom setup, you might even need to stop floating vanities from dipping with steel plates to counteract that heavy stone countertop.
Is it even possible to keep a floating shelf level forever?
You might be skeptical. We’ve all seen those wobbly shelves in trendy coffee shops. But the secret lies in what’s happening inside the wall. Most off-the-shelf brackets are made of thin, bendable metal. When you add weight, the metal flexes, and the shelf tips. To fix this, you need to look at internal torsion box engineering or a hidden wall plate strategy that spreads the load across multiple studs.
Why Your Drywall is Your Own Worst Enemy
Drywall is basically just compressed chalk and paper. It has zero structural integrity when it comes to pulling forces. When your shelf tilts, it’s often because the top of the bracket is pulling out while the bottom is crushing into the drywall. This is why following an expert guide to flawless installation is so critical—you have to get past the gypsum and into the wood. In the next section, I’m going to walk you through the ‘shim and plate’ method I use to rescue shelves that have already started to dive.If the shelf is already drooping, pull the shelf body off the bracket and look at the connection point. You will likely see that the top of the bracket has pulled away from the wall by just a fraction of an inch. That tiny gap translates to a massive tilt at the edge of a 10-inch shelf.
Force Your Shelf Back into Alignment with Shims
Think of a shim as a tiny, surgical wedge designed to fight gravity. When a bracket is slightly angled downward, you can place a thin plastic or wood shim behind the bottom edge of the wall plate. This forces the rods or the mounting surface to tilt slightly upward, compensating for the weight that will eventually pull it back down. I’ve seen homeowners try to jam cardboard back there, but cardboard compresses. Use horseshoe shims or thin wood slivers. We used a similar approach when we learned how we fixed a tilted floating vanity with hidden leveling shims, and the principle is identical: micro-adjustments at the wall save you inches of sag at the front edge.
Stop Relying on Cheap Box-Store Hardware
If your bracket feels like you could bend it with your bare hands, it has no business holding up your books. Most commercial kits use hollow tubes that flex under load. To get a truly professional result, you need heavy-duty solid steel. If you are dealing with seating or extra-heavy items, you might even need 4 stealth wall anchor fixes for forward tilting floating seats to ensure the hardware doesn’t shear off under pressure. 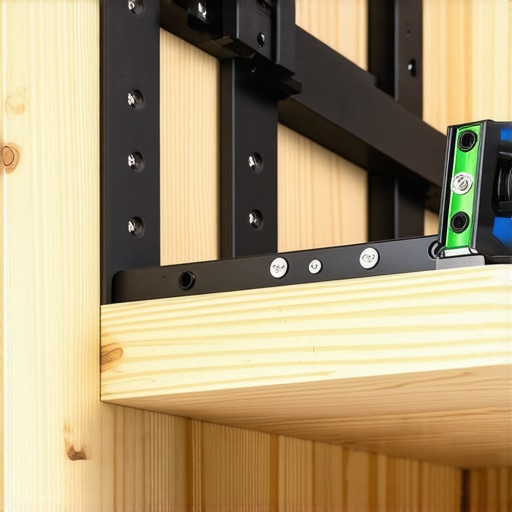
How I Saved an 8-Foot Oak Shelf from Disaster
I once worked on a project for a local café where they wanted an 8-foot long ‘floating’ oak slab to hold heavy ceramic mugs. Halfway through the install, the middle started to dip like a wet noodle. It was a mess. We realized the studs alone weren’t providing enough lateral support. We had to pivot and use the internal torsion box trick for extra-long floating shelves. By building a hollow plywood skeleton inside the oak, we increased the shelf’s rigidity without adding significant weight. It’s the same logic used in airplane wings—strength through geometry rather than just bulk.
Distribute the Weight with a Hidden Wall Plate
If you’re mounting onto a wall where you can’t hit every stud exactly where you want them, a specialized mounting plate is your best friend. Instead of two small points of contact, a hidden wall plate strategy for floating media shelves allows you to screw into the studs anywhere along a horizontal span, then slide the shelf onto the pre-welded rods. This stops the ‘point-load’ failure where a single screw tears through the drywall. If your project is part of a larger room transformation, you might also look at how to fix wobbly built-ins with 4 hidden steel plate tactics to stabilize the entire unit. Remember, the goal isn’t just to make it level today; it’s to make sure it’s still level three years from now when someone inevitably overloads it with heavy cookbooks.
Most DIYers obsess over getting that bubble perfectly centered on the level during the initial install. Here is the contrarian truth: if you set a heavy floating vanity or a deep kitchen shelf perfectly level on day one, it will be out of level by day ninety. In my professional experience, you actually want to ‘over-correct’ by a hair—about 1/16th of an inch per foot of depth—to account for the inevitable compression of the drywall and the microscopic settling of the wood fibers. It sounds like heresy to the ‘level is king’ crowd, but physics doesn’t care about your bubble. The Forest Products Laboratory explains in their ‘Wood Handbook’ that mechanical fasteners are subject to ‘creep’ and withdrawal forces that fluctuate with seasonal humidity. This is why you need to go beyond the basics.
The Swiss Cheese Stud Mistake
The biggest ‘oops’ I see is people thinking that more screws into the same stud makes the shelf stronger. It’s actually the opposite. If you drive four 3-inch lag bolts into a four-inch span of a single 2×4, you’ve essentially turned that stud into a piece of perforated Swiss cheese, significantly weakening its structural integrity and causing the wood to split along the grain. Instead of more screws, you need better distribution. This is where the hidden sub-frame move for supporting massive quartz top vanities comes into play. It’s about spreading the load across a wider surface area, not concentrating it in one vulnerable spot. Have you ever fallen into this trap where you thought more was better? Let me know in the comments.
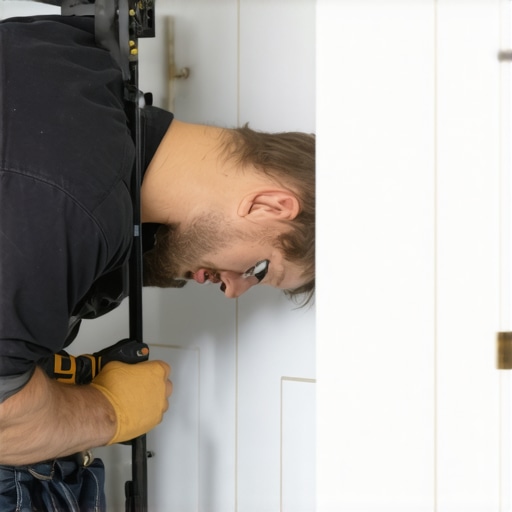
Why do even the most expensive built-ins still pull away from the ceiling?
It’s the question that keeps homeowners up at night after spending thousands on custom work. You see that hairline crack where the crown molding meets the ceiling, and you think the house is falling down. Usually, it is not a structural failure but ‘ceiling slap’ or floor joist deflection caused by the weight of the furniture above. If you’re building a floor-to-ceiling unit, you have to account for the house ‘breathing.’ This is why professional installers use a ‘floating’ top plate rather than hard-fastening the unit directly to the ceiling joists. If you don’t, you’ll eventually end up wondering why your built-in cabinets are pulling away from the ceiling and looking for a costly fix.
Why Caulk is Never the Solution for Gaps
One hidden nuance that separates the pros from the amateurs is the ‘scribe’—the art of fitting a straight cabinet to a crooked wall. Most people try to fill gaps with mounds of caulk, which eventually shrinks, cracks, and peels. If you’re working with textured surfaces or masonry, you need the scribing move for flawless cabinet gaps on natural stone or brick. It’s tedious, but it’s the only way to avoid that ‘floated’ look that screams amateur DIY. Furthermore, for those working in bathrooms, remember that standard wood shims are a disaster in high-moisture zones. I always recommend the moisture-proof shim strategy for basement built-ins and vanities to prevent the capillary action that rots your base from the inside out. If you’re struggling with a unit that just won’t stay put, check out our expert guide to flawless vanity installation tricks and tips to see how the pros handle truly wonky walls.
If you’re serious about precision, you need to stop guessing with a 2-foot spirit level. I personally use the Bosch GLL 3-330CG green-beam laser. The human eye picks up green light far better than red, which is a lifesaver in bright, renovated spaces. It projects a 360-degree plane, which is essential when you’re trying to coordinate a floating vanity height with existing tile lines. When I followed my own expert guide to flawless vanity installation tricks and tips, having that perfectly level line wrapping around the room meant I wasn’t constantly readjusting my brackets. It’s also the only way to ensure effortless storage solutions for a tidy, stylish home don’t end up looking like a funhouse mirror reflection.
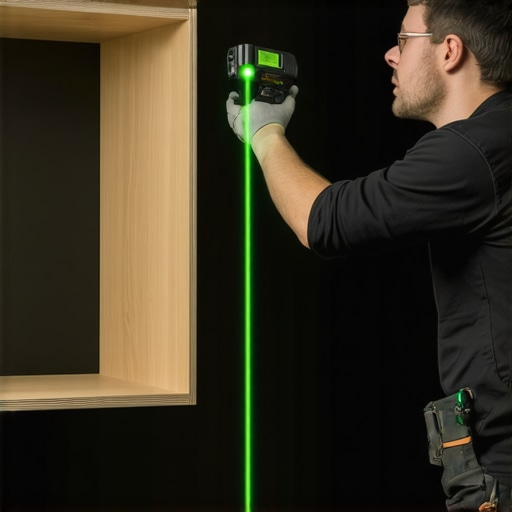
Beyond the laser, a Fein Multimaster with a Japanese-tooth blade is my secret weapon for the scribing I mentioned earlier. You can’t get those tight, ‘grown-out-of-the-wall’ gaps without a tool that allows for surgical precision. The Architectural Woodwork Institute (AWI), in their Section 11 Quality Standards for ‘Stowage and Display Units,’ emphasizes that the failure of wall-hung units is almost always due to the fastener’s withdrawal strength. They recommend a minimum 200lb pull-out resistance for any bracket—something your standard hardware store screws simply won’t provide. If you’re building out heavy units, you might need the steel bracket hack for floating entryway benches to meet those industrial-grade standards.
How do I maintain my custom built-ins over the long haul?
Maintenance isn’t just about dusting; it’s about checking the ‘health’ of your wall connections. Once a year, I take everything off my deepest shelves and put a level on them. If I see even a 1/32nd-inch drop, I know the home is settling or the drywall is compressing. This is your early warning sign to tighten those hidden anchors or add a support shim. If you ignore it, you’ll eventually find why your built-in face frames are separating from the wall the hard way. For those with smart storage solutions to optimize small bathroom spaces, check the sealant around the backsplashes. Moisture is the silent killer of structural wood fibers; once it gets behind the cabinet, your anchors will start to rot in place.
Looking ahead, I predict we’re going to see a massive shift toward carbon-fiber reinforced internal skeletons for floating furniture. It’s already happening in high-end European cabinetry. We’re moving away from bulky plywood cores and toward ultra-thin, incredibly stiff materials that don’t expand and contract with humidity. This will eventually make the ‘sag’ a thing of the past. For now, we still have to fight physics with our hands. If you’re currently seeing a slight dip in your cabinet doors, take ten minutes to learn how to fix uneven gaps in custom built-in doors using the hinge adjustment screws. It’s a simple fix that restores the visual line of your entire room. Go ahead and try the 1/16th-inch over-correction tip on your next install—you’ll thank me in six months when the shelf settles into a perfect zero.
The Truth About Why Heavy-Duty Isn’t Always Enough
After years of installing custom pieces, I’ve realized that ‘heavy-duty’ is often just a marketing term. The biggest lightbulb moment for me was understanding that a bracket’s weight rating doesn’t account for the leverage of a deep shelf. If you have a 12-inch shelf, the pulling force on that top screw is massive. I also learned the hard way that missing a stud by even half an inch is a recipe for a 3:00 AM disaster. If you’re just starting out, my step-by-step guide to vanity installation for beginners covers the fundamental basics you need to master before tackling massive floating units. Another hard-earned lesson: never trust the level of your floor or ceiling—always trust your laser. Houses are rarely square, but your storage solutions have to look like they are.
Must-Have Gear for Professional Grade Results
If you want to stop the sag for good, you need to move beyond the basic hammer and screwdriver. I personally rely on the Bosch GLL 3-330CG for every single project because that green laser line is unmistakable even in a sun-drenched room. For the fine details, a Japanese pull saw is essential for those tight scribing maneuvers against uneven masonry. I also swear by 1/4-inch solid steel plates for those instances where standard brackets just won’t cut it. To stay ahead of the curve on aesthetics, check out the top trends in vanity designs you need to know in 2025 to see how hardware is evolving. For those smaller spaces, these innovative storage solutions to transform your bathroom can handle even the tightest layouts while maintaining structural integrity.
#IMAGE_PLACE_HOLDER_E#
Take the Leap and Level Up Your Home
Don’t let the fear of a little gravity hold you back from creating a beautiful, functional space. Engineering a shelf to stay level is as much about patience as it is about the right hardware. By using the ‘over-correction’ method and ensuring you’re anchored deep into the wall’s framing, you can build something that lasts as long as the house itself. You have the tools, the logic, and the professional tricks to create rock-solid storage solutions that won’t let you down. Have you ever struggled with a shelf that just refused to stay level no matter what you tried? Let me know in the comments below.