

I’ll never forget the sound of three hundred pounds of oak and winter gear meeting the floor at 2 AM. It wasn’t just a loud bang; it was the sound of my Saturday afternoon project failing in spectacular fashion. I had built these beautiful mudroom lockers, spent hours on the finish, and then made the classic amateur move: relying on standard screws and a prayer. If you’ve ever seen your hard work slowly pull away from the drywall, leaving behind gaping holes and a sense of defeat, you know exactly how I felt. That disaster forced me to stop guess-working and start thinking like a structural engineer, leading me to the strategy I use for every heavy build today.
Your Mudroom Deserves More Than Just Drywall Anchors
When we talk about heavy built-ins, we aren’t just talking about the weight of the wood. We’re talking about the dynamic load of kids jumping on benches and heavy backpacks being tossed into cubbies daily. My biggest early mistake was thinking that a few ‘heavy-duty’ toggles would be enough. They weren’t. You need to tie the unit into the actual skeleton of your house. This is why the sub-frame strategy is so critical for anything that people sit on. Without a structural cleat—essentially a hidden ledger board that transfers the weight directly into the studs—your walls are doing all the heavy lifting, and they aren’t designed for it. According to the Forest Products Laboratory, the withdrawal strength of a screw in the side grain of wood is significantly higher than any anchor in gypsum, which is why we must hit the timber.
Is this structural cleat thing actually worth the extra effort?
I get it. You just want the lockers up so you can stop tripping over boots. You might think a cleat adds too much bulk or complicates the installation on textured walls. But here’s the reality: it actually makes the process faster. Instead of fighting to find studs while holding a heavy cabinet, you mount the cleat first. It gives you a perfectly level ‘shelf’ to rest your lockers on while you drive the final fasteners. It’s the difference between a unit that lasts twenty years and one that becomes a liability in twenty months. I’ve seen benches pull away from the wall far too often because people skipped this step. Have you ever noticed a terrifying gap growing between your built-ins and the ceiling? Drop a comment and tell me if you’re dealing with a sagging unit right now—I’ve likely been there and fixed it.
Forget the Anchors and Build a Real Skeleton
Starting a project this size without a structural plan is like building a house on a sand dune. Most DIYers jump straight to the ‘pretty’ parts—the paint and the cubby holes—while ignoring the fact that a bench needs to support hundreds of pounds of dynamic pressure. When I built a set for a client in a 1920s craftsman, I learned the hard way that walls are rarely flat and studs are rarely where you want them. I spent three hours wrestling with a unit that just wouldn’t sit flush until I realized I was fighting the wall instead of working with it. The solution isn’t more screws; it’s a dedicated mounting surface. Using the hidden ledger trick for rock-solid entryway seating is the only way to ensure that when your kids hurdle themselves onto the bench, the drywall doesn’t crumble behind them. You essentially create a horizontal ‘shelf’ of wood that spans multiple studs, giving your lockers a massive surface area to bite into.
The Stealth Ledger That Does the Heavy Lifting
Think of a ledger board as the backbone of your build. Instead of trying to find a stud while balancing a 100-pound cabinet, you mount a 3/4-inch strip of plywood or solid wood directly to the studs first. This strip should be slightly shorter than the width of your unit so it stays hidden. During that craftsman build, I used a hidden plywood cleat to bridge a four-foot gap where the studs were spaced irregularly. It felt like cheating. Once that cleat was leveled and lagged into the timber, the lockers just slid right over it. It turned a two-person struggle into a one-person breeze. If you are worried about the unit pulling forward, you can also integrate the plywood plate move for extra security, which provides a secondary point of contact at the base.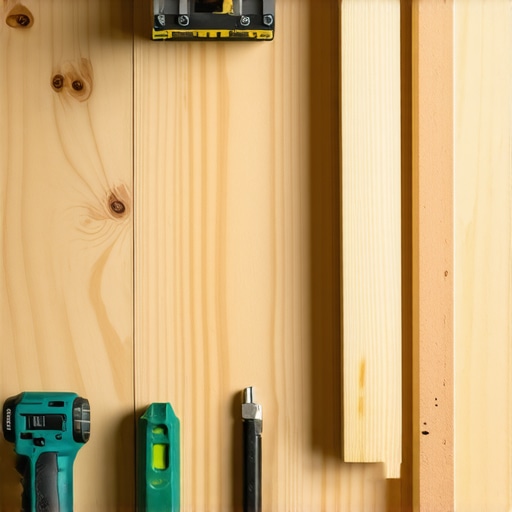
Scribe for a Seamless Fit Against Any Wall
No wall is perfectly plumb, and no floor is perfectly level. If you just shove your lockers into a corner, you’ll end up with gaps that make even the most expensive wood look like a cheap kit. This is where the pros separate themselves from the amateurs. You need to use a technique called scribing to match the wood to the wonky curves of your home. I remember a project where the drywall had a massive bulge right at eye level; I used the scribing secret for perfect built-ins to trace that exact bump onto my side panels. By shaving away just a few millimeters of wood with a jigsaw or power plane, the unit sucked right into the wall as if it had been grown there. It’s a tedious ten minutes of work that saves you years of looking at an ugly caulk joint.
Secure the Base to Stop the Rocking
A mudroom bench that wobbles even a fraction of an inch will eventually work its fasteners loose. To prevent this, you have to anchor the base as firmly as the top. If you are working on a concrete subfloor or even over tile, you might need to look into the hidden floor bolt strategy to keep the front edge from lifting. By locking the ‘toe kick’ or the base frame into the floor joists or the slab, you create a rigid box that cannot pivot. This is especially important for innovative built-in solutions for small rooms where every inch of stability counts because the units are often taller and narrower, making them more prone to tipping.Most DIYers think that if a screw is long enough, it’s strong enough. I see it every week: people using standard gold deck screws to hang heavy mudroom units or bathroom cabinets. Here is the contrarian truth: deck screws are actually terrible for built-ins. They are hardened and brittle, designed to resist withdrawal but not shear. When a 200-pound unit shifts even slightly, those brittle heads can snap off like glass. In my experience, relying on structural screws like GRK or Spax is the only way to go because they are engineered to bend, not break, under lateral pressure. This is a core part of any expert guide to flawless vanity installation because it accounts for the physics of the load, not just the length of the fastener. According to the USDA Forest Service’s Wood Handbook (FPL-GTR-190), the performance of a mechanical fastener is dictated by the specific gravity of the lumber and the lateral resistance—factors that standard hardware store screws often ignore.
The Hidden Danger of a Tight Ceiling Fit
Another ‘trap’ I see constantly is the obsession with making a cabinet sit perfectly flush against the ceiling. It looks great on day one, but it’s a recipe for disaster. Houses are living organisms; they breathe, settle, and move with the seasons. If you jam a floor-to-ceiling unit into a tight space without a ‘shadow gap’ or a two-piece crown molding system, the ceiling will eventually exert downward pressure on your unit. I’ve seen this cause built-in cabinets pulling away from the ceiling as the stress forces the fasteners to fail or the face frames to buckle. Always leave a 1/2-inch gap and hide it with a decorative trim that is only nailed to the cabinet, not the ceiling. 
How can you tell if your floor is actually lying to your level?
This is the advanced question that trips up even seasoned builders. You might have a laser level that says your base is perfect, but when you step back, the whole unit looks like it’s leaning. Why? Because our eyes often prioritize ‘parallel to the corner’ over ‘perfectly level.’ If your walls are out of plumb, a perfectly level unit will highlight that flaw. The nuance is finding the ‘optical middle ground.’ Sometimes you have to split the difference, slightly tilting the unit so it doesn’t look like it’s falling over while still maintaining enough level for your drawers to function. If you find your unit is still vibrating or moving despite being leveled, you might need to fix wobbly built-ins with hidden steel plates to bridge the gap between the structure and a wonky floor. Have you ever fallen into the trap of trusting your level more than your eyes? Let me know in the comments—I’ve spent hours chasing a bubble only to realize the house was the problem.
Protect the Base to Ensure Decades of Stability
Finally, never let your wood sit directly on a concrete subfloor or even a tiled bathroom floor. Capillary action will pull moisture up into the grain, leading to rot and cabinet failure within a few years. I always use a moisture-proof base hack, typically using PVC shims or a sacrificial pressure-treated cleat that stays hidden behind the baseboard. This simple barrier keeps your expensive cabinetry dry and prevents the wood from expanding and contracting at different rates than the floor. For those working on larger projects, remember that the steel bracket hack can provide that extra cantilevered support for benches that need to withstand heavy daily use without sagging.
The Gear That Keeps My Projects from Failing
After years of trial and error, I’ve realized that the tool isn’t just about making the job easier; it’s about the integrity of the fastener. I stopped using my standard drill for structural mounting and switched exclusively to a high-torque impact driver for driving those 3-inch GRK structural screws. The reason is simple: a drill often cams out, stripping the head or failing to fully seat the screw into the heart of the stud. An impact driver uses rotational strikes to seat the fastener without putting that snapping pressure on the screw’s neck. If you are aiming for effortless storage solutions for a tidy, stylish home, you cannot afford a loose connection behind the face frame. I also never start a build without my 360-degree green beam laser level. It doesn’t just show you where ‘level’ is; it shows you exactly how much your floor dips over a ten-foot span, allowing you to plan your shims before the first cabinet even enters the room.
Stop Your Large Drawers from Binding Two Years Later
We spend so much time on the carcass of the build that we often neglect the hardware that actually moves. If you are building deep lockers or wide bathroom units, standard 75-pound slides are a trap. For anything over 24 inches wide, I jump to 100-pound or even 150-pound over-travel slides. I’ve seen why your large kitchen drawers drag and the support fix is almost always beefier hardware or a center-mount support rail. According to the Blum Hardware Technical Manual for TANDEM systems, exceeding the dynamic load capacity by even 10% can lead to a 50% reduction in the life cycle of the runner, causing the bearings to flatten and the ‘soft-close’ mechanism to fail. This is why I always over-spec the hardware weight limit. If you want to how to support extra wide kitchen drawers without dragging, you have to account for the weight of the drawer box itself, not just the items going inside it. 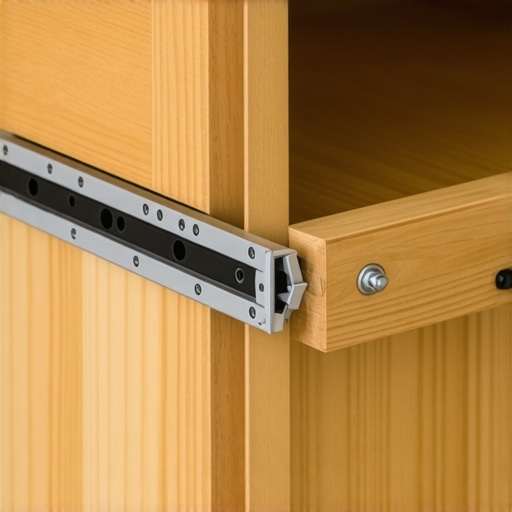
How do I maintain my custom built-ins so they never sag?
Maintenance for built-ins is mostly about monitoring the house’s seasonal shifts. Twice a year—once in the peak of humid summer and once in the dead of dry winter—check the gaps where your unit meets the wall. If you see the caulk cracking, don’t just add more; check the mounting screws to ensure the house hasn’t pulled them slightly. For those following maximize your space with custom vanities expert design tips, keep an eye on the plumbing penetrations. A tiny, slow leak from a P-trap can soften the wood base of a vanity, compromising the structural integrity of the floor mounts long before you see a puddle. Looking toward the future, I see the top trends in vanity designs you need to know in 2025 shifting toward ‘floating’ structural steel skeletons that are bolted directly to the wall framing, allowing for even heavier stone tops without the need for traditional legs. My advice? Try using a laser level to project a vertical plumb line across your entire wall before you even touch a screwdriver—it’s the only way to see the ‘hidden’ curve of your house that will fight your installation.
Hard Lessons from the Trenches of Structural Cabinetry
Building heavy units isn’t just about the aesthetics; it’s about the physics of everyday life. Looking back at my early mistakes, I realized three things that changed my approach forever. First, never assume a wall is flat just because it looks okay; always assume it is a topographical map that needs navigating. Second, the good enough screw is usually the one that will snap when your teenager drops a heavy bag on the bench. Third, taking ten minutes to scribe is the difference between a project that looks DIY and one that feels like it was part of the original home architecture. These realizations led me to refine my effortless storage solutions for a tidy, stylish home by prioritizing the skeleton over the skin.
The Non-Negotiable Kit for a Pro Level Finish
I don’t leave my workshop without a few specific items that guarantee a solid result. I trust GRK structural fasteners because they have a shear strength that ordinary wood screws simply lack—they are designed to move with the house rather than snapping under lateral pressure. I also swear by a 360-degree self-leveling laser; it is the only way to catch a floor slope before it ruins your cabinetry alignment. If you are tackling something more complex, like a bathroom remodel, I highly recommend checking out an expert guide to flawless vanity installation to see how these tools apply to wet environments. Finally, always keep a set of steel shims or plates on hand; sometimes you need to fix wobbly built-ins with hidden steel plates to achieve that rock-solid feel on uneven tile or hardwood floors.
Bring Lasting Stability to Your Next Home Project
There is a unique kind of satisfaction in walking through your front door and seeing a mudroom or a set of lockers that you built with your own hands—and knowing they aren’t going anywhere. Whether you are using built-in storage ideas to declutter and enhance your home or building a custom vanity, the principles of structural anchoring remain the same. Don’t be intimidated by the physics; embrace the process, hit your studs, and build something that stays put for decades. Your future self (and your drywall) will thank you for the extra effort today. Have you ever felt that sinking feeling when a heavy-duty anchor pulled right out of the wall? Drop a comment below and share your most frustrating installation moment—I would love to help you troubleshoot it!