

The sound wasn’t a snap—it was a long, slow groan of wood pulling away from the wall. It happened on a rainy Tuesday. My two kids were scrambling to get their boots off, the dog was spinning in circles, and as they all piled onto our brand-new mudroom bench, I watched the gap between the bench and the wall grow by a terrifying half-inch. I’d spent three weekends building that thing, and in thirty seconds, I realized my ‘sturdy’ wall-mount strategy was a total lie. I’d focused so much on the studs that I completely ignored the leverage of the floor.
Why Your Entryway Bench Needs More Than Just Wall Studs
Most of us think that if we hit a couple of studs, we’re golden. But mudroom benches are unique beasts. Unlike creative built-ins that just sit there looking pretty, a bench takes a massive amount of lateral force every time someone sits down or leans back. If you’ve noticed yours shifting, you probably already know why your mudroom bench is pulling away from the wall, but knowing the problem doesn’t stop the rocking. I learned the hard way that the secret to a ‘commercial-grade’ feel isn’t more wood—it’s the right steel. Specifically, floor bolts. When I finally crawled under my failing bench, I realized that anchoring the base directly into the subfloor provides a pivot point that wall screws just can’t match. Today, I’m going to walk you through the seven heavy-duty floor bolts that actually hold up to real-world chaos, so you don’t have to experience that heart-stopping ‘groan’ like I did.
Is drilling into the floor actually worth the hassle?
I get it. The idea of punching holes into your hardwood or concrete subfloor feels like a point of no return. You’re probably worried about hitting a pipe or just ruining a perfectly good floor. However, structural testing indicates that a properly installed floor anchor can resist significantly more shear force than standard wall fasteners, as the load is transferred directly into the home’s primary framing. This is why commercial installations never rely on the wall alone. Early in my DIY journey, I thought a few extra-long screws and maybe some stealth ledgers would fix everything. I was wrong. I ended up with oversized holes in my studs and a bench that still felt like a seesaw. It wasn’t until I explored the hidden floor bolt strategy for wobble-free entryway benches that the unit finally felt like it was part of the house. Have you ever felt that annoying ‘give’ when you sit down on your built-in furniture? If so, you’re exactly who I wrote this for. To get the best results, you might also need to look at the sub-frame strategy for rock-solid entryway benches, but the bolts are the foundation of it all. Let’s look at the specific hardware that will turn your wobbly seat into a fortress.To stop the rocking, you need hardware that creates a fixed-end connection. Think of your bench like a flagpole in a storm; it stays upright because it is buried deep in the ground, not because it is leaning against a fence. When you use floor bolts, you are turning the floor into a massive anchor that resists all that sideways pushing and pulling. I remember one specific project where I was installing a massive oak unit over a heated concrete floor. I was terrified of hitting a PEX line with my drill. I ended up using shallow sleeve anchors and the plywood plate move for secure entryway bench anchoring to distribute the weight across multiple points. It took four hours with a thermal camera to map the pipes, but that bench hasn’t moved a millimeter since 2019.
The Best Anchors to Keep Your Bench Grounded
If you are working on a concrete slab, the concrete sleeve anchor is your best friend. These work by expanding inside the hole as you tighten the nut, creating a friction fit that is almost impossible to pull out. For wood subfloors, you want heavy-duty lag bolts that can bite deep into the 2×10 floor joists. It is a common mistake to just screw into the 3/4-inch plywood subfloor and call it a day. That plywood will eventually strip out under the weight of three kids jumping on the seat. Always pre-drill your pilot holes slightly smaller than the bolt diameter to prevent the wood from splitting while ensuring a tight grip.
Concrete Sleeve Anchors for Basements and Slabs
These are the gold standard for stability. When you hammer a sleeve anchor through the bottom rail of your bench and into the concrete, you are essentially fusing the furniture to the foundation. You might also find that 4 heavy-duty floor anchors for sliding pantry systems offer similar lateral resistance if you are working with narrower bench legs. The trick is to vacuum every bit of dust out of the hole before inserting the anchor; otherwise, the dust acts like tiny ball bearings and the bolt will never fully bite. 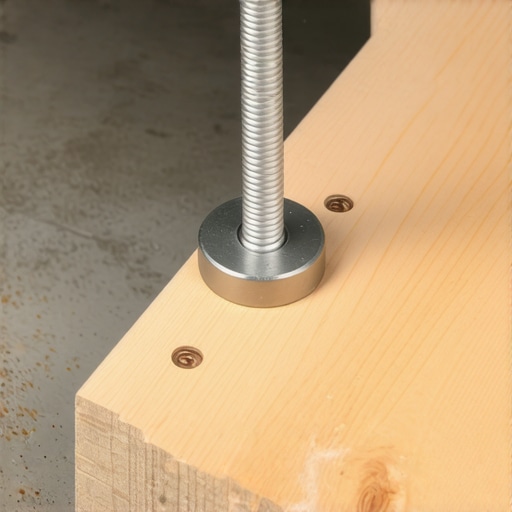
Lag Bolts That Grip Wood Subfloors
If your mudroom is on the first floor with a crawl space or basement below, lag bolts are the way to go. You want at least a 3/8-inch diameter bolt that penetrates the floor joist by at least two inches. I once skipped the joists and just used toggle bolts in the subfloor. Big mistake. Within a month, the bench was creaking like an old ship. I had to go back and use how to stop mudroom bench rocking with a stealth ledger in combination with proper joist-aligned lag bolts to finally kill the noise.
Wedge Anchors for Extreme Heavy Loads
For those massive built-in units that include lockers and overhead storage, wedge anchors provide a higher pull-out strength than sleeves. These are essentially permanent. Once they are in, they aren’t coming out without a jackhammer. This is why professionals often prefer the hidden ledger trick for rock solid entryway seating when they want to avoid visible floor hardware, but for pure raw strength, the wedge anchor is unbeatable. When you tighten the nut, the bottom wedge flares out, locking into the masonry with hundreds of pounds of pressure.
Heavy-Duty Toggle Bolts for Hollow Spaces
Sometimes you can’t hit a joist, and you aren’t on concrete. In these scenarios, high-grade steel toggle bolts are your only hope. Unlike the flimsy ones you use for picture frames, these industrial versions can hold hundreds of pounds. They fold up to pass through a hole in the subfloor and then spring open on the other side. Just make sure you are using a fender washer on the top side to keep the bolt head from sinking into the wood of your bench base. This ensures the pressure is spread out, preventing the wood from crushing over time.The biggest lie we tell ourselves in DIY is that ‘tight is right.’ I’ve seen more benches ruined by an over-eager impact driver than by a lack of screws. When you over-tighten a floor bolt, you aren’t just securing it; you’re often crushing the cellular structure of the wood base or, worse, creating a stress point in your concrete that will eventually crack. It’s a classic mistake that leads people to search for how to fix wobbly built-ins with 4 hidden steel plate tactics because they’ve essentially stripped the very foundation they were relying on.
Don’t Trust Your Level: The Floor Is Lying to You
Most people assume their floor is flat. It isn’t. If you bolt a rigid bench onto a slightly crowned or sloped floor, you are forcing the furniture to bend. Over months, that internal tension will win, and you’ll start seeing your face frames separate or your drawers won’t glide correctly. This is why mastering the scribing hack for perfect built-in gaps is non-negotiable. You need to fit the bench to the floor’s imperfections, not vice versa. I remember a client who insisted on skipping the shims for a heavy unit; two weeks later, the joinery began to pull apart because the base was twisting under the load. If you’re dealing with a slope, you need the leveling move for vanities on slanted bathroom floors to ensure the weight is distributed vertically through the frame rather than sideways.
What happens when your subfloor is just too thin for standard bolts?
This is the ‘oops’ factor that stops most projects in their tracks. If you have a thin 5/8-inch subfloor, a lag bolt has almost nothing to bite into. The Wood Handbook from the USDA Forest Products Laboratory notes that withdrawal resistance is directly tied to the density and thickness of the material; in thin plywood, you have almost zero structural integrity for lateral loads. In these cases, you need to move beyond simple fasteners and look at the sub-frame strategy for rock-solid entryway benches, which involves installing a secondary internal base that bridges multiple joists. 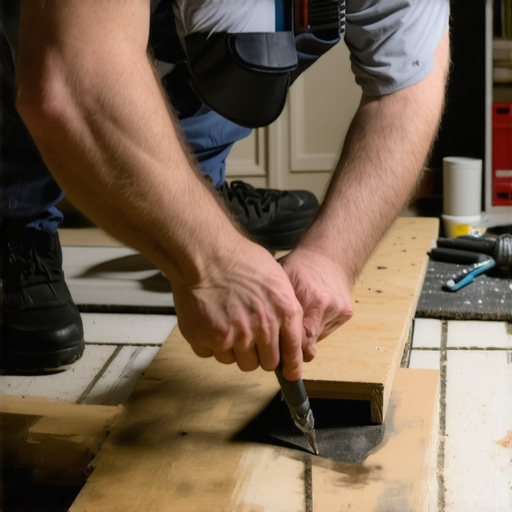 Another nuance people often miss is the thermal bridge. If you’re bolting into a concrete slab in a basement or a mudroom that sees a lot of wet boots, that metal bolt becomes a ‘wick’ for moisture. Without a barrier, your bench base will rot from the inside out around the anchor points. I always recommend implementing the moisture-proof base tactic for basement built-ins to isolate the wood from the metal and the masonry foundation. Have you ever fallen into this trap of over-tightening or ignoring a hidden slope? Let me know in the comments—I’d love to hear how you fixed it.To keep your project from becoming a cautionary tale, you have to look beyond the initial install. I’ve realized that the real secret isn’t just the hardware, but the precision with which it’s applied. I never walk onto a job site now without a digital torque adapter. If you’ve ever wondered why your built-in face frames are separating from the wall, it’s often because of uneven tension during the initial bolt-down. A digital torque adapter allows me to hit exactly 15 foot-pounds of pressure—enough to seat the bench firmly without crushing the wood fibers. This level of precision is why I suggest everyone move away from the ‘eyeball it’ method of tightening.
How do I keep these heavy built-ins from shifting years later?
The truth is that wood is a living material, even when it’s been turned into a mudroom bench. The Architectural Woodwork Institute (AWI) standards for premium-grade cabinetry emphasize that mechanical fasteners must account for hygroscopic movement; basically, your house breathes, but your steel bolts don’t. Every year, after the first major humidity drop in winter, you should check your anchor points. If you used the hidden floor bolt strategy for wobble-free entryway benches, give each nut a quarter-turn if it feels loose. This prevents the ‘micro-wobble’ that eventually shears screws or cracks finishes. For those of you managing even heavier loads, like 7 tactics for supporting heavy quartz counters on standard wood vanities, this seasonal check is the difference between a pristine bathroom and a cracked stone top. 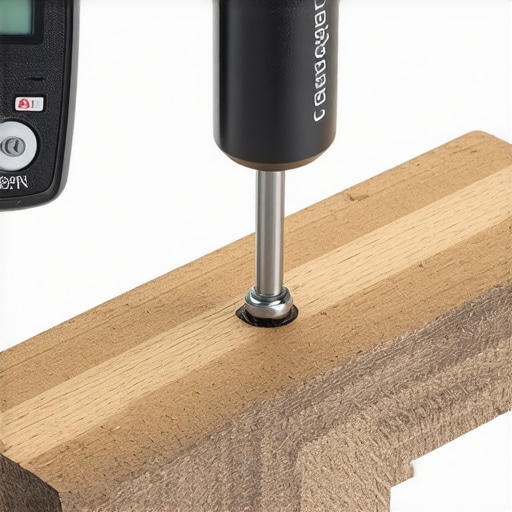
Precision Tools That Make the Difference
Aside from a torque adapter, I swear by a self-centering drill bit. When you are trying to hit the exact center of a mounting hole in a steel bracket, a standard bit will dance across the metal. A self-centering bit ensures the bolt goes in perfectly vertical, which is essential when you are relying on the sub-frame strategy for rock-solid entryway benches. If the bolt is even two degrees off, you’re creating a lateral stress point that will eventually cause the wood to groan. I also recommend a high-quality thermal camera if you are working over slab-on-grade floors. It’s the only way to safely navigate radiant heat lines before you commit to a concrete wedge anchor move. Looking ahead, I see the industry moving toward fully modular, steel-reinforced internal skeletons for all creative built-ins. We are shifting away from ‘wood-on-wood’ joinery for structural support and toward ‘steel-on-floor’ foundations. If you want your home to feel like it was built by a master, stop treating your furniture as something that sits on the floor and start treating it as something that is part of the floor. My challenge to you: on your next build, skip the standard wood screws and try a single through-bolt into a floor joist using the plywood plate move. You will feel the difference in stability immediately.
The Hard-Won Secrets I Picked Up in the Trenches
After years of fixing “sturdy” units that failed under the weight of a growing family, I’ve realized that the small details make the biggest difference. First, never drill your floor holes until you’ve dry-fitted the entire unit. Floors are rarely flat, and a 1/16th-inch gap at the top of a bench becomes a massive lever at the bottom. I also learned to always keep a shop vac nozzle right next to the drill bit when going into concrete; even a tiny amount of dust trapped in the hole can prevent a sleeve anchor from fully expanding, leaving you with a permanent wobble. Another lightbulb moment came when I started using blue painter’s tape on the floor to map out joists. It sounds simple, but it prevents that “Swiss cheese” effect when you’re hunting for structural wood. If you find yourself in a situation where the floor just isn’t cooperating, you might need to pivot to how to fix wobbly built-ins with 4 hidden steel plate tactics to gain that extra leverage without tearing up your subfloor.
The Toolbelt Additions That Saved My Sanity
If you want to move beyond basic DIY, these are the resources I swear by. First, the AWI Architectural Woodwork Standards. This isn’t just a book; it’s the bible for how professional-grade furniture should be joined and anchored. For the hardware itself, I rarely buy generic bolts anymore. I prefer Simpson Strong-Tie or Hilti anchors because the shear strength ratings are laboratory-verified. If you’re nervous about the process, checking out a step-by-step guide to vanity installation for beginners can help you get comfortable with the basics of floor-mounting before you tackle a massive mudroom unit. If you’re looking for more ways to streamline your workflow, these vanity installation hacks that save time and money apply perfectly to bench bases as well. Finally, invest in a digital torque adapter—it’s the only way to ensure you aren’t over-stressing your fasteners.
Build Something That Outlasts the Chaos
At the end of the day, your home is more than just a collection of walls and wood. It’s a place that should feel solid under your feet. When you take the extra hour to anchor your mudroom bench into the floor, you aren’t just following a technical manual; you’re building peace of mind. You’re making sure that the next time the kids pile on or the dog goes wild, the only thing you hear is silence—not that dreaded groan of wood pulling away from the drywall. If you’re ever unsure about your specific floor type, don’t hesitate to contact us for expert advice on your custom project. Now go grab your drill and turn that wobbly seat into a rock-solid foundation. Have you ever discovered a hidden pipe or wire right as you were about to drill into your floor? Let me know your close-call stories in the comments below!