

I will never forget the sound of three hundred pounds of steel and salt-crusted tools meeting my garage floor at two in the morning. It wasn’t just a crash; it was a personal insult from my 1940s brickwork. I had made the classic rookie mistake—trusting those little plastic expansion anchors that come “free” in the box. I thought I was being efficient, but instead, I was just lucky no one was standing there when the brick face finally gave up the ghost. Aging brick is a beautiful, character-filled liar. It looks solid, but internally, it is often as brittle as a dry biscuit. If you are trying to mount heavy cabinetry to masonry that has seen more than a few decades of freeze-thaw cycles, you aren’t just DIYing; you are performing structural surgery.
Stop Your Garage Cabinets from Ripping Out the Wall
The struggle with old masonry is real. Unlike new construction, where you can rely on predictable density, aging brick is a lottery. One hole hits a solid core, while the next one—just two inches away—drifts into a pocket of dust and mortar. I have spent years figuring out how to bypass the fragility of these surfaces, often learning the hard way through why your garage shelves are pulling away from the wall. Today, I want to share the exact heavy-duty fixes that actually work when the “standard” hardware fails. We are going to look at everything from chemical anchors to the specific concrete wedge anchor for heavy garage tool cabinets that finally saved my workshop.
Does Old Brick Actually Have Any Structural Integrity Left?
It is the question every homeowner asks when they see red dust pouring out of a drill hole. You are right to be skeptical. According to the Brick Industry Association, the compressive strength of historical brick can vary wildly based on the original kiln temperature, often making it significantly softer than modern materials. This means your traditional fasteners might actually be accelerating the damage by creating internal pressure that cracks the brick from the inside out. I learned this the hard way when I tried to use high-torque bolts on a crumbling pillar—I didn’t just fail to hang the shelf; I actually split the brick in half.
The Secret to Anchoring When There Is No Stud in Sight
One of the biggest hurdles in a garage is that we often want cabinets exactly where the masonry is at its weakest. You might be tempted to just keep drilling until you hit something solid, but that is a recipe for a “Swiss cheese” wall. Instead of hoping for the best, I started using 4 steel wall track tactics for heavy garage storage cabinets to distribute the load across multiple points. This way, if one anchor is in a “soft” spot, the others compensate. It is the same logic I use when I am anchoring heavy floating vanities to old brick bathroom walls—you have to respect the material you are working with, not fight it. Have you ever had that heart-sinking moment where a screw just keeps spinning in the wall, never tightening? Drop a comment or reach out via our contact-us page—I would love to hear your “wall from hell” stories before we get into the nitty-gritty of the fixes.
Clean the Hole or Prepare for a Crash
The biggest reason anchors fail in old masonry isn’t the hardware; it is the dust. Think of it like trying to tape something to a pile of flour. When you drill into 80-year-old brick, the friction creates a fine, silty powder that acts as a lubricant. If you don’t blow that out with a hand pump or compressed air, your anchor is gripping the dust, not the wall. I learned this the hard way in a 1920s carriage house when a 40-pound cabinet slid right off the wall because the sleeve anchors were basically skating on red silt. Now, I always drill 1/2 inch deeper than the anchor length to give that extra dust somewhere to go, then I vacuum the hole twice. It is a small step, but it is the difference between a secure shop and a pile of broken tools on the floor.
Stop Trusting Friction and Start Using Resin
Standard expansion anchors work by pushing outward against the sides of a hole. In old, brittle brick, that internal pressure can actually cause the face of the brick to blow out or ‘spall.’ This is where chemical anchoring becomes your best friend. Instead of mechanical pressure, you are using a two-part epoxy resin that flows into every micro-crack and void in the masonry. It is effectively like turning the inside of the wall into solid rock. I used this technique when I was tasked with anchoring heavy floating vanities to old brick bathroom walls in a historic renovation. The bricks were so soft I could almost scratch them with a fingernail, but once the resin cured around the threaded rods, that vanity wasn’t going anywhere. For garage setups, I often recommend the concrete sleeve anchor for wall mounted tool chests only if you hit a truly solid core; otherwise, stick to the epoxy. 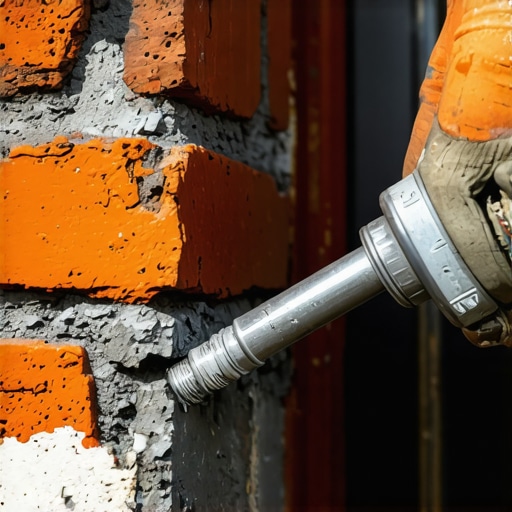
Distribute the Weight with a Steel Backbone
If you are hanging something truly massive, like a full-length tool locker, don’t rely on four individual points of contact. Old masonry loves to fail locally. Instead, I use the steel rail strategy for secure garage wall cabinets. By mounting a heavy-duty steel track or a 3/4-inch plywood ledger across the length of the wall, you can bridge the gaps between the ‘good’ bricks and the ‘dusty’ ones. This is the same principle I apply when I’m looking for 6 tactics for mounting heavy garage racks without hitting a stud. You are essentially creating a new, artificial ‘stud’ that is bolted into ten different locations. If two of those bolts are in soft mortar, the other eight are doing the heavy lifting.
The Scribing Secret for Flush Fits
Old brick is never flat. If you bolt a flat cabinet back against a wavy brick wall, you will either warp the cabinet box or leave a massive, ugly gap. I always use a the scribing trick for cabinets against uneven masonry. I hold the cabinet in place, use a compass to trace the wall’s profile onto a side filler strip, and then grind the wood down to match the bricks perfectly. It makes the cabinet look like it grew out of the wall rather than being slapped onto it. I remember a project where I had to install creative built-ins for seamless storage and home aesthetics against a chimney breast that leaned three inches from top to bottom. Scribing was the only way to keep the doors from binding.
Let’s dig deeper into a mistake I see even seasoned pros make: the ‘more is better’ anchoring fallacy. Everyone assumes that if four anchors are good, eight must be twice as secure. In the world of aging masonry, this is a dangerous lie. Drilling too many holes in a concentrated area actually compromises the structural integrity of the brick, essentially turning it into a perforated sheet of crackers. When you are working with smart storage solutions to optimize small bathroom spaces, especially those involving heavy stone tops, the goal isn’t just to add more fasteners; it is to maximize the surface area of the grip without shattering the host material.
The Moisture Trap Most Installers Ignore
One of the biggest ‘oops’ moments happens when people transition from the garage to the bathroom. You might think the wall is your only enemy, but the floor is often the silent killer. I have seen beautiful creative built-ins for seamless storage and home aesthetics ruined within two years because the installer forgot a simple moisture barrier. In older homes, concrete or tile floors over crawlspaces act like a sponge. If you bolt a vanity directly to that surface, you are inviting capillary action to rot the base of your cabinet from the inside out. I always recommend the moisture barrier fix for vanities on cold basement floors to ensure that your hard work doesn’t become a moldy mess. Have you ever pulled up a cabinet only to find the bottom was soft as cardboard? Let me know in the comments—I want to know if I am the only one who has encountered this ‘invisible’ rot.
Why Does Your Floating Vanity Still Feel Like It Might Sag?
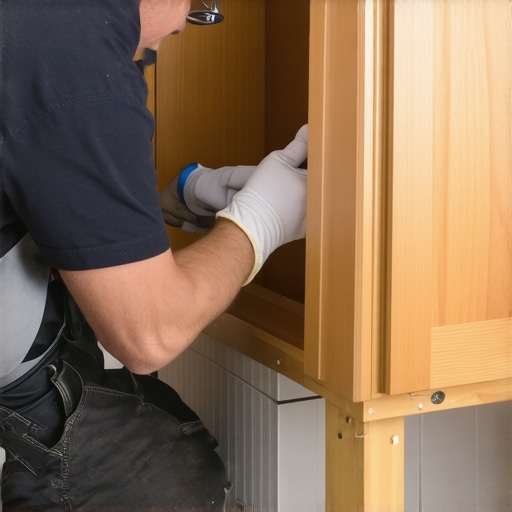
It’s the question that keeps DIYers up at night. You used the right bolts, you hit the masonry, yet there is still a fraction of an inch of ‘give’ when you lean on it. The nuance here isn’t the fastener; it’s the lack of internal cabinet reinforcement. According to the National Kitchen & Bath Association (NKBA), large-format vanities with quartz tops require specific load-bearing support that standard cabinet boxes simply aren’t built for. Most people skip the hidden sub-frame move for supporting massive quartz top vanities, relying instead on the thin plywood back of the cabinet. This is a recipe for disaster. To get a truly rock-solid feel, you need to tie the cabinet’s internal frame directly to the wall anchors, bypassing the decorative ‘skin’ of the unit. This is the difference between a expert guide to flawless vanity installation and a weekend project that ends in a cracked countertop. If you are struggling with a unit that just won’t stay level, you might need to check if your cabinet is actually bowing under its own weight before you even add the sink.
Stop Treating Every Wall Like It Is Drywall
The most common mistake I see is ‘hardware carryover.’ People buy a high-end storage system and use the screws provided in the box, regardless of whether they are mounting to 19th-century lime mortar or 21st-century steel studs. For those dealing with modern builds, you need to pivot your strategy entirely and look into the cleat hack for mounting vanities to steel studs. Steel studs don’t have the ‘bite’ of wood, and they certainly don’t have the density of brick. If you try to use masonry tactics on steel, or vice-versa, you are going to end up with a pile of scrap. Whether you are browsing innovative storage solutions to transform your bathroom or beefing up your garage, the golden rule is: the wall dictates the tool, not the other way around.
I’ve spent thousands on tools over the years, but the one that truly saved my sanity when dealing with old brick wasn’t the most expensive—it was an SDS-plus rotary hammer with a variable speed trigger. I used to think a standard hammer drill was fine, but those high-frequency ‘clacks’ actually vibrate old lime mortar into dust before the bit even bites. If you are following my expert guide to flawless vanity installation tricks tips, you’ll know that precision is everything. I personally use a rotary hammer because it allows me to toggle off the hammer function to start the hole cleanly, which prevents that ugly ‘spalling’ where the front of the brick blows out and leaves you with a crater instead of a hole.
Ditch the Impact Driver for a Rotary Hammer
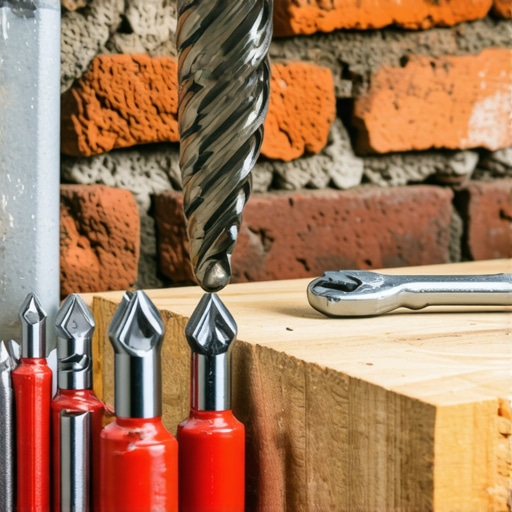
When you are working with the concrete wedge anchor for heavy garage tool cabinets, the depth of your hole must be exact. A standard drill often wanders, but a rotary hammer punches through with a consistent force that keeps your path true. I’ve found that using ‘four-cutter’ bits—the ones with a cross-head tip—prevents the drill from catching on the hard aggregate often found in older masonry. This is the same level of care I take when I am implementing creative built-ins for seamless storage and home aesthetics in historic homes; you cannot afford for the wall to crack because your tool was too aggressive.
How do I keep my heavy storage secure for the long haul?
Maintenance isn’t just about cleaning off the sawdust; it’s about physical checks. Every six months, I take a level to my larger installations. If you notice a tiny gap appearing at the ceiling or the top of the unit, you need to investigate why your built-in cabinets are pulling away from the wall immediately. Often, it’s not the anchor failing but the wood of the cabinet frame itself compressing under the weight. Regarding technical standards, the The Masonry Society (TMS 402) code specifically highlights that anchor spacing is critical to avoid ‘cone failure,’ where the tension on one bolt rips out a chunk of brick already weakened by a nearby hole. I always maintain a distance of at least five times the anchor diameter between each mounting point to respect these structural limits.
The Invisible Shift You Need to Watch For
In seasonal climates, masonry actually breathes, expanding and contracting with humidity and temperature. This is why I always leave a tiny ‘expansion gap’ when I’m using the moisture barrier strategy for below grade vanities. If your cabinet is bolted too tight against a wall that is moving, something has to give—and it’s usually your cabinet joints. I recommend checking the tension on your primary mounting bolts once a year using a torque wrench. If they’ve loosened, don’t just crank them down; back them out, check for red brick dust (a sign of internal wear), and then re-seat them. This is especially vital if you’ve followed top trends in vanity designs you need to know in 2025 which favor heavy, solid-stone integrated basins.
Smart Hardware is Coming for Your Garage
I predict that within the next few years, we will see the rise of ‘active’ anchoring systems—hardware with built-in sensors that can alert your phone if a storage rack shifts even a millimeter. We are already seeing this in industrial settings, and as homeowners push for heavier, more complex built-in storage ideas to declutter and enhance your home, the demand for ‘set it and forget it’ safety will only grow. For now, you are the sensor. I want you to try the chemical resin anchoring method on just one ‘problem’ hole in your next project. It’s the single most effective way to turn a ‘spinning’ screw into a rock-solid mount that you can actually trust with your life—or at least your expensive tool collection.
The Brutal Truth I Learned After My First Wall Collapse
If there is one thing I’ve learned from decades of DIY, it’s that old masonry is alive. It shifts, it breathes, and it reacts to the weight we put on it. I used to think that a spinning screw was a failure of the hardware, but it is actually a cry for help from the brick itself. Now, when I am working on a step-by-step guide to vanity installation for beginners, I always emphasize that the ‘feel’ of the drill is your best diagnostic tool. If the bit enters too quickly, you aren’t in solid material—you need to stop and reassess before you ruin the face of the brick.
- The Tap Test: Before you even pick up a drill, tap the bricks with a rubber mallet. A hollow ‘thud’ means the face is delaminating, and you need to find a different mounting point.
- Mortar is a Buffer: Never anchor directly into the mortar line if you can avoid it. Mortar is designed to be the sacrificial lamb of the wall; it is meant to fail before the brick does.
- The Pry-Bar Effect: Heavy cabinets pull *out* at the top and push *in* at the bottom. Always over-engineer your top row of anchors, as they are doing 90% of the structural work.
My Go-To Kit for Brick and Mortar Mastery
Having the right tools isn’t just about making the job easier; it is about respecting the integrity of your home. I don’t go into any masonry job without my ‘big three.’ First, a high-quality dust blower—because as we discussed, dust is the enemy of friction. Second, I always keep a stash of varying shims. Even if you have mastered how to scribe cabinets to heavily-textured plaster walls, you will still need internal shims to keep the cabinet box square against an uneven brick face. Finally, I never start a project without a dedicated masonry vacuum to keep the air clear and the holes clean.
#IMAGE_PLACE_HOLDER_E#
Turn That Brittle Wall Into a Fortress
It is easy to feel intimidated by a wall that seems to crumble at the touch, but with the right tactics, you can make it the strongest part of your home. Whether you are installing a massive tool locker or looking for built-in storage ideas to declutter and enhance your home, the goal is always the same: stability and peace of mind. Don’t be afraid to slow down, use the resin, and double-check your levels. Your tools—and your toes—will thank you for the extra effort. What’s the scariest ‘crunch’ you have ever heard while drilling into your home? Let me know in the comments below!