

I still remember the sickening ‘pop’ that echoed through my hallway at 2 AM. I had just finished a total master bath overhaul three months prior, and I was convinced I had done everything perfectly. But when I checked the vanity the next morning, my heart sank. A hairline fracture had appeared right at the miter joint of the face frame, and the left cabinet door was sagging like a tired eyelid. I had made the classic mistake of assuming that a standard, off-the-shelf cabinet could handle the immense, unforgiving weight of a three-centimeter quartz slab without extra help. If you are noticing your vanity doors sticking or seeing tiny cracks in the wood grain, your vanity is literally being crushed under the weight of your own style choices. Today, we are going to dive into why this structural failure happens and how you can intervene before your beautiful stone ends up on the floor.
The Hidden Math Behind Your Heavy Stone Countertops
When I started my renovation, I chose quartz because it is durable and gorgeous, but I completely ignored the physics of it. We often think of cabinets as solid blocks, but in reality, they are mostly empty boxes held together by tension. According to the Natural Stone Institute, a 3cm thick quartz slab weighs roughly 19 pounds per square foot. For a standard 60-inch double vanity, you are effectively parking a small motorcycle on top of a structure built with 1/2-inch particle board. I learned the hard way that you need specific tactics for supporting heavy quartz to prevent the frame from bowing. If the cabinet isn’t reinforced, that vertical load turns into lateral pressure, forcing the joints to separate.
Is quartz actually worth the structural headache?
I used to ask myself this every time I saw a new crack forming. Most homeowners fear that quartz is just too heavy for a typical bathroom, but the problem isn’t the stone; it is the installation method. I once skipped the leveling process on a guest bath, and within a year, the sheer torque of the unlevel slab had pulled the cabinet right off the wall. Following an expert guide to vanity installation is the only way to ensure the weight is distributed across the floor rather than just the cabinet’s weak points. [IMAGE_PLACEHOLDER]
Stop the Snap Before it Destroys Your Cabinet
The moment you see a gap between your cabinet and the wall, the clock is ticking. Most factory-made vanities rely on thin staples and glue that simply cannot withstand the constant downward force of engineered stone. In my own home, I had to retroactively install heavy-duty wall fixes to help the studs carry the load. This prevents the cabinet box from twisting when the house naturally settles. If you are working with a floating design, the risk is even higher. You have to understand how to support quartz counters on custom floating vanities using internal steel or reinforced cleats. Have you ever noticed your vanity drawers becoming harder to open shortly after installing a stone top? That is your cabinet frame telling you it is under too much stress. Drop a comment below and tell me if you’ve discovered any mysterious cracks in your bathroom lately!To stop your vanity from pancaking, you need to think like an engineer, not a decorator. The first thing I do now—before the stone installers even show up—is strip off the flimsy cardboard backer and replace it with a real structure.
Beef up the frame before the stone arrives
Standard factory-built vanities are essentially held together by hope and wood glue. I once helped a neighbor install a heavy double-sink quartz top, and we could actually hear the staples groaning as we lowered it. We stopped immediately and installed 2×4 blocking inside the corners. These act like the pillars of a skyscraper, transferring the weight directly from the top rail to the floor. If you are working with something extra heavy, check out these tactics for supporting heavy quartz to ensure your frame does not buckle under the pressure. Most homeowners do not realize the factory hanging rail is often just a thin strip of MDF. I replace this with a solid oak or maple board; it feels like overkill until you realize you are putting a literal mountain on top of it.
Use the wall as a permanent kickstand
Your floor should not carry 100% of the load. I have found that using a plywood plate move behind the cabinet is a game-changer. By screwing a 3/4-inch strip of plywood into three different studs and then securing the vanity to that plate, you create a massive surface area of friction. This keeps the back of the vanity from sliding down the wall. If your walls are particularly problematic, you might need heavy-duty wall fixes to bridge the gap between the studs and the cabinet rail. 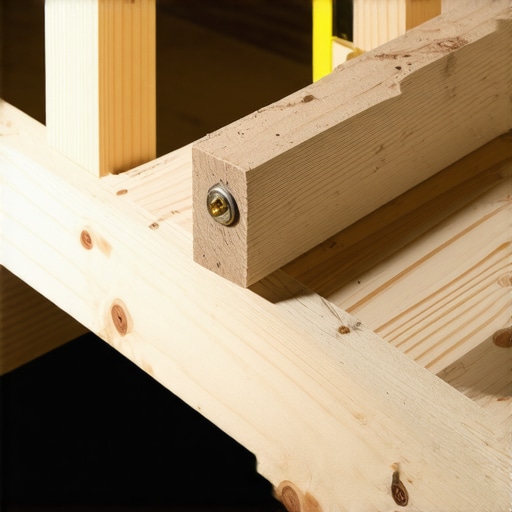
Kill the wobble with precision leveling
A vanity that is not level is a vanity that is destined to crack. When I was rushing my first master bath, I thought close enough was fine. It was not. Because the floor sloped slightly toward the drain, the quartz was bridging—hanging in the air over the middle of the cabinet. The moment I leaned on it to brush my teeth, *snap*. You must use the leveling move for vanities on slanted floors to ensure the stone sits flush on every single inch of the cabinet top edge. I once worked in an old Victorian where the floor was so out of whack it looked like a skate park; I spent three hours just shimming the base. Using plastic shims instead of wood is a pro move because they will not compress over time. If your legs are the issue, do not ignore them; fixing wobbly vanity legs is the only way to prevent the whole unit from vibrating every time you open a drawer.
Upgrade your hardware to handle the stress
Do not rely on the screws that came in the box. Those little zinc screws are fine for holding a spice rack, but they will shear off under 200 pounds of quartz. I always swap them for #10 or #12 stainless steel wood screws. This is especially critical for vanity installation hacks that actually save you money in the long run by preventing a $2,000 countertop replacement. When you follow a step-by-step guide to vanity installation, you will see that the alignment of your drawer slides depends entirely on the frame remaining square under load. If the frame bows, the drawers will stick, which is your first warning sign of structural failure.Most homeowners are sold on the myth that ‘solid wood’ is the gold standard for supporting heavy stone. In my experience, this is a dangerous oversimplification. While solid oak or maple is strong, it is also alive; it expands and contracts with the humidity of your bathroom. When you pin a 200-pound, rigid quartz slab to a material that wants to move, something has to give. Usually, it is the miter joints or the finish. I actually prefer high-grade, multi-ply furniture plywood for the box construction because its cross-grain layers offer superior dimensional stability. If you are seeing your cabinet doors fall out of alignment, it might not be the hinges—it is likely the frame shifting. You should learn how to fix uneven gaps in custom built-in doors to see if the issue is actually structural settling.
Can your plumbing layout actually cause a structural failure?
One of the most overlooked ‘traps’ in vanity installation is the oversized plumbing cutout. I once walked into a job where the contractor had notched out 70% of the back-hanging rail to accommodate a wide P-trap. By doing so, they effectively turned a load-bearing beam into a flimsy strip of wood. This is a primary reason why your built-in face frames are separating from the wall. The National Kitchen & Bath Association (NKBA) guidelines suggest that any cabinet supporting a stone top should maintain at least 75% of its original structural rail integrity. If you have to cut more, you must bridge the gap with steel or secondary blocking. I have seen many DIYers struggle with deep vanity drawers that kept hitting plumbing because they prioritized the drain over the cabinet’s skeletal strength. 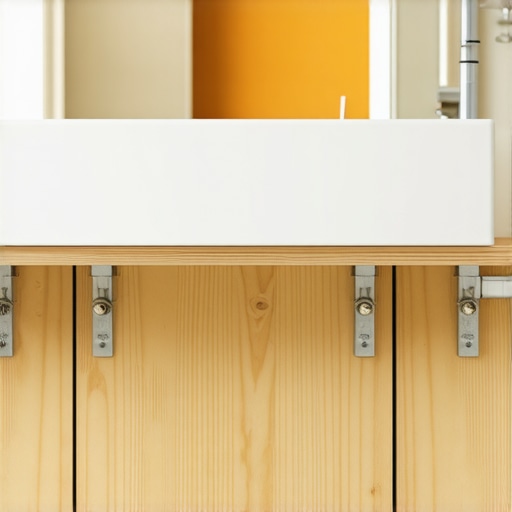
The moisture trap that rots your supports from below
Another nuance people miss is the ‘wicking effect’ of bathroom floors. If your vanity sits directly on a tile floor that sees regular steam or occasional puddles, the end grain of the wood base acts like a straw. Over five years, that wood softens. Now, imagine that softened wood trying to hold up a massive stone top. It is a recipe for a slow-motion collapse. I always recommend using moisture-proof base fixes for rotting cabinets, such as plastic shims or a bead of high-quality silicone at the floor line, to create a thermal break. Have you ever noticed your vanity feeling ‘spongy’ or found mysterious wood dust near the base? Have you ever fallen into this trap? Let me know in the comments. To prevent this, I treat the bottom edges of every vanity I install with a water-resistant sealer—a ten-minute step that adds a decade to the vanity’s life. Don’t let a tiny leak turn your beautiful quartz investment into a pile of wet sawdust.Once the sealant is dry and the plumbing is confirmed leak-free, the real test of your craftsmanship begins. In my years of building and fixing bathroom storage, I’ve learned that the ‘set it and forget it’ mentality is why so many beautiful renovations look like a disaster within five years. To keep everything functioning like day one, you need a specific maintenance toolkit. I personally swear by the Bosch GLL3-330CG laser level for the initial setup and yearly check-ins. Spirit levels are fine for hanging a picture, but when you are monitoring a 200-pound slab, a 360-degree green beam reveals structural settling that the naked eye simply misses. If you see the beam deviating from your original marks, your cabinet is sinking. At that point, you need to revisit those vanity installation hacks that focus on load redistribution before the stone snaps. 
How do I maintain my vanity’s structural integrity over time?
Your vanity is a mechanical system, not just a box. Every six months, I crawl under my sink with a T25 Star bit and check my GRK structural screws. These aren’t your typical hardware store screws; they are heat-treated and designed for high-torque loads. If they’ve backed out even a quarter-turn due to the vibration of daily drawer use, the tension of the quartz slab will start to warp the frame. This warping is usually the hidden reason why your soft-close drawers are slamming or catching on the frame. If the frame stays square, the hardware stays quiet. I also recommend checking the tension on your hinges. Heavy stone tops can cause the cabinet sides to ‘flare’ slightly outward over time, which pulls the doors out of plumb. Knowing how to fix drawer fronts that won’t stay aligned is a skill that saves you from a total hardware replacement down the road.
Weight ratings and the future of smart vanities
Looking ahead, the top trends in vanity designs are moving toward sleeker, thinner profiles that actually carry more weight thanks to integrated tech and hidden steel. However, we are still bound by the laws of physics. According to the Blum Technical Manual for TANDEM runner systems, dynamic load capacity is rated for specific weights (often up to 155 lbs), but this rating assumes the cabinet remains perfectly square. Once your frame bows even 2mm, that rating drops by nearly 40%. This is why I always over-spec my builds with expert design tips that include internal steel bracing. If you want a truly ‘future-proof’ bathroom, stop looking at the paint color and start looking at the weight capacity of your slides. I challenge you to go into your bathroom right now and check the gap between your drawer front and the frame. If it’s wider at the top than the bottom, your vanity is starting to spread under the weight. Grab a structural screw and a laser level, and fix it this weekend before that gap becomes a permanent crack in your quartz. There is plenty of room for creative storage solutions for vanities, but they only work if the box holding them is rock solid.
What Every Showroom Salesperson Forgets to Mention
After years of fixing split frames, I’ve realized that the ‘solid wood’ label is often just a marketing shield. Here is the reality of heavy-duty installation: your vanity doesn’t fail because the wood is ‘bad’; it fails because the load-bearing geometry was ignored. First, understand that your cabinet box is basically a suspension system. If one corner is off by even an eighth of an inch, the quartz slab becomes a lever that is slowly prying your joints apart. Second, moisture is the silent structural killer. While we focus on the weight, it’s often the steam that softens the glue joints enough for that weight to finally win. This is why I always prioritize maximize your space with custom vanities expert design tips that focus on structural integrity before aesthetics.
Another lightbulb moment for me was realizing that ‘level’ and ‘flat’ are not the same thing. A floor can be perfectly level but have a hump in the middle that prevents the cabinet from sitting flush. I’ve seen innovative storage solutions to transform your bathroom completely ruined because the base wasn’t shimmed correctly, leading to a twisted frame that wouldn’t let the drawers slide. [IMAGE_PLACEHOLDER]
The Three Tools That Save My Vanities (And Sanity)
If you want a vanity that stands the test of time, you need more than just a screwdriver. Here is what is in my toolkit and why I trust them:
- GRK Cabinet Screws: These are non-negotiable for me. The built-in washer head provides incredible clamping force without splitting the wood, which is essential for anchoring into those 2×4 blocks.
- Self-Leveling Cross Line Laser: This is how I ensure my wall-cleats and floor-shims are in perfect harmony across the entire room. It catches the dips in the floor that a standard level misses.
- High-Quality Silicone: It sounds basic, but applying the waterproof sealant move for vanity backsplashes prevents water from seeping behind the cabinet and rotting your structural wall plates.
I also highly recommend looking into smart storage solutions to optimize small bathroom spaces to ensure you aren’t overloading internal shelves without verifying the cabinet’s weight capacity first.
Give Your Stone the Foundation it Deserves
Renovating a bathroom is an act of love for your home, and seeing that first crack in a new quartz top is heartbreaking. But it is also preventable. By taking an extra hour to beef up your frame and secure your wall anchors, you are ensuring that your beautiful vanities and other built-ins remain the centerpieces of your home for decades. You have the skills to do this right; just remember to think like a builder, not just a decorator. Have you ever noticed your cabinet doors starting to sag or discovered a mysterious crack shortly after a stone installation? Let me know your story in the comments below!