

It was 3:00 AM when I heard a sound like a gunshot followed by a wet, heavy thud. I knew immediately. My sleek floating vanity—the one I’d installed with such pride just two weeks prior—was now a sad pile of porcelain and splintered MDF on the bedroom floor. I’d made the classic amateur mistake: I trusted standard drywall and a few basic anchors to do the work of a structural beam. It was a messy, expensive lesson in gravity that I don’t want you to repeat. If you’re planning to transform your bedroom with custom vanities, you have to realize that the ‘floating’ look is a lie. It shouldn’t just float; it should be anchored so firmly that the house would fall down before the vanity did. Today, I’m sharing the hard-won secrets I’ve learned from that failure and subsequent successes. We’re going to solve the problem of sagging, tilting, and—heaven forbid—crashing. Have you ever noticed that terrifying 1/16th-inch gap starting to form at the top of your cabinetry? Let me know in the comments if you’ve seen the dreaded ‘vanity lean’ in your own home.
Secure Your Vanity Like It Is Part of the Foundation
The biggest mistake I made early on was thinking that ‘heavy-duty’ anchors were enough for a piece of furniture people naturally lean on. According to weight load guidelines from the National Kitchen & Bath Association (NKBA), a standard wall-hung unit can face over 200 pounds of downward pressure once you account for the stone top, a sink full of water, and someone leaning on it to apply mascara. You cannot just screw into the studs and call it a day. You need a strategy for securing floating vanities to double-layer drywall or even older, more fragile surfaces. I once tried to shortcut this by skipping the backing plates, and within a month, the vanity had tilted so far forward that the drawers wouldn’t stay shut. Don’t be like past-me. We need to talk about structural cleats and why heavy-duty wall fixes are the only way to support that massive quartz slab you picked out.
Will all this extra hardware ruin the minimalist look?
I get it. You want that clean, airy vibe, and the idea of adding steel brackets feels like you’re building a bridge inside your bedroom. But the beauty of modern reinforcement is that it stays completely invisible. By using low-profile supports and learning how to support quartz counters on custom floating vanities from the inside out, you keep the aesthetic while gaining peace of mind. It is about working smarter behind the wall so you can enjoy the view in front of it. Before we pick up the drill, let’s look at the first few tactics that will make your installation bulletproof.
Build a Skeleton Behind the Wall
The physics of a floating vanity are brutal. You have a heavy cabinet, a 60-pound quartz top, and the inevitable weight of someone leaning on the edge while they brush their teeth. If you simply drive screws through the back of the cabinet into the studs, you are creating a massive amount of shear stress on a very small point of contact. Instead, think of your installation like a heavy-duty bridge. You need to distribute that load across the entire wall surface. I remember a project last year where we were supporting quartz counters on custom floating vanities that were over 72 inches long. We didn’t just use screws; we built an internal sub-frame to catch the weight before it ever reached the drywall.
Why the Ledger Board is Your Best Friend
The most reliable way to prevent the dreaded forward dip is to use a ledger board—essentially a sturdy piece of lumber or plywood screwed into every available stud that the vanity sits on. This transfers the downward force directly into the vertical studs of your home. It is the same principle as the structural cleat strategy for heavy mudroom lockers. When I first started, I thought I could skip this and just use better screws. I ended up back at a client’s house three months later because their expensive marble top had developed a hairline fracture from the cabinet sagging just an eighth of an inch. Now, a ledger is my non-negotiable first step. 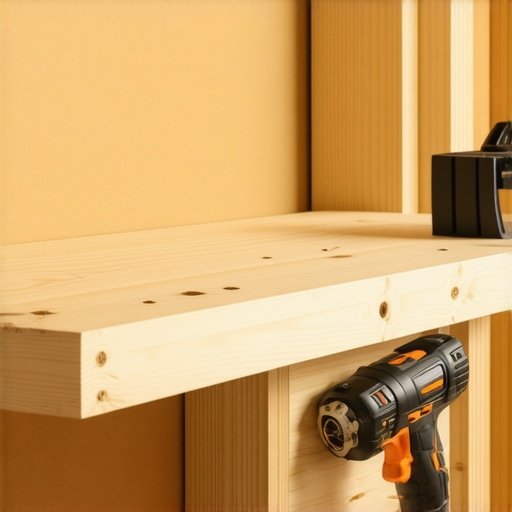
Bridge the Gap Between Your Studs and the Vanity
In many modern homes, you might be dealing with securing floating vanities to double-layer drywall, which adds a layer of squish between your cabinet and the actual wood of the studs. This gap is where most installations fail. To fix this, you need to use spacers or blocking inside the wall cavity if you have the luxury of open walls. If the walls are closed, you must use long, high-tensile structural screws that can bite deep into the timber without snapping. I once saw a DIYer use standard drywall screws for this—they snapped like dry twigs the moment the sink was filled with water. Always opt for heavy-duty wall fixes like GRK or Spax cabinet screws that are rated for several hundred pounds of shear force.
Scribe the Frame for a Professional Fit
No wall is perfectly flat. If you bolt a perfectly square vanity to a wavy wall, you will either warp the cabinet or leave an ugly, yawning gap. This is where scribing comes in. It’s the art of trimming the back of your cabinet to match the exact profile of your wall. On a particularly difficult job with a 100-year-old brick wall, I had to use the scribing hack for perfect built-in gaps against uneven brick to make the vanity look like it grew out of the masonry. Once the cabinet is flush, you can use hidden leveling shims to make those final micro-adjustments. A perfectly level cabinet isn’t just about looks; it ensures your drawers glide smoothly and your plumbing drains correctly.
We’ve covered the basics of keeping your vanity level, but let’s dig deeper into why even level cabinets can eventually tear themselves apart. Everyone tells you to ‘hit the stud,’ but in my professional experience, hitting the stud is only 40% of the battle. The most common expert-level oversight is ignoring the structural integrity of the cabinet box itself. You can drive a massive lag bolt into the center of a 2×4, but if your vanity back is made of 1/8-inch MDF or thin hardboard, the screw head will eventually pull right through the material under the weight of a heavy stone top. This mechanical failure is exactly why your built-in face frames are separating from the wall despite your best efforts. For high-stakes projects, I always reinforce the interior with a 3/4-inch plywood internal cleat that spans the full width of the unit. This ensures the load is distributed across the timber before it ever reaches the fastener. Have you ever fallen into this trap where the screw stayed in the wall, but the furniture didn’t? Let me know in the comments.
According to the Architectural Woodwork Institute (AWI) standards for cabinet installation, ‘withdrawal resistance’ is only one part of the equation; the density of the cabinet back material is what prevents total structural collapse. For those seeking an expert guide to flawless vanity installation, these structural nuances are what separate a weekend DIY job from a professional-grade finish that lasts decades.
Why does your soft-close hardware keep failing?
It’s infuriating to invest in high-end hinges only to have them lose their ‘hush’ within months. Often, the issue isn’t the hardware itself—it’s a microscopic twist in the cabinet box caused by an uneven wall. When you force a cabinet to conform to a curved wall by over-tightening your anchors, the box racks. This slight misalignment puts constant lateral pressure on the drawer glides, leading to drawer bind on heavy pantry pull-outs and premature component wear. If you’ve already noticed a change in performance, you might need to investigate why your soft-close drawers are slamming and the tension fix that goes beyond just turning a adjustment screw.
The Hidden Plumbing Collision You Didn’t See Coming
There is a specific kind of heartbreak that happens when you slide in your beautiful, custom-made drawers only to hear a loud ‘clunk’ as the back of the drawer box hits the plumbing P-trap. This is the ‘oops’ factor that catches even seasoned pros. We get so focused on the exterior aesthetics and choosing the perfect vanity style that we forget the inner ‘guts’ of the cabinet. I’ve spent countless hours on job sites applying hacks for deep vanity drawers that hit plumbing because the original layout didn’t account for the waste line height. Always measure your drain and supply line exits before you finalize your internal drawer depths. If you’re expanding into a desk area as well, remember that spans are equally tricky; why your built-in desk is bowing usually comes down to ignoring the center-point load on any surface longer than four feet. Precision behind the scenes is the only way to achieve that effortless look.
Even the most beautiful installation can turn into a nightmare if you ignore the environmental reality of a bathroom. It’s essentially a high-humidity rainforest. I’ve seen $5,000 custom units swell and delaminate because the installer skipped the basics of protection. If you’re working in a basement, you absolutely must implement the moisture-barrier strategy for below-grade vanities. But even on the main floor, steam is your enemy. I make it a rule to use the waterproof sealant move for vanity backsplashes not just for the looks, but to keep water from seeping behind the cabinet and rotting your drywall anchors. If that water gets in, you’ll soon find out why your vanity plumbing is leaking into the cabinet base and destroying the floor.
How can I keep my custom vanity looking new for years?
Maintenance isn’t just about cleaning the mirrors; it’s about mechanical checks. Every six months, I tell my clients to grab a screwdriver and check the tension on their hinges. According to Blum’s technical specifications, their hardware is rated for 200,000 open-and-close cycles, but that is contingent on the cabinet remaining square. If your house settles—and it will—you might need to revisit our expert guide to flawless vanity installation to see how to adjust for shifts. I also recommend checking the underside of the sink for any ‘sweating’ that could drip onto the wood. It’s these small, five-minute inspections that prevent a total structural failure.
Get the Right Gear Before You Drill
I used to rely on a bubble level and a prayer, but that’s a recipe for disaster. Now, I don’t step onto a job site without a self-leveling green beam laser. Why green? Because it’s four times more visible to the human eye than red, especially in bright bathrooms. It allows you to project a perfectly level line across three walls simultaneously, ensuring your ledger boards and vanity heights are consistent down to the millimeter. If you’re following a step-by-step guide to vanity installation for beginners, invest in a set of cabinet claws. These specialized clamps hold two face frames together and align them in multiple planes while you screw them together. It’s like having a second pair of hands that never gets tired. I predict that within the next five years, we’ll see a massive shift toward ‘modular structural skeletons’—pre-engineered steel frames that sit behind the drywall and allow you to click-and-lock floating furniture into place without ever searching for a stud. Until that becomes the standard, we have to rely on the manual methods that work. My challenge to you: before you mount your next cabinet, try the internal plywood cleat method I mentioned earlier. It’s a game-changer for stability. We are building for the long haul, not just for the ‘after’ photo.
The Expensive Hard-Knock Lessons I Learned So You Don’t Have To
First, the ‘Tap Test’ is non-negotiable. I never trust a stud finder 100% because double-layer drywall can play tricks on the sensors. Always verify your stud edges with a tiny finishing nail before you drive a 4-inch structural screw into what might be empty space. Second, remember that gravity is a patient enemy. A floating vanity is essentially a giant lever, and every inch of depth increases the torque on your top anchors. This is why I now obsess over the internal plywood cleat; it prevents the cabinet back from blowing out under the pressure. Finally, always seal your entry points. A tiny dab of silicone in the screw holes prevents moisture from wicking into the wall studs, which is a key part of any vanity installation hacks that save time and money in the long run. If you are looking for inspiration on how to layout these units, checking out the top trends in vanity designs you need to know in 2025 can help you plan for the weight and size of modern fixtures.
The Gear That Separates Pro Installs from Weekend Wrecks
If you want to maximize your space with custom vanities, you need the right kit. I swear by GRK Cabinet Screws—the W-cut threads prevent wood splitting, and the washer head provides a massive surface area that won’t pull through the cabinet back. For leveling, a Huepar 3D Green Beam Laser is my secret weapon; it projects a 360-degree line that ensures your ledger is perfect across every wall. I also highly recommend the Architectural Woodwork Institute (AWI) standards guide. It is the industry gold standard for weight-bearing tolerances and will give you the confidence to mount even the heaviest stone tops without fear. These tools are especially critical when you are implementing smart storage solutions to optimize small bathroom spaces where every millimeter of clearance counts.
Your Journey Toward a Rock-Solid Bedroom Oasis
Building your dream space is about more than just aesthetics; it is about the peace of mind that comes from knowing your home is structurally sound. When you finally decide to transform your bedroom with custom vanities, you aren’t just adding storage—you’re elevating your daily routine. Don’t let the technical details intimidate you. With the right prep and a bit of patience, your floating masterpiece will stay exactly where you put it for decades to come. Have you ever found a surprise behind your drywall that ruined your installation plans? Let me know in the comments below!