

I stood there with my drill in one hand and a level in the other, staring at a stretch of drywall that felt more like a movie set prop than a structural wall. My stud finder was chirping like a confused bird, finding absolutely nothing but air behind the plaster. I’d spent weeks dreaming up these built-in storage ideas to declutter my living room, but the reality was hitting me hard: there wasn’t a single 2×4 where I actually needed one. In my early days, I would have just jammed in some of those flimsy plastic conical anchors and hoped for the best. Big mistake. I once watched a custom pantry unit slowly peel away from the wall like a giant, wooden sticker because I didn’t respect the physics of a hollow wall. It’s a gut-wrenching sound, hearing screws pull through gypsum at 2 AM. Today, I’m going to make sure that never happens to you. We are going to dive into the world of ‘blind’ anchoring and explore how to make those cabinets rock-solid, even when the wall feels like it’s made of cardboard. If you’ve ever felt that sinking feeling when your stud finder stays silent, have you ever actually tried to ‘wing it’ only to regret it later?
The Cold Hard Truth About Hollow Walls
Securing a massive cabinet without a stud to bite into feels like a recipe for disaster, and honestly, if you do it wrong, it is. When I first started experimenting with creative built-ins for seamless storage, I assumed the weight of the cabinet would mostly sit on the floor. I was wrong. Gravity is a relentless beast, and cabinets—especially those top-heavy ones—want to tip forward. According to the Gypsum Association, the structural integrity of 1/2-inch drywall can handle significant vertical loads, but it has almost zero resistance to the ‘pull-out’ force exerted by a heavy cabinet leaning away from the wall. This is exactly why your built-in face frames are separating from the wall if they aren’t anchored with the right hardware. You need more than just a screw; you need a mechanical bond that grips the back of the wall like a vise. I realized quickly that maximizing your space requires knowing how to manipulate the environment you’re given, not just the one you wish you had. We’re going to look at why heavy-duty l-brackets can be your best friend and how to prep your cabinets so they don’t just stay up, but stay level for decades.
Can these anchors really hold up a heavy cabinet?
It’s the number one thing people ask me when they see me reach for a box of toggle bolts instead of a box of wood screws. ‘Is that really going to hold?’ The skepticism is healthy. We’ve all been burned by hardware that promised the world and delivered a hole in the wall. But here is the secret: modern anchoring tech, like the toggle bolt strategy or specialized steel channels, can actually support hundreds of pounds if you distribute the load correctly. I’ve used these methods to save projects that seemed impossible. Whether you are dealing with massive pantry shelves or a sleek media center, the goal is to stop thinking about the wall as a flat surface and start treating it like a structural sandwich. I’m going to walk you through the exact hardware I use now—the stuff that lets me sleep at night without worrying about my hard work crashing down.
Ditch the Plastic and Go for Steel
I remember sweating over a ‘floating’ vanity that felt more like it was sinking. The homeowner had double-layered drywall, and my usual long screws were hitting nothing but air. That’s when I pivoted to securing floating vanities to double-layer drywall using heavy-duty zinc toggles. It was a mess at first—I blew out a hole twice the size I needed—but it taught me that patience is as important as the drill bit. If you’re staring at a hollow wall, stop reaching for those yellow plastic anchors. They are designed for picture frames, not built-in storage ideas to declutter a kitchen or bath. For any cabinet over 20 pounds, you need mechanical toggles. These devices use a metal bar that flips open behind the gypsum, creating a ‘T’ shape that distributes the pull-out force across a much wider surface area than a single screw ever could. When I used the toggle bolt strategy for the first time on a massive pantry unit, I hung my entire body weight off the bracket before the cabinet even went on. It didn’t budge.
How to Execute a Clean Toggle Install
First, you have to drill a hole significantly larger than the bolt itself—usually 1/2 inch or 5/8 inch. This feels wrong, I know. It feels like you’re damaging the wall. But once you slide that metal channel through and pull the plastic straps tight, the bond is incredible. The secret is to ensure the metal channel is oriented vertically behind the wall. This mimics the vertical strength of a stud. I’ve seen people let them flip horizontally, which can eventually lead to the drywall crushing under the pressure. If you are working in a bathroom, you might also need reinforcement tactics for wall-hung bedroom vanities, such as adding a bead of construction adhesive to the back of the cabinet frame to assist the anchors.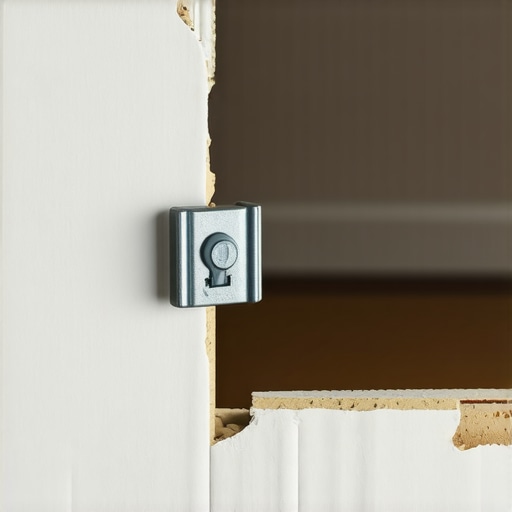
How to Distribute Weight Without a Single 2×4
If your cabinet is exceptionally heavy—think a solid oak unit or something with a stone top—relying on just a few points of contact is a gamble. This is where the structural cleat strategy becomes your best friend. Instead of trying to find a stud to screw the cabinet into, you find a stud (even if it’s far away) to screw a long horizontal cleat into. This cleat acts as a bridge. I once had to mount a heavy media center where the studs were spaced irregularly. By using the hidden support rail method, I was able to catch two studs that were nowhere near the cabinet’s center, but the rail distributed the load so evenly that the unit felt like it was part of the foundation.
The Secret of the Plywood Mounting Plate
When even a cleat won’t work because the wall is just too compromised—maybe from old water damage or crumbling plaster—you have to create your own structure. I call this the plywood plate move. You take a piece of 3/4-inch ACX plywood, cut it slightly smaller than the footprint of your cabinet, and anchor *that* to the wall using as many toggle bolts as you can fit. Then, you screw your cabinet directly into the plywood. This turns the entire wall section into a solid mounting surface. It’s a lifesaver for creative built-ins for seamless storage where the placement is non-negotiable. If you find yourself dealing with wonky walls while doing this, don’t forget the scribing hack for fitting vanities to make sure that plywood sits flush and doesn’t create unsightly gaps.Most DIYers think that if a project feels shaky, the solution is to just keep drilling more holes. It’s a classic case of ‘if some is good, more is better.’ But in the world of professional installation, this is a dangerous fallacy that can actually destroy your drywall. When you pepper a small area with high-tension toggles, you are essentially perforating the gypsum like a sheet of stamps. Under the immense load of sleek built-in vanities, that perforated section doesn’t just fail—it can shear off the wall in one clean, catastrophic piece. The National Kitchen & Bath Association (NKBA) emphasizes that structural integrity is about load distribution across spans, not fastener density. If you are installing massive pantry shelves or heavy units, you must space your anchors at least 12 inches apart to allow the wall’s internal core to maintain its compression strength. Have you ever fallen into this trap of over-fastening only to have the wall crumble? Let me know in the comments.
Why do anchors feel rock-solid today but fail after six months?
This is the ‘creep’ factor that catches even experienced builders off guard. You might finish your vanity installation for beginners and find it perfectly level, but six months later, the doors are rubbing and the unit has tilted. This usually happens because of ‘tensile vs. shear’ confusion. A fastener might be rated for 100 pounds of tensile strength (pulling straight out), but its shear strength (the downward force) is much lower in soft gypsum. Over time, the heavy weight of a cabinet causes the screw to slowly ‘hog out’ the hole, microscopically enlarging it until the mechanical bond fails. This is especially true for massive quartz top vanities where the weight is constant and unforgiving. 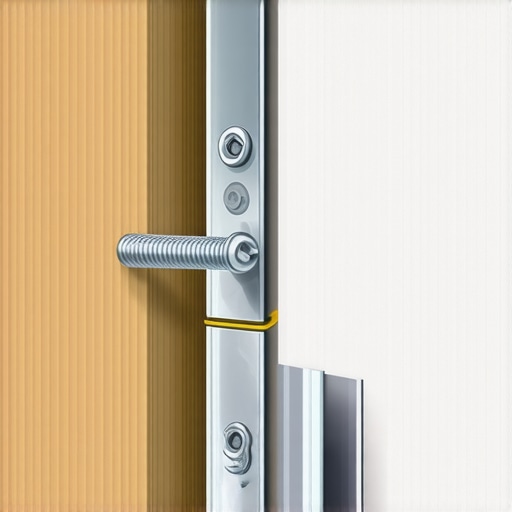 Another hidden nuance is the material of your shims. Many people reach for cedar shims, which are fine for dry living rooms but a disaster for bathrooms. In high-humidity environments, wood shims compress and swell, eventually rotting or shifting. This ‘seasonal wiggle’ is what eventually loosens your high-end steel anchors. I always advocate for the waterproof shim move using composite materials because they never compress. If you don’t account for this, your heavy quartz vanity is cracking the cabinet frame or pulling away from the wall because the base support has physically shrunk. Beyond the wall connection, you must look at the internal box. If the cabinet itself wasn’t designed for floating loads, the back panel might separate from the sides long before your anchors give way. Using an expert guide to flawless vanity installation means reinforcing the internal corners with steel gussets to ensure the box stays square under pressure. It’s about building a system, not just putting a screw in a hole.
Tools That Actually Earn Their Keep
After years of trial and error, I’ve realized that standard DIY kits just don’t cut it for professional-grade creative built-ins for seamless storage. If you’re serious about your installation, you need an impact driver with precise torque control. I personally swear by the Milwaukee M12 FUEL Surge; its hydraulic powertrain is quieter and prevents the sudden ‘snap’ that often shears the heads off cheaper zinc bolts when you’re bottoming out a toggle against the drywall. For drilling, I stopped using standard high-speed steel bits. I’ve moved exclusively to Bosch DareDevil spade bits or carbide-tipped glass and tile bits if I’m working near a bathroom backsplash. The precision is unmatched, and you won’t get that ‘wandering’ bit that ruins a perfectly measured layout. Speaking of layout, if you are still using a bubble level, you’re working too hard. A self-leveling cross-line laser, like the Bosch GLL series, is the only way to ensure your sleek built-in vanities are perfectly plumb across an entire wall span. According to technical specifications from the Fastener Quality Act (FQA) documentation, the consistency of thread engagement in high-load anchors is the primary determinant of long-term failure rates—so don’t cheap out on the hardware. 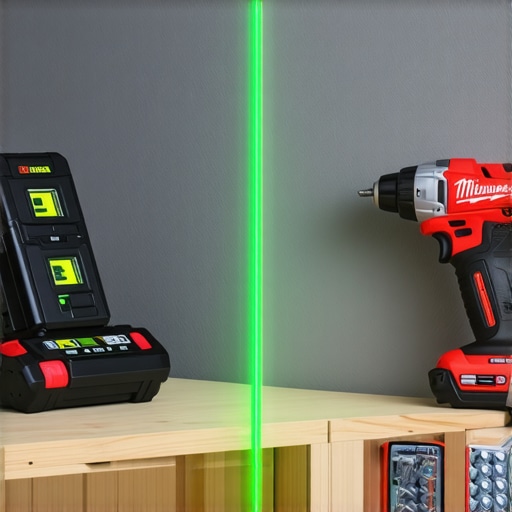
How do I maintain the structural integrity of my cabinets over time?
Maintenance isn’t just about wiping down the dust; it’s about monitoring the ‘settle’ of your home. Twice a year, especially during seasonal transitions when humidity shifts, I recommend opening your cabinets and checking the anchor points. If you see even a hairline gap between the cabinet back and the wall, it’s time to intervene. This is often where vanity installation hacks that save time and money really pay off—specifically, using a secondary support like the moisture-proof shim strategy. These composite shims don’t compress like wood, so if you find a slight wobble, you can tap a new one in without redesigning the whole system. Also, keep an eye on the door hinges. If they start to sag, it might not be the hinge itself but the entire cabinet box slowly twisting because of an uneven load. Using the hidden internal bracing trick during the initial build can prevent this ‘box-racking’ entirely. I predict that in the next few years, we will see the rise of ‘smart anchors’—fasteners with built-in tension indicators that change color if the load starts to shift. Until then, we rely on our eyes and a good torque wrench. I challenge you to go check the anchors on your heaviest kitchen cabinet right now; if they aren’t rock-solid, grab some steel toggles and fix it before the ‘2 AM crash’ becomes your reality.
Hard-Won Lessons from the Back of a Drywall Sheet
After decades of wrestling with out-of-plumb walls, I’ve realized that the biggest mistake isn’t using the wrong anchor; it’s ignoring the tactile feedback of the material itself. When you drill into a hollow wall, pay close attention to the resistance. If the gypsum crumbles like sand rather than resisting the bit, you need to widen your load distribution immediately using the plywood plate move. Another lightbulb moment for me was realizing that why your built-in bookcase is sagging often has more to do with a lack of internal structural support than the wall anchors themselves. I’ve learned to trust the mechanical ‘T’ bond of a toggle over the ‘hope and a prayer’ of a standard screw every single time. It is always better to spend twenty minutes prep-mounting a cleat than two hours patching a hole where a cabinet used to be.
The Gear That Keeps My Projects from Crashing
I never show up to a job site without a specific kit designed for hollow-wall challenges. My first choice is always Toggler Snaptoggles; they are the gold standard because their unique straps allow you to remove the bolt without losing the anchor behind the wall. For those following a step-by-step guide to vanity installation for beginners, I cannot recommend a self-leveling laser level enough. It removes the human error that leads to tilted units and uneven stress on your fasteners. I also suggest keeping a reference for the Gypsum Association’s GA-216 standards handy—it is the definitive source for drywall weight-bearing capacities and helps you understand exactly how much stress your specific wall type can handle before you ever pull the trigger on your drill. For more complex setups, utilizing an expert guide to flawless vanity installation is the best way to ensure your hardware choice matches the load.
Go Build Something That Lasts
There is a unique kind of pride that comes from hanging a massive unit on a wall everyone told you was too weak. By mastering these ‘blind’ anchoring techniques, you are no longer limited by where the studs happen to be. You can finally execute those creative built-ins for seamless storage exactly where they look best in your home rather than where the framing dictates. Don’t let a lack of 2x4s stop your vision. Grab the right steel hardware, take your time with the layout, and ensure your home remains a place of both beauty and structural safety. Have you ever heard that terrifying ‘pop’ of a screw stripping out of the wall at the very last second? Let me know your worst installation horror stories—or your biggest wins—in the comments below!