I remember the moment clearly. I opened my bathroom cabinet, only to be greeted by a chaotic jumble of toiletries and towels spilling out every time I reached in. It was frustrating, and honestly, a little embarrassing when guests came over. That lightbulb moment made me realize: I needed a smarter, more integrated storage solution. If you’ve ever faced similar clutter—where your space feels more like a battleground than a haven—you know exactly what I mean.
Why Customized Built-in Cabinets Make All the Difference
When I first considered installing built-in cabinets, I was skeptical. Would it really maximize my space? Would it look as seamless as I envisioned? The truth is, choosing the right storage isn’t just about fitting in more stuff; it’s about creating an environment that feels calm, organized, and inviting. Personal experience has shown me that tailored built-ins—like custom vanities or wall-to-wall cabinetry—transform the way a home functions and feels.
According to a study by the National Association of Realtors, homes with well-designed storage solutions sell faster and at higher prices. That might sound like a sales pitch, but it’s backed by real data—space efficiency is a top priority for buyers. Moreover, investing in these solutions enhances your daily life by reducing stress and saving time.
But here’s a mistake I made early on: I thought going DIY for my storage projects would save money. Instead, I spent more fixing mistakes than I would have if I’d consulted with experts from the start. Learning from this, I now advocate for professional guidance—trusting experts can make all the difference in achieving flawless, durable results. You can read more about expert tips on [vanity installation and design](https://customcabinetrypro.com/vanity-installation-hacks-that-save-time-and-money), which might help you avoid common pitfalls.
Are you tired of battling clutter every day and longing for a space that truly works for your lifestyle? If so, this post is going to guide you through the most effective ways to implement seamless storage solutions that fit your home—and your needs—like a glove. Let’s get started on transforming your space into a beautiful, organized haven.
Assess Your Needs and Map Your Space
Start by measuring your bathroom or bedroom to understand the exact dimensions available. I once took a tape measure and detailed my space, noting where I could maximize storage without crowding. Visualize how you use your space daily—do you need more drawer space for toiletries or open shelving for decor? Sketch a simple layout or use design tools to map out potential configurations.
Select the Right Materials and Style
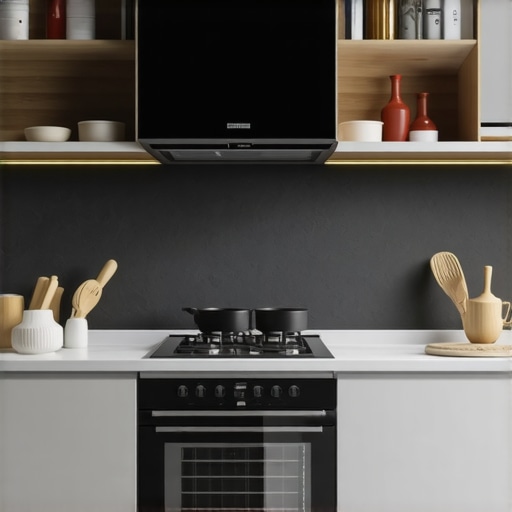
Choose materials that match your home’s aesthetic and are durable enough for daily use. For example, I opted for moisture-resistant MDF for my bathroom vanity, which prevents warping. Visit local suppliers or browse online to compare finishes, colors, and hardware options. Remember, the style should complement your existing decor, whether modern, rustic, or classic.
Design Custom-Fitted Components
Work with a professional or use design software to craft components tailored to your measurements. Think of it as tailoring a suit—precise fits matter. I sent my dimensions to a cabinet maker who suggested adjustable shelves and soft-close drawers, enhancing functionality. This step ensures your storage fits perfectly while optimizing space.
Plan the Installation Carefully
Preparation is key. Clear the area, and ensure your wall or flooring can support the weight of built-ins. I watched installation videos, like this guide, and prepared my tools accordingly. Precise marking and leveling prevent crooked installations, which can be costly to fix later.
Ensure Proper Support and Anchoring
Use appropriate brackets or wall studs to secure heavy cabinets. During my install, I located studs using a stud finder and anchored the cabinets directly into them, preventing any wobbling. This step is critical for safety and longevity.
Incorporate Efficient Hardware and Accessories
Select handles, pulls, and organizers that improve usability. I installed internal drawer dividers and hooks for towels, which made my space feel more organized. Thoughtful hardware not only looks good but also keeps things accessible and tidy.
Finish with Personal Touches
Add finishing details—paint touch-ups, decorative trims, or lighting—that reflect your style. I added LED strip lights under shelves for ambiance and better visibility. These small enhancements make the built-in feel cohesive and polished.
Implementing these steps was a hands-on experience; I encountered messy glue drips and minor misalignments, but patience and precise adjustments led to professional results. For deeper insights into design and installation, explore tips on maximizing space and storage solutions. Taking control of each stage ensures a seamless transformation that boosts both function and style in your home.Many homeowners believe that selecting a vanity or built-in storage is as simple as choosing a style and installing it. However, this approach overlooks critical nuances that can affect functionality, durability, and overall aesthetics. For instance, a prevalent misconception is that larger or more elaborate vanities automatically mean better storage, but in reality, improper planning can lead to wasted space and clutter buildup. Advanced homeowners and designers understand that the devil is in the details—like how hardware placement impacts accessibility or how moisture-resistant materials extend the lifespan of bathroom cabinetry.
Are Higher Prices Always Better for Vanities
Many assume that investing in a more expensive vanity guarantees quality, but that isn’t always the case. It’s essential to evaluate craftsmanship, materials, and installation processes. Custom solutions often outperform off-the-shelf options, especially when tailored to specific space constraints or stylistic preferences. Experts suggest focusing on factors like durable hardware, moisture-resistant finishes, and precise measurements, which ensure that your vanity remains both beautiful and functional over time. Sometimes, a mid-range, well-designed vanity with professional installation beats a high-end model that’s poorly fitted or made from subpar materials. This is backed by research from industry studies indicating that investing wisely in materials and craftsmanship offers better long-term value than simply choosing the most expensive piece. Additionally, a common trap many fall into is neglecting the importance of precise measurements and proper installation techniques. Incorrectly installed built-ins can lead to wobbling, misalignments, or even structural damage. To avoid these pitfalls, consulting with experts can save you time and money—like reading through vanity installation hacks that ensure a seamless fit. Remember, a flawlessly installed vanity not only enhances your space’s look but also its longevity. Last but not least, many underestimate the importance of integrating storage solutions that adapt to changing needs over time. Modular accessories like internal dividers or adjustable shelves can make your storage more versatile, especially as your collection of toiletries or personal items grows. For contemporary designs, exploring innovative storage ideas can lead to smarter, more efficient use of space. To sum up, dig deeper into the hidden nuances—such as material choice, precise measurements, and advanced storage options—rather than relying solely on aesthetics or price tags. Doing so ensures your vanity or built-in is a long-lasting, functional centerpiece of your home. Have you ever fallen into this trap? Let me know in the comments.
To ensure your custom vanities and built-in cabinets remain functional and visually appealing, regular maintenance is essential. I personally rely on specific tools and methods that have proven effective in my experience. One of my top recommendations is using a microfiber cloth and a gentle, non-abrasive cleaning solution for routine dusting and wipe-downs. This combo prevents dust accumulation and preserves finishes without risking damage. For more stubborn spots or drying, I swear by a soft plastic scraper, which gently removes debris without scratching surfaces.
When inspecting hinges, pulls, or soft-close mechanisms, I keep a small screwdriver and silicone lubricant handy. A quick tightening of loose screws or a drop of lubricant every few months can prolong the life of delicate hardware and prevent squeaks or jams. I learned the hard way that neglecting these minor checkups can lead to costly repairs or replacements down the line.
In terms of software and planning, I utilize 3D design tools, such as SketchUp, to simulate maintenance access and ensure future modifications are feasible. Keeping detailed records of measurements and installed components simplifies troubleshooting and upgrades. As technology advances, emerging tools like digital level sensors are beginning to help in maintaining perfect alignment, which is crucial for built-in installations.
How do I maintain my vanities and storage over time?
Long-term results depend heavily on consistent care. I schedule a quarterly check to tighten screws, clean surfaces, and assess hardware functionality. I also inspect for any signs of material wear or moisture damage, especially in humid environments. Applying protective finishes or sealants periodically can help maintain surface integrity. For example, a layer of wax or furniture polish enhances durability and can make cleaning easier.
Looking ahead, I believe the trend is shifting toward smart maintenance systems integrated with sensors that notify you when cleaning or repairs are needed. Consider technology like smart hinges that sense operation frequency and alert you when lubrication is due; this is a game-changer for busy homeowners. For detailed care routines and recommended products, I suggest exploring expert insights found in industry-specific guides or trustworthy blogs.
Don’t wait until issues arise—try implementing a regular maintenance protocol using gentle cleaning tools and keep essential hardware lubricated. This small investment of time pays off in prolonged lifespan and continued beauty of your built-ins. For more advanced tips, check out effective storage solutions to keep your systems performing at their best over the years.
 Throughout this journey of transforming your space, I’ve learned that the most impactful changes come from the nuances—details like choosing the right materials or perfecting the placement of hardware. The biggest lesson? Patience and attention to detail outshine hurried DIY efforts. My initial mistake was rushing through measurements, which led to misfits and frustration, but taking the time to be precise made all the difference. Remember, expert guidance isn’t just a luxury; it’s an investment in longevity and aesthetic harmony. Don’t underestimate how small tweaks—like incorporating adjustable shelves—can adapt to your evolving needs without costly overhauls. Then there’s the magic of integrating smart accessories, turning your vanity or built-in cabinet from mere storage into a personalized, clutter-free haven. Trust me, these insights are the secret sauce to a seamless, stylish upgrade that truly enhances daily life.
Related Posts
Built-ins & Storage Solutions: The Ultimate Installation Guide in 2025
My Journey into Built-in Storage Solutions: A Personal ReflectionWhen I…
6 Heavy-Duty L-Brackets for 2026 Custom Built-in Cabinets
I remember the day I decided to embark on my…

Expert Guide to Built-in Cabinets & Storage Solutions Installation
I remember the exact moment I realized I had bitten…