

I’ll never forget the sound—a slow, agonizing “creak” that echoed through my garage at 2 AM. It wasn’t a ghost; it was my expensive corner shelving unit slowly surrendering to gravity. I walked out the next morning to find my collection of heavy-duty power tools and paint cans leaning at a precarious 15-degree angle. The culprit? Those flimsy, thin-metal brackets that came in the box. I’d followed the instructions to a T, yet there I was, staring at a potential disaster. That’s when I realized that if I wanted a workspace that didn’t double as a liability, I had to stop thinking like a consumer and start thinking like a fabricator. This was the birth of what I now call “The Steel Angle Trick,” a simple but game-changing reinforcement method that has kept my gear rock-solid ever since.
Stop Trusting Those Thin Little Brackets in Your Corner Units
Most garage storage systems fail at the corners because that’s where the most stress is concentrated. You have two planes of weight converging on a single joint. When I first started out, I made the classic rookie mistake: I assumed that adding more wood screws would solve the problem. It didn’t. In fact, it just chewed up the particle board until the whole thing looked like Swiss cheese. If you’ve ever noticed your shelves pulling away from the wall, you’re likely facing the same structural fatigue I did. This isn’t just about aesthetics; it’s about safety. According to the American Institute of Steel Construction, the structural integrity of a joint is only as strong as its reinforcement, and standard household fasteners often lack the shear strength required for industrial-level garage loads.
I’ve found that 6 heavy duty l-brackets for reinforcing custom built-in units are a great start, but for those deep garage corners, you need something even more substantial. You need an angle that spans further and bites deeper into the studs. It’s the difference between a wobbly bookshelf and a fortress. Have you ever walked into your garage and noticed a shelf looking just a little bit “off”? If you have, don’t wait for the 2 AM creak to take action.
Is this heavy-duty steel really worth the extra effort?
You might be thinking that a simple corner unit doesn’t need “over-engineering.” I thought that too, until I had to replace a dented fender because a shelf collapsed onto my car. The beauty of the steel angle trick is that it’s incredibly affordable for the peace of mind it provides. Unlike the steel rail strategy for secure garage wall cabinets, which is great for long runs, the corner angle specifically targets that weak pivot point. I learned the hard way that saving five dollars on hardware can cost you five hundred in repairs. By using thick-gauge steel angles, you’re essentially creating an external skeleton for your cabinetry, ensuring it stays level even if the house settles or the humidity spikes. We’re going to dive into exactly how to measure, cut, and mount these angles today. We’ll look at why we stabilized shaking garage workbenches with concrete anchors in the past and how those same principles apply here to keep your corners tight. Ready to stop the sag for good?
Upgrade to Industrial Steel Angles for Real Support
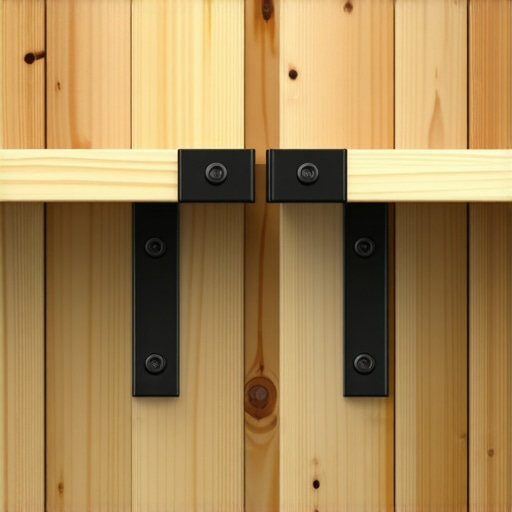
To pull off the steel angle trick, you need to think beyond the flimsy hardware aisle of your local big-box store. Most ‘heavy-duty’ shelf brackets are just bent sheet metal that will flex under the weight of a few sets of winter tires or a crate of masonry tools. Instead, you want to source 1/8-inch or even 3/16-inch thick hot-rolled steel angles from a local metal supply shop or a specialized industrial vendor. These aren’t just supports; they are structural components that provide the rigid backbone your corner unit lacks. By mounting a continuous length of steel along the corner seam, you effectively create a bridge that prevents the two shelving faces from pulling apart. This method is far superior to standard L-brackets because the solid steel cannot bend or ‘open up’ under extreme vertical pressure.
Master the Precise Measurement for Heavy Loads
Measurement is where most people rush, and in a corner, an 1/8th-inch error becomes a gaping hole. You need to measure from the vertex of the corner out toward the studs on both walls. I recommend using angles that span at least 12 to 18 inches in both directions. This allows you to hit at least two studs on each side of the corner. If you are dealing with a garage that has finished walls, finding the studs is your non-negotiable step. If you find yourself in a garage with crumbling walls or no clear wood framing, you’ll need to pivot to something like how to secure built-in cabinets to walls with no studs to ensure the weight transfers correctly. I’ve seen DIYers try to use standard toggle bolts for this, and while 6 heavy duty wall anchors for massive pantry shelves work for static pantry loads, they often fail when subjected to the vibration of a miter saw or the constant shifting of heavy toolbox drawers.
Use Structural Screws for a Permanent Grip
The secret to a rock-solid corner is the ‘bite’—that moment when the fastener pulls the steel flush against the wood until they act as one. I always use the structural screw choice for heavy duty garage workbenches because they feature a built-in washer head and a high shear strength that won’t snap when the wood expands during humid summers. Drywall screws are brittle and will shear off like glass if the shelf settles. When you drive these structural screws through your pre-drilled holes in the steel, you are essentially pinning the shelving unit into the very skeleton of your home. It’s a similar philosophy to how we stop wobbly custom built-ins with 4 hidden steel plate fixes 4—it’s all about creating massive surface area contact between the reinforcement and the framing.
Learn from My Smoked Drill Bits and Sheared Screws
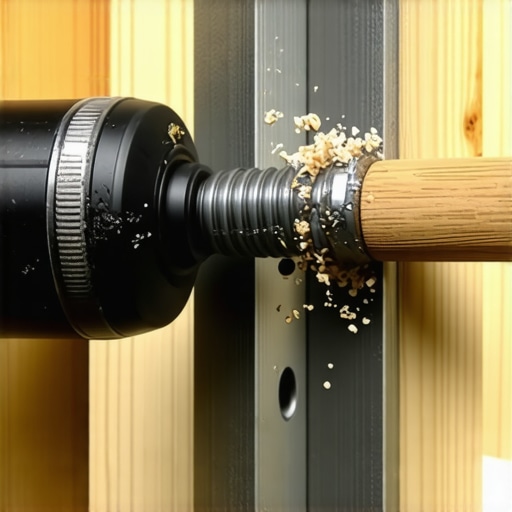
Last year, I was retrofitting a massive set of built-in storage ideas to declutter and enhance your home in a neighbor’s garage, and I made the mistake of trying to power through the steel without the right lubrication or pilot holes. The steel was so dense it actually smoked my expensive cobalt drill bit and the heat caused the first screw to seize and snap. It was a mess. The lesson? Always use a drop of cutting oil and step up your drill bits from a small pilot to the final size. If your corner unit is sitting against a foundation wall, remember that the concrete anchor rule for heavy duty garage shelving 2 applies; you need to transition from wood screws to wedge anchors or sleeve anchors once you hit that masonry. By taking these extra steps, you transform a shaky corner into a fortress that will outlast the tools you put on it.
Most DIY enthusiasts think that simply using thicker plywood is the secret to a ‘heavy-duty’ build. I’m going to go against the grain here: mass is often your enemy. When you add more wood, you’re just adding more dead weight for the wall fasteners to carry. In my experience, a thinner, well-engineered cabinet with strategic steel reinforcement outperforms a ‘beefy’ three-quarter-inch oak unit every time. The real issue isn’t the thickness of the material; it’s the lack of lateral rigidity. This is exactly why your built-in face frames are separating from the wall over time. The wood moves, but the steel stays put. If you aren’t accounting for that differential movement, you’re building a ticking time bomb.
Why Your Heavy Quartz Top Might Be Destined to Crack Your Frame
When we transition from the garage to the bathroom, the stakes get even higher. A massive double-sink vanity with a quartz or granite top can easily weigh 300 pounds. Most standard cabinets are held together by staples and prayers. If you don’t implement 7 reinforcement tactics for wall-hung bedroom vanities, that stone top will eventually bow the side panels. According to the National Design Specification (NDS) for Wood Construction, the ‘creep’ of wood under a constant heavy load can cause permanent deformation. This is why your heavy quartz vanity is cracking the cabinet frame—it’s not a manufacturing defect; it’s a failure of the support structure. I’ve seen expensive slabs of marble snap because the installer didn’t use a simple steel angle to transfer the load directly to the studs. 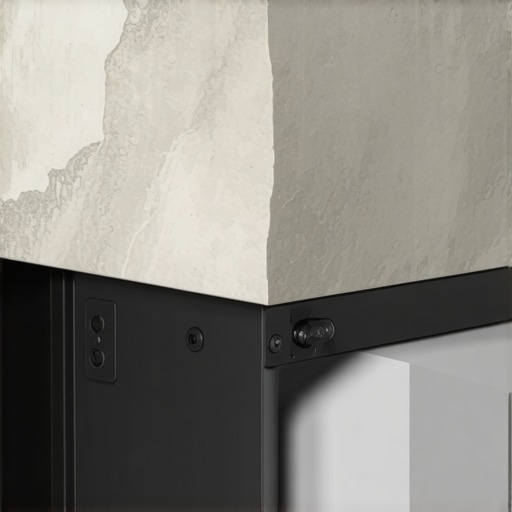
Avoid the Brittle Screw Trap
The biggest ‘oops’ factor I see in the field is using the wrong fastener for the job. People love to grab whatever is in the jar on the workbench. But if you’re using drywall screws for a heavy-duty corner unit, you’re asking for a catastrophe. Drywall screws are hardened for speed, making them incredibly brittle. They have zero shear strength. If the shelf shifts even a fraction of an inch, the head will pop right off. You need a screw that can bend without breaking. Using an expert guide to flawless vanity installation tricks tips will tell you that structural lags are the only way to go. If you ignore this, you’ll end up wondering how to fix uneven gaps in custom built-in doors that were caused by the frame sagging under its own weight. Have you ever fallen into this trap of using ‘good enough’ hardware and paying the price later? Let me know in the comments.
You can have the thickest steel in the world, but if you’re trying to drive it home with a weak cordless drill from 2010, you’re going to strip heads and lose your mind. I exclusively use a high-torque impact driver for these reinforcements. Why? Because the concussive force of an impact driver seats the screw into the stud without the ‘cam-out’ that ruins standard Phillips heads. If you’re working with the 3/16-inch steel I recommended, you also need to invest in cobalt drill bits. Standard high-speed steel (HSS) bits will dull after three holes. I’ve found that using a bit of 3-in-One oil as a lubricant makes the process twice as fast and saves your bits from burning up. If your project involves masonry walls, you should definitely upgrade to the concrete wedge anchor move for heavy wall hung garage racks 2 to ensure your foundation doesn’t just crumble under the pressure.
Grab an Impact Driver Instead of a Standard Drill
When you’re pulling steel tight against a stud, you need torque that a standard drill just can’t provide. I personally recommend an impact driver with at least 1,800 in-lbs of torque. This ensures that the structural screw’s washer head fully compresses the steel against the wood. Without this tight bond, you leave room for the cabinetry to vibrate or shift, eventually leading to those annoying creaks. If you are dealing with older homes, you might find that the scribing tool for cabinets against textured plaster walls 2 is your best friend to ensure the steel sits flush. If there’s even a tiny gap between the reinforcement and the wall, the fastener is under shear stress before you even put a single tool on the shelf.
How do I maintain these heavy structural units over the years?
Maintenance is the part everyone skips until something fails. Every six months, I do a ‘torque check’ on my garage units. Wood is an organic material; it shrinks in the winter and expands in the summer. This cycle can slightly loosen even the best fasteners. A quick quarter-turn with your driver can prevent a catastrophic failure down the line. This is especially true if you live in a climate where why your laundry room cabinets are warping is a common complaint due to humidity spikes. Also, keep an eye on your drawer alignments; if things start to rub, refer to how to fix drawer fronts that wont stay aligned 2 to catch structural shifts early. According to the Simpson Strong-Tie Technical Bulletin T-C-STRUCTSCW22, the load-carrying capacity of a fastener is significantly reduced if the wood substrate has undergone multiple extreme moisture cycles without being re-tightened.
Expect Modular Steel Systems to Dominate the Next Decade
Looking ahead, I see the industry moving away from static, permanent wooden built-ins toward hybrid modular systems. We are already seeing a surge in creative built-ins for seamless storage and home aesthetics that incorporate hidden steel tracks. This allows you to move your heavy reinforcement points as your needs change without re-drilling your studs. The trend for 2025 and beyond is ‘adaptable strength.’ Homeowners want the look of custom cabinetry with the industrial strength of a warehouse, and the steel angle trick is the bridge that gets you there. If you want to stay ahead of the curve, start integrating these metal supports into your current projects now. I want you to try this: next time you’re at the hardware store, skip the cheap zinc screws and buy a small box of GRK structural fasteners. Swap out just four of your main corner screws on a sagging unit and feel the difference in ‘bite’ yourself. You’ll never go back to standard hardware again. If you’re still planning your layout, check out these built-in storage ideas to declutter and enhance your home for more inspiration on where to apply these heavy-duty fixes.
Hard-Won Truths from My Shakiest Installations
After years in the shop, I’ve realized that the ‘hollow sound’ is your biggest warning sign. If you knock on a cabinet side and it sounds thin, that steel angle needs a solid backing plate to prevent the fasteners from simply pulling through the material. I also stopped trusting manufacturer pre-drilled holes; they are usually placed for shipping convenience rather than structural integrity. Another lightbulb moment was acknowledging that gravity never sleeps. A shelf might look fine today, but over three years, heavy loads will cause wood to ‘creep’ and fasteners to fatigue. Finally, remember that metal and wood expand at different rates. If your garage sees extreme temperature swings, don’t drive the steel bone-dry against the wood; give it a microscopic amount of ‘breathing room’ to prevent buckling during a summer heatwave.
The Heavy-Lifter’s Essential Gear List
To move beyond basic DIY and into professional-grade fabrication, you need the right kit. I never start a reinforcement project without GRK Structural Screws. Their shear strength is legendary compared to brittle drywall screws. For drilling through 3/16-inch steel, Cobalt Drill Bits are non-negotiable because standard HSS bits will just smoke and dull within seconds. I always keep a small bottle of 3-in-One Oil nearby to reduce friction heat while drilling. Lastly, a high-torque Impact Driver is essential to seat a screw through thick metal without stripping the head. If you’re still practicing your technique, following a step-by-step guide to vanity installation for beginners is a great way to get comfortable with these tools before tackling massive garage racks.
Time to Turn Your Shaky Shelves into Fortresses
Building something that lasts isn’t about how much you spend but where you place the strength. By mastering the steel angle trick, you’re taking control of your storage and ensuring your gear stays safe for decades. Whether you are implementing creative built-ins for seamless storage and home aesthetics or saving a wobbly workbench, the principles of rigid reinforcement remain the same. Don’t be afraid to over-engineer your projects; the peace of mind is worth every extra minute spent drilling. For those moving their projects into the home, don’t forget to check out this expert guide to flawless vanity installation tricks tips for a professional, high-end finish. Now, grab your driver and make those corners rock-solid. Have you ever had a shelving unit collapse on you in the middle of the night? Let me know your horror stories or your biggest wins in the comments below!