

I still remember the night I heard the ‘big crunch’ coming from my garage at 3:00 AM. I ran out in my pajamas to find my entire wall-hung storage system—bins, heavy bins, and my vintage tool collection—transformed into a chaotic heap on the concrete floor. I had made a classic rookie mistake: I trusted standard expansion plugs and generic screws for a load that demanded professional-grade hardware. If you have ever wondered why your garage shelves are pulling away from the wall, you are likely dealing with the same physics battle I lost that night. Today, we are going to fix that forever by mastering the concrete wedge anchor move. This is the secret to hanging racks that could practically hold up a truck. Have you ever felt that sinking feeling in your gut when you see a shelf start to tilt forward under the weight of your gear?
Stop Trusting Plastic Plugs for Your Heavy Gear
Early in my DIY journey, I thought a hole and a plastic sleeve were ‘good enough’ for almost anything. I was dead wrong. For heavy-duty garage storage, you need a mechanical bond that literally bites into the masonry. Standard fasteners often fail because they do not account for the massive leverage that a deep shelf applies to the top mounting points. This is why so many homeowners find their garage wall tracks failing under load shortly after installation. When you are dealing with solid concrete or grout-filled block, the wedge anchor is the undisputed king of the castle. It uses a small expansion clip at the base that flares out as you tighten the nut, creating a permanent anchor point that is stronger than the surrounding material.
Do these mechanical anchors actually hold more weight?
You might be skeptical. After all, a bolt is just a bolt, right? Not quite. Unlike sleeve anchors that distribute pressure along a thin tube, wedge anchors concentrate force at the bottom of the hole. According to the Portland Cement Association, the compressive strength of residential concrete is immense, and a properly set wedge anchor utilizes that strength to provide thousands of pounds of pull-out resistance. I once tried to skimp on the hole depth because my drill bit was getting dull—a mistake that led to a bolt sticking out too far and a rack that was totally useless. Whether you are anchoring heavy garage tool cabinets or overhead racks, the precision of the hole and the quality of the wedge are what stand between a tidy workspace and a disaster area. Let’s dive into the gear you need to get this right the first time.
Grab Your Hammer Drill and Let’s Make Some Noise
When you are ready to start the concrete wedge anchor move for heavy garage racks, you have to stop thinking in terms of standard drills. A regular drill relies on rotation alone, but concrete requires a percussive ‘hammer’ action to break up the aggregate. I remember my first time trying this with an underpowered driver; I spent nearly an hour on a single hole and almost burned the motor out. Once I switched to a dedicated hammer drill, I realized I had been fighting a battle I could never win. This is the same level of preparation required for vanity installation for beginners when dealing with masonry rather than wooden studs.
Mark Your Depth or Face the Consequences
Before you pull the trigger, wrap a piece of painter’s tape around your masonry bit at the exact depth you need. You want to drill about a half-inch deeper than the anchor’s length. This extra space is a ‘dust pocket’—it ensures that any leftover debris doesn’t prevent the anchor from seating fully. If you skip this, you might end up with a bolt sticking out too far, a common issue when installing wall-mounted tool chests that need to sit perfectly flush against the concrete.
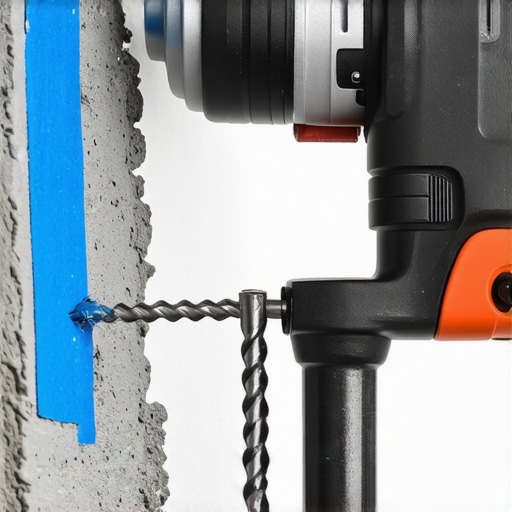
Don’t Let Concrete Dust Ruin the Grip
Cleaning the hole is the most overlooked step in DIY history. If there is dust in the hole, the expansion clip will slide against the dust rather than biting into the solid concrete. I once had a whole shelf system fail because I thought blowing into the hole with a straw was ‘good enough.’ It wasn’t. Now, I use a dedicated blow-out pump or a thin vacuum attachment. It makes the difference between a temporary fix and a permanent bond. This attention to detail is what separates a professional job from garage wall tracks failing under load because of poor friction and improper preparation.
Drive It Home Without Damaging the Threads
When you are ready to insert the anchor, always keep the nut on the bolt. It should be threaded on just enough to cover the top of the bolt. If you strike the bare steel threads with your hammer, you will mushroom the head, and you’ll never be able to tighten the nut later. I learned this the hard way on a project involving secure garage wall cabinets where I had to hacksaw off three damaged anchors and start the process over from scratch. Tap the anchor gently with a hammer until the washer is snug against the wall or the bracket you are mounting.
The Final Torque and That Satisfying Feeling of Solid Steel
The magic happens during the final three or four turns of the wrench. As you tighten the nut, the tapered end of the bolt pulls through the expansion clip, forcing it outward into the walls of the hole with incredible force. You should feel a significant, heavy increase in resistance as the steel ‘bites’ into the masonry. This is the same rock-solid feeling you get when successfully anchoring floating vanities to old brick bathroom walls. Once that nut is torqued down, your gear isn’t going anywhere, and you can finally say goodbye to the worry of collapsing shelves.
Stop Trusting Your Level Blindly
In the world of custom cabinetry, there is a dirty little secret: your level is often lying to you. Well, not technically, but if you follow it religiously in a house built more than a decade ago, your project will look crooked to the naked eye. Most beginners think that if the bubble is in the middle, the job is done. But if your ceiling or floor is slanted—which they almost always are—that perfectly level shelf will create a tapered gap that screams amateur hour. I have seen homeowners struggle with why your built-in cabinets are pulling away from the ceiling simply because they forced a square box into a non-square room. The pro move is to scribe your pieces, slightly trimming the edges to follow the real-world curves of your walls. This is especially vital when performing the scribing move for flawless cabinet gaps on natural stone where the texture is never uniform.
Is your concrete slab actually stable enough for 1,000 lbs of gear?
Many advanced DIYers assume the floor is the strongest part of the garage, but residential concrete slabs are often only 4 inches thick. When you install massive storage units, you are creating point loads. According to the American Concrete Institute (ACI), localized stress can lead to hairline fractures if you do not distribute that weight properly. This is why I always recommend a sub-frame or a ledger system to spread the burden across a wider surface area. It is the same logic we use for the hidden sub-frame move for supporting massive quartz top vanities. You are not just holding weight; you are managing energy. If you have ever noticed why your vanity plumbing is leaking into the cabinet base, it might not be a pipe issue—it could be the floor shifting under the weight of a heavy stone top, causing the cabinet to settle and pull the drain lines apart.
The Physics of Why Your Bolts Snap in February
Here is a trap that catches even the experts: thermal expansion. Concrete and steel have different coefficients of expansion. If you drive a wedge anchor into a freezing cold garage wall and torque it to its absolute limit, come mid-July, that steel is going to expand. I once saw a row of heavy-duty brackets literally pop their heads off because there was no room for the metal to breathe. It is the same reason we talk about the moisture-proof base tactic for basement built-ins—you have to account for the environment, not just the static weight. Always leave a fractional safety turn on your torque wrench rather than cranking it until it cries. Have you ever fallen into this trap where a rock-solid install failed months later? Let me know in the comments. If you are struggling with a specific setup, check out our expert guide to flawless vanity installation tricks and tips to see how we handle these high-stress environments.
Keep Your Heavy Racks from Creeping Over Time
Once those wedge anchors are in and your racks are loaded, you might think the job is done for the next twenty years. I used to think the same until I noticed a slight, almost imperceptible tilt in my main tool wall after a particularly humid summer. Mechanical fasteners are rock solid, but the materials they grip—like concrete and wood—are dynamic. If you want to avoid how to fix wobbly built-ins with 4 hidden steel plate tactics later, you need to treat your garage storage like a living structure. According to technical bulletins from Simpson Strong-Tie, even high-quality mechanical anchors can experience ‘displacement under sustained load’ if the initial torque isn’t maintained or if the concrete quality is subpar. I make it a habit to do a ‘wrench check’ every six months, especially on systems using the plywood ledger trick for heavy garage overhead racks. It takes five minutes but saves a thousand-dollar disaster.
Why Your Torque Wrench is the Real MVP
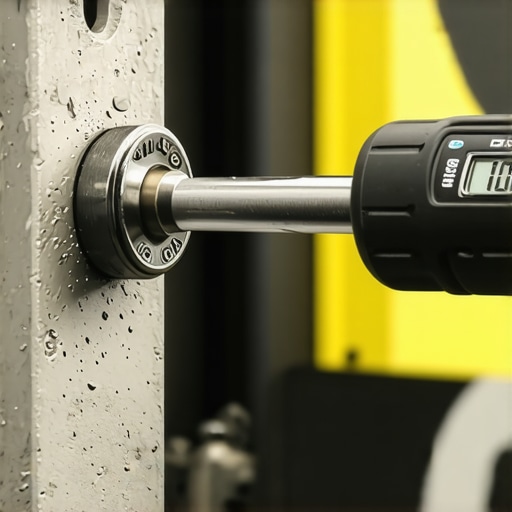
I cannot stress this enough: stop guessing how tight is ‘tight enough.’ For years, I relied on my ‘calibrated elbow,’ but when I finally bought a high-quality digital torque wrench, I realized I was consistently under-tightening my anchors for fear of snapping them. This is a common pitfall when choosing 4 heavy duty garage rack bolts that wont snap under load. A torque wrench ensures you hit that sweet spot where the expansion clip is fully engaged without stretching the steel of the bolt. This precision is the same reason we advocate for high-end hardware in our expert guide to flawless vanity installation tricks and tips. When you hear that click, you know the physics are working in your favor, not against you.
How do I maintain my concrete anchors for the long haul?
The secret to long-term stability is managing the environment around the anchor. Concrete is porous; it breathes and holds moisture. If your garage or basement is prone to dampness, that moisture can travel down the bolt and cause internal oxidation, eventually weakening the expansion clip. I always use a tiny dab of marine-grade anti-seize on the threads and check for any ‘spalling’—that’s the technical term for concrete flaking away—around the base of the anchor. If you see white, powdery efflorescence, you likely need the moisture-proof base tactic for basement built-ins to protect your investment. I predict that in the next few years, we will see smart-bracket technology with built-in tension sensors that alert your phone if a rack begins to shift, but for now, your eyes and a good wrench are your best defense.
Scalability and Future-Proofing Your Setup
As your tool collection grows, your storage needs to grow with it. Instead of drilling new holes every time you buy a new saw, I recommend installing a secondary horizontal rail system once your anchors are set. This allows for modularity without compromising the integrity of your concrete walls. It is the same logic used when you apply 4 moisture proof base fixes for rotting bathroom vanity cabinets; you are building a foundation that can handle future changes. My advice? Grab your torque wrench this weekend and verify the tension on your top-most anchors. If they’ve moved even a fraction, you’ll be glad you caught it before the ‘big crunch’ happens to you.
Hard-Won Secrets From My Garage Floor Fails
After years of drilling into everything from soft brick to high-psi cured slabs, I have realized that the most dangerous moment is when you think you are finished. One lightbulb moment I had was the ’48-hour check.’ I noticed that sometimes, as the anchor settles and the rack takes its first full load, the nut can actually benefit from a tiny fraction of a turn once the metal has fully seated. It is about the difference between a system that lasts and one that requires 6 tactics for mounting heavy garage racks without hitting a stud to fix a potential failure. Also, never underestimate the power of a stainless steel anchor if your garage is unheated. Galvanized is fine, but stainless is the insurance policy your future self will thank you for when the seasonal humidity hits. Ensuring that the metal doesn’t corrode inside the concrete is the only way to maintain that ‘bite’ over a decade or more.
The Gear That Never Lets Me Down
If you want to move beyond basic DIY, you need tools that provide physical feedback. I personally swear by a digital torque wrench; it removes the guessing game that leads to snapped bolts or loose brackets. I also never start a masonry project without a dedicated hole-cleaning brush and a manual blow-out pump. If you think a straw works, you are just moving dust around the bottom of the hole. These are the same precision-focused tools I recommend for vanity installation hacks that save time and money. Finally, invest in high-quality ‘multi-cutter’ masonry bits. They don’t wander when they hit heavy aggregate, ensuring your hole is perfectly vertical and sized correctly for the wedge expansion clip to engage properly.
#IMAGE_PLACE_HOLDER_E#
Build a Foundation You Can Trust
Taking the time to master the concrete wedge anchor move for heavy garage racks is about more than just organization—it is about peace of mind. When you walk into your garage at night, you shouldn’t have to listen for the sound of creaking steel or crumbling masonry. By treating your walls with respect and using professional-grade hardware, you are creating a workspace that can evolve with your needs. Whether you are exploring built-in storage ideas to declutter and enhance your home or just hanging a few heavy bikes, do it once and do it right. Have you ever had a heavy rack start to pull away from the wall after just a few months? Let me know your masonry horror stories in the comments below.