

I remember the exact moment my indestructible garage storage system became a pile of twisted steel and shattered plastic. It was a Tuesday night, and the silence of my suburban street was broken by a deafening thwack-crunch that sounded like a car hit my house. I ran out to find my heavy-duty shelving leaning at a sickening 45-degree angle, with my expensive miter saw dangling by its cord. I had broken the cardinal rule of garage organization: I assumed a hole in concrete and a heavy-duty plastic plug were enough. They weren’t. I spent the next three days cleaning up the mess and nursing a bruised ego. That failure taught me everything I needed to know about why your garage shelves are pulling away from the wall and how to fix it for good. Today, I’m sharing the hard-won secrets of the concrete anchor rule so you don’t have to experience that 2 AM wake-up call. We’re going to dive into the physics of pull-out strength and the specific hardware that actually holds up under real-world weight.
Stop Trusting Those Little Plastic Sleeves for Your Heavy Gear
Most of us start our DIY journey with those little ribbed plastic anchors. They’re fine for a picture frame in drywall, but for a rack holding 400 pounds of lumber or car parts? They are a disaster waiting to happen. Concrete is an incredibly strong material in compression, but it can be surprisingly fickle when you start drilling and applying shear force. According to testing by structural engineering experts, a properly installed mechanical anchor can hold thousands of pounds of tension, while basic plastic plugs often fail at a fraction of their rated load due to concrete spalling inside the hole. My mistake was simple: I didn’t match the anchor type to the load and the substrate. If you’re mounting something substantial, you need to look at heavy-duty garage rack bolts that won’t snap under load. It’s about mechanical interlocking, not just friction. Have you ever felt that sinking feeling when a screw just keeps spinning in the wall? Tell me if you’ve ever had a shelf fail on you!
Is the extra drilling really worth the effort?
I get it. Dragging out the hammer drill is a pain. The dust gets everywhere, and the noise is enough to annoy the neighbors. But here is the reality: the time you save by taking a shortcut now will be spent tenfold when you’re repairing your drywall or, worse, replacing a smashed piece of equipment. Using the concrete wedge anchor move isn’t just about over-engineering; it’s about peace of mind. When I switched to these, I could literally hang my own body weight off the rack without so much as a creak. We’re going to look at the exact sizing you need and why bigger isn’t always better when it comes to the hole diameter. Once you see how these bite into the masonry, you’ll never go back to those flimsy plastic inserts.
Pick the Right Steel for the Job
When you are staring at a concrete wall, you aren’t just looking at a surface; you’re looking at a structural challenge that requires specific mechanical leverage. For my garage rebuild, the turning point was realizing that friction alone is a coward. I shifted my entire strategy to the concrete wedge anchor move for my heavy racks. Think of a wedge anchor like a rock climber’s cam. As the nut is tightened, the mandrel pulls up through the clip, expanding it against the walls of the hole. The more weight you apply, the more it bites. It turns the concrete’s own strength against itself. 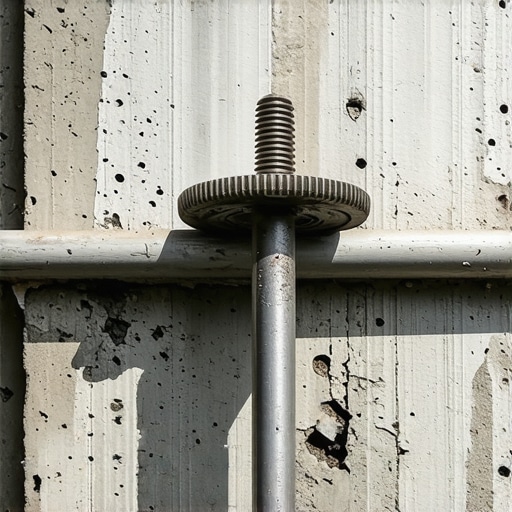
Why Wedge Anchors Beat Everything Else
I once tried to mount a massive tool chest using standard lag bolts and lead shields. It felt solid for about a month. Then, one day, I noticed a fine dusting of gray powder on the floor. The vibration of the drawers opening and closing had turned the concrete inside the hole into flour. The bolt was literally rattling. I had to replace them with the concrete sleeve anchor move for wall-hung tool cabinets, which distributes the pressure over a larger surface area. If you’re dealing with older, slightly crumbly concrete, the sleeve is your best friend because it doesn’t rely on a single point of extreme pressure.
The Drill-and-Drive Protocol
Success is 90% preparation and 10% not panicking when the hammer drill hits a piece of rebar. You need to drill your hole at least a half-inch deeper than the anchor will sit. This gives the dust a place to go. If the hole is too shallow, the anchor bottom will hit the end before the nut is flush, and you’ll be left with a useless stud sticking out of your wall. I’ve been there—I once had to use an angle grinder to cut off three misplaced anchors because I was too lazy to clear the debris. Now, I always use a vacuum or a blow-out bulb.
Getting the Dust Out is Not Negotiable
Clean holes make for permanent installs. Once the hole is prepped, tap the anchor in with a dead-blow hammer. You want a snug fit, not a struggle. When you start torquing that nut, you’ll feel the resistance build. That’s the sound of victory. This level of security is essential whether you are building a workshop or looking for innovative built-in solutions for small rooms that have masonry foundations. For overhead storage, I often combine this with the plywood ledger trick to give the racks a solid, continuous shelf to sit on while I’m driving the primary bolts.
Don’t Skimp on the Hardware Grade
Finally, pay attention to the bolts themselves. Cheap zinc-plated mystery metal will shear off if you look at it wrong. I always opt for heavy-duty garage rack bolts that are rated for the shear force of the specific rack system. If the bolt snaps inside the anchor, you are in for a world of hurt trying to extract it. This is about building a system that outlasts the house, ensuring your gear stays exactly where you put it.Everyone tells you that hitting a stud is the holy grail of installation. I’m here to tell you that sometimes, a single 2×4 is a surprisingly weak foundation for a massive storage unit or a stone-topped vanity. In my years of fixing failed DIY projects, I’ve seen that the biggest mistake isn’t missing the wood; it’s overestimating the wood’s ability to handle lateral tension. When you are hanging a heavy unit, the top of the cabinet wants to pull away from the wall while the bottom wants to push into it. If you rely solely on standard screws, you’re asking for a slow-motion disaster. For those massive projects, I’ve learned how to stop floating vanities from dipping with steel plates rather than just hoping the pine studs hold.
Why Your Stud Finder is Lying to You About Stability
We’ve all been taught that if the beep goes off, we’re safe. But the nuance most people miss is ‘stud integrity.’ In older homes, or even poorly framed new ones, studs can be bowed or split. Driving a heavy lag bolt into a split stud is essentially useless. This is where the contrarian view comes in: I often prefer a structural cleat or a backing board over direct stud-mounting for anything holding significant weight. By using expert vanity installation tricks, you can distribute that load across multiple points of contact. I once saw a ‘perfectly mounted’ pantry pull the actual drywall and studs forward because the weight wasn’t distributed—it was concentrated on two points. 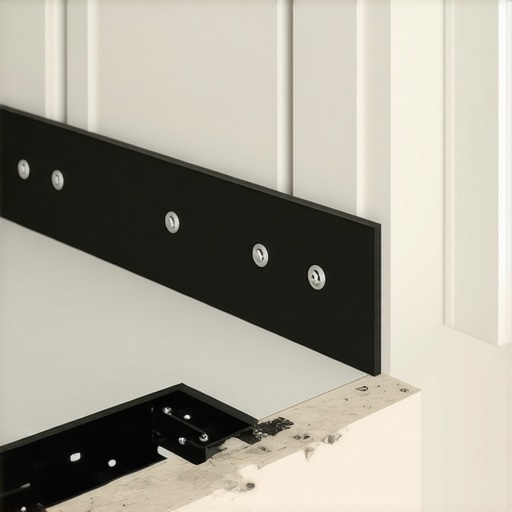
Should You Ever Trust a Floating Vanity Without Steel Reinforcement?
In my professional opinion, the answer is almost always ‘no’ once you cross the 48-inch mark. Modern quartz and marble tops are incredibly heavy, and the leverage they exert on a wall is immense. According to the National Kitchen & Bath Association (NKBA), structural support must be able to withstand the weight of the cabinet, the top, and the additional pressure of a person leaning on it. This is why I always lean toward the steel bracket hack for floating entryway benches and apply that same logic to bathroom storage. Without that internal steel, you’re just waiting for the day the wood fibers finally give up.
The Scribing Trap Most DIYers Fall Into
Another hidden nuance is the wall itself. No wall is perfectly flat, and if you bolt a rigid cabinet to a wavy wall, you’re introducing internal stress into the cabinet box. Most people just tighten the bolts and hope for the best, but that actually pulls the cabinet out of square, leading to doors that won’t stay shut. I’ve found that using the scribing trick for cabinets against uneven masonry or plaster is the only way to ensure the unit sits neutral. It’s the difference between a project that looks okay and one that is structurally sound. Have you ever fallen into this trap where you tightened a bolt only to hear a sickening ‘crack’ from the cabinet frame? Let me know in the comments! Finally, keep an eye out for the ‘oops’ factor of over-torquing. Especially with masonry, more ‘crank’ isn’t better. If you over-tighten a wedge anchor, you can actually blow out the back of the hole, leaving you with zero holding power. It’s all about finding that sweet spot where the hardware is engaged but the substrate isn’t compromised. If you’re ever in doubt, it’s always worth checking out innovative built-in solutions for small rooms to see how the pros handle these tight, high-stress clearances.Maintenance isn’t just about wiping the sawdust off your work surface; it’s about conducting a structural audit of your wall’s integrity. I make it a habit every spring to check my mechanical anchors with a skeptical eye. Concrete is a dynamic material—it expands and contracts with the seasons, and sometimes a foundation can develop micro-fractures that weren’t there six months ago. If you see even a hairline gap between the rack and the masonry, you are witnessing the beginning of a failure. I’ve seen countless DIYers ignore these signs until they need to stop wobbly custom built-ins with 4 hidden steel plate fixes because the substrate simply couldn’t handle the localized stress anymore.
Stop Guessing How Tight Your Bolts Are
I’ve completely moved away from the ‘tighten until it feels right’ philosophy. That approach is how you either leave a bolt loose enough to vibrate out or, worse, over-torque it until the concrete inside the hole turns to powder. Now, I swear by a digital torque wrench for every single anchor I drive. Why? Because specific hardware like 4 heavy-duty garage rack bolts that won’t snap under load comes with specific manufacturer tension ratings for a reason. Using a tool like the GearWrench Electronic Torque Wrench gives you a literal buzz when you hit the sweet spot, ensuring the wedge or sleeve is fully engaged without compromising the concrete’s internal structure. This precision is non-negotiable when you are implementing the concrete sleeve anchor move for wall-hung tool cabinets, where the expansion pressure needs to be uniform. 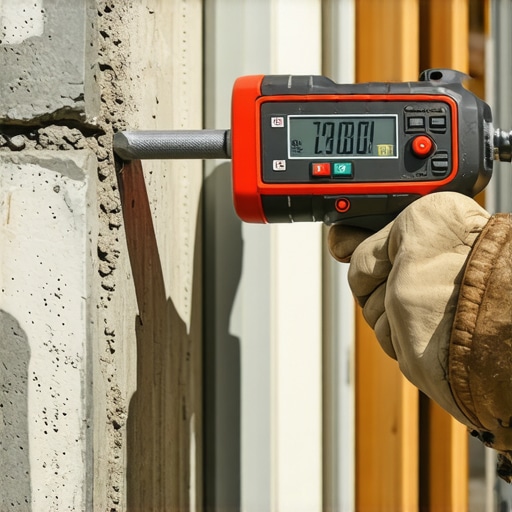
How do I keep my garage storage from failing over the years?
Consistency is the secret to longevity. Every year, I take a dead-blow hammer and lightly tap the mounting brackets of my heaviest racks. A solid ‘thud’ is good; a hollow ‘clack’ means the anchor has lost its bite. According to the Hilti North America Product Technical Guide, maintaining specific edge distances and avoiding anchor ‘grouping’ is vital; if your anchors are too close together, they create a stress zone that can lead to a ‘cone failure’ where a chunk of the wall literally pops out. I also recommend checking the plumb of your units. If a rack starts to lean even half a degree, the shear force on those top bolts increases exponentially. For heavy work surfaces, I often upgrade to the steel cantilever fix for floating garage workbenches to take the strain off the vertical wall plane and move it into the framing or slab.
Load-Sensing Hardware is the Next DIY Frontier
Looking ahead, I predict we are moving toward ‘smart storage’ that does more than just hold boxes. We’re already seeing industrial sensors that can detect weight imbalances, and I suspect we’ll soon see consumer-grade load-sensing washers that change color if a shelf is nearing its structural limit. This will take the guesswork out of storage and prevent the 2 AM crashes that started my journey. Until then, your best defense is over-engineering. My challenge to you: pick your heaviest, most precarious shelf this weekend and swap out one standard bolt for a structural anchor or a steel reinforcement plate. You’ll sleep a lot better knowing your gear isn’t going anywhere.
Why I No Longer Trust the Hardware That Comes in the Box
After that midnight disaster with my miter saw, my perspective on ‘included hardware’ changed forever. Here are the core truths I’ve gathered from the rubble of my failed storage system:
- Manufacturers cut corners: Most off-the-shelf kits include generic anchors designed for ideal conditions, not your real-world garage with its hairline cracks and moisture.
- Depth matters more than diameter: A slightly deeper hole allows for dust settlement, ensuring your anchor actually reaches its full expansion potential without hitting a dead end.
- Listen to the drill: If the resistance changes suddenly, you’ve hit an air pocket or a large piece of aggregate stone; don’t just push through, or you’ll wallow out the hole and lose your grip.
What’s in My Toolbox for Structural Projects?
To avoid a repeat of my ‘twisted steel’ Tuesday, I rely on a very specific set of gear that never lets me down. First, invest in a dedicated SDS-plus hammer drill; the impact energy is leagues better than a standard drill’s hammer setting. #IMAGE_PLACEHOLDER_E# Second, I never start a project without high-quality carbide bits—Bosch or Hilti bits cut cleaner holes which lead to tighter fits. For the actual mounting, I prioritize 4 heavy-duty garage rack bolts that won’t snap under load because I’ve seen the cheap zinc-plated ones shear under half their rated weight. Finally, if you’re dealing with older walls, keep some hidden steel plate fixes in your back pocket to bridge the gap between weak studs or crumbling masonry.
Make Your Next Project Permanent
There is a profound sense of satisfaction that comes from grabbing a shelf and feeling the entire house move instead of the bracket. When you master the mechanics of the concrete anchor rule, you aren’t just organizing your space; you are protecting your investments and your safety. Whether you are using the concrete sleeve anchor move for wall-hung tool cabinets or reinforcing a vanity, do it with the intention that it will never need to be fixed again. You have the tools and the knowledge now—go build something that stays exactly where you put it. Have you ever had a shelf or a cabinet unexpectedly fail on you, and what was the culprit? Let me know in the comments below!