

It was 2 AM, and the sound of straining drywall is something you never forget. It’s a slow, rhythmic ‘cr-cr-crack’ that says your Sunday afternoon project is about to become a Monday morning disaster. I had spent all weekend installing what I thought were the ultimate floating shelves—thick, gorgeous white oak planks that made my kitchen look like a high-end bistro. But by Tuesday, they were sagging like a tired clothesline, and my expensive ceramic bowls were slowly migrating toward the edge. I had made the classic rookie error: I trusted a generic, off-the-shelf ‘invisible’ bracket to hold forty pounds of stoneware. I realized then that if I wanted that clean, hardware-free look without the constant anxiety of a collapse, I had to stop fighting the drywall and start working inside the wall. That’s where the recessed ledger move comes in. Today, I’m going to show you how to bury your support system so deeply into your home’s skeleton that you could practically do pull-ups on your spice rack. Have you ever walked into your kitchen and noticed a slight, heart-sinking tilt in your shelving? Drop a comment and let me know I’m not the only one who has faced the ‘floating shelf lean.’
The Night My Minimalist Dream Hit the Floor
I used to think that ‘heavy duty’ was just a marketing term. I was wrong. When I first started experimenting with open shelving, I ignored the fundamental physics of leverage. Because the shelf sticks out from the wall, every pound of weight you add is magnified, pulling the top of the bracket away from the stud. I’ve seen this same issue happen when people try to fix a tilting floating desk or wonder why their floating shelf is tilting down after just a few months. My mistake was thinking that a few long screws would be enough. They weren’t. According to data from the Forest Products Laboratory, the withdrawal strength of a screw in a wood stud is impressive, but it doesn’t account for the crushing force applied to the fragile gypsum of your drywall. The recessed ledger move eliminates this by removing the drywall ‘crush’ factor entirely. By cutting a channel and mounting a hardwood ledger directly to the studs, you create a structural seat that can’t pivot or pull. It’s the same level of stability we aim for when we reinforce wall-hung vanities.
Does This Strategy Actually Justify the Extra Effort?
I know what you’re thinking: ‘Cutting into my drywall sounds like a lot of dust and a lot of regret.’ It’s a fair fear. Most DIYers want a project they can finish between lunch and dinner. But let me be honest with you—the two hours you spend on the recessed ledger will save you two days of patching and repainting when a standard bracket eventually rips a hole in your wall. This isn’t just about strength; it’s about the ‘pro’ finish. If you’ve ever looked into internal torsion box engineering, you know that the best support is the kind you can’t see. Using a recessed ledger allows the shelf to slide over the support and sit perfectly flush against the wall, mimicking the seamless look of creative built-ins for home aesthetics. We are going to dive into the exact measurements and the ‘back-bevelling’ trick that makes the shelf look like it grew out of the wall.
Why Surface-Mounted Brackets Are Liars
Standard brackets rely on the face of the drywall to act as a fulcrum. The problem is that drywall is essentially compressed chalk. Over time, the weight of your kitchen gear compresses that chalk, the bracket sinks in, and the front of your shelf dips. By the time you notice the gap, the damage is done. My journey into the recessed ledger started after I failed at using internal braces for extra-long shelves without proper wall prep. I learned that you have to bridge the gap between the studs with a solid member. When you recess that member into the wall, you aren’t just hanging a shelf; you are extending the house’s framing into your kitchen. This creates a foundation so stiff that even a heavy quartz-topped shelf won’t budge. This level of preparation is the ‘secret sauce’ I use in an expert guide to flawless vanity installation, and it applies perfectly here.
Carve Out a Foundation That Never Sags
The first thing you need is a steady hand and a sharp oscillating multi-tool. We aren’t just putting a bracket on the wall; we are performing a ‘surgical strike’ on your drywall. I mark a horizontal strip exactly the height of my 3/4-inch plywood or hardwood ledger. It’s scary the first time you plunge that blade into a finished wall, but you have to remember: the drywall isn’t doing the work. Similar to the plywood ledger trick for heavy garage overhead racks, this strip will transfer the load directly into the framing. I remember a project in a 1940s bungalow where the studs were spaced like a drunk person’s footsteps—anywhere from 12 to 22 inches apart. A standard bracket would have missed half of them. By cutting a continuous channel, I was able to bridge those gaps and create a rock-solid mounting surface that spanned the entire length of the shelf. 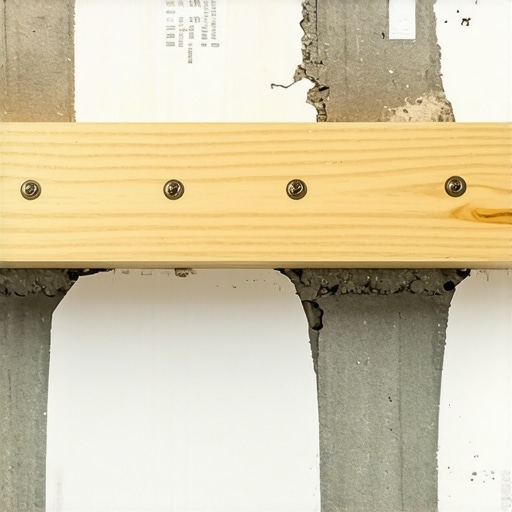
Ditch the Brackets for Hardwood Ledger Strips
Once you’ve cleared the drywall, you’re looking at the bare studs. This is your chance to correct any ‘wall wave.’ I like to use a 3/4-inch strip of maple or high-grade birch plywood. You screw this strip directly into every single stud you’ve exposed using 3-inch structural screws. This mimics the logic of reinforcement tactics for wall-hung bedroom vanities, where the goal is to distribute the weight across the widest possible footprint. If your studs are slightly recessed, you can shim the ledger to be perfectly plumb. This is the stage where you win or lose the ‘level battle.’ If your ledger is tilted, your shelf will be too. I once spent forty minutes shimming a ledger in a kitchen with a 3-degree wall lean; it felt like overkill until I realized my shelf didn’t have that depressing ‘downward dip’ six months later.
Master the Back-Bevel for a Seamless Fit
The real magic happens when the shelf meets the wall. Most people cut their shelf back at a perfect 90-degree angle. That’s a mistake. If your wall has even the slightest texture or bow, you’ll end up with an ugly gap. I use the back-bevin trick for scribing cabinets to out-of-plumb walls. By angling the back edge of the shelf slightly inward (about 2 or 3 degrees), only the very front edge of the wood touches the wall. This allows you to ‘crush’ the edge into the drywall slightly for a vacuum-sealed look. When combined with internal torsion box engineering, the shelf essentially clamps onto the recessed ledger. It’s a mechanical bond that no amount of heavy stoneware can break. This is the exact same precision we use when leveling vanities on sloping tile floors—it’s about outsmarting the imperfections of your home’s construction.
Stop Turning Your Studs Into Swiss Cheese
We have all been there—staring at a heavy shelf and thinking, ‘If four screws are good, twelve must be invincible.’ This is the most common mistake I see in DIY circles and even among some professional installers. People think they are reinforcing the wall, but they are actually weakening the lumber. There is a structural reality called the ‘group action factor’ mentioned in the National Design Specification (NDS) for Wood Construction, which basically explains that adding more fasteners in a tight cluster doesn’t linearly increase strength; it can actually lead to a localized failure of the wood grain. When you drill too many holes into a single section of a 2×4, you aren’t securing a shelf; you’re perforating a postage stamp. I’ve seen beautiful expertly installed vanities fail because the installer turned the wall plate into sawdust. Instead of more screws, you need better placement and the right gauge of structural fastener. Have you ever fallen into the ‘more screws equals more strength’ trap only to watch the wood split? Let me know in the comments.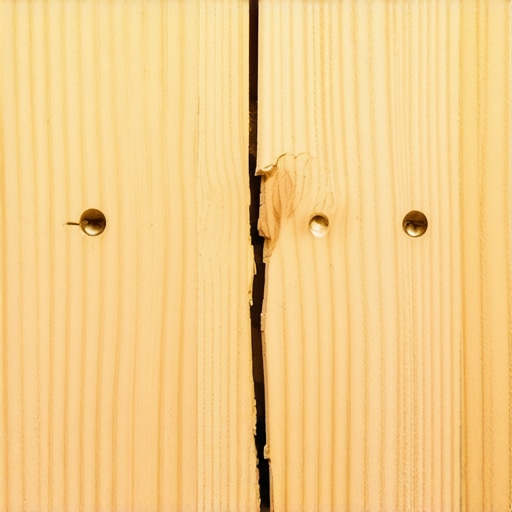
The Overtightening Trap That Ruins Your Finish
Another nuance that separates the pros from the weekend warriors is the ‘torque ego.’ Most people use an impact driver to slam their mounting screws into the wall until the wood screams. This is a disaster for high-end creative built-ins. Over-torquing crushes the wood fibers and creates internal tension that will eventually release as a ‘pop’ or a crack months later when the house shifts with the seasons. This is especially dangerous when you are dealing with heavy duty wall fixes for quartz top vanities. That stone top doesn’t flex, so if your cabinet frame is under pre-existing stress from over-tightened fasteners, the frame will bow, and your expensive countertop will be the thing that snaps to relieve the pressure. I always back off my impact driver and finish the last two turns with a hand wrench to feel the ‘seat’ of the screw. It’s one of those vanity installation hacks that saves thousands of dollars in potential stone repairs.
Why Do Wide Cabinets Fail Even With Premium Hardware?
If you are working on a project with a significant span—like a five-foot floating desk or a double-sink vanity—hardware isn’t your only concern; it’s the deflection of the unit itself. Many builders assume that if the wall anchors hold, the cabinet will too. But as I’ve noted when discussing why heavy quartz vanities crack cabinet frames, the internal structure of the box is often the weak link. Without a mid-span support or a hidden steel spine, the weight of the contents will eventually pull the front edge down, even if the back is bolted perfectly to the studs. For these ultra-wide spans, I always integrate hidden steel brackets for office desks or similar reinforcement into the cabinetry carcass itself. This ensures the unit remains rigid, preventing that dreaded ‘smile’ shape that ruins the look of your modern, minimalist storage. Always remember: the goal isn’t just to keep the shelf on the wall, but to keep the shelf perfectly flat while it’s there.
I have learned the hard way that the best installation in the world won’t save you if you don’t account for the fact that your house is a living, breathing organism. Wood expands, concrete settles, and drywall eventually yields to the relentless tug of gravity. To keep those high-end creative built-ins for seamless storage looking as sharp as the day they were installed, you need a maintenance strategy that goes beyond just dusting the top. Every year, during the transition from the humid summer to the dry winter, I take five minutes to check the tension on my structural fasteners. It sounds obsessive, but according to the Wood Handbook from the USDA Forest Service, wood can change dimensions significantly based on relative humidity. This movement can slightly loosen the bite of your screws. A quick quarter-turn to ensure everything remains snug can prevent a minor gap from turning into a major failure. It is the same philosophy I apply when using vanity installation hacks that save time and money—preventative tightening is cheaper than a total structural rebuild.
How can I ensure my storage stays level as the house ages?
The secret is monitoring the wall-to-shelf junction for what I call ‘the ghost gap.’ If you see a hairline fracture in the caulk or paint where the shelf meets the wall, your support system is likely under stress. This is often where a moisture barrier for vanities or similar sealant helps, as it provides a flexible buffer that hides small movements. For those of you scaling up to larger projects, like built-in storage ideas to declutter and enhance your home, I recommend using a digital angle gauge once a year. I personally use the Wixey WR300 Type 2. It’s accurate to 0.1 degrees, allowing you to catch a shelf that is tilting down long before it becomes visible to the naked eye. If you catch it early, you can often shim the ledger or tighten the internal torsion box without having to rip out the drywall again.
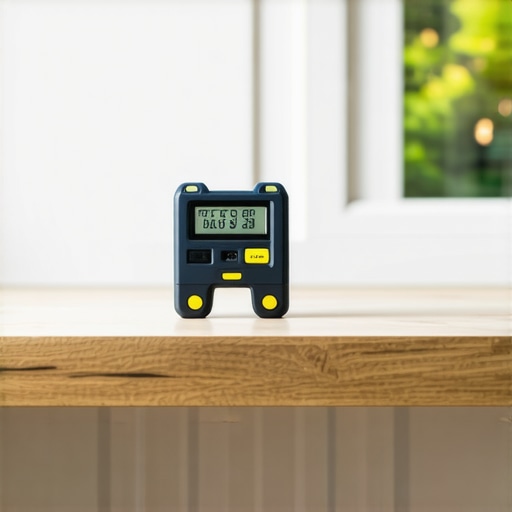
The Precision Kit I Never Leave Behind
If you want professional results, you have to stop using the free ‘bubble levels’ that come in furniture kits. I swear by my Stabila R-Beam level. Its shape makes it nearly impossible to twist, which is critical when you are trying to find a perfectly flat line across six feet of kitchen wall. When you are aiming for flawless vanity installation tricks, even a sixteenth of an inch of ‘tool flex’ can ruin the alignment of your doors. I also recommend a high-quality oscillating multi-tool with a carbide-grit blade for those recessed ledger cuts. It allows for surgical precision that a drywall saw simply can’t match. As we look toward the future, I predict we will see more hybrid shelving cores made of carbon fiber or ultra-high-density composites. These materials won’t be affected by humidity, making the ‘floating look’ even more accessible for bathrooms and laundry rooms. For now, focus on the fundamentals: use structural screws, respect the wood’s need to breathe, and don’t be afraid to over-engineer. I want you to grab your level today and check your heaviest shelf—if it’s dipping even slightly, try the ‘back-bevel’ trick I mentioned earlier to pull that front edge back to true. It’s the difference between a project that lasts a weekend and one that lasts a lifetime.
Hard-Won Lessons from Ten Years in the Woodshop
After a decade of dodging falling shelves, I’ve realized that the wall is rarely your friend. My biggest lightbulb moment came when I stopped treating drywall as a surface and started treating it as a temporary obstacle. Always verify your stud locations with a small drill bit or a finish nail before committing to a heavy ledger; stud finders are great, but they can be fooled by plumbing stacks or double-layered drywall. Another hard truth: the ‘static load’ isn’t your only enemy. You have to account for the ‘dynamic load’—the weight of someone leaning on the shelf or a heavy stack of plates being dropped down roughly. This is why we prioritize built-in storage ideas to declutter and enhance your home that use mechanical bonds rather than just friction. Finally, never assume the floor and ceiling are parallel. Sometimes a shelf that is technically ‘level’ looks disastrous because the crown molding is sagging. Trust your level, but verify with your eyes for the best effortless storage solutions for a tidy stylish home.
My Non-Negotiable Kit for Heavy-Duty Storage
If you want to move beyond the basic DIY phase, you need tools that don’t lie to you. I never start a project without GRK RSS Structural Screws. Unlike standard gold screws, these are heat-treated and specifically designed to carry heavy loads without snapping—essential for any expert guide to flawless vanity installation tricks tips. I also rely heavily on Fine-Tooth Carbide Blades for my multi-tool; they make those recessed drywall cuts clean enough that you barely need to caulk. For inspiration and technical specs on wood movement, I always keep a copy of Understanding Wood by R. Bruce Hoadley on my workbench. It’s the definitive guide on why wood moves and how to stop your creative built-ins for seamless storage and home aesthetics from cracking at the seams.
#IMAGE_PLACE_HOLDER_E#
Go Build Something That Stays Put
Installing high-quality storage solutions isn’t just about adding more room to your house; it’s about the peace of mind that comes from knowing your craftsmanship is solid. You’ve now got the blueprint for a recessed ledger and the secrets of the back-bevel. Don’t let the fear of a messy wall stop you from creating the home you want. Every pro started with a sagging shelf and a lesson learned the hard way. Now, take these tactics, grab your impact driver, and build a foundation that will stand the test of time.
Have you ever started a project only to realize the wall behind the drywall was a complete mess? Let me know your biggest installation ‘surprises’ in the comments below!