

I remember standing in my client’s mudroom, holding a heavy-duty masonry bit and feeling a cold pit in my stomach. The floor was gorgeous, heated Italian porcelain, and beneath that tile lay a web of pressurized PEX tubing filled with hot water. One slip, one over-ambitious drill depth, and I’d be responsible for a $10,000 plumbing disaster. I’d seen it happen once before on a job site—a single rogue screw turned a beautiful entryway into a literal geyser. We often think of mudroom benches as simple furniture, but when you are dealing with hydronic heat, the stakes change from DIY project to surgical operation. Today, I am going to show you exactly how to get that rock-solid, it-won’t-budge feel for your heavy bench without risking a flood.
Forget the Floor Bolts and Save Your Pipes
[IMAGE_PLACEHOLDER] The traditional way to stop a heavy seat from shifting is to run long anchors straight into the subfloor. But with radiant heat, that’s just playing Russian Roulette with your HVAC system. Early in my career, I made the mistake of assuming the standard 1.5-inch pour of gyp-crete would protect the lines—I was wrong. I nearly nipped a manifold line because the installer had floated the pipes higher in one corner. Since then, I’ve learned that the structural cleat strategy for heavy mudroom lockers is a far superior way to carry the load than relying on the floor alone. According to the Radiant Professionals Alliance, hydronic tubing can sometimes be as shallow as 3/4 of an inch below the surface depending on the installation method, meaning your margin for error is razor-thin. Have you ever felt that heart-in-throat moment when you aren’t 100% sure what’s behind the wall or under the floor?
Is a wall-only attachment actually strong enough for a heavy family?
Many homeowners worry that if they don’t bolt the bench to the floor, it will eventually pull away or creak when three kids pile onto it at once. I get it. Nobody wants a wobbly seat. However, by using a ledger board move for level mudroom benches, we shift the weight-bearing responsibility from the fragile floor to the sturdy wall studs. If you’ve noticed why your mudroom bench is pulling away in the past, it’s usually not a lack of heavy duty floor bolts, but a failure to hit the center of the studs. We are going to focus on building a bridge of sorts—a structure that sits on the floor for vertical support but relies on massive lateral strength from the wall to prevent shifting. This approach keeps your feet warm and your basement dry.
Find the Studs Before You Find the Pipes
The first rule of working over hydronic heat is that the floor is lava. Seriously. Instead of reaching for your hammer drill, reach for a high-quality stud finder. You need to identify every vertical support member behind that drywall. I’ve found that even when we are doing an expert guide to flawless vanity installation tricks tips style project, the wall is always your most reliable ally. Once you have marked your studs, you are going to create a structural shelf that the back of the bench will sit on. This completely removes the need to penetrate the subfloor and risking a leak.
Build a Support System That Defies Gravity
To make this work, we use a structural cleat. I prefer using a 2×4 ripped at a 45-degree angle or a heavy-duty plywood strip. By using the ledger board move for level mudroom benches, you create a solid horizontal plane that transfers the weight of the bench—and the three adults sitting on it—directly into the framing of the house. I once spent four hours on a project just ensuring my ledger was perfectly level because the tile floor had a slight pitch for drainage. If that ledger is off by even an eighth of an inch, the whole bench will groan every time someone sits down.
The Scribe Method for a Seamless Fit
Rarely is a wall perfectly flat, especially in older homes. I remember a specific installation where the mudroom wall had a massive hump right in the middle. If I had just jammed the bench against it, there would have been a half-inch gap on either side—a total amateur move. Instead, I used the scribing hack for fitting vanities against out of plumb walls to trace the wall imperfections onto my side panels. By trimming to that line, the bench fit like a glove against the drywall, providing extra surface area for adhesive and preventing that annoying pulling away sensation over time.
Reinforce from the Inside Out
Since we are not bolting to the floor, we have to ensure the bench box itself does not rack or tilt. This is where the hidden internal bracing trick for extra deep kitchen sink bases comes in handy. By installing triangular gussets or steel L-brackets inside the corners of the bench carcass, you create a rigid box that cannot twist. To finish it off and stop those annoying noises, I always look at why your mudroom bench is creaking and the hidden screw fix techniques to ensure that the wood-to-wood connections are tight and lubricated with a bit of wood glue or construction adhesive. This setup is so solid you could jump on it, yet your PEX tubing remains completely untouched beneath the tile floor.
Most DIYers and even some pros assume that if a bench or cabinet feels heavy, you just need to add more screws until it stops moving. In my experience, this is the quickest way to turn a high-end project into a pile of toothpicks. Over-fastening is a massive myth. When you drive twenty screws into a single wall stud, you aren’t making it stronger; you are effectively perforating the wood like a piece of notebook paper, making it easier for the stud to split under load. According to the Architectural Woodwork Institute (AWI) Quality Standards, the structural integrity of a wall-hung unit depends on the shear strength of specifically spaced fasteners rather than the sheer quantity of them. If you’ve ever wondered why your heavy quartz vanity is cracking the cabinet frame, it is often because the weight wasn’t transferred correctly to the vertical supports, causing the box to torque.
How do you distribute weight when the floor is strictly off-limits?
The trick is to stop thinking about the bench as a box and start thinking about it as a lever. By using 7 reinforcement tactics for wall hung bedroom vanities, such as internal steel plates or integrated blocking, you can create a cantilevered effect that stays rock-solid without a single bolt touching the tile. For really long spans, I’ve often had to stop floating shelf sag with internal torsion box engineering techniques. This involves building a honeycomb-style frame inside the bench seat itself. It’s the same tech used in aircraft wings—maximum rigidity with minimum weight. Have you ever fallen into the ‘more screws is better’ trap only to find your wood splitting or the unit sagging anyway? Let me know in the comments below! 
Beware of the Heat Expansion Disaster
Another nuanced mistake I see involves the interaction between the wood and the radiant heat system. Wood is a living material that breathes, and placing it directly over a heat source without a thermal break is asking for trouble. I always utilize the waterproof shim move for vanities on wet room floors to create a tiny, 1/8-inch air gap between the base of the bench and the tile. This gap allows for airflow and prevents the wood from drying out too quickly and cracking. Without this, the constant cycling of the hydronic heat can cause the bottom of your custom built-in to cup or warp, eventually pulling those expensive wall anchors right out of the drywall. It’s these tiny, hidden details—the things you can’t see once the trim is on—that separate a project that lasts five years from one that lasts fifty.
To pull off this kind of high-stakes installation, your tool bag needs more than just a standard hammer and a box of nails. I’ve learned the hard way that precision is the difference between a bench that stays put and a $5,000 floor repair. My go-to is always a high-end track saw for those long, clean cuts and a self-leveling cross-line laser. If you aren’t using a laser, you’re just guessing. I also swear by the scribing tool for cabinets against textured plaster walls because it allows me to follow the floor’s subtle waves without ever touching a drill bit to the tile. When I’m setting the upper components, I rely on the structural cleat move for heavy-duty entryway hooks to ensure that even a dozen heavy winter coats won’t pull the unit off the wall. The right gear doesn’t just make the job faster; it makes the impossible installs actually doable.
How can I keep these built-ins looking new for a decade?
Maintenance for built-ins over heated floors is all about managing wood movement. Because the heat cycles on and off, the wood will naturally expand and contract. I tell my clients to check their cabinet hinges once a year. If you start to notice why your mudroom locker doors won’t close and the hinge shift, it’s usually not a build failure but a simple seasonal adjustment. According to the USDA’s Forest Products Laboratory Wood Handbook, the ‘withdrawal resistance’ of a fastener is significantly impacted by the moisture content of the wood. This is why I always use structural-grade screws instead of standard hardware. They have the shear strength to handle the wood’s movement without snapping. For the long haul, investing in creative built-ins for seamless storage and home aesthetics means planning for this movement during the initial build phase, rather than trying to fix a cracked frame five years down the line.
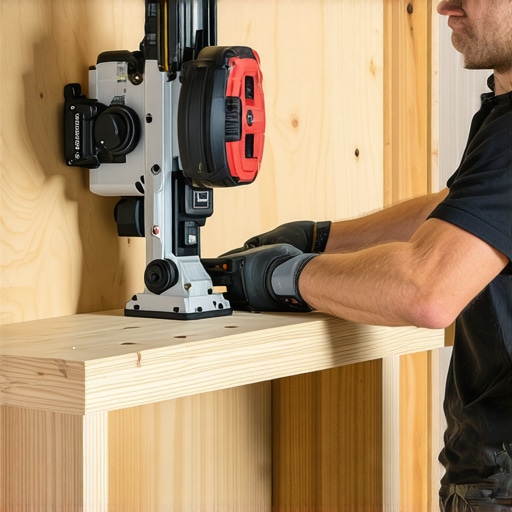
Looking ahead, I see a massive shift toward ‘active’ cabinetry. We are no longer just building boxes; we are building systems. In the next few years, I expect to see more integration of climate-controlled cubbies and built-in drying racks. If you’re planning a project now, consider the toe-kick ventilation fix for under-cabinet heaters to help circulate the air from your radiant floors up through the bench. This prevents heat pockets and keeps the internal temperature of your cabinetry stable. If you want a result that looks like a pro did it, stop thinking about the floor as a foundation and start treating your walls like the structural backbone they are. Give the ledger board method a try on your next project—it’s the single best way to protect your plumbing while gaining rock-solid stability.
Hard-Won Secrets from the Mudroom Trenches
Over the years, I’ve realized that the biggest mistakes don’t happen because of a lack of skill, but a lack of preparation. For example, never scribe your bench while the radiant heat is running at full blast. Wood and tile expand at different rates, and you might find unsightly gaps once the system cools down. I also learned that using thermal imaging is no longer optional; it is a requirement for total peace of mind. If you are worried about lateral movement, remember that stop wobbly custom built-ins with 4 hidden steel plate fixes 4 can provide that extra bite into the wall studs without needing a single floor anchor. Lastly, always trust your laser level over your eyes—floors are notorious for lying about being flat, even when they look perfect.
My Essential Gear for High-Stakes Woodworking
To pull this off, you need tools that prioritize precision over raw power. I never step onto a job site with hydronic heat without my FLIR Thermal Camera. It allows me to map out the danger zones before I even unpack my level. Speaking of levels, using a high-end self-leveling cross-line laser is the only way I handle 7 tactics for leveling vanities on sloping tile floors 2 properly. For the actual assembly, I rely on GRK structural screws and 6 heavy duty l-brackets for reinforcing custom built-in units 2 to ensure the bench box behaves like a solid piece of steel rather than a shifting wooden crate. These tools aren’t just luxuries; they are the insurance policy for your client’s expensive plumbing and your reputation.
Start Your Next Build with Total Confidence
Installing a heavy bench over a heated floor might feel like walking a tightrope, but once you master the wall-cleat method, you will never look at a floor bolt the same way again. This approach doesn’t just save you from a potential plumbing disaster; it results in a cleaner, more professional look that feels truly integrated into the architecture. By focusing on structural integrity through the wall studs, you ensure your creative built-ins for seamless storage and home aesthetics remain a highlight of the home for decades. Don’t let the fear of a PEX line stop you from creating something beautiful—just change your strategy and trust your wall. Have you ever found a surprise behind a wall or under a floor during a project? Share your close-call stories in the comments below!