

I remember sitting on my sofa, coffee in hand, admiring the supposedly perfect floor-to-ceiling media center I had just finished installing. Then I heard it—a tiny, sharp crack. I looked up, and there it was: a sliver of light where the crown molding used to kiss the ceiling. My heart sank. It starts as a hairline fracture in the caulk, but before you know it, you can fit a coin in the gap. If you are seeing this right now, do not panic; you are not alone, and your house probably isn’t falling down. Most homeowners face this exact frustration because they treat their walls like static blocks of stone rather than the living, breathing structures they actually are. I have spent years troubleshooting these gaps, and today, I am going to show you why that gap is happening and how we can pin that unit back where it belongs.
Stop the Sag Before Your Living Room Becomes a Hard Hat Zone
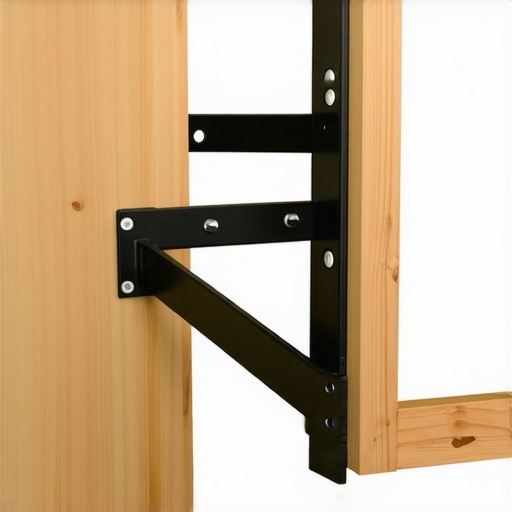
When I first started building, I made the classic mistake of thinking that if I drove enough screws into the studs, nothing would ever move. I once installed a massive unit without accounting for the seasonal shift in my own home, and three months later, the drywall looked like a spiderweb. This issue is often related to similar problems like why your integrated wardrobe is pulling away from the ceiling, where the sheer weight of the unit fights against the natural settling of the house. Houses settle, and wood expands. If your media center is packed with heavy electronics or books, the downward pressure is immense. You might need to look into 6 hidden steel brackets for heavy duty built in office desks or similar reinforcement tactics to ensure the frame isn’t bowing under the load.
Is this gap actually dangerous or just an eyesore?
It is the question I get most often: Is my media center going to tip over? Usually, it is a cosmetic nightmare caused by timber shrinkage. According to the Forest Products Laboratory, wood can expand or contract significantly across its grain depending on relative humidity—sometimes as much as a quarter-inch over a short span. This movement, combined with the weight of the cabinetry, creates that dreaded separation. However, if the gap is widening rapidly, it could mean your floor joists are deflecting. Have you noticed a gap appearing in your home lately, or is your crown molding starting to scream for help? Before you reach for the caulk gun to hide the evidence, we need to address the structural anchors. Using something like the hidden support rail for extra wide media centers can often provide the necessary uplift to close that distance permanently. Let’s look at the physics of your wall and how to win the battle against gravity.
Find Your Structural Anchors Before Reaching for the Caulk
Most homeowners make the mistake of treating a ceiling gap as a surface-level annoyance when it is actually a sign of foundation or anchoring failure. To fix this, you have to find the bones of your wall. I once worked on a massive library project where the client wanted floating shelves to span ten feet. I initially thought standard structural screws would suffice, but as soon as we loaded the books, the unit pulled a half-inch away from the ceiling. I had to backtrack and implement the hidden support rail for extra wide media centers to distribute the load across four different studs. If you are working with an older home, you might even need to learn how to anchor heavy closet organizers to crumbling plaster 3 because standard plastic anchors will just pull right through the aged lath.
Stop the Lean with Mechanical Reinforcement
Think of your media center as a heavy backpack. If you only hang it by one strap, it is going to sag and pull away from your body. You need straps at the top, middle, and bottom. For units that are particularly deep or heavy, I often use 6 heavy duty wall anchors for massive pantry shelves to ensure the vertical cabinets stay suctioned to the drywall. If the unit is already installed and sagging in the middle, you can use the hidden tension rod fix for bowing shelf units to pull the structure back into alignment without visible hardware. This mechanical tension creates a permanent bond that seasonal humidity won’t easily break.
Level the Ground Beneath Your Feet
A gap at the top often starts at the very bottom. If your floor isn’t level, the entire unit will lean forward like a tired giant, creating that dreaded sliver of light at the crown molding. In one basement remodel, I found that the concrete floor sloped nearly an inch toward a floor drain. To solve this, I used the leveling leg move for mudroom cubbies on tile 2 to lift the front of the unit, which naturally closed the gap at the ceiling. When the floor is the culprit, you cannot just screw the top tighter; you have to support the base. For heavy-duty builds in work areas, you might even need to consider how we stabilized shaking garage workbenches with concrete anchors to provide a rock-solid foundation that won’t shift under the weight of heavy electronics and hardware.
Scribe Your Way to a Professional Finish
Walls are never perfectly flat. They have humps and valleys that push your cabinetry away from the corner, making the top look misaligned. This is where the scribing tool for cabinets against textured plaster walls 2 becomes your best friend. By shaving the back edge of the cabinet to match the wave of the wall, you allow the unit to sit closer to the studs, making your anchors much more effective. I remember a kitchen install where the wall had a massive bulge right at eye level. By using the scribing secret for floor-to-ceiling built-ins on carpet, we were able to tuck the unit into the recess, making the gap disappear without a single drop of caulk. It is about working with the natural curves of your house rather than fighting them with brute force.
Stop assuming more screws make a cabinet stronger
Everyone says you should screw your cabinets into every single stud with as much torque as your drill can provide. In my experience, that is exactly how you end up with a split face frame or a unit that groans every time the furnace kicks on. Wood is hygroscopic; it wants to breathe. If you pin it too tightly against a foundation that is also moving, something has to give. Usually, it’s the finish or the joint itself. According to the Architectural Woodwork Institute (AWI) Standards, cabinetry should be installed only after the building has reached a stable in-use humidity level, typically between 25% and 55%. If you ignore these environmental nuances, no amount of hardware will prevent the wood from doing what it naturally wants to do: move.
The quartz countertop trap that ruins custom frames
If you are dealing with a massive stone top, you need to worry about more than just the wall. I’ve seen beautiful installs fail because the installer didn’t realize why your heavy quartz vanity is cracking the cabinet frame—it’s often due to point-loading on a frame not designed for that specific weight distribution. You can’t just rely on the box; you need to integrate stop wobbly custom built-ins with 4 hidden steel plate fixes 4 into the internal structure. The oops factor often comes down to moisture trapped behind the unit. In high-traffic bathrooms, I always implement 7 moisture barriers for vanities in high humidity bathrooms to prevent the back panels from delaminating before the warranty even expires.
#IMAGE_PLACE_HOLDER_C#
Can your wall actually support a floating vanity without a center leg?
It’s a common question for those chasing that sleek, modern look. The answer is usually no if you’re just using standard drywall screws. You need 7 reinforcement tactics for wall hung bedroom vanities 2 or specialized hardware like how to support double sink vanities without center legs. Without a recessed ledger or steel reinforcement, that floating look will eventually become a floor-sitting reality. Even with perfect structure, you need smart internals. I recommend looking into creative storage solutions for vanities declutter in style to ensure your heavy bottles and hair tools don’t add unnecessary cantilevered stress to the front of the unit. Have you ever fallen into this trap? Let me know in the comments.
The laser level saved my reputation
I used to rely on a bubble level and a prayer until a client called me back because their ‘perfect’ vanity had drifted six millimeters out of plumb after a month of use. Now, I don’t move a muscle without my Bosch GLL series self-leveling cross-line laser. It is the difference between a unit that looks good today and one that stays level forever. When you are exploring vanity installation hacks that save time and money, the real ‘hack’ is investing in precision layout tools. A laser ensures that your pilot holes are perfectly horizontal across the entire wall, which is vital when you are managing heavy-duty loads. If your layout is off by even an eighth of an inch, the torque on your screws will eventually cause them to back out, leading to that dreaded ceiling gap we discussed earlier.
How do I maintain my custom built-ins over the next decade?
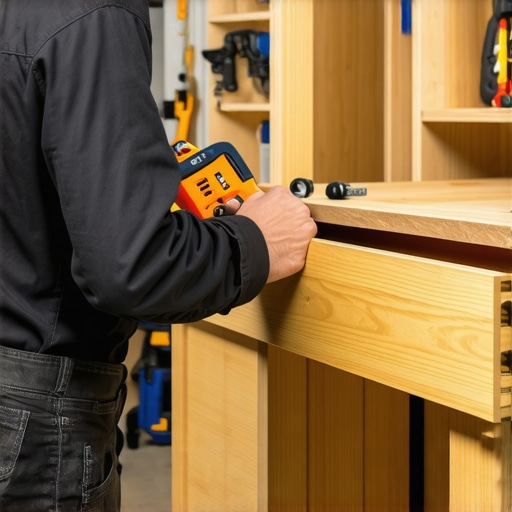
Maintenance isn’t just about dusting the shelves; it’s about mechanical upkeep. Wood is a dynamic material that reacts to your HVAC system. Twice a year, I recommend doing a ‘torque check’ on your mounting screws and checking your drawer alignment. If you notice a drawer face looking slightly crooked, do not wait for it to scrape the frame. You can usually learn how to fix drawer fronts that wont stay aligned 2 with a simple Pozidriv screwdriver and five minutes of adjustment. According to the Blum Product Configurator technical specs, even the most robust under-mount slides lose significant load capacity and smooth operation if the internal drawer width exceeds the recommended safety margin or if the box is slightly out of square. Keeping things aligned prevents the hardware from grinding itself into an early grave.
Keep your drawers gliding like silk for years
The most common failure point in any custom storage unit isn’t the wood—it’s the moving parts. I’ve seen beautiful pantry units become a source of daily frustration because of a single misaligned rail. You can stop pantry pull outs from jamming with this slide alignment trick by ensuring the slides are perfectly parallel to within a sixteenth of an inch. I personally use a set of shop-made spacer blocks to set my slides rather than relying on a tape measure. This ensures that the pressure is evenly distributed. For those looking at top trends in vanity designs you need to know in 2025, we are seeing a massive shift toward internal power strips and integrated lighting, which means you also need to ensure your cable management isn’t interfering with the slide’s path.
The shift toward tech-integrated cabinetry
Looking forward, the future of custom built-ins is ‘active’ storage. We are moving away from static boxes toward units that include climate control for skincare in vanities or hidden charging hubs in media centers. This trend requires even better ventilation and structural integrity. As you integrate more tech, you’ll need to focus on creative storage solutions for vanities declutter in style while keeping heat-generating devices away from moisture. I predict that by 2030, most high-end built-ins will feature modular internal components that can be swapped out as technology evolves, making the ‘bones’ of your cabinet more important than ever.
If you really want to level up your DIY game, don’t just rely on standard fasteners for those wide spans. I challenge you to try the steel plate method on your next project. Go ahead and stop wobbly custom built-ins with 4 hidden steel plate fixes 4 to see how a small piece of metal can provide more stability than a dozen extra screws ever could. It is the professional secret for creating furniture that feels like it’s part of the foundation of the house itself.
The Truth About Why Tight Screws Fail
Over the years, I’ve realized that the most common mistake is fighting nature instead of working with it. Here are a few lightbulb moments from my workshop that might save your next project. First, wood is a sponge; it will expand and contract regardless of how many fasteners you use. Second, that gap at the ceiling is usually a symptom of a base leveling issue, not a problem with the top mounting. Third, silence is your enemy—if your cabinets creak when you walk by, they are under mechanical stress and need adjustment. Finally, precision layout saves more time than fast drilling ever will. When you aim for creative built-ins for seamless storage and home aesthetics, remember that the best designs account for the house’s natural heartbeat.
My Go-To Kit for Rock-Solid Cabinetry
I don’t believe in magic, but I do believe in the right equipment. To avoid the frustration of shifting units, I always keep these three things within arm’s reach. I swear by my cross-line laser level because it never lies about a sloped floor that could eventually pull your unit away from the wall. I also rely heavily on the shim secret for perfectly flush built-in doors, which ensures that even when the house settles, your cabinet faces remain perfectly aligned. For those looking for deeper knowledge, I highly recommend studying the AWI standards for moisture management in woodwork. Lastly, don’t overlook built-in storage ideas to declutter and enhance your home that utilize integrated ledgers rather than relying solely on side-wall pressure.
Start Your Next Project with Confidence
Taking on a massive installation can be intimidating, but remember that every master builder started with a single crooked shelf. Don’t let a small gap at the ceiling discourage you from the goal of creating a beautiful, functional space. Whether you are choosing the perfect vanity style for your bedroom or bath or bracing a library wall, the principles remain the same: support from the bottom, anchor at the studs, and leave room for the wood to breathe. Follow an expert guide to flawless vanity installation tricks tips and you’ll find that your built-ins become a legacy part of your home. Have you ever noticed your crown molding opening up a gap during the dry winter months? Let me know how you handled it in the comments below!