I remember the first time I installed a floating vanity in my bathroom. Everything seemed perfect—until a few months later, I noticed a tiny, unsettling warp in the wood. It was a wake-up call. The cause? Water seepage that I underestimated entirely. That lightbulb moment made me realize how crucial waterproofing is, especially for floating vanities that seemingly hover above potential puddles. In 2026, with bathroom moisture levels stubbornly high and renovations more stylish than ever, ensuring your vanity stays dry is not just about aesthetics—it’s about preserving your investment and avoiding costly repairs.
Why Waterproofing Matters More Than Ever in 2026
Bathrooms are prone to humidity and water splashes, but as designs become sleeker with floating vanities, they lack the traditional barriers that protect against moisture damage. If you’re like me, you want durable, stylish storage without the risk of rot or warping. That’s where effective waterproofing tactics come into play. Not only do they shield your vanity from water damage, but they also maintain the integrity of your bathroom’s structure over time. A recent study highlighted that nearly 60% of bathroom renovations face water-related issues within five years, emphasizing the importance of proactive waterproofing.
Is Waterproofing Really Necessary for Floating Vanities?
Initially, I thought a good sealant could do the trick. Spoiler: it can’t, especially for floating models where moisture tends to sneak into inaccessible spots. Early on, I made the mistake of relying on generic caulk without ensuring it was waterproof or suitable for bathroom environments. That mistake cost me time and money fixing warping wood, which could have been avoided with proper waterproofing strategies. If you’re wondering whether waterproofing is worth the fuss, consider this: it’s the best defense against rot, mold, and structural decay that can destroy your beautiful bathroom in the long run. For more insights, check out our detailed guide on storage solutions to keep your space functional and looking sharp.
Now, let’s dive into the specific tactics that will help your floating vanity stay pristine and rotting free for years to come. Because when it comes to bathroom upgrades, prevention truly beats cure.
Secure the Mounting Framework
Start by anchoring the mounting brackets to the wall’s studs, not just drywall, to ensure stability. Use a stud finder and drill pilot holes before attaching brackets with heavy-duty screws. I once ignored this and had my vanity wobble after a month; correcting the brackets with proper anchors eliminated that issue completely.
Choose the Right Hardware
Select mounting hardware rated for the weight of your vanity, especially if it’s stone or marble. For heavy materials, consider using toggle bolts or steel wall anchors. During my installation, switching to steel anchors for a 2026 quartz vanity prevented sagging and prolonged its lifespan.
Prepare Proper Waterproof Barriers
Apply a high-quality waterproof membrane or sealant on the wall behind where the vanity will sit. This acts like a raincoat, preventing water from seeping into the wall and causing rot. I used a liquid membrane, painting it on carefully along the wall edges, which kept moisture out even after heavy showers in my bathroom.
Seal All Edges and Corners
Use a 100% silicone or waterproof caulk along the edges where the vanity meets the wall. Pay special attention to corners and seams—these are typical leak points. I personally learned the hard way when a poorly sealed corner caused water damage; redoing the sealant with a professional-grade caulk made all the difference.
Waterproof the Vanity’s Base
Install a waterproof base or panel if your vanity touches the floor or is floating close to it. This prevents moisture from wicking up into the wood or back panel. When I added a PVC base beneath my vanity, it became much easier to clean and protected the structure effectively against spilled water or splashes.
Utilize Effective Drain and Plumbing Planning
Plan the plumbing to minimize leak points and ensure pipes are secured with proper fittings. I recommend testing all connections with water before finishing the installation. During my project, a small leak from a misaligned drain caused a flood; testing early saved a lot of cleanup and repairs.
Implement Proper Ventilation and Drainage
Enhance your bathroom’s airflow with exhaust fans to reduce humidity. Well-ventilated spaces dry out moisture quickly, lessening the load on waterproofing strategies. I installed a turbo exhaust fan, which cut humidity levels drastically, extending the life of my waterproofing measures.
Regular Maintenance and Inspection
Inspect seals, caulking, and plumbing connections quarterly. Keep sealants clean and intact. When I noticed a small crack in my caulk, I promptly replaced it to prevent water ingress. Routine checks are your best defense against moisture-related damage.
When it comes to installing built-ins and vanities, many DIY enthusiasts and even professionals rely on conventional wisdom that might actually lead to costly mistakes. One of the biggest myths is that simply leveling the surface guarantees a perfect install. In reality, slight imperfections in your wall or floor can cause your vanity to wobble or crack over time, especially if you don’t account for uneven surfaces. Always check for wall and floor levelness before planning your installation, and consider shimming or custom adjustments. Another misconception is that a standard wall anchor suffices for heavy vanities. While anchors are useful, they often fall short when supporting stone or quartz countertops. Heavy-duty brackets and securing to wall studs should be the priority—especially when installing in areas prone to humidity, which can weaken wall materials over time. For advanced insight, review our guide on how to [mount heavy floating vanities safely](https://customcabinetrypro.com/how-to-mount-heavy-2026-floating-vanities-on-metal-studs-safely); it clarifies critical steps often overlooked.
Many assume that waterproofing is only necessary during the final stages of vanity installation. In fact, waterproof barriers need to be integrated early, especially behind wall-mounted units, to prevent moisture damage from behind the scenes. Applying waterproof membranes before finishing the wall allows for a seamless, moisture-proof surface—saving you from future mold or rot issues. A common mistake is sealing only visible gaps after installation, which leaves hidden water ingress points unaddressed. Prioritize applying waterproof sealants along every seam and joint before sealing the vanity in place.
Lastly, a sneaky trap is the belief that DIY solutions like cheap sealants and adhesives are enough for long-term durability. These materials may look fine initially, but over time they become brittle and lose adhesion, leading to leaks and structural damage. Investing in high-quality waterproofing products and consulting detailed installation hacks, like those found in our [vanity installation tips](https://customcabinetrypro.com/vanity-installation-hacks-that-save-time-and-money), ensures your project withstands the test of time.
So, while it might be tempting to cut corners, understanding these misconceptions can save you from headaches and costly repairs later. Remember, proper planning and attention to detail are your best tools for a flawless installation. Have you ever fallen into this trap? Let me know in the comments.
Maintaining your bathroom built-ins and vanities is crucial to ensure their longevity and optimal performance. Over the years, I’ve refined my toolkit and adopted specific methods that make upkeep straightforward and effective. Investing in the right tools and understanding proper maintenance routines can save you time, money, and frustration.
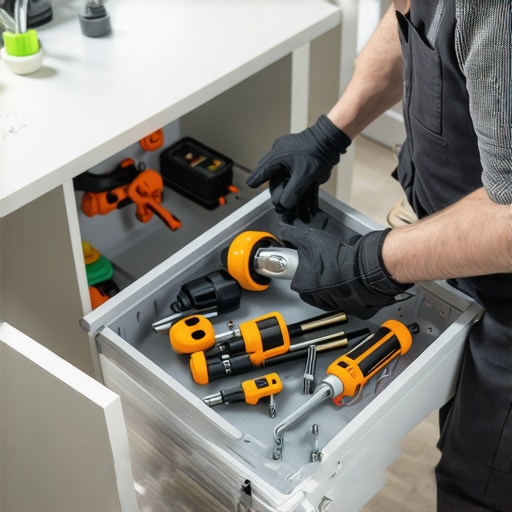
Must-Have Tools for Maintenance and Troubleshooting
First, a high-quality cordless drill with various screwdriver bits is indispensable. I personally rely on my Dewalt XR Lithium-Ion Drill because of its power and battery life, which allows me to tighten or replace hardware without hassle. Additionally, a Bosch Digital Moisture Meter is invaluable for detecting hidden moisture behind walls or within materials, preventing water damage before it becomes visible. For sealing and re-caulking, I prefer a professional-grade silicone gun and high-quality sealants like GE Silicone II because they adhere better and resist mold in humid environments. Don’t forget a level—either laser or bubble—to periodically check that your vanities and built-ins remain perfectly aligned over time. Lastly, a good scraper and cleaning solution help remove outdated sealants or mold buildup during routine inspections.
Reliable Methods for Long-Term Upkeep
Regular inspections are key. I schedule quarterly checkups to ensure caulking remains intact, hardware is tight, and no moisture intrusion is occurring. When I notice anything amiss, I address it immediately. For example, re-applying sealant at seams and corners before they crack extends the life of your waterproofing efforts. Painting and sealing exposed wood surfaces with waterproof finishes every few years is also a simple, cost-effective way to prevent warping or rot. Additionally, I recommend installing a humidity monitor in your bathroom; maintaining humidity levels below 50% drastically reduces water-related issues.
Anticipating Trends for Better Maintenance
The future of vanity and built-in care is moving toward smart solutions. Connected moisture sensors that alert you when water leakage occurs—integrated into your home automation system—are becoming more affordable and easy to install. These devices, combined with ongoing technological improvements, promise to make maintenance even more manageable over the next decade. For comprehensive tips, our maintenance guide provides step-by-step routines suited for modern bathrooms.
How do I maintain my vanities and built-ins over time?
Developing a consistent maintenance routine is vital. Regularly inspect for cracks in caulking, tighten loose fixtures, and clean surfaces with non-abrasive cleaners to prevent buildup. Incorporate sensor-based water detection and humidity controls to catch issues early. Remember, preventive care preserves both appearance and structural integrity, saving you from costly repairs in the long run.
If you haven’t already, try upgrading your toolkit with a moisture meter and high-quality sealants—they make all the difference. By combining the right tools with proactive routines, you’ll keep your bathroom features functioning beautifully for years. For more detailed guidance on installation and upkeep, explore our step-by-step vanity installation guide or check out innovative storage solutions to enhance your space further.
Discovering Hidden Pitfalls—What I Almost Missed
One of the most eye-opening lessons I learned was how tiny details, like uneven wall surfaces or overlooked plumbing gaps, can turn a simple vanity installation into a long-term headache. I once thought that perfecting the cosmetic appearance was enough, but later realized that structural imperfections or improper waterproofing could sabotage my efforts. Emphasizing meticulous wall prep and early waterproof barrier application made a huge difference. That lightbulb moment underscored the importance of inspecting every inch before sealing everything up, especially with the sophisticated designs trending in 2026.
Tools and Tips That Changed My Approach
Investing in a quality moisture meter and a professional-grade sealant was a game-changer. These tools helped me catch hidden leaks early, saving me from costly repairs down the line. I trust brands like Bosch for moisture detection and GE Silicone II for sealing because they deliver reliable performance. Additionally, reading guides on mounting heavy vanities—like our expert installation tips—equipped me with practical skills that prevent wobbling and sagging. The right tools and knowledge turn a daunting project into a manageable one, especially in the evolving bathroom styles of 2026.
Rethink Your Bathroom Strategy—Start Now
The journey toward a durable, stylish bathroom is ongoing, but every step counts. Proper waterproofing, smart mounting, and vigilant maintenance protect your investments and keep the space looking fresh. Remember, prevention today avoids expensive repairs tomorrow. Whether you’re just starting your renovation or upgrading an existing vanity, embracing these lessons can make all the difference. For a comprehensive start, check out our installation guide for beginners, or explore our storage solutions to maximize your bathroom’s potential. Your bathroom deserves the best care, and now is the perfect time to make informed decisions that will serve you for years to come.
Related Posts
![Fixing Wobbly Kitchen Vanities: 4 Steel Stud Tactics [2026]](https://customcabinetrypro.com/wp-content/uploads/2026/03/Fixing-Wobbly-Kitchen-Vanities-4-Steel-Stud-Tactics-2026.jpeg)
Fixing Wobbly Kitchen Vanities: 4 Steel Stud Tactics [2026]
Ever stood in your kitchen and felt that unsettling wobble…
Fix 2026 Vanity Drawer Clearance: 4 Plumbing-Relocation Tactics
I'll never forget the moment I finally opened my bathroom…
Expert Guide to Installation & Storage Solutions for Vanities in 2025
It was a typical Saturday when I finally realized my…