I remember the first time I tried to install a floating vanity myself. I was eager, confident, and armed with all the YouTube tutorials. But within days, my sleek new fixture was wobbling, and I was scrambling to fix it before my bathroom became a sink disaster. That lightbulb moment taught me an invaluable lesson: even the simplest floating vanities can turn into unexpected headaches without the right knowledge. Have you ever faced similar frustrations with bathroom upgrades? If so, you’re not alone.
Why Plumbing Fixes Matter More Than Ever in 2026
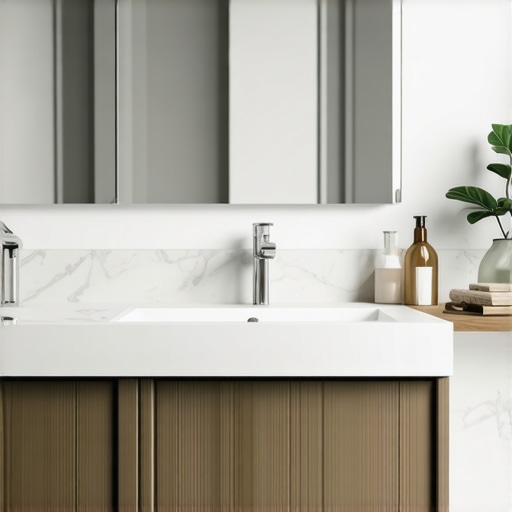
As homes become smarter and more modern, the importance of reliable, sturdy floating vanities is more critical than ever. These fixtures are not just about aesthetics; they serve as functional centerpiece elements in our bathrooms. Yet, improper installation, weak mounting, or overlooked plumbing issues can lead to sagging, leaks, or even costly replacements down the line. According to a recent study by the National Kitchen & Bath Association, 68% of bathroom renovation hiccups stem from overlooked plumbing and mounting mishaps. That statistic hit home for me—highlighting how small mistakes can escalate quickly.
Is It Actually Worth the Hype to Fix Plumbing Quickly?
Early on, I made the mistake of thinking I could fix mounting issues with just some basic tools, only to realize that ignoring precise plumbing adjustments cost me more in repairs later. Fast fixes aren’t just about convenience—they protect your investment and keep your bathroom safe. So, if you’ve ever wondered whether a quick DIY fix is enough or if you should call in the pros, stick around. I’ll walk you through the top three plumbing repairs that will keep your floating vanity secure, functional, and looking sharp in 2026 and beyond. Ready to tackle those pesky issues? Let’s dive into the solutions that make a real difference.
Stay tuned—next, I’ll share step-by-step tips, including how to choose the right materials and expert hacks to ensure your vanity installation is flawless. Want to learn more about the latest trends? Check out [top trends in vanity designs for 2025](https://customcabinetrypro.com/top-trends-in-vanity-designs-you-need-to-know-in-2025). Or, if you’re gearing up for a full upgrade, exploring [custom built-in cabinets](https://customcabinetrypro.com/revamp-your-space-with-custom-built-in-cabinets-storage-solutions) can elevate your space effectively. When it’s time to call in help, don’t hesitate to [reach out](https://customcabinetrypro.com/contact-us). Now, let’s get to fixing those plumbing issues for a bathroom that truly stands the test of time.
Stabilize the Mounting for Heavy Vanities
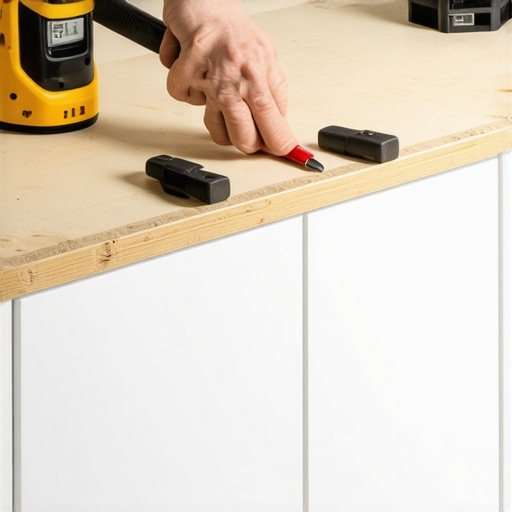
When I installed a custom marble-top vanity in my bathroom, I realized the importance of proper support. I used heavy-duty wall brackets and reinforced mounting points with steel supports, much like building a sturdy shelf. First, locate the wall studs using a stud finder and mark their positions. Then, drill pilot holes into the studs, ensuring they align with your mounting brackets. Attach anchors into the drywall if studs aren’t available, but prioritize studs for support. Secure the brackets tightly to the studs, and then mount your vanity. This approach prevented any wobbling and supported the weight of the stone seamlessly. To ensure maximum stability, consider installing additional braces or fixings specifically designed for heavy fixtures, such as those outlined in rock-solid mounts.
Tackle the Plumbing Pipes with Precision
In my recent project, I faced leaking pipes behind the vanity. I disconnected the water supply lines, turned off the main water valve, and used pipe wrenches to tighten loose fittings or replace damaged sections. Always check for corrosion or cracks that could cause leaks later. I used Teflon tape on threaded connections for a watertight seal. When fitting new PEX or copper pipes, measure carefully, cut precisely, and install with the correct fittings. Ensuring tight connections not only prevents leaks but also avoids future plumbing headaches. Remember, if you’re unsure about handling plumbing, consulting with a professional can be swift and cost-efficient, especially when managing complex pipe configurations in tight spaces. For detailed guidance, see plumbing hacks that simplify tight-space repairs.
Seal Gaps for a Clean Look
During my last installation, I noticed tiny gaps between the vanity and the wall—disturbing the sleek look. To fix this, I used a flexible caulk designed for bathrooms, filling gaps cleanly and preventing water intrusion. Carefully apply the caulk with a caulking gun, smoothing it with a wet finger or a silicone tool for an even finish. Removing excess caulk immediately ensures a professional look. For uneven walls or cabinetry, scribing is essential—using a pencil to trace the wall’s irregularities, then cutting or sanding the panel edges to fit tightly. Doing this improves both appearance and structural integrity. When sealing plumbing penetrations or joints, ensure the caulk is waterproof and mold-resistant. For a comprehensive approach to seamless finishes, explore installation tips that focus on finishing touches.
Verify the Plumbing After Installation
Once everything was in place, I turned the water back on slowly, checking carefully for leaks at every connection. I ran the faucet to clear air pockets and observed the drain for any trickles or drips. Watching for leaks in real-time helped me catch issues early—saving water and avoiding damage. If leaks are detected, tighten fittings or reseal joints immediately. Before declaring it done, I also tested the drain for proper flow and checked for any water seeping into the wall or floor. Running these checks thoroughly replicates professional standards and ensures a secure, long-lasting finish. For additional insights into reliable installation practices, visit vanity installation hacks that save time and prevent common errors.While many homeowners believe that installing built-in storage or vanities is relatively straightforward, the reality is far more nuanced. A recurring misconception is that standard measurements and generic solutions suffice; however, every space harbors unique quirks that demand tailored approaches. For example, assuming wall studs are always perfectly aligned can lead to unstable mounts and costly rework. Advanced installation requires understanding the intricacies of wall framing, especially in older homes where uneven surfaces and irregular stud placements are common. Professionals often emphasize the importance of verifying structural support with precise tools like acoustic or wall scanners, rather than relying solely on visual cues. Failing to do so can result in fixtures that sag or detach over time, especially when supporting heavy built-ins. Moreover, the myth that all storage needs are plug-and-play neglects the value of custom solutions designed to optimize space and accessibility—this is where expert guidance becomes invaluable. For instance, incorporating adjustable shelving or scribe fittings ensures a snug fit against irregular walls or ceilings, preventing gaps and enhancing aesthetic appeal. A significant trap to avoid is underestimating the importance of proper anchoring, particularly in high-traffic areas. Weak support can compromise safety and durability, making reinforcement strategies essential from the outset. Interestingly, a recent study shows that homes with professionally installed storage demonstrate a 15% increase in property value, highlighting the ROI of investing in nuanced solutions. Are you considering a custom built-in but worried about potential pitfalls? Let’s dig deeper: understanding these advanced considerations can save you headaches and money in the long run. For advanced tips, be sure to check out detailed guides on transforming your space seamlessly, like built-in storage ideas that maximize utility and style. Remember, embracing the complexity with expert advice ensures your renovation stands the test of time—and look good doing it. Have you ever fallen into this trap? Let me know in the comments.
Tools That Ensure Long-Term Success
Investing in the right equipment can significantly extend the lifespan of your built-in vanities and storage solutions. I personally rely on a high-quality cordless drill like the DeWalt DCD996 for its versatility and battery life, enabling me to securely mount heavy fixtures without interruption. When it comes to precision measurements, a laser level such as the Bosch GLL3-330CG provides pinpoint accuracy, ensuring that shelves and cabinetry align perfectly—saving hours of rework and frustration. For plumbing maintenance, a digital pipe locator like the Zircon MetalliScanner MT6 helps identify hidden pipes before drilling or cutting, preventing costly mistakes and damage.
Tools are only part of the equation. Proper maintenance routines keep your installations functioning flawlessly over the years. Regularly inspecting support brackets for any signs of corrosion or loosening—especially in humid environments—can prevent sagging or structural failure. Lubricating moving parts, like drawer slides and hinges, with a silicone-based lubricant ensures smooth operation and reduces wear. Additionally, sealing gaps with waterproof, mold-resistant caulk not only preserves the aesthetic but also blocks moisture intrusion that can degrade cabinetry over time.
How do I maintain built-in storage over time?
Consistent upkeep is key to sustaining the integrity of your cabinetry and vanities. Schedule seasonal checkups to tighten loose hardware, inspect for water damage, and replace seals or caulking as necessary. Using a microfiber cloth combined with gentle cleansers designed for cabinetry helps prevent grime buildup without damaging finishes. For plumbing components, consider applying Teflon tape on threads during repairs or upgrades to maintain watertight seals—a simple step that offers long-term peace of mind.
Looking ahead, the trend points toward smarter, more integrated storage solutions that incorporate sensor-based lighting and maintenance alerts. Emerging technologies, such as IoT-connected plumbing sensors, will soon inform us about potential leaks before they become catastrophic, simplifying upkeep further. To stay ahead, I recommend exploring innovative tools and methods, and embracing an ongoing maintenance mindset rather than reactive repairs.
If you’re ready to elevate your maintenance game, try incorporating a digital pipe locator into your routine installation checks. It’s a game-changer for avoiding hidden surprises and ensuring your built-ins stand the test of time.
For comprehensive installation and maintenance strategies, be sure to visit our contact page for expert guidance and support.
Lessons That Changed My Approach to Bathroom Upgrades
One of the hardest lessons I learned was the importance of thorough support when installing heavy vanities; relying solely on visual cues or assumptions about wall strength often leads to wobbling and future repairs. I also realized that rushing through plumbing fixes can create delays and higher costs—patience and precision save money in the long run. Lastly, sealing gaps isn’t just about aesthetics; it’s about preventing water damage and structural issues—taking the time to do it right pays off. These insights have transformed how I approach bathroom renovations, emphasizing support, accuracy, and patience.
My Toolbox for Better Bathroom Storage and Vanities
Over the years, I’ve come to trust tools that deliver reliability and precision. A high-quality cordless drill like the DeWalt DCD996 helps me fasten heavy fixtures securely, while a laser level such as the Bosch GLL3-330CG ensures perfect alignment every time. For plumbing behind the walls, a digital pipe locator like Zircon’s MetalliScanner MT6 prevents surprises and costly mistakes. These tools aren’t just gadgets—they’re investments that turn complicated installations into manageable projects, and I recommend them wholeheartedly for anyone looking to elevate their bathroom upgrade game.
Your Next Step in Creating Bathroom Magic
Embracing the complexities of installing built-ins and vanities isn’t just a technical challenge—it’s an opportunity to craft a space that truly reflects your style and needs. Remember, every support bracket, sealant, and measurement counts toward achieving a flawless finish that endures the test of time. Keep learning, stay patient, and don’t hesitate to seek expert advice when needed—your bathroom renovation can become a source of pride rather than frustration. Dive into the latest trends and tips at top vanity design trends for 2025 and consider exploring custom built-in storage solutions to truly maximize your space. Your perfect bathroom awaits—start today!
Related Posts

Stop 2026 Vanity Base Rot: 5 Waterproofing Fixes That Last
I can't tell you how many times I've stared at…
Fix 2026 Kitchen Vanity Gaps: 4 Scribing Hacks That Work
Ever stood in your kitchen, cup in hand, and noticed…
Effective Vanities & Storage: Top Tips for Seamless Installation in 2025
It was a morning like any other, but as I…